How to Wire a Switch Box
An electrician walks you through step-by-step on how to wire a switch box.
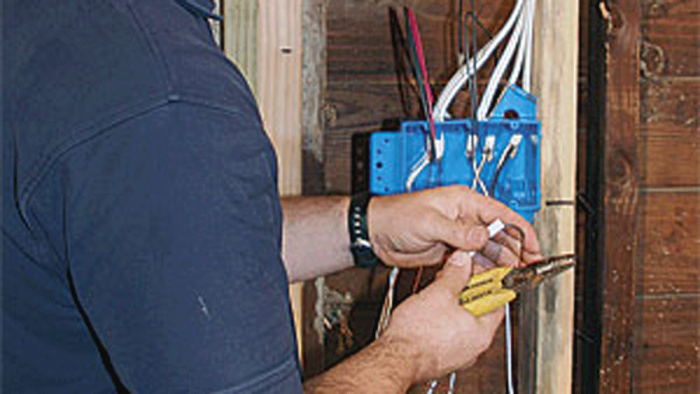
Part of my job as a professional electrician is keeping my work neat and organized. A tidy work box makes it easier to install lights, switches, and outlets, and it helps future electricians to see what’s going on inside the box. Inspectors look for tidiness, too, because neat wiring makes short circuits and arcing less likely.
For me, part of being organized is maintaining some conventions with regard to how I run the cables into a switch box. When possible, I run the cable that’s feeding power into the box through a bottom knockout. Cables going to lights or receptacles down line go through knockouts in the top. If there’s an exterior light and an interior light in the same switch box (a common scenario at exterior doors), the cable closer to the door goes to the outside light; a cable farther from the door feeds the interior light.
Nothing in the code says you have to run specific cables through specific knockouts, and never assume that somebody else’s wiring follows your conventions. Using your own conventions is simply a way to know what wires go where when you’re looking at your own work, which is handy when you have to make changes or troubleshoot down the road.
Finally, always check with a voltage tester to make sure power is off to each switch (see “Make Sure the Power Is Off,” FHB #196). Some boxes contain more than one circuit.
Online Extra: Watch the companion video series
Step by Step
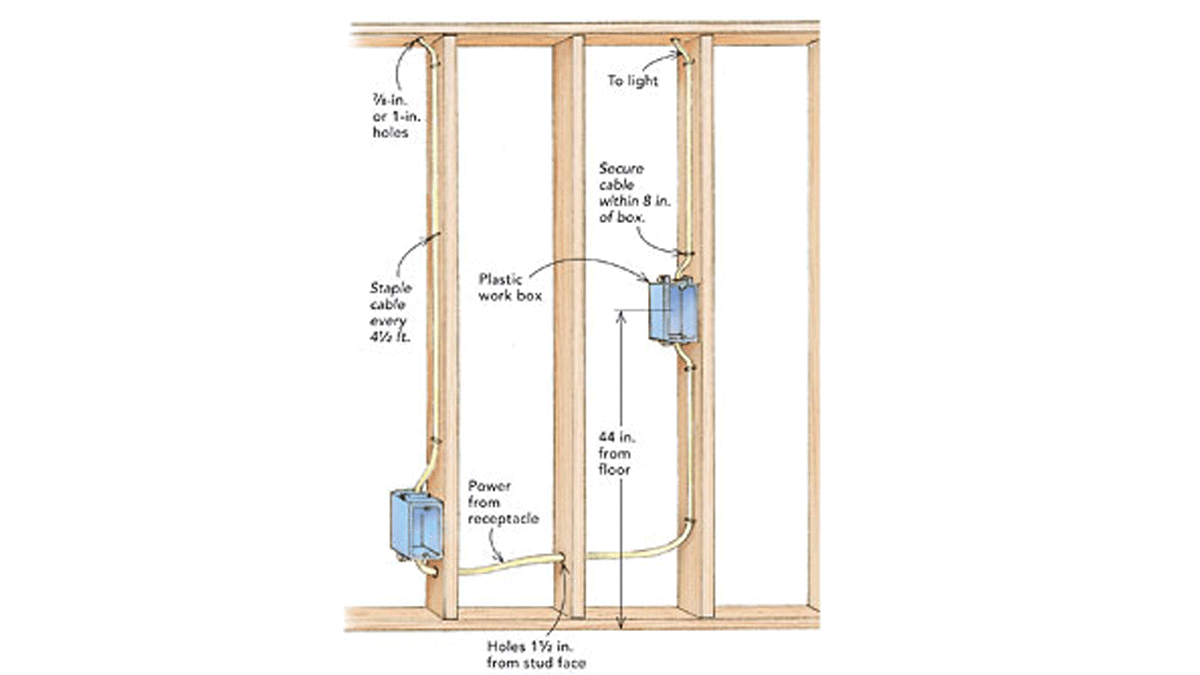
| 1. Run the cable.Cables running parallel to framing members should be stapled no less than every 4-1⁄2 ft. near the center of the board. Although there are no hard-and-fast rules, be consistent with box placement. A distance of 44-in. from the floor works for adults, kids, and people in wheelchairs. Code requires that cables be protected from damage and installed in a neat or “workmanlike” manner. Keep the cable free of loops and twists to make pulling easier. | 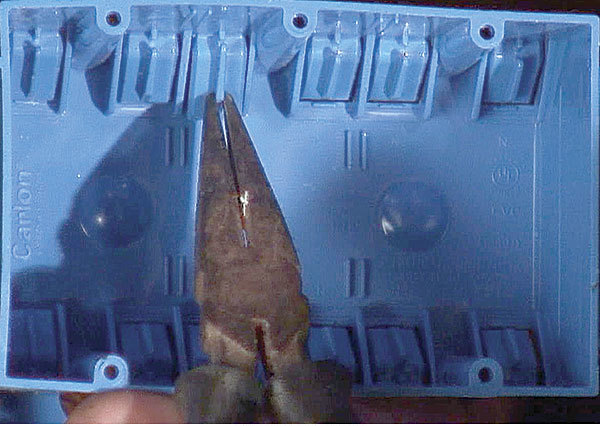 |
| 2. Label your cable. Untwist each cable, and label it so that the writing will be below the box when the cable is in the box and stapled. Although labels may seem like an unnecessary hassle, using them in boxes with multiple switches makes it easier to hook up the switches later. | 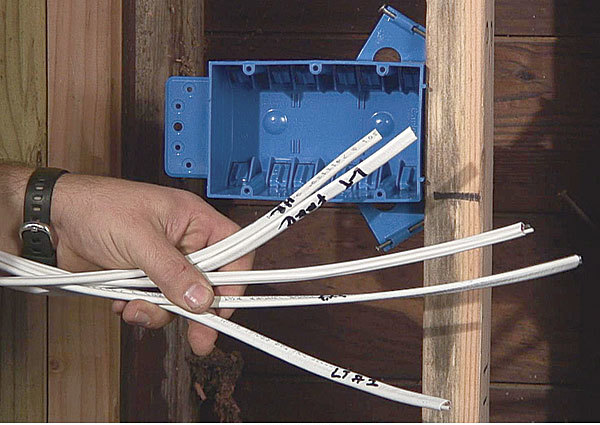 |
| 3. Bring the cables into the box.A plastic box has tabs that secure the wires. The tabs are often connected to the box from the molding process. Pull up the tab a little bit with needle-nose pliers or a flat screwdriver, and give the cable a slight bend before pushing it into the box. | 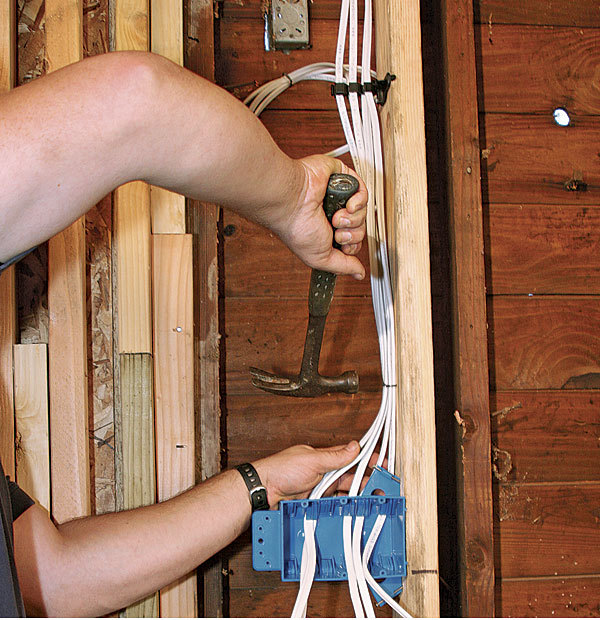 |
| 4. Secure cables all at once. Make sure all the cables extend 3 in. or 4 in. beyond the front of the box. It’s best to feed in all the cables, making sure they’re neat and untwisted, and then to staple them no more than 8 in. from the box. A cable stacker is a great tool for arranging four or more cables. | 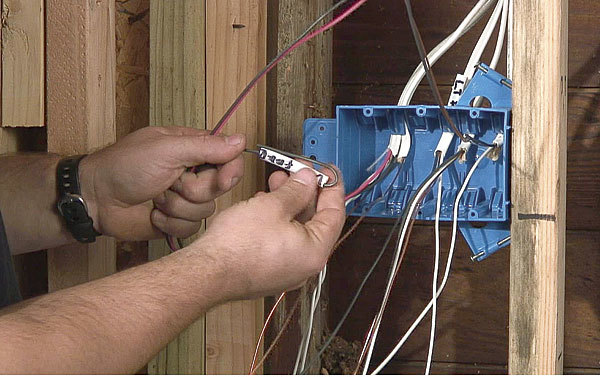 |
| 5. Prepare the conductors. With the wires in the box and secured with staples, clip off the labels with an insulation cutter, and tuck them into the knockouts where the cables enter the box. Remove the rest of the insulation by cutting it with a utility knife, starting about 2 in. from the end. (Be sure to cut away from yourself.) While holding the conductors, pull down the outer insulation. When you’re done, cut off the insulation with side cutters, and slip the label on the cable’s hot conductor. | 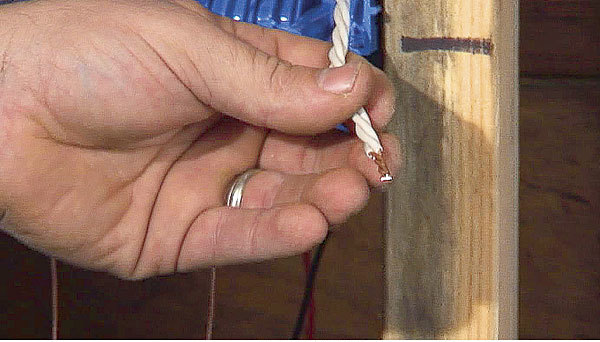 |
| 6. Connect neutrals first. White (neutral) wires often are connected together in a switch box. Route them along the back of the box to a central location, cut them to length, and use wire strippers to expose about 3/4-in. to 1 in. of copper conductor on each wire. Twist the conductors with pliers, trim the bundle, and cap it with a wire nut. Carefully fold the bundle so that it lies flat in the back of the box. Consult the wire-nut package for guidance on properly sizing wire connectors. | 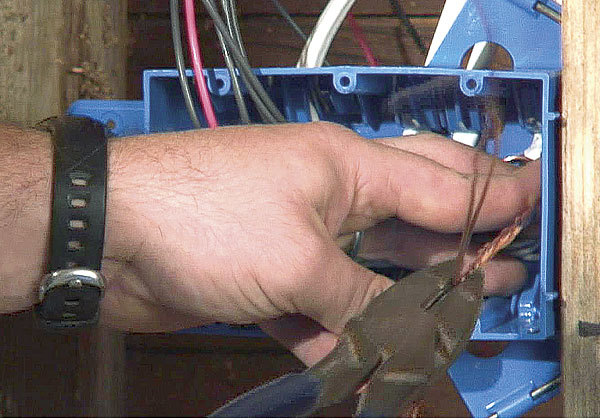 |
| 7. Connect ground wires next. Run bare copper ground wires along the back of the box, and route them to a single point. Twist the wires together as a single unit, and cap them with a wire nut or crimping sleeve. Make sure there’s a 4-in.-long length of wire (a pigtail) for every grounded switch in the box. | 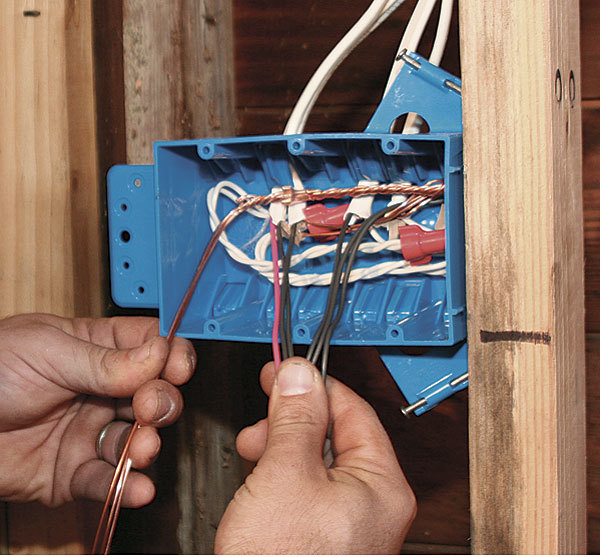 |
| 8. Hot wires are last. On a single-pole switch, the black (hot) wire feeding power to the switch is connected to one of the terminals, and the load wire is connected to the other. You can have a single feed supply power to more than one switch by adding pigtails under a wire nut. The box also contains a cable for a three-way switch. Its red conductor is treated the same as the black conductors. | 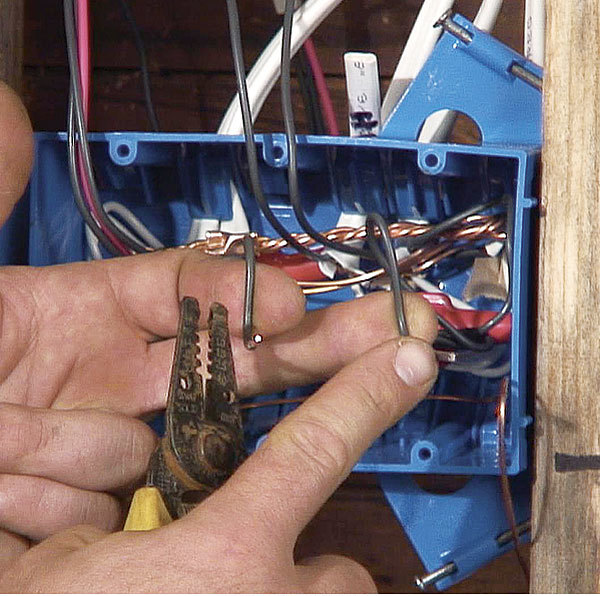 |
9. Fold the wires inside. Each single-pole switch will have a pair (line and load) of black wires. Near exterior doors, put the black wire feeding outdoor light fixtures closest to the door. Carefully fold the wires into the box without tangling them. Push the wires to the back of the box so that they’re not damaged during drywalling. When it’s time to install the switches, pull out the black and ground wires, and connect them to their respective switch terminals.
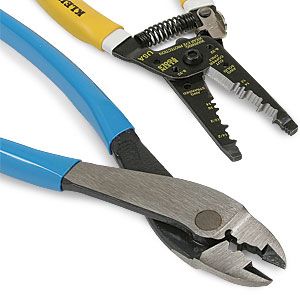
Tools of the Trade
From Fine Homebuilding #228
-
Cable stripper with insulation cutter
-
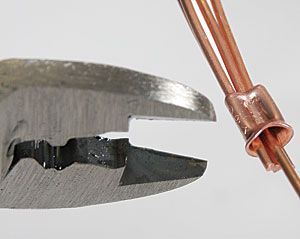
Side-cutting pliers with crimping jaw
-
-
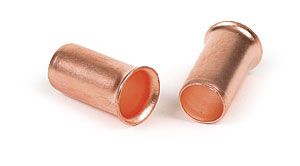
Crimping sleeve
-
Wire nut
-
Grounding-wire nut