Insulating Cathedral Ceilings
Vented or unvented roof assemblies can work, but failure carries a heavy price.
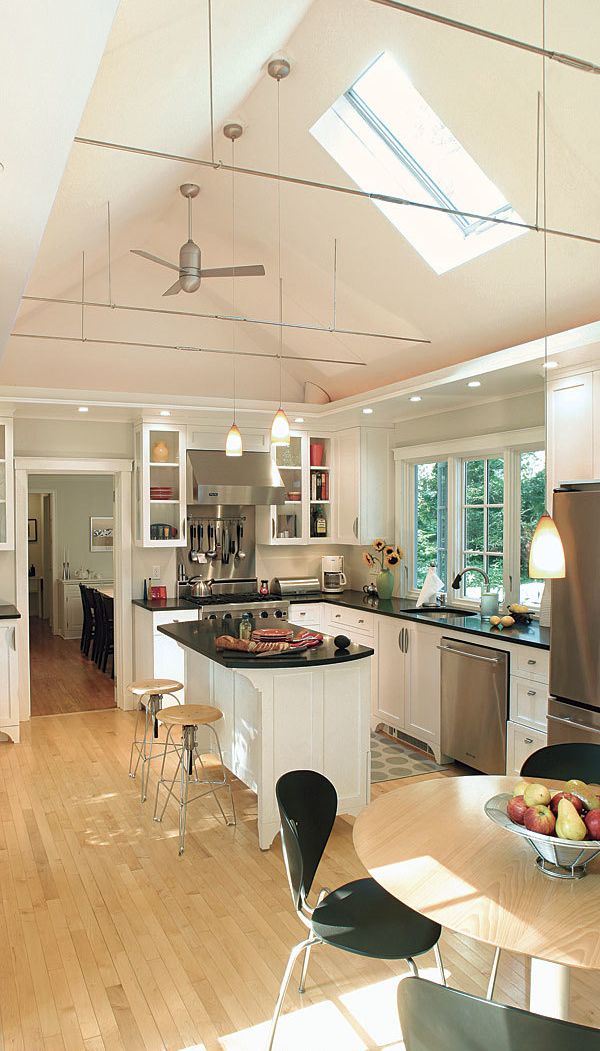
Synopsis: Cathedral ceilings provide a majestic crown for many a great room, but insulating them can be tricky. A poorly detailed cathedral ceiling can lead to energy losses and rotted roofing. In this article, senior editor Martin Holladay describes eight ways to get a cathedral-ceiling roof to R-45 or better using both vented and unvented processes. Holladay says that vented cathedral ceilings can be difficult to insulate well, so it’s important to place the vent baffles and insulation properly. He also says that unvented cathedral ceilings have a mixed track record, but can work when the details are managed correctly. This article includes cross-section diagrams showing four ways to prepare a ceiling from above (if the roofing is going to be replaced) and four ways to access the ceiling from inside. A sidebar outlines various roof-venting myths.
Because older cathedral ceilings are usually insulated with thin fiberglass batts, they are often thermal disasters. These ceilings usually leak air, leak heat, create monumental ice dams, and permit condensation and rot. Roofers sometimes try to solve these problems by improving ventilation openings at the soffits and ridge, but these “improvements” often make every symptom worse.
Fortunately, there are better ways to build cathedral ceilings. Whether they are vented or unvented, such ceilings can perform well, as long as they are properly detailed.
Although many builders still follow the time-tested technique of installing vent channels directly under roof sheathing, a vented cathedral ceiling makes sense only if the geometry of your roof is simple. You need a straight shot from the soffits to the ridge. That’s easy on a gable roof without any hips, valleys, dormers, or skylights, but if the geometry of your roof is complicated, it’s impossible to ensure adequate airflow through all of the rafter bays. Until recently, building codes required that insulated sloped roofs be ventilated. For complex roof designs, the International Residential Code (IRC) now allows unvented cathedral ceilings.
Vented cathedral ceilings can be difficult to insulate well
Ventilation channels maintain an air gap between the insulation and the roof sheathing. The component that creates the gap is called a variety of things, including a ventilation baffle, a ventilation chute, a ventilation channel, or a product such as Proper-Vent.
The first vent baffles to hit the market — the classic Proper-Vents of the 1970s and ’80s — were flimsy items made of thin polystyrene. These baffles don’t work well. Being thin and flexible, they can’t resist the pressures from dense-packed cellulose; they don’t ventilate the entire width of the rafter bay; and as usually installed, they allow air to leak out the top of the insulated assembly.
Eventually, manufacturers began offering stiffer alternatives that were able to resist the pressures of dense-packed insulation. Many of these products are no longer available. At one time or another, it was possible to buy baffles that were made of cardboard, vinyl, and compressed cellulose fibers. These days, the best available vent baffle is probably the AccuVent baffle, which is made from stiff vinyl.
Some builders make their own site-built baffles. According to the IRC, “A minimum of a 1-inch space shall be provided between the insulation and the roof sheathing and at the location of the vent.” Such a vent space can be created by tacking 1-in. by 1-in. “sticks” in the upper corners of each rafter bay, followed by stiff cardboard, thin plywood, OSB, fiberboard sheathing, or panels of rigid-foam insulation. Many experts advise that 2-in.-deep vent cavities are even better.
When installing any type of vent baffle, it’s important to pay attention to air-sealing, especially if you plan to install fibrous insulation in the rafter bays. Seal the edges of each panel with caulk, and tape the seams between panels with a high-quality tape.
Some builders locate their vent channels above the roof sheathing instead of below it. You can create 11⁄2-in.-high vent channels above the sheathing with 2x4s installed on the flat; locate these 2x4s above the rafters, 16 in. or 24 in. on center. Although this approach is less fussy than installing vent baffles under the sheathing, it usually costs more, because most types of roofing require second layer of plywood or OSB on top of the vent channels.
In some cases, these vent channels are installed above rigid foam. It’s also possible to purchase nail base (a type of structural insulated panel with OSB on one side instead of two) that includes integrated vent channels between the OSB and the rigid foam; one brand is Cool-Vent from Hunter Panels.
If you choose a vented roof assembly, include soffit vents and ridge vents. (To calculate how much soffit and ridge venting you need, see “A Crash Course in Roof Venting.”)
Unvented cathedral ceilings have a mixed track record
In recent years, most building codes have begun allowing the construction of unvented cathedral ceilings. Many such roofs have failed over the years, so it’s essential to get the air-sealing and insulation details right.
First, you can’t use air-permeable insulation (for example, fiberglass batts, mineral-wool batts, dense-packed cellulose, or blown-in fiberglass) to insulate an unvented cathedral ceiling unless the roof assembly also includes a layer of air-impermeable insulation (either spray polyurethane foam or rigid-foam panels) directly above or directly below the roof sheathing. If you go this route, make sure that the foam layer is thick enough to avoid condensation problems. For information on how thick the exterior foam should be, see section R806.4 of the 2009 IRC.
If you want to use just one type of insulation in unvented rafter bays, you are limited to spray polyurethane foam. Another approach is to build your roof with structural insulated panels (SIPs).
The code restrictions on the use of air-permeable insulation between rafters were developed to prevent the roof sheathing from rotting. When fiberglass batts are installed in unvented rafter bays, the batts often allow moist indoor air to reach the cold roof sheathing. When the moist air hits the cold sheathing, that leads to condensation or moisture accumulation in the sheathing, followed eventually by rot. By preventing air movement, spray-foam insulation almost eliminates this problem.
Why did this roof rot? Air leaks
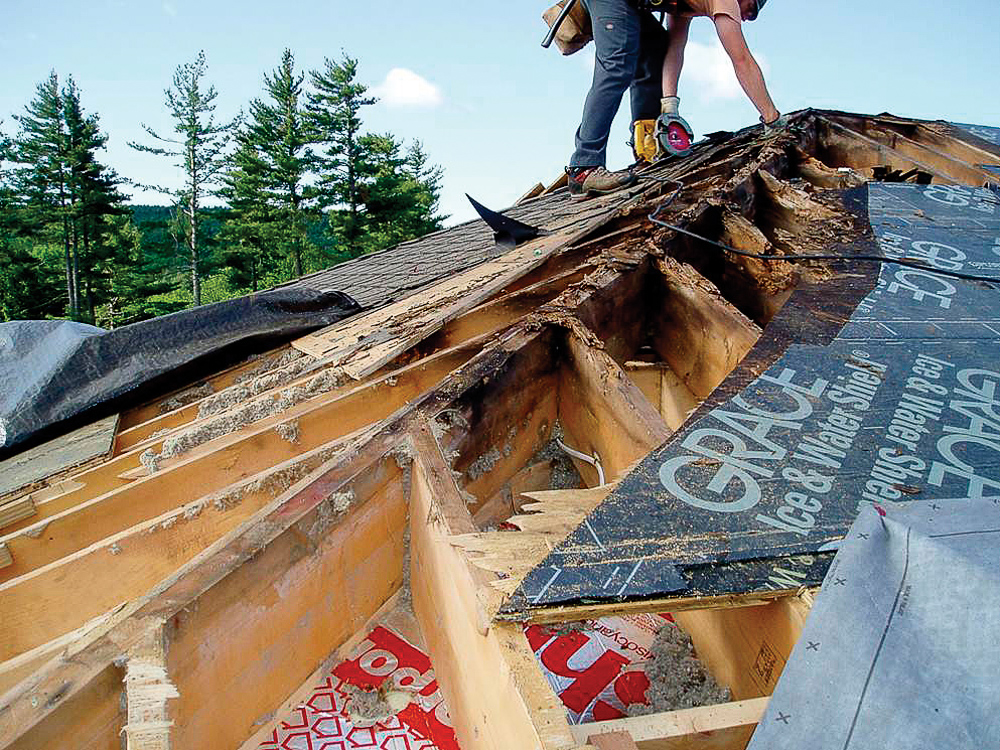
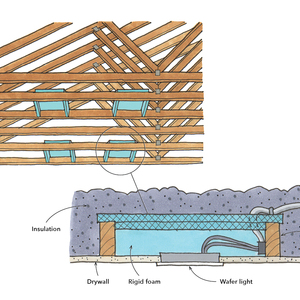
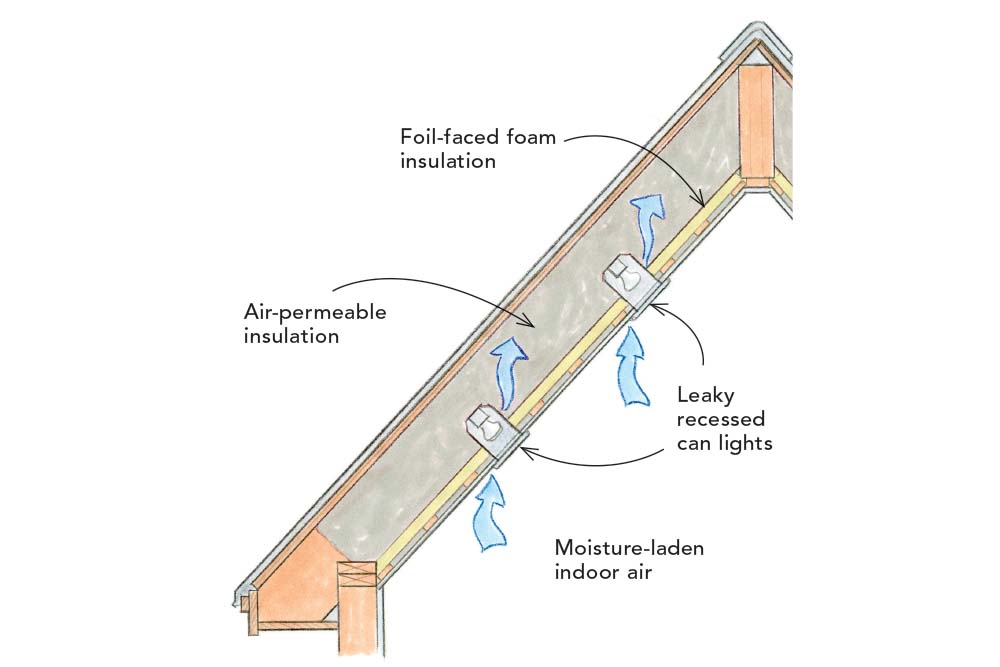
Recessed can lights doomed the cathedral ceiling on this 10-year-old house. Leaky light fixtures allowed moisture-laden indoor air to enter the roof assembly. When the moisture encountered cold roof sheathing, it condensed, leading to moisture accumulation and rot. Although the code permits the installation of “airtight” recessed can lights in insulated rafter bays, installing these fixtures in a cathedral ceiling is a bad idea. Recessed can lights take up room that should be filled with insulation; they give off heat, creating thermal hot spots in an insulated roof; and they leak air.
Dispelling roof venting myths
The practice of roof venting has developed its own mythology. Here are the facts.
- Roof ventilation cannot be used to lower indoor humidity levels.
- Builders shouldn’t encourage the migration of water vapor through a cathedral ceiling.
- During the summer, roof venting does not significantly lower the temperature of asphalt shingles or other types of roofing.
- While roof ventilation can lower the risk of ice damming, it’s essential for builders to limit the flow of heat into vent channels by including one or more ceiling air barriers and by installing thick insulation so that as little heat as possible escapes from the home.
- While roof ventilation can help to dry out damp roof sheathing, it’s essential to limit the flow of water vapor escaping from the home so that the roof sheathing never becomes damp in the first place.
- In the absence of an airtight ceiling, roof ventilation can do more harm than good, because air movement in rafter bays can encourage indoor air to leak through ceiling cracks.
Eight ways to get to R-45 or better
Because rafter cavities are generally shallow, it is hard to meet minimum energy-code requirements when insulating cathedral ceilings. There are at least a few ways to compensate for this: furring down the rafter, adding rigid foam to the top or bottom of the roof, and using high-performance insulation. Depending on your climate zone and which version of the code your building department uses, this may or may not be enough.
If you plan to replace your roofing, adding exterior rigid foam is a no-brainer
- Vented roof: pile on the exterior foam One simple way to insulate a cathedral ceiling is with many layers of rigid foam installed above the roof deck. Be sure to stagger the seams of the foam to limit air leakage. This type of roof resembles a site-built structural insulated panel (SIP), which would be a good substitute for this many-layered sandwich approach.
- Vented roof: Add cavity insulation to exterior foam. With enough rigid foam to keep the roof sheathing above the dew point during the winter, it’s safe to install fibrous insulation like fiberglass batts between the rafters. This type of roof works only when the foam layer is thick enough; colder climates require a thicker foam layer than warmer climates.
- Unvented roof: Pile on the exterior foam. Although ventilation channels above the insulation layer reduce the chance of ice dams forming, many builders have built successful roofs without any venting. The roof shown here can be assembled on site or purchased from a SIP factory.
- Unvented roof: Add cavity. This hybrid roof has rigid foam above the sheathing and fibrous insulation between the rafters. According to most building codes, this type of roof assembly does not need to be vented.
If you do not plan to replace your roofing, either make the rafters deeper or improve the insulation
- Vented roof: Fur down the rafter for more insulation. If you are installing fiberglass, cellulose, or mineral-wool insulation between your rafters only (no rigid foam inside or outside), you must vent the roof sheathing. A 2×10 rafter provides room for only about 81⁄4 in. of R-30 fibrous insulation after the vent channel is installed. This is less than the code minimum in most climates. You can deepen the rafter bays by suspending 2x4s with plywood gussets.
- Vented roof: Add interior rigid foam. A good way to add R-value to a roof assembly is to install a continuous layer of rigid foam under the rafters. The foam also limits thermal bridging through the rafters. If you choose rigid foam with a foil facing, it makes sense to strap the ceiling with 1x4s. When foil faces a 3⁄4-in. airspace, it can add between R-2 and R-3 to the roof assembly.
- Unvented Roof: Use high-performance insulation. If you want an unvented roof assembly with just one type of insulation between the rafters, your only insulation choice is spray polyurethane foam. Cellulose alone is forbidden by code for unvented roofs.
- Unvented roof: High performance, lower cost. This type of insulation job, known as flash and batt, includes a layer of closed-cell spray polyurethane foam against the underside of the roof sheathing. The spray foam must be thick enough to prevent condensation problems during cold weather. Once the foam has cured, the rest of the rafter bay can be filled with fiberglass, cellulose, or mineral wool.
Photos by Dwight Holmes and Charles Miller. Drawings by Dan Thornton.
Related stories:
- Five Cathedral Ceilings That Work
- Keeping Cathedral-Ceiling Walls From Bowing
- Comfortable Cathedral Ceilings
From Fine Homebuilding #228
For more photos, drawings, and details, click the View PDF button below:
Fine Homebuilding Recommended Products
Fine Homebuilding receives a commission for items purchased through links on this site, including Amazon Associates and other affiliate advertising programs.

Insulation Knife
Respirator Mask

Disposable Suit
