Install a Full-Frame Replacement Window: How to Install and Air-Seal a New Window in an Old Brick Wall
Remodeler Mike Sloggatt shows how to flash and air-seal the new window.
Mike Sloggatt: Before I dry-fit the window, I cut a couple of blocks—2 inches each. I’ve got about 4 extra inches in the framed opening so that I can center the window and have no trouble getting the trim on later.
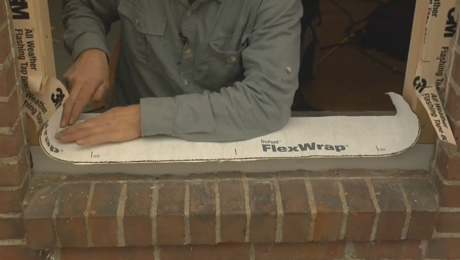
Before I install the window, I place a piece of foil-faced flashing tape on the bottom to use as a storm flap. It will prevent any wind-driven rain from getting between the brick and the flashing system. On a second-floor window installation, this is really important. I have no idea what the weather barrier behind the brick is like; I can’t see it. So this foil tape is another layer of protection, and it prevents call-backs.
The window manufacturer wants me to put a 3-inch bead of sealant behind the flange here—right behind where the nails go. I won’t put any sealant on the bottom. We’ve established a drainage plane, so any water that gets behind there has got to be able to come out. So I’ll just seal the two sides and the top.
The sill is just a little bit out of level. I put a shim on the sill so that when the window goes in, it will be perfect.
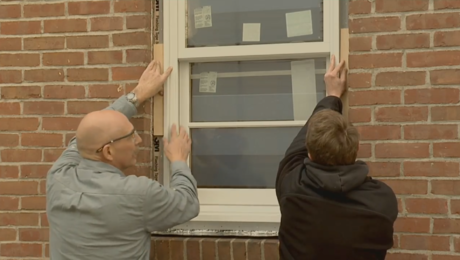
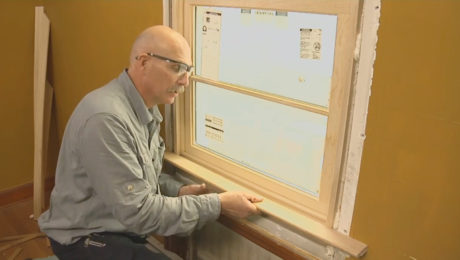
When the window is in and centered, check it for plumb and level, then tack it in. At this point I go inside to check the reveals. Then I’ll go back outside and nail it off.
Narrator: Mike uses shims to straighten the jambs before screwing through the nailing flange on the exterior.
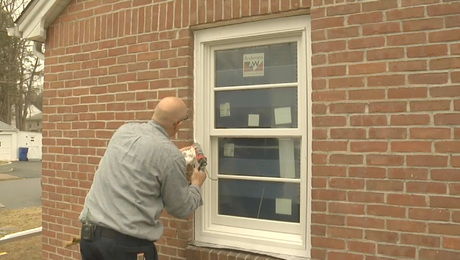
Mike: I’m going to screw every hole because I want the sealant to squeeze out from behind and give a good seal. I use 1¼-inch pan-head screws. It’s a lot easier to use screws when you’re working between the brick and the window. Don’t risk damaging the frame with a hammer. There’s always debate on how many fasteners to use. I work in coastal areas—high wind load zones—so we’re required to use every single hole to make sure the window is fully secured to the structure.
I’ll cut back this storm flap later. Once the trim is in, I can cut it back behind the trim and seal it.
Now that the window is completely fastened in, it’s time to do the flashing on the exterior. I can’t use wide flashing on brick. That’s why we took so much time to prepare those boards, before we put them in, with another thinner weather barrier. Applying this flashing is tricky because it has an aggressive adhesive on the back. I try to keep it in position and peel the release paper at the same time. I do it a little section at a time. If I try too big a piece, I’m going to lose it.
Remember, we won’t flash the flange at the bottom, because that’s a drainage assembly.
The back of the release paper is nonstick. If I roll it over the flashing tape, I can apply really good pressure and smooth it out.
I’ve lipped the edge of the flashing tape over the mechanical joint of the flange on the window, preventing any moisture from getting in. If there’s any movement in the house, sometimes the flange can pull away. This flashing lip will make sure it never leaks.
On the other side of the window, some of the fin pulled away—not a lot—and some water and air could get in there. I cover it with flashing tape to make sure that’s not an issue.
I’ll put the head flashing piece on now. This is one of the most important pieces. If I don’t put it on, water could come down right on top of this window. Earlier, I put the flap in with the backing on so that I could get under it with the head flashing, shingle style.
Now that I’ve finished flashing the exterior, I go inside to put the foam sealant on, giving it time to harden while I go back outside to make the frame. Make sure to use a window and door foam because it’s a low-pressure, low-expansion foam. I like to fill the whole void on the three sides. I left the shims in. The foam will solidify and hold the shims. I’ll cut them off later before I trim the window. I put a little foam over the top of the shims to make sure they’re sealed too.
The foam gun has an adjustable setting. When you’re first using it, it takes a little practice. You can turn the flow control down so that only a little foam will come out. When you get used to using the gun, you won’t have to use the flow control that much.
The bottom is a little different. Since we created a drainage assembly in here, I don’t want to go all the way forward with the foam. I just want to put a back dam of foam in here to prevent any air movement. If any water gets into that pan, the foam will stop it right here.
Videos in the Series
-
Install a Full-Frame Replacement Window: Removing Old Trim and Measuring for a New Window in a Brick Wall
-
Install a Full-Frame Replacement Window: How to Remove Old Window Sashes and Jambs From a Brick Wall
-
Install a Full-Frame Replacement Window: How To Flash a Window Rough Opening in an Existing Brick Wall
-
Install a Full-Frame Replacement Window: How to Install and Air-Seal a New Window in an Old Brick Wall
-
Install a Full-Frame Replacement Window: How to Install a PVC Exterior Casing on a Window in a Brick Wall
-
Video Series: How to Install Interior Extension Jambs and Window Trim

