
How to Install a Bay Window: Part 2
With the roof built, it’s time to tackle the window installation.
Synopsis: In part 1 of this two-part series, Rick Arnold began a bay-window installation by building the roof on the ground. In part 2, Arnold describes how to install the roof and the window. After setting up a two-level piece of scaffolding, Arnold and an assistant move the window into the rough opening from the outside. Then they temporarily secure the head board so that they can shim and fasten the window in place. After the window is secured, they insulate and install the roof. With the roof in place, they install stainless-steel cables to keep the window from sagging over time. The tops of the cables are attached under the roof, and the bottoms are attached to the seat board near the angled corners farthest from the building. The cable ends are accessible for adjustment later, if necessary. To complete the job, Arnold and his assistant install the flashing, the roofing, and the trim.
Part one of this article is available here.
Magazine extra: Watch this video series for Rick Arnold’s method of building a bay-window roof.
A bay window is a great feature in almost any room. The bright projecting space is perfect for setting plants, reading a good book, or simply brightening an otherwise dark or boring room. I recently replaced a twin double-hung window with a 45° bay window in my parents’ house. To make the installation easier, I chose a model that would fit in the existing rough opening.
Setting the stage
Because installing a bay window is more complicated than installing a conventional window, I’m covering the process in a two-part article. The first part showed how to build a hip roof for the window ahead of time. Here, I’ll show how to install the window and integrate it into the existing wall.
I’ve learned that it’s worth spending a little extra time to set up two levels of scaffolding to make the installation process easier. The first level is where you stand while working. The second, located above the first but just below the bottom of the rough opening, helps to support the heavy window while it’s being installed.
Just about any type of scaffolding will do, but I use basic wooden A-frames because their multiple rungs make it easy to get the window and the work platform at the correct heights.
Once the staging is set up, I pull off enough siding so that I can flash the opening and integrate the new window into the existing weather-resistive barrier. In this case, I removed the cedar-shingle siding about two courses (10 in.) higher than the top part of the bay window’s roof, one or two shingles (depending on their width) on the sides, and one course at the bottom of the window opening. It’s easier to do this work before the window is installed and restricts access to the siding around it.
I patched the missing and damaged sections of felt paper with new housewrap and covered the sides of the opening with flashing tape, which seals the vertical seams better. I also covered the rough sill with flexible flashing. Working from the bottom up ensures proper laps.
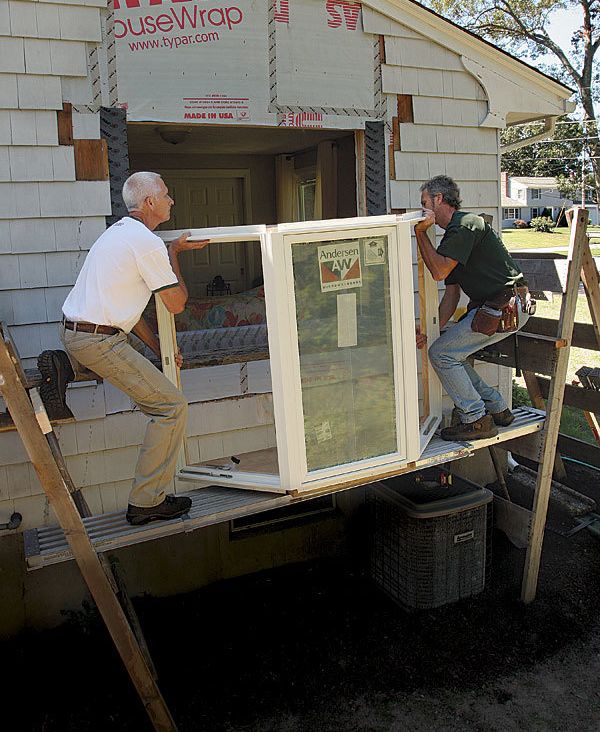
Bay windows are heavy, so before a second carpenter and I carry the window to the staging, I remove the operating sashes to make the window lighter and easier to handle. I also have some shims and plywood scraps handy so that we can use them to level the window on the staging once it’s positioned in front of the opening.
We set the window on the lower level of staging and then climb up. We lift the window onto the upper level of staging and slide it into the rough opening. Using the plywood scraps on the stage, we level the window. While my co-worker steadies the window, I go inside to fasten it temporarily with a few screws. When the window is stable, we reinstall and lock the sashes to ensure that the window remains square while it’s being fastened.
Fasten the frame
When securing the window, it works best to have one carpenter hold a level on the exterior to check for plumb while the other shims the head and seat boards and checks for level on the inside. Once the window is plumb and level, it’s secured by 3-in. #8 screws spaced from 6 in. to 8 in. apart, and run through the head and seat boards into the framing. As the screws are driven, we keep checking for plumb and level with 4-ft. levels.
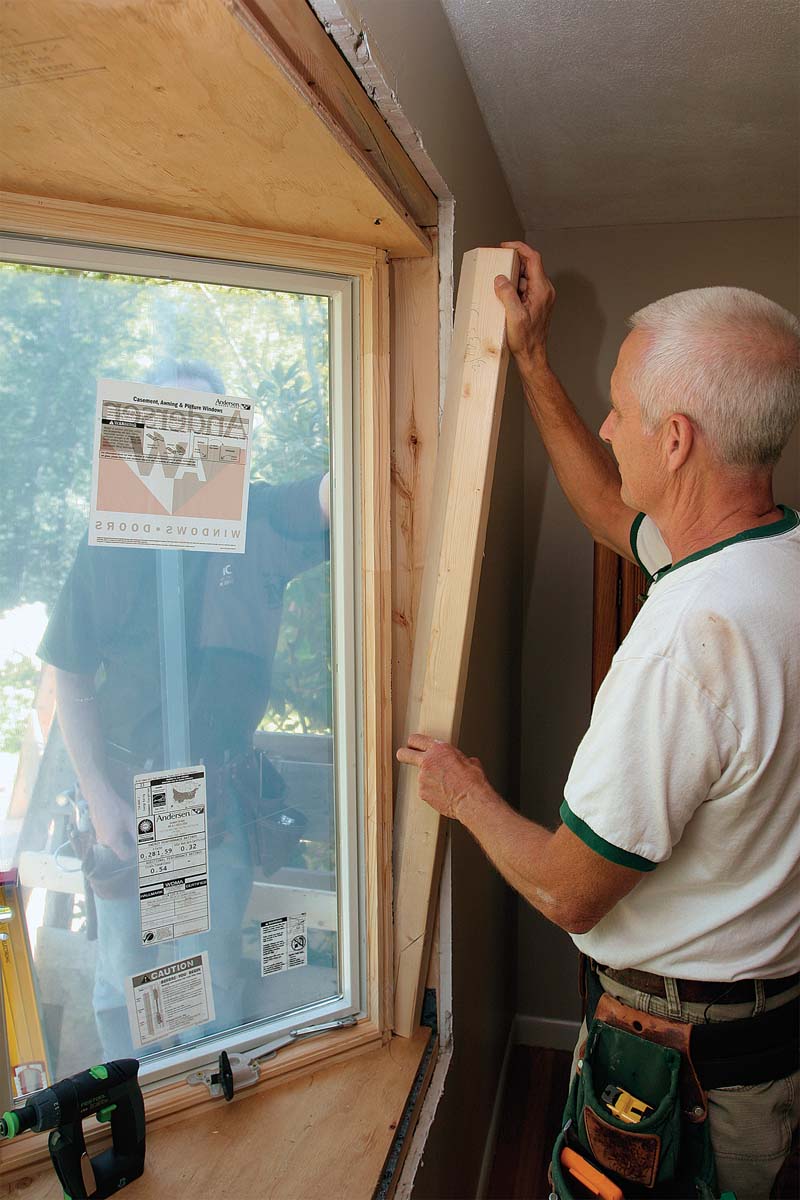
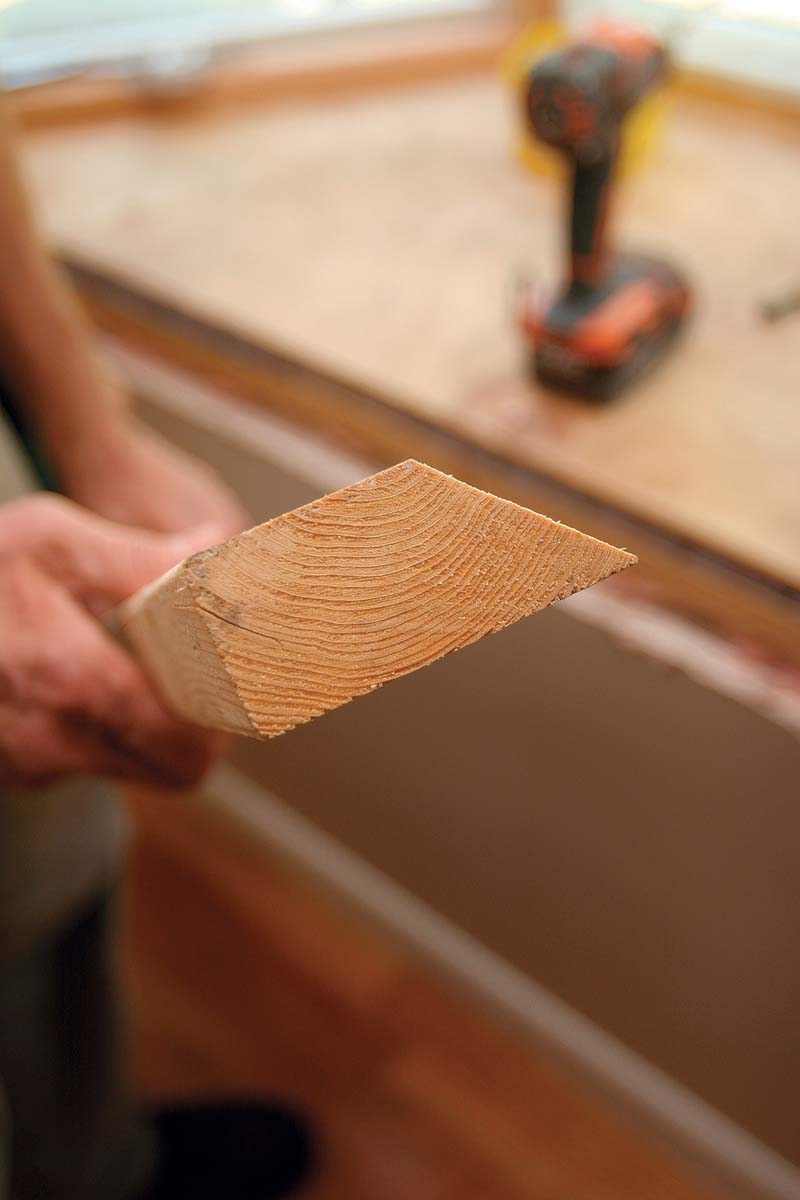
With the top and bottom of the window secure, I fasten the sides. I first make angled spacers by cutting 45° bevels on a pair of 2x4s. These spacers prevent the window frame from distorting when I run screws through the bay window’s angled side. I attach the spacers to the jack studs with 3-in. screws, and then I open the sashes and install 3-in. screws through the window frames and into the spacers. With the window securely fastened, I check the operating sashes to make sure that they open and close easily. I then go back outside to focus on drying in the installation. If the sashes are difficult to open, I check the gaps between the sash and the window frame to see if anything moved out of square while being fastened. I then shim and refasten until the sashes work correctly.
Insulate and install the roof
Projecting windows of all types can be cold and drafty, so before installing the roof I built previously, I add a 1-in.-thick layer of rigid insulation on the head board, 2-in.-thick rigid insulation beneath the seat board (covered with soffit material), and spray foam around the perimeter of the window to stop air leaks. The rigid insulation, which acts as an air barrier and thermal break, greatly improves the window’s thermal performance.
It’s now time to install the roof. The roof is centered on the window and is screwed to the framing with structural screws long enough to reach the framing under the wall sheathing. Connecting the roof’s OSB back to the framing members—not just the sheathing—is important; the roof’s OSB back will later be the attachment point for stainless-steel cables that help to hold up the front of the window.
Install the support cables
When I started out as a carpenter 30 years ago, we supported bay windows with large brackets. The brackets take a surprisingly long time to build and install when the window is being put into an existing house. The siding must be cut away and additional blocking installed between the studs because the existing framing seldom corresponds with the bracket locations.
For all these reasons, I now use cable supports from the window manufacturer, which are faster and easier to install and can be adjusted later if the house settles or the window sags. When a client wants brackets under the window for aesthetics, I’ll add them, but I still use the cables for proper window support.
The cables attach to the house with metal clamps mounted under the window’s roof. The braided stainless-steel wires are fished through the window and connect to the seat board with nuts and a series of washers. The manufacturer provides plugs that allow access to the adjusting nut should the front of the window need to be raised or lowered later.
A pair of cables can safely support up to 1000 lb. If you have an especially large window or need greater capacity, consult the manufacturer for guidance. Sometimes additional cables or other means of support are required.
To begin the cable installation, I fish the cables through the hole locations specified by the window manufacturer and then attach hex nuts and washers to the threaded shaft on the bottom of each cable. The top of the cable is fastened to the metal clamps under the roof. After all the components are in place, I tension the cables by tightening the hex nuts on the bottom.
Roofing and trim
With the window fully fastened in the opening, I place 6 in. of fiberglass insulation in the bottom of the roof before installing the roof sheathing (zipsystem.com). The sheathing has a waterproof surface and a companion tape to seal the seams. When used together, the sheathing and tape eliminate the need for shingle underlayment. I cover the roof with the same shingles used on the main roof.
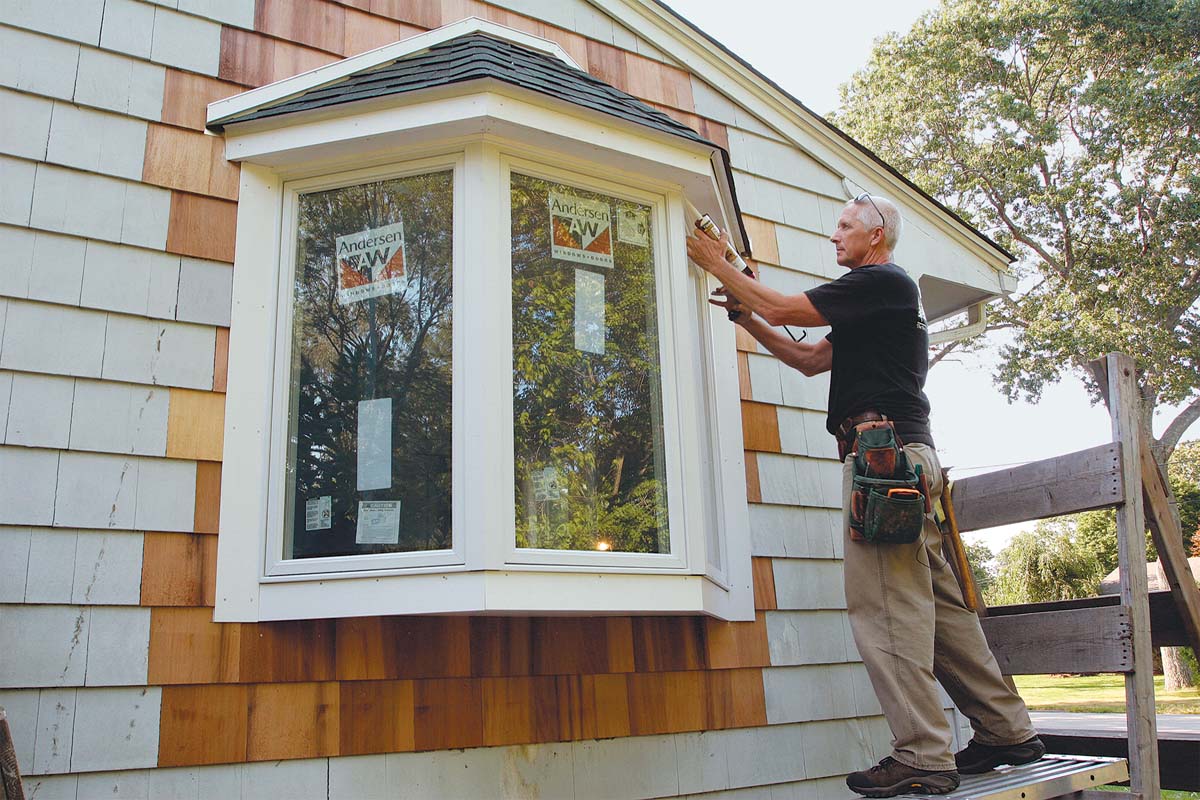
Before attaching the exterior casing, I put another layer of flashing tape on the house and lap it onto the sides of the bay window to stop air and water. For trim, I use cellular PVC sheet stock on the bottom of the window and cellular PVC boards for the rest. After all the trim pieces are in place, I fill in the missing cedar shingles around the window and caulk any gaps in the trim for a finished look.
Despite installing a couple dozen or so bay windows during my career, I am always surprised at how long the process takes. Unlike a typical window replacement, bay windows have a roof to build; insulation, shingles, and flashing to install; support cables to connect; and additional exterior trim to attach. This particular installation took two skilled carpenters a full day to complete, although I think the improved living space makes the considerable effort worth it.
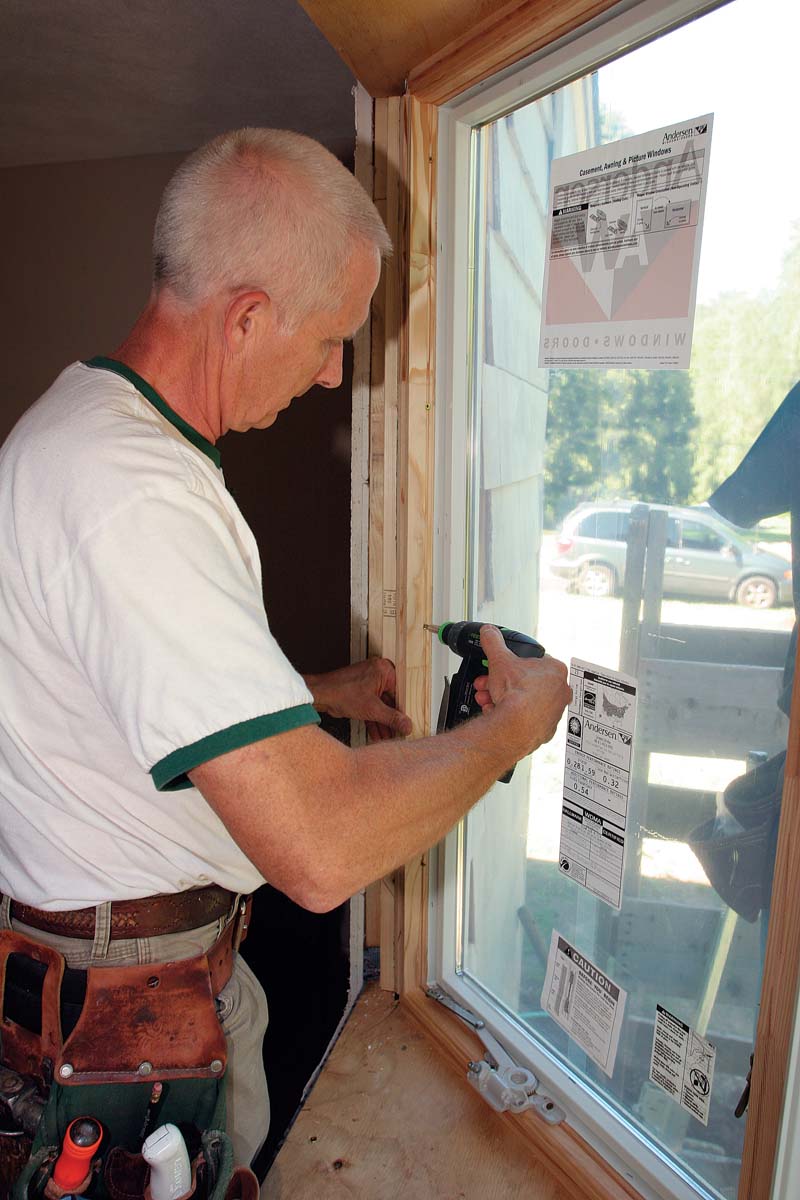
Shim And Fasten
The window is moved into the rough opening from the outside. One carpenter moves inside to fasten the head board temporarily to keep the unit steady while it’s shimmed and fastened. The other carpenter remains outside to check for plumb, adjusting the front of the window as necessary.
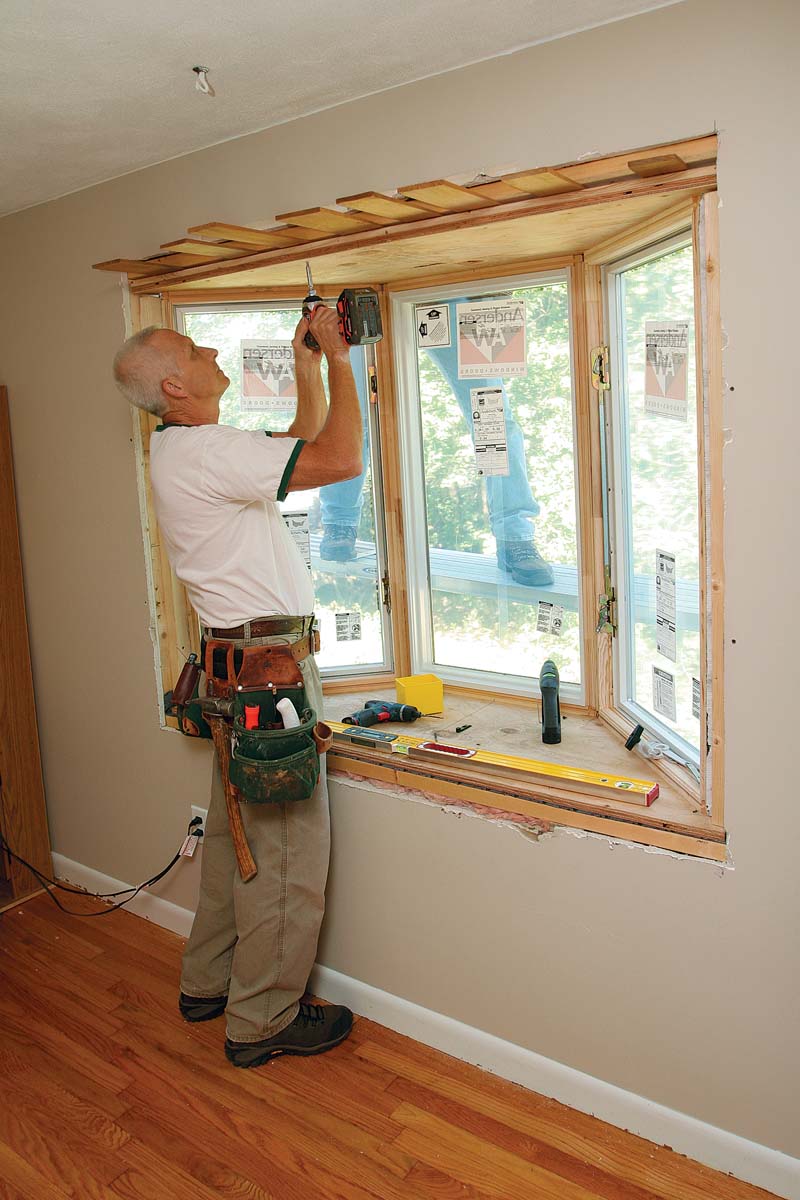 |
Fasten the top and bottom. Secure the window’s head and seat boards with 3-in. screws spaced every 6 in. or 8 in. Shims prevent the plywood boards from bowing as the screws are tightened. |
 |
 |
|
Make angled spacers. A 2×4 with a 45° bevel fills the space between the bay window’s angled casement windows and the rough opening. The pieces are best cut with a portable tablesaw. |
 |
Fasten the sides. With the angled spacers in place, secure the sides of the bay window with 3-in. screws driven through the jamb. The screws are spaced approximately 12 in. apart. |
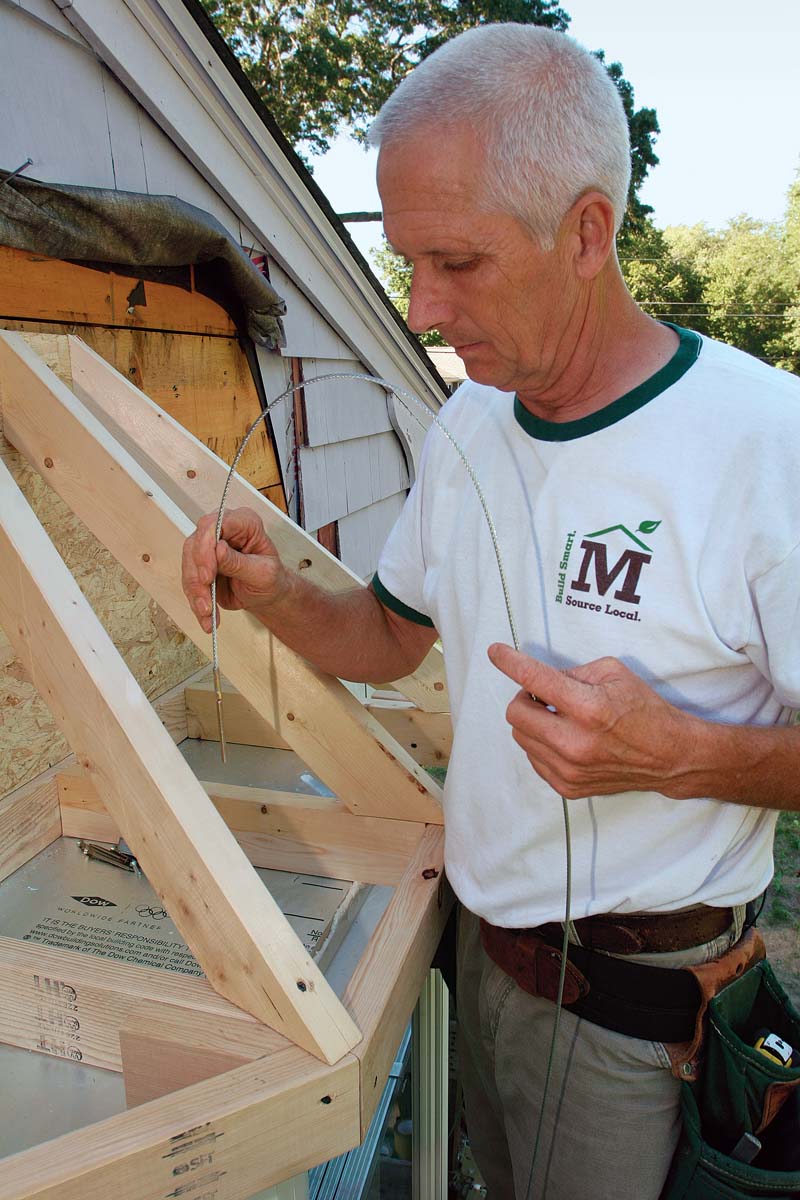
Install The Cable Supports
Once the assembled roof is screwed in place, stainless-steel cables are installed to keep the window from sagging over time. The tops of the two cables are attached under the roof, and the bottoms are attached to the seat board near the angled corners farthest from the building. The cable ends have threaded sections that allow the cables to be tensioned and adjusted later if needed.
|
Go fishing. Fish the cables that support the front of the window through the corners where the center picture window meets the flanking casements. Secure the cables at the top and the bottom, and then tension them. |
 |
 |
Mount the clamp. The manufacturer provides a paper template for correctly positioning the two-piece cable clamp that anchors the support cables. The clamp location varies depending on the type of bay window used and the blocking or studs behind it. |
|
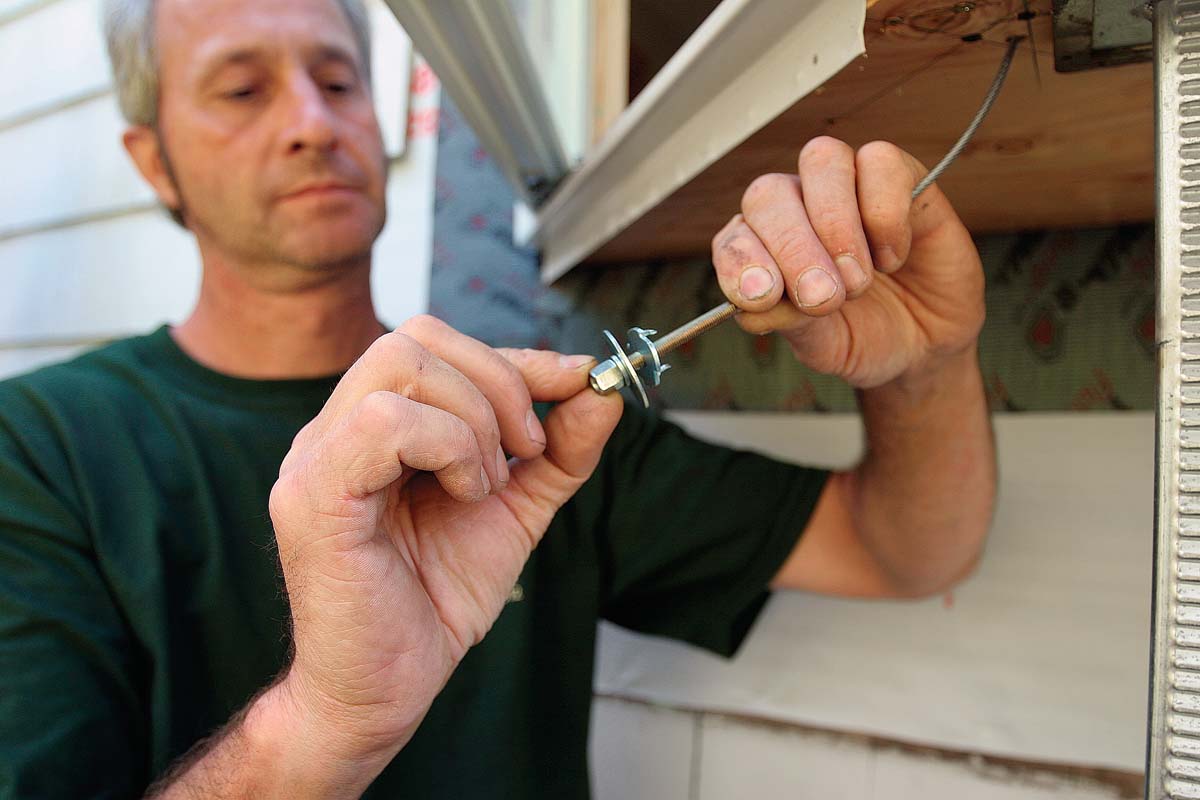
Assemble the cable bottom. The cable’s threaded end allows tensioning and future adjustment should the house or window move. The end of the threaded section accepts a hex wrench, so the shaft doesn’t turn when the hex nut is adjusted. |
 |
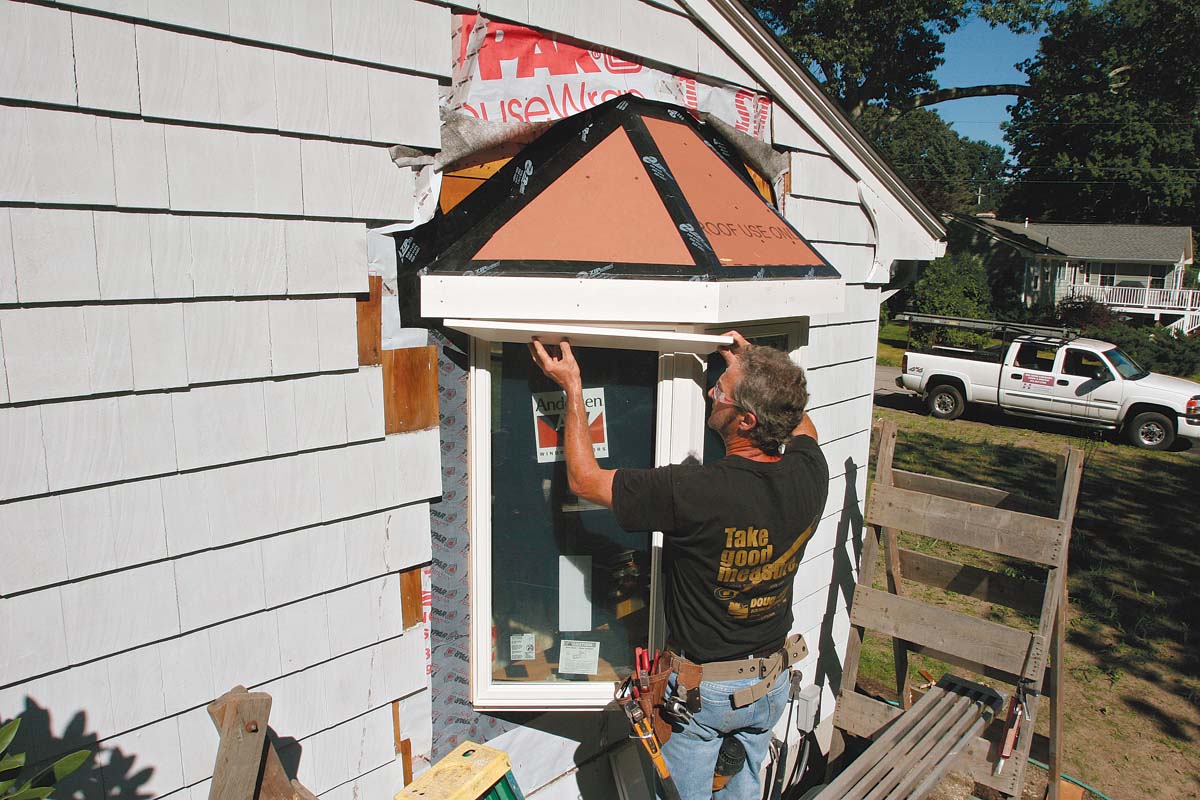
Install Flashing, Roofing, And Trim
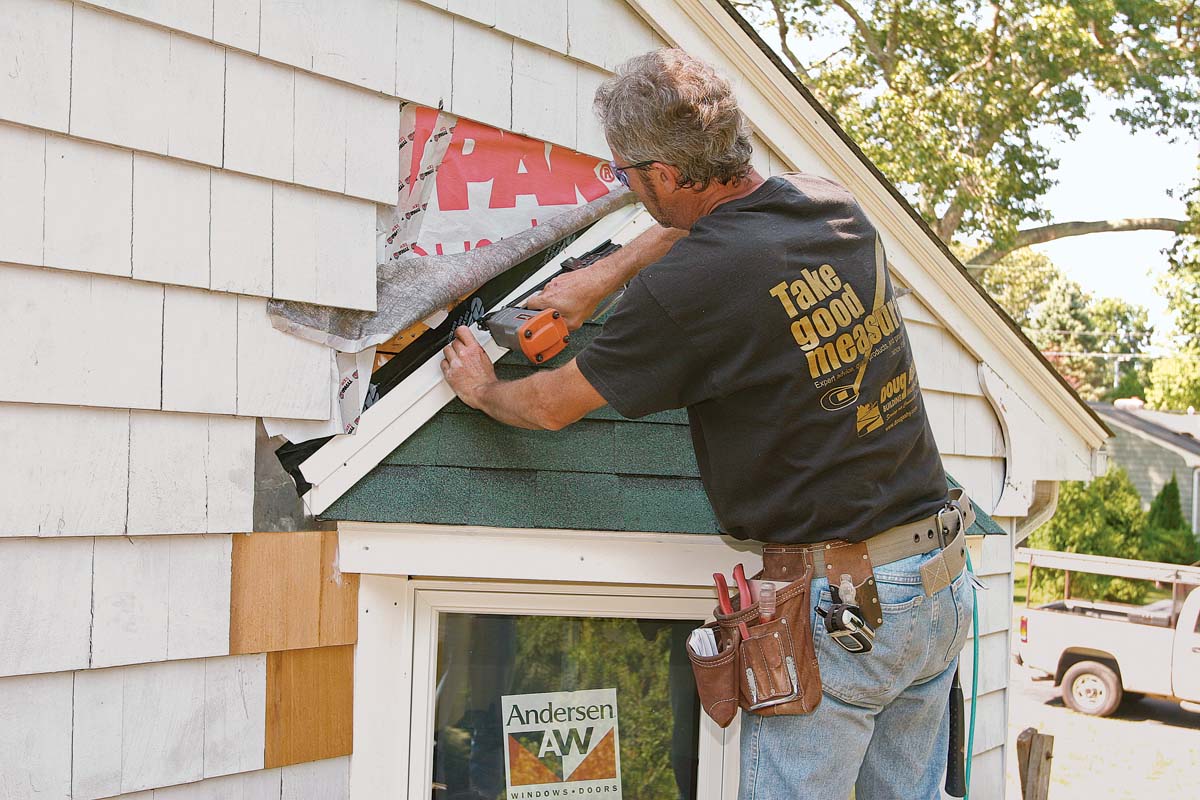
With the roof sheathed and the overhang trimmed out, the asphalt roofing can go on. Step flashing is woven in between the roof shingles where the small hip roof meets the exterior wall. The flashing’s vertical legs are taped to the wall and covered with housewrap. A small piece of trim over the roof shingles prevents the cedar-shingle siding from wicking water.
|
Install the trim. Size the overhang to complement the bay-window roof and to accept standard-width boards. The author chose PVC trim stock for this project because it needs minimal maintenance and can be left unpainted. |
 |
|
Make it watertight. A small piece of trim covered by an aluminum drip cap keeps the sidewall shingles’ end grain off the wet roof shingles. Lap the housewrap over the drip cap’s vertical leg before reinstalling the shingle siding. |
 |
|
A good-looking, watertight window. The completed installation has redundant flashing and a good-looking roof that matches the scale and details on the rest of the house. The bedroom space inside is also brighter and more inviting than before. |
 |
For more photos and details, click the View PDF button below:
