Install and Finish Drywall Series: 6 Steps to a Level-5 Finish
High-gloss paint and harsh lighting will show every imperfection in your walls unless you take this additional step to eliminate surface differences.
Jump to all the videos in this series
Getting the smoothest-possible drywall finish is not as difficult as you might think. Use the tools and techniques that Myron Ferguson demonstrates in this video, and you will be well on your way.
1. Sand
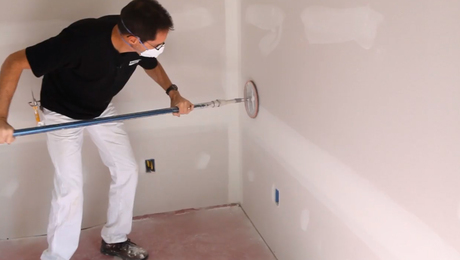
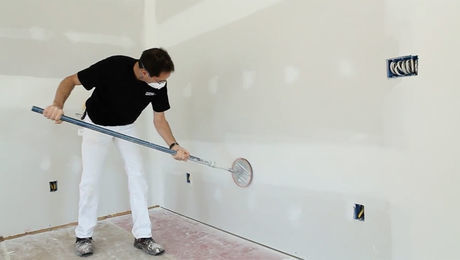
The first thing to do is to take a pole sander and sand the surface. Normally, you’d be done after sanding it for a typical finish. But you’d be left with a lot of areas that have compound on them, and other areas that don’t have any compound.
2. Remove dust
Take a brush and get all the dust and compound chunks out of the outlets. You don’t want to pick them up with your taping knife when applying the level-5 finish.
Differences are visible between areas of the same wall surface. Some very smooth areas blend into the paper, but in other areas the paper is kind of roughed up. Sanding has raised the nap of the paper just a little bit; you can see the dust clinging to the nap. The porosity of these areas is different, and that creates slight differences in the look after the wall has been primed. That’s the reason for a level-5 finish: to eliminate all the differences.
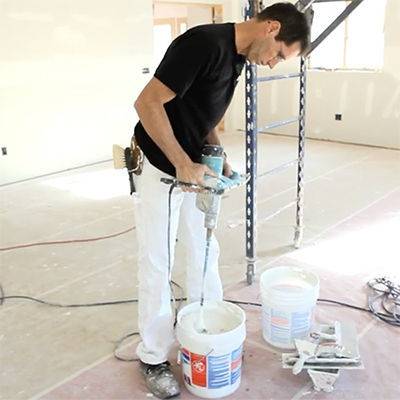
3. Thin all-purpose compound with water
Mix all-purpose lightweight compound and water in a bucket. The consistency should not be too thin. When you dip the roller in, you don’t want the compound to drip right off before you get it to the wall surface. The compound should cling to the roller so that you can get it to the wall without creating a big mess. After mixing, stick your knife in there to make sure the consistency is good. As you work with the mix, it’ll get a little thicker, so you’ll have to re-mix it.
Use a roller with a thick nap – ½ inch to ¾ inch. The mix should cling to the roller.
4. Roll on compound over the entire wall
Roll up the wall; if you roll down, the compound will drip on the floor. Move the roller in one long pass up the wall. Just slide it; the roller will turn very slowly. You don’t have to go right into the corner with this thin layer of compound, because the corner is already covered with compound. But do go over the seams to blend them in.
Apply the compound rather heavily. If the application is too thin, it’ll dry too quickly before you get to remove it.
5. Remove compound from the wall
After you’ve rolled 4 feet wide, start removing the compound right away using the knife. It will have already started to dry along the edge, so remove a little compound from another area and apply it to that dry edge. Then start removing as much compound as you can. A level-5 finish is just a thin film; it’s not comparable to a plaster finish or a veneer plaster finish. You’re just trying to equalize the wall surfaces. You’re not trying to put another thick layer of compound on the wall.
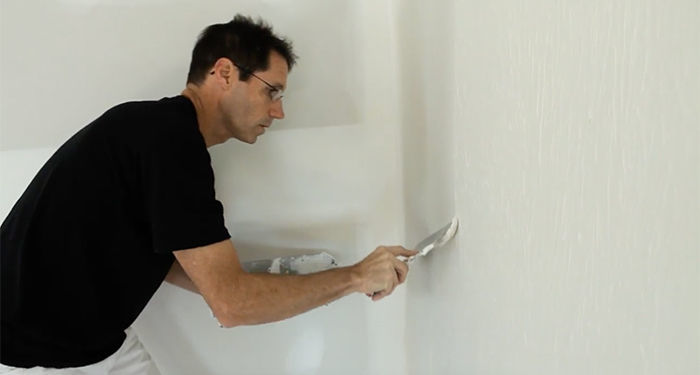
This finishing process doesn’t have to be a one-man operation. If you have a helper rolling it on ahead of you, you could really accomplish a level-5 finish very quickly.
The compound that you remove goes right back into the bucket. As you work, the mixture will dry out a little bit.
6. Give a quick final sanding
The wall will dry quickly. In about an hour, go over it lightly with a pole sander equipped with 220-grit sandpaper. It’ll take about a minute. Then the wall is ready for priming and painting.
Videos in the Series
-
Series Introduction: Install and Finish Drywall
-
Install and Finish Drywall: 7 Tips for an Accurate Takeoff
-
Install and Finish Drywall: 7 Fixes Before Delivery
-
Install and Finish Drywall: 9 Secrets to an Effortless Install
-
Install and Finish Drywall: 9 Rules for Hanging a Vaulted Ceiling
-
Install and Finish Drywall Series: 7 Tips for the Best Basic Finish
-
Install and Finish Drywall Series: 6 Steps to a Level-5 Finish



View Comments
how
Nice video series from a very conscientious professional. As a homeowner I have renovated three homes and hanging drywall is the hardest job as I am a perfectionist and spend way too much time trying to make it look nice. I wish I had learned these tips 15 years ago. Great video series.