FHB Logo Facebook LinkedIn Email Pinterest Twitter X Instagram Tiktok YouTube Plus Icon Close Icon Navigation Search Icon Navigation Search Icon Arrow Down Icon Video Guide Icon Article Guide Icon Modal Close Icon Guide Search Icon Skip to content
Subscribe
Log In
  • How-To
  • Design
  • Tools & Materials
  • Restoration
  • Videos
  • Blogs
  • Forum
  • Magazine
  • Members
  • FHB House
  • Podcast
Log In
How-To

Invisible Repairs to Hardwood Floors

The key is finding boards that match and installing them with care.

By Scott Sidler Issue 242 - April/May 2014
Featured in Old House Journal
  • X
  • facebook
  • linkedin
  • pinterest
  • email
  • add to favorites Log in or Sign up to save your favorite articles

Synopsis: The beauty of a hardwood floor has an underside: It can be difficult to repair damaged boards and to do so in a way that integrates the new boards with the old. In this article from FHB‘s Project House series, restoration contractor Scott Sidler shares his process for making invisible repairs to hardwood floors. The first step is finding boards that are as close a match as possible to the existing floor. This means not only finding boards of the same species, but finding boards of the same width and with a similar grain and color. Sidler then demonstrates how to remove the damaged boards, how to patch an open or damaged area of the subfloor, and how to install new boards tightly, maintaining the tongue-and-groove connections and keeping face-nailing to a minimum. He concludes with tips for blending the new with the old when refinishing the entire floor is not in the budget.

Other than refinishing hardwood floors, the most common repair my restoration company gets called to do is floorboard replacement. The typical reasons we replace boards are termite or water damage, pet stains that blacken the boards to a point sanding won’t fix, and floor-plan changes that involve the removal of interior walls.

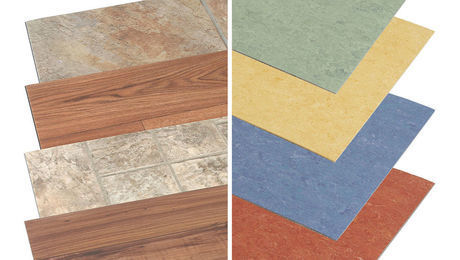
My goal is to find replacement boards that match the existing floor, and then integrate them for a natural appearance. It takes skill and patience, but the payoff is another 100 years or more of use without having to resort to an unfortunate solution: covering up the old floor with carpet, vinyl, or another layer of wood. The mark of success for a restoration carpenter is for nobody to realize you were ever there.

Identifying wood and its installation

When I get called to look at a floor-repair job, the first thing I check is the species of the wood. The old homes I come across here in Florida usually have flooring of heart pine, red oak, or white oak; occasionally, they have Douglas fir. There are online guides to identifying wood grains, but this part of the job is hard to teach. Experience really is the best teacher.

I can usually identify the species by examining the grain of the planks, and I know some people who can determine the species by the smell of the sawdust or the weight of the boards. When in doubt, I remove a couple of boards and bring them to the salvage yard for help in finding a match.

The second thing I look for is whether the joints of the floorboards are randomly spaced, or set consistently at 16 in. or 24 in. on center. Consistently spaced joints are usually an indication that there’s no subfloor under the hardwood flooring. In my area of Florida, this is common to the oldest homes (1890s and earlier) and the homes in the low-end working-class neighborhoods built from the 1900s to the 1940s.

If there is a subfloor, I can use the replacement boards more efficiently, staggering the joints wherever I need. Without a subfloor, I have to use lengths in 16-in. or 24-in. increments and be careful not to fall through the floor while I’m working on large repairs. Also, in homes without subfloors, the planks run underneath the interior walls instead of butting against them, which means far more hassle when it comes to removing and replacing each piece.

Finding the best match

When it comes to finding replacement boards that will blend with the rest of the floor, there are a few options. In the case of this project, we got lucky. The second floor of the house had been gutted by a previous owner, and the old flooring had been left ­behind, so we had a full stack of original floorboards to choose from. Without that, we would have had to start shopping around for a match.

Don’t expect to get a good match just by driving to the local supplier to pick up some new wood of the same species. Wood looks different depending on where it was grown, when it was harvested, and how it was milled. For the best match, check an archi­tectural salvage yard. First, though, arm yourself with as much information about the existing floorboards as possible.

Start by taking careful measurements of the existing boards. The width needs to be pretty accurate for a good fit and a satisfying match. In my area, I’ve seen heart-pine boards in 2-1⁄4-in., 2-3⁄8-in., and 2-1⁄2-in. widths. Why manufacturers decided to have such minimal differences is beyond me, but they do make a difference, so measure carefully. Fortunately, this is a pretty easy measurement to take right from the finished surface of the floor.

Accuracy is less crucial for the thickness of repair boards; as long as you’re within 1⁄8 in. or so, the sanding should remedy any slight differences. That said, a replacement board that’s too thick is better than one that’s not thick enough.

To measure the thickness, you’ll need to get creative. I typically look for a floor grate or a piece of baseboard I can remove in order to get an accurate measurement of the cross section of the flooring.

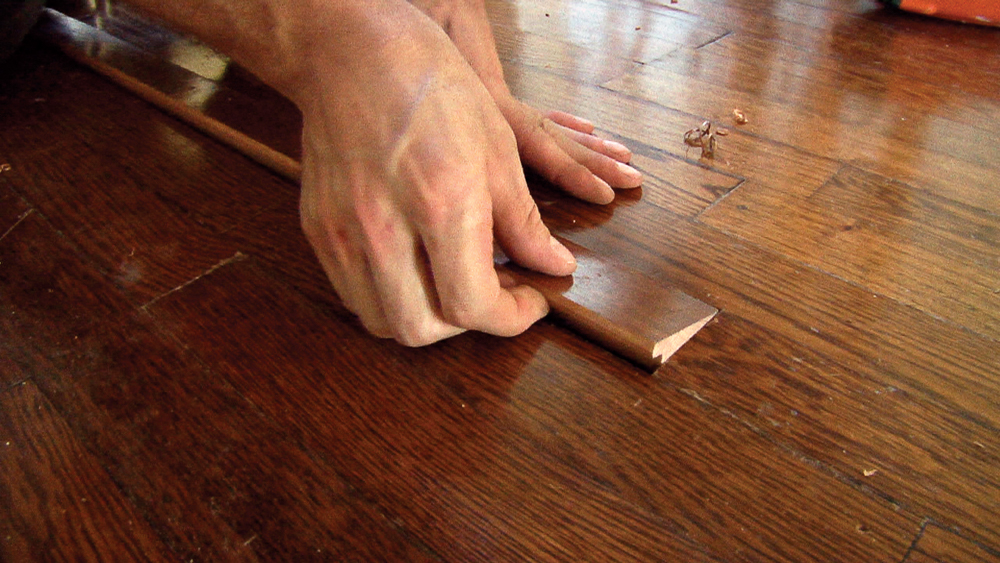
Pay attention to the position of the tongue of the board, too. The tongue is right in the middle of most floorboards, but with 7⁄8-in.- or 1-in.-thick boards, the tongue can be just below center. (This allows the boards to be sanded and refinished more times before replacement is necessary.) You need enough thickness above the tongue to match the rest of the floor, but the more crucial dimension is the distance between the tongue and the bottom of the board.

Finally, you need to find an appropriate grain and color match. For instance, if the floorboards in the house are quartersawn, then a replacement board with flatsawn grain will stick out like a sore thumb. The same holds true when comparing heartwood with sapwood. Some heart-pine floors have a lot of deep-red heartwood, while others are a bit more yellow.

Before you begin searching salvage yards for a match, find out the date that the house was built. If the homeowner isn’t sure, check the property-appraiser’s website, or visit the town hall. Ideally, the replacement boards will be from the same decade. If a decade match is not possible, at least look for similar grain patterns. Should you find nothing but replacement boards that are close but not quite perfect, there’s still a back door. You can borrow flooring from a closet or pantry to do the more visible repair, and then put the new wood in these more remote locations where it will be less noticeable. It means more repair work, but the payoff is worth it.

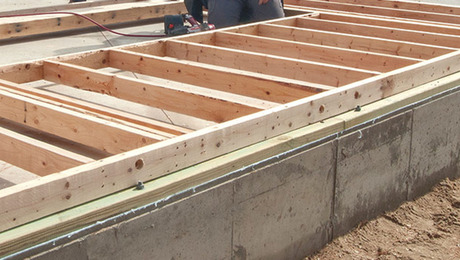
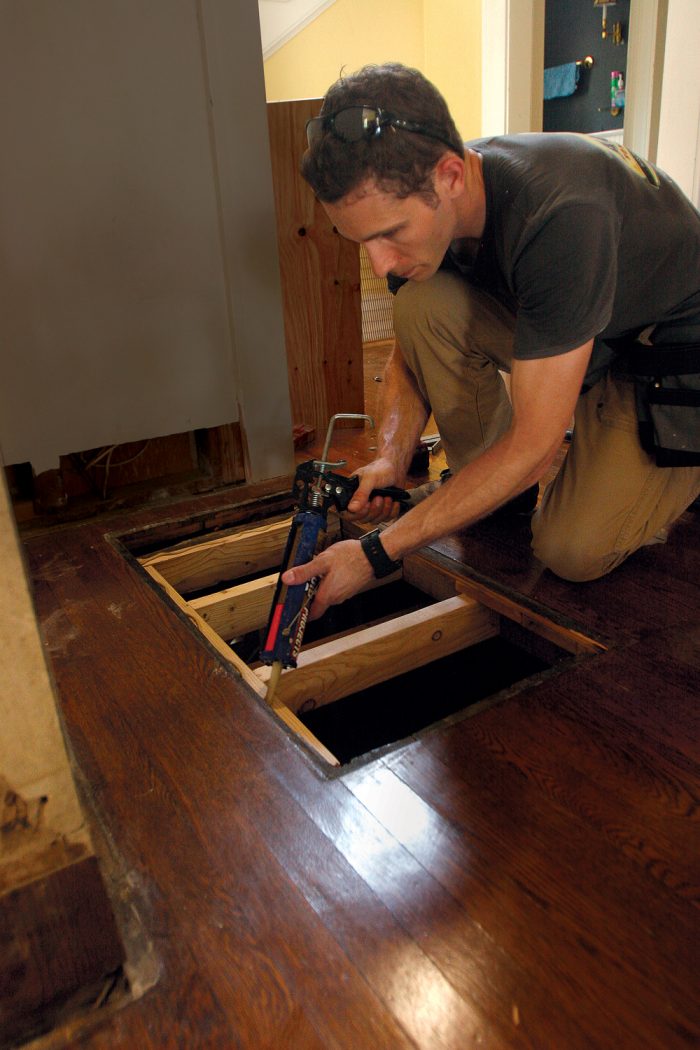
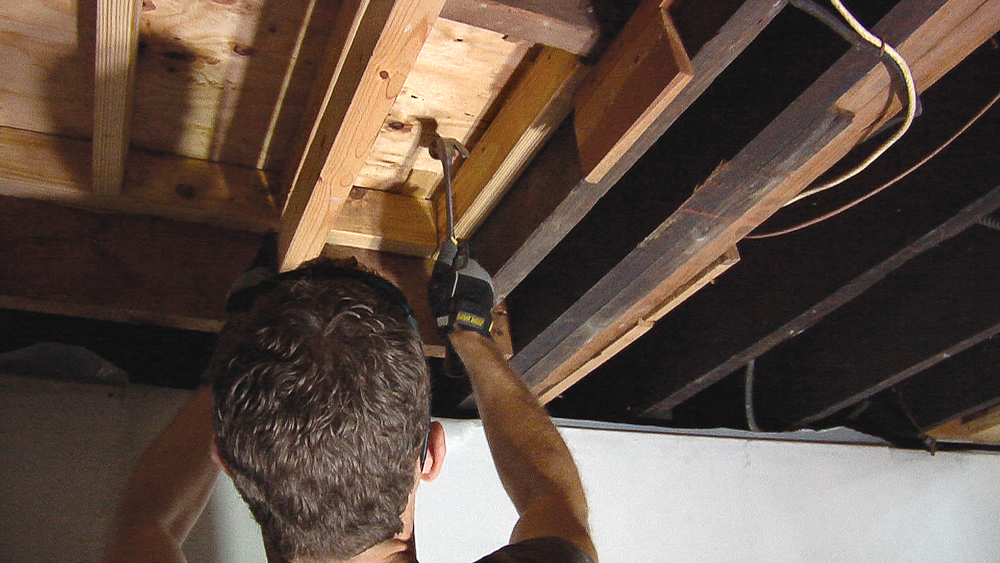
Patching comes first

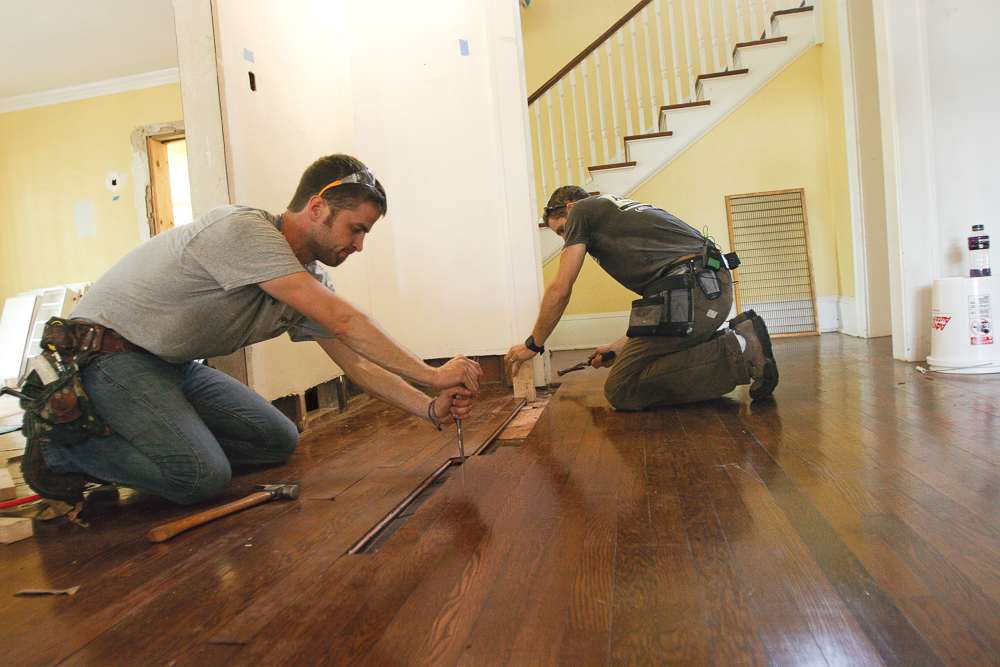
Many times the flooring repair is just the most visible part of a larger job that may involve rot repair or fixing other underlying damage to the subfloor and framing. On this job, we were called in to remove the return-air floor registers that fed the old, and now decommissioned, heating system. Before we could tackle the floorboard repair, we needed to install a framework in the hole and patch the subfloor.

frame area to be patched with 2x4s
Sturdy support. If the area to be patched is over a small opening, as it was here, you can frame it with 2x4s. Hold the 2x4s up tight to the underside of the existing subfloor, and take care to keep all of the pieces level and flush at the top as you fasten them with screws. With the framing in place, lay down a bead of subfloor adhesive.
glue and screw new piece of plywood
Shim it flush. Often the existing subfloor, usually 3⁄4 in. thick, won’t match the thickness of modern plywood, which is often slightly thinner than 3⁄4 in. To make up for this discrepancy, glue and screw the new piece of plywood into place, but before the adhesive sets up, back off the screws and add shims below. When the top edge is flush, drive the screws home.

Removing the first board is always the hardest

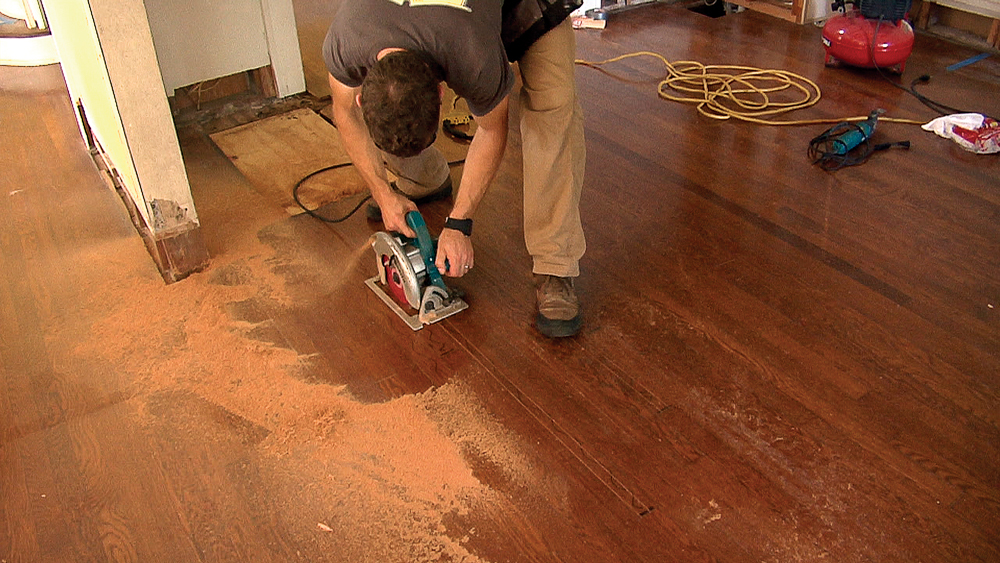
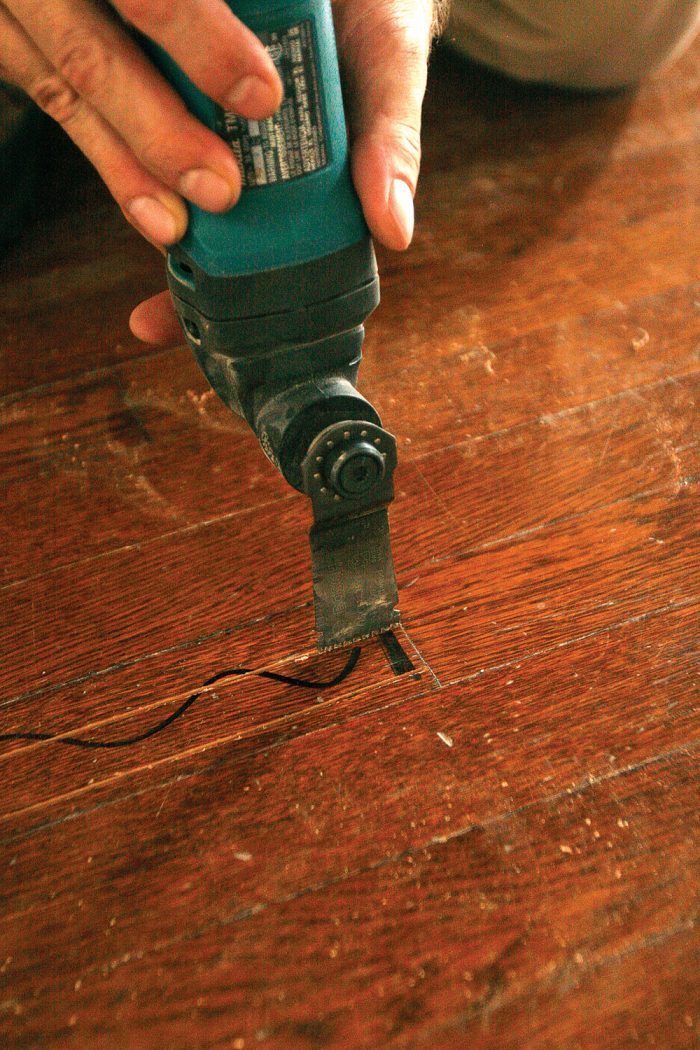
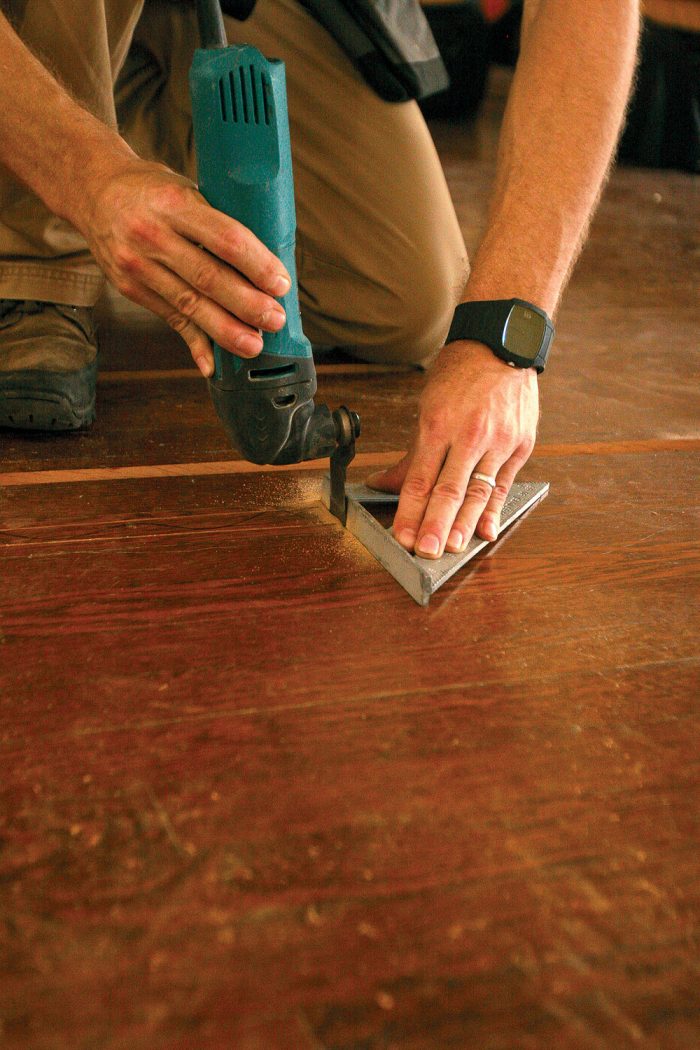
On this project, some of the floorboards ran continuously from one end of the room to the other, so you can imagine how it would have looked if I had tried to patch in this floor vent, which spanned across nine or ten pieces of flooring, with short pieces. Instead of always removing entire boards, though, you can make your own butt joints.

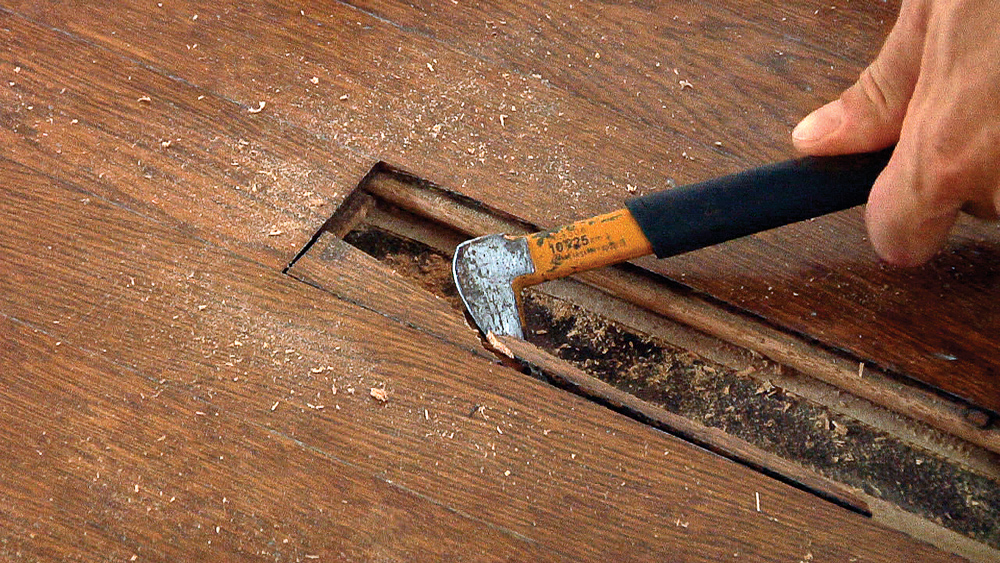
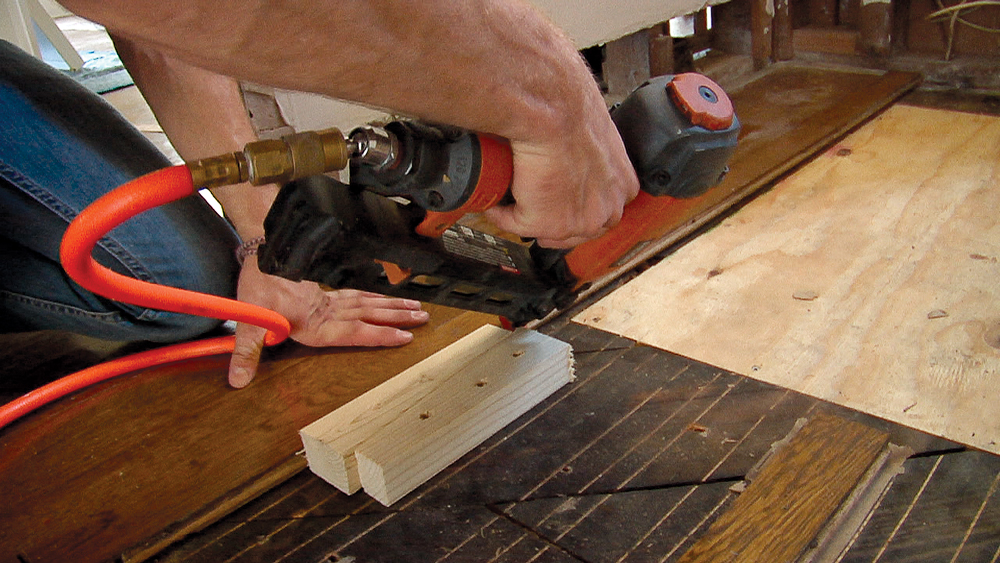
Tongue-and-groove flooring is fastened with nails driven through the tongue of each piece and down into the subfloor or framing below. The nails then are covered by the grooves of the next board that gets installed. To remove the boards, you have to gain access to the nails.
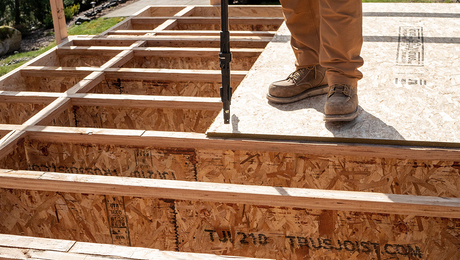
using a marker to indicate which boards will be removed
Mark a new layout. Use a marker to indicate which boards will be removed, and where any new butt joints will be added. Always carry the mark along the length of the board to avoid confusion when cutting, and stagger the joints by at least a foot or so.
circular saw making two parallel cuts along length of marked board
Divide the board. Using a circular saw set to the thickness of the flooring, make two parallel cuts along the length of each marked board, stopping shy of the end. If there are several boards in a row that will be removed, cut across their width to speed up the process.
plunge straight down until blade hits subfloor
Plunge to finish the cut. The circular saw will leave a bit of uncut wood at the end of the board, which can be handled with an oscillating multitool. Plunge straight down until the blade hits the subfloor, being careful not to nick the adjoining board.
apply firm downward pressure to the square when you plunge
Make your own joints. When creating a new joint in the middle of an existing board, align a rafter square with the long side of the floorboard, and apply firm downward pressure to the square as you plunge the multitool along its edge.
cat's paw pulls pieces toward gap
Clear out the waste. The center strip of the board can be lifted out by hand, which gives you access to the sides. Use a cat’s paw to pull these pieces toward the gap in the center, then lift them out.

Avoid ripoffs

It’s tempting to rip off the bottom half of the groove on every replacement board before dropping the board into place, but that’s not as strong as having a full tongue-and-groove connection. To maximize the strength of the repair, I like to slide as many intact boards into place as possible. The fit has to be tight, so expect a lot of resistance. Once those boards are set and face-nailed sparingly, many of the remaining ones can be placed just as they would in a new installation. Drop in a new piece groove first, then toenail the tongue to the subfloor.
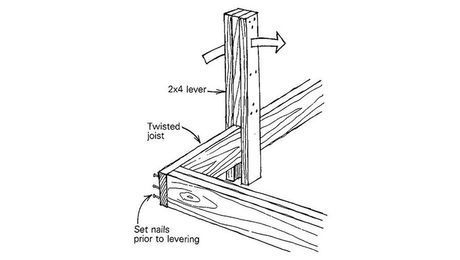
use beater block to protect end of a new board
Take off the pressure. To help a new board slide more easily into place, make sure the tongues and grooves of the existing and new boards are free of splinters or caked-on residue, and use a beater block to protect the end of the new board. A helper can drive a chisel into the subfloor and use it to leverage the nearby boards just enough to take the pressure off the board you’re trying to slide in.
seat groove side with a hammer and a piece of scrap wood
Face-nail the last board. For the final board, cut off the bottom half of the groove, and insert the board tongue first. Carefully seat the groove side with a hammer and a piece of scrap wood. It should fit tightly but not feel forced into place. Face-nail the final board into place with 18-ga. nails—two at either end and one staggered every 12 in. along the length of the board—and be sure the nail heads are set below the surface to avoid problems when it’s time to sand the floors.

Wedge it

cut a pair of opposing wedges from a scrap of wood
If you need to snug up the joint between a fastened and an unfastened floorboard, cut a pair of opposing wedges from a scrap of wood, fasten one half to the subfloor with screws, and hammer the other half into place to force the floorboards together. Nail the unfastened floorboard thoroughly before removing the wedges.

Plan for a full refinish

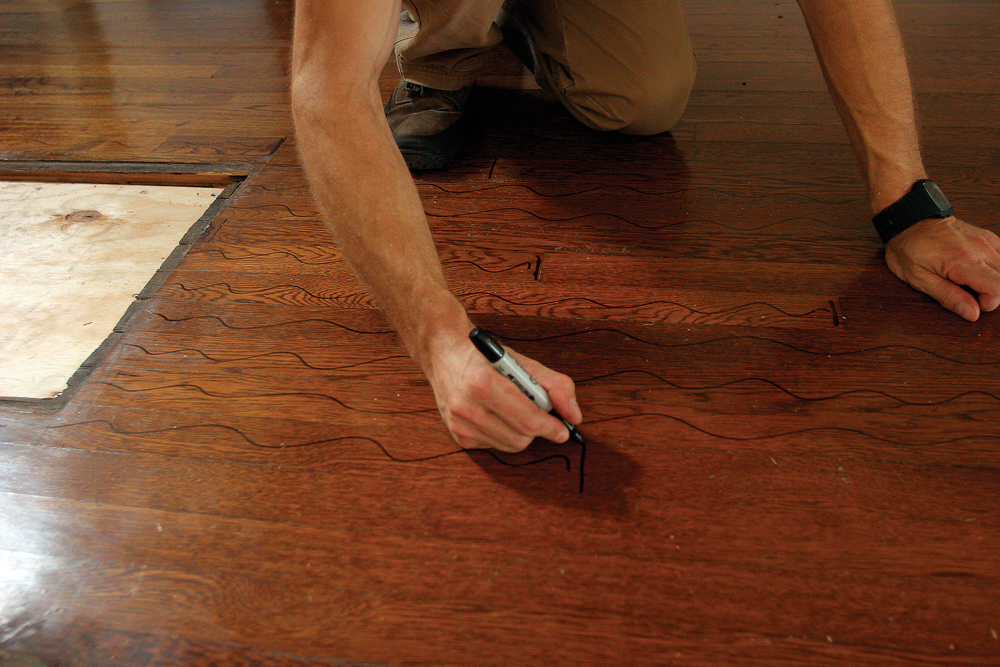
A great repair job still can be hard to blend in with the surrounding boards. Even if the repair planks match the existing floor—as they did on this job—the new boards usually sit proud of the existing floor due to wear, as well as sanding and refinishing that may have been done over the years. Customers don’t always like to hear it, but the best way to get a good match is to sand down and refinish the entire room, if not that whole level of the house.

If that’s not in the budget, then you have to get creative with color-matching the stain and blending subtle differences with colored wood putty. You can draw in the grain on any puttied sections that aren’t blending well enough. With the help of your thumb as a smudging tool, brown and black Sharpies can make almost any putty find the floor’s true color.

Photos by Justin Fink, Colin Russell, and Scott Sidler


Related stories:

  • A Closer Look at Solid-Wood Flooring
  • 2 Methods for Patching a Hardwood Floor
  • Reclaimed Pine Boards Milled Onsite Into Flooring

From Fine Homebuilding #242

For more photos and details, click the View PDF button below:

Sign up for eletters today and get the latest how-to from Fine Homebuilding, plus special offers.

Signing you up...

This site is protected by reCAPTCHA and the Google Privacy Policy and Terms of Service apply.
See all newsletters
See all newsletters
×

Get home building tips, offers, and expert advice in your inbox

Signing you up...

This site is protected by reCAPTCHA and the Google Privacy Policy and Terms of Service apply.
See all newsletters
See all newsletters
View PDF

New Feature

Fine Homebuilding Forums

Ask questions, offer advice, and share your work

  • X
  • facebook
  • linkedin
  • pinterest
  • email
  • add to favorites Log in or Sign up to save your favorite articles

Log in or create an account to post a comment.

Sign up Log in

Become a member and get full access to FineHomebuilding.com

Up Next

Video Shorts

Featured Story

FHB Podcast Segment: Repairing an Old Home While Maintaining Its Integrity

Learn about different approaches to making updates and repairs to older homes with historic charm.

Featured Video

Video: Build a Fireplace, Brick by Brick

Watch mason Mike Mehaffey construct a traditional-style fireplace that burns well and meets current building codes.

Related Stories

  • FHB Podcast Segment: Designing and Building an Efficient Slab-On-Grade Home
  • A Modern Texture With Historical Roots
  • The Twister
  • Mastering Floor Design and Construction: Tips from Industry Experts

Discussion Forum

Recent Posts and Replies

  • |
  • |
  • |
  • |
  • |
  • |
View More Create Post

Highlights

Fine Homebuilding All Access
Fine Homebuilding Podcast
Tool Tech
Plus, get an extra 20% off with code GIFT20

Video

View All Videos
  • FHB Podcast Segment: Designing and Building an Efficient Slab-On-Grade Home
  • FHB Podcast Segment: Sealing a Floor Cavity in a Slab-on-Grade House
  • Podcast 606: Foam Slabs, Gaps in Click Flooring, and Board and Batten Rainscreens
  • Podcast 587: Members-only Aftershow—Basement Flooring
View All

Floors and Coverings

View All Floors and Coverings Articles
  • A Modern Texture With Historical Roots
  • The Twister
  • Mastering Floor Design and Construction: Tips from Industry Experts
  • FHB Podcast Segment: Sealing a Floor Cavity in a Slab-on-Grade House
View All Floors and Coverings Articles

Fine Homebuilding Magazine

  • Issue 331 - June 2025
    • A More Resilient Roof
    • Tool Test: You Need a Drywall Sander
    • Ducted vs. Ductless Heat Pumps
  • Issue 330 - April/May 2025
    • Deck Details for Durability
    • FAQs on HPWHs
    • 10 Tips for a Long-Lasting Paint Job
  • Issue 329 - Feb/Mar 2025
    • Smart Foundation for a Small Addition
    • A Kominka Comes West
    • Making Small Kitchens Work
  • Issue 328 - Dec/Jan 2024
    • How a Pro Replaces Columns
    • Passive House 3.0
    • Tool Test: Compact Line Lasers
  • Issue 327 - November 2024
    • Repairing Damaged Walls and Ceilings
    • Plumbing Protection
    • Talking Shop

Fine Home Building

Newsletter Sign-up

  • Fine Homebuilding

    Home building tips, offers, and expert advice in your inbox.

  • Green Building Advisor

    Building science and energy efficiency advice, plus special offers, in your inbox.

  • Old House Journal

    Repair, renovation, and restoration tips, plus special offers, in your inbox.

Signing you up...

This site is protected by reCAPTCHA and the Google Privacy Policy and Terms of Service apply.
See all newsletters

Follow

  • Fine Homebuilding

    Dig into cutting-edge approaches and decades of proven solutions with total access to our experts and tradespeople.

    Start Free Trial Now
    • Facebook
    • Instagram
    • X
    • LinkedIn
  • GBA Prime

    Get instant access to the latest developments in green building, research, and reports from the field.

    Start Free Trial Now
    • Facebook
    • YouTube
  • Old House Journal

    Learn how to restore, repair, update, and decorate your home.

    Subscribe Now
    • Facebook
    • Instagram
    • X

Membership & Magazine

  • Online Archive
  • Start Free Trial
  • Magazine Subscription
  • Magazine Renewal
  • Gift a Subscription
  • Customer Support
  • Privacy Preferences
  • About
  • Contact
  • Advertise
  • Careers
  • Terms of Use
  • Site Map
  • Do not sell or share my information
  • Privacy Policy
  • Accessibility
  • California Privacy Rights

© 2025 Active Interest Media. All rights reserved.

Fine Homebuilding receives a commission for items purchased through links on this site, including Amazon Associates and other affiliate advertising programs.

  • Home Group
  • Antique Trader
  • Arts & Crafts Homes
  • Bank Note Reporter
  • Cabin Life
  • Cuisine at Home
  • Fine Gardening
  • Fine Woodworking
  • Green Building Advisor
  • Garden Gate
  • Horticulture
  • Keep Craft Alive
  • Log Home Living
  • Military Trader/Vehicles
  • Numismatic News
  • Numismaster
  • Old Cars Weekly
  • Old House Journal
  • Period Homes
  • Popular Woodworking
  • Script
  • ShopNotes
  • Sports Collectors Digest
  • Threads
  • Timber Home Living
  • Traditional Building
  • Woodsmith
  • World Coin News
  • Writer's Digest
Active Interest Media logo
X
X
This is a dialog window which overlays the main content of the page. The modal window is a 'site map' of the most critical areas of the site. Pressing the Escape (ESC) button will close the modal and bring you back to where you were on the page.

Main Menu

  • How-To
  • Design
  • Tools & Materials
  • Video
  • Blogs
  • Forum
  • Project Guides
  • Reader Projects
  • Magazine
  • Members
  • FHB House

Podcasts

  • FHB Podcast
  • ProTalk

Webinars

  • Upcoming and On-Demand

Podcasts

  • FHB Podcast
  • ProTalk

Webinars

  • Upcoming and On-Demand

Popular Topics

  • Kitchens
  • Business
  • Bedrooms
  • Roofs
  • Architecture and Design
  • Green Building
  • Decks
  • Framing
  • Safety
  • Remodeling
  • Bathrooms
  • Windows
  • Tilework
  • Ceilings
  • HVAC

Magazine

  • Current Issue
  • Past Issues
  • Magazine Index
  • Subscribe
  • Online Archive
  • Author Guidelines

All Access

  • Member Home
  • Start Free Trial
  • Gift Membership

Online Learning

  • Courses
  • Project Guides
  • Reader Projects
  • Podcast

More

  • FHB Ambassadors
  • FHB House
  • Customer Support

Account

  • Log In
  • Join

Newsletter

Get home building tips, offers, and expert advice in your inbox

Signing you up...

This site is protected by reCAPTCHA and the Google Privacy Policy and Terms of Service apply.
See all newsletters
See all newsletters

Follow

  • X
  • YouTube
  • instagram
  • facebook
  • pinterest
  • Tiktok

Join All Access

Become a member and get instant access to thousands of videos, how-tos, tool reviews, and design features.

Start Your Free Trial

Subscribe

FHB Magazine

Start your subscription today and save up to 81%

Subscribe

We hope you’ve enjoyed your free articles. To keep reading, become a member today.

Get complete site access to expert advice, how-to videos, Code Check, and more, plus the print magazine.

Start your FREE trial

Already a member? Log in

Privacy Policy Update

We use cookies, pixels, script and other tracking technologies to analyze and improve our service, to improve and personalize content, and for advertising to you. We also share information about your use of our site with third-party social media, advertising and analytics partners. You can view our Privacy Policy here and our Terms of Use here.

Cookies

Analytics

These cookies help us track site metrics to improve our sites and provide a better user experience.

Advertising/Social Media

These cookies are used to serve advertisements aligned with your interests.

Essential

These cookies are required to provide basic functions like page navigation and access to secure areas of the website.

Delete My Data

Delete all cookies and associated data