How to Lay Out an Accurate Ellipse with a Stick, Two Nails, and a Pencil
If you need to make an elliptical backing for a cove or arch, you could look at the 15 ways Wikipedia shows how to do it and risk your head exploding, but there’s a better way.
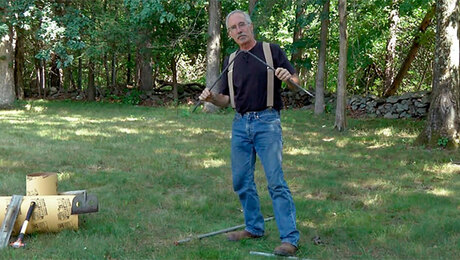
Dave Ferry from Silver Spring, MD, has sent us a technique where you can lay out an accurate ellipse every time using a stick, 2 nails, and a pencil. Because we want a true ellipse and not a simple curve, we can’t simply swing an arc with a standard compass. We’ll instead creat a jig that does all the work for us. It’s a little complicated to explain the entire process, but Dave’s trick is actually quite easy to use. The best way to learn how is to watch the video above.
_________________________________________________
Attention all tipsters!
We’re looking for any smart idea that would make a great There’s a Better Way Video or that could be featured in the Tips & Techniques department in Fine Homebuilding magazine.
We pay for any tips that get published
You can post tips in our submit a tip blog, or just email them to Fine Homebuilding care of Chuck Miller. Thanks!
Plus, browse 30 years of great ideas in our Reader Tips department.




View Comments
Chuck,
"There's a better way" is a great video series, and this tip is no exception. However, I would like to make a contribution regarding it's name. While completing my degree I had this amazing teacher who taught us this very tip. In fact, he has been teaching this tip to every one of his student for decades calling it the "yee ha whammy diddle." I have no idea why he calls it that, but I enjoy it just the same.
He is such a good teacher that I now aspire to be a teacher as well. And you better believe that I am going to be teaching the yee ha whammy diddle the first chance I get.
Take care,
Dale Brown
That's a great tip but when I saw it in my email box I was really hoping for a Chuck Miller April fools tip! They are always the best! Wouldn't have my sonic stop without you Chuck!
cheers,
Jeremiah
It's like folding a band saw. I know how to do it but I still cannot! It is the same with drawing an ellipse. This way sounds fool-proof.
Thanks.
Bill
Hi Chuck,
This video is great, but I came up with a bit of a problem.
In your sketch you showed "radiusing" a corner with an ellipse. Although, what you demonstrated, was actually "notching" a corner with ellipse. Using this "method", how would you modify it to "radius" a corner, as shown in your sketch?
My mind's either too old, or too tired to try and revise Dave Ferry's information. I "knoodled" on it for awhile, but came up with no answer.
Is it possible that you can't actually "radius" a corner, (as shown in your drawing) using a modified version of Dave's method?
Look forward to an answer, and any suggestions.
Thank You,
Jim Dasher
Edmonds, WA (Seattle area)
P.S.: Thoroughly enjoy all of your "There's A Better Way" suggestions!
Jim_in_Edmonds_WA,
I'll see if Chuck has a better answer, but my first thought is to use this tip to mark a template out of thin plywood, and then cut out and use that template to layout the inverted "radius" you're looking for on your workpiece. Does that sound right?