Save Energy with Storm Windows
Contractor Mike Guertin takes a look at the latest products and how to install them.
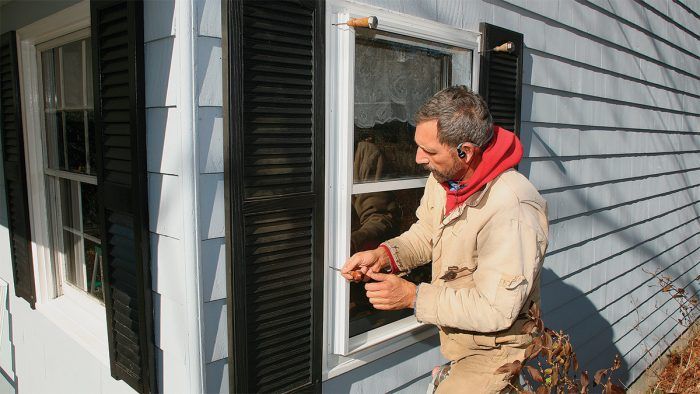
Synopsis: Over time, corrosion on aluminum storm windows can make them inoperable. Instead of replacing the existing windows with new insulated units, sometimes it makes sense to replace the storm windows instead. In this article, contractor and FHB editorial adviser Mike Guertin reviews the major types of storm windows, their construction, available options for glass, and their general cost. He also shows how to measure for new storm windows, and the best practice for installing them. Photo: Charles Bickford
A client contacted me about installing replacement double-hung windows because she said the old ones were leaky and difficult to operate. It turned out that the double-hung wood windows on her 1960s ranch were actually in good condition. The problem was with the storm windows, which were aluminum triple-track models that had corroded. Many of the spring-loaded sash locks had frozen up, so the sashes wouldn’t latch in position, and the gasketing had dried up, allowing the sashes to rattle and leak air.
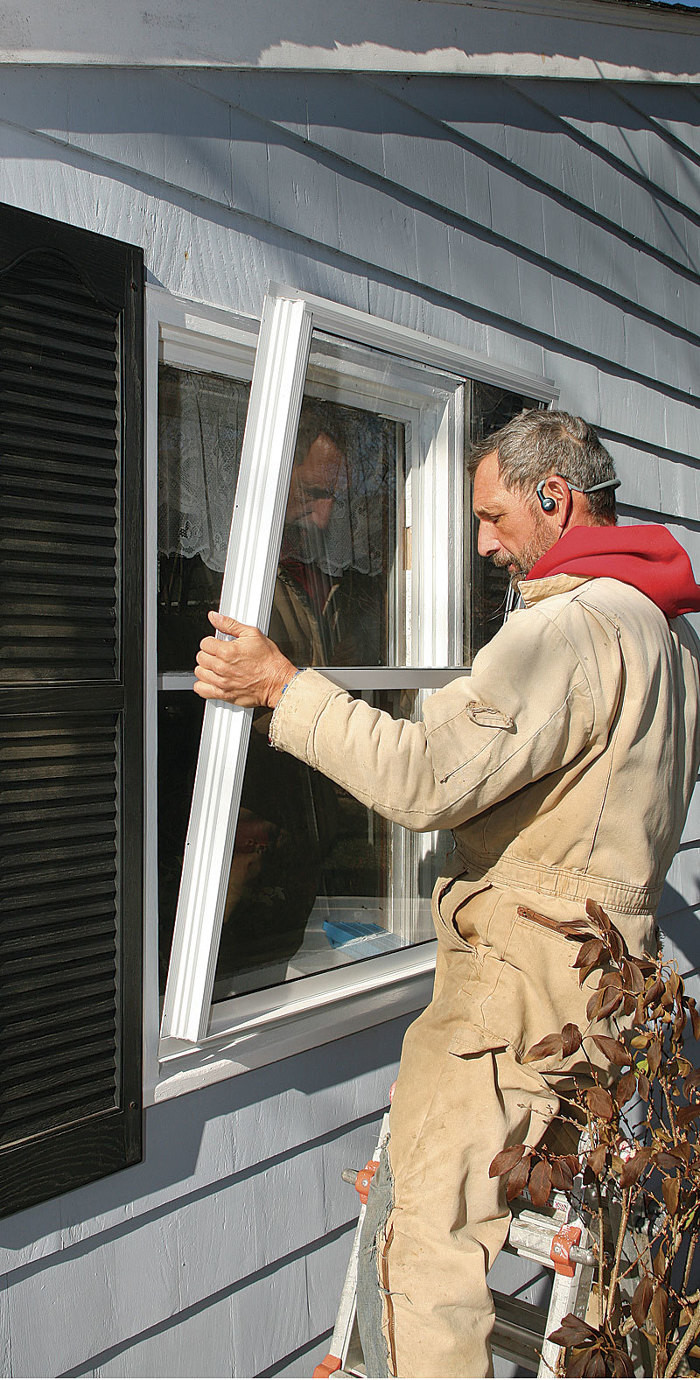
When considering window upgrades for operational or energy-efficiency purposes, many people think only of full replacement windows. But in many cases, installing or replacing storm windows can offer more bang for the buck. And they’re much easier and less intrusive to install. (You also can probably save $25 to $50 per window by installing them yourself.) Storm windows improve the overall energy efficiency of windows, help protect the painted surfaces, and often are the only option for upgrading in historic districts where removing and replacing the original windows is prohibited.
After selecting the right style of storm window from the several common types available, I took measurements, placed the order, and installed the windows for my client.
Choosing new storm windows
When I began to research storm windows, I looked at the extrusions and coatings, the sash operation and hardware, the gasketing, and how the corners were fastened (screws only or corner inserts and screws) to assess their quality and function. Because I live near the Atlantic coast, wind resistance is a big consideration. I priced new, white, anodized-aluminum triple-track storms in “good-better-best” models for this article. The prices ranged from about $60 to a little over $100 each. The best was wind-load rated with an integral heavy-duty meeting rail, a low air-infiltration rate, an easy-tilt function for washing, and an optional hard-coat low-e glazing ($20 more per window) for improved energy efficiency.
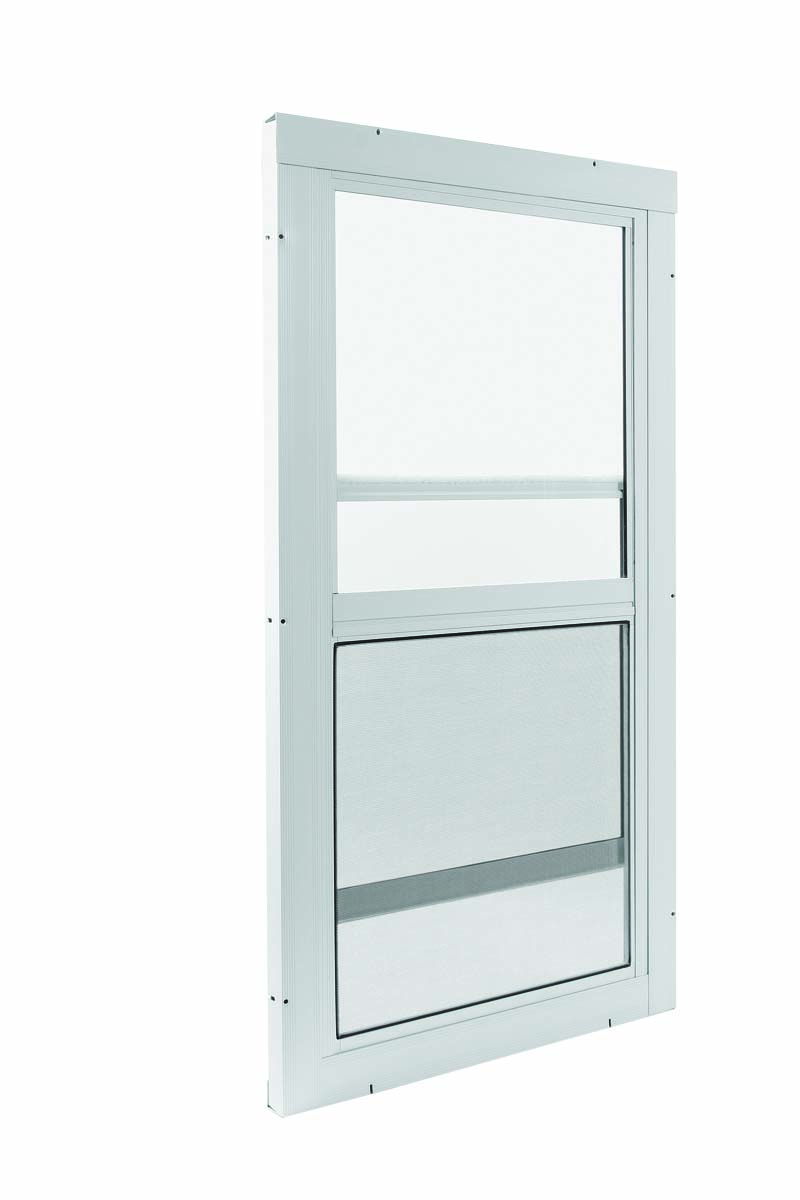
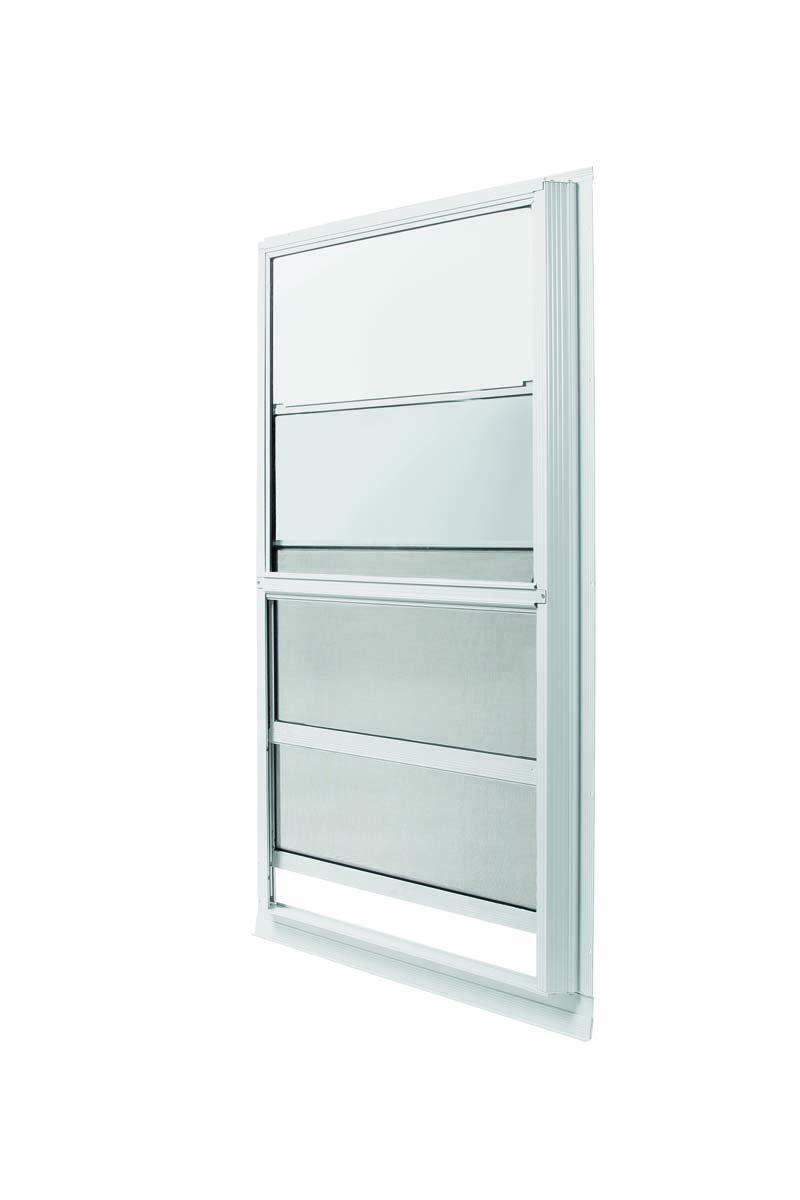
Double track VS Triple track
|
Double-track storms have an outer track that contains the upper sash. The screen snaps in below the upper sash in the same track. The inner track contains the lower sash. In order to lower the upper sash, the screen must be removed. Some double-track models have a fixed upper sash. |
Triple-track storms have three tracks, one each for the upper sash, the lower sash, and the screen. All three parts operate independently of one another and can be removed for cleaning and repair. Triple-track storms are about 1⁄2 in. deeper than double-track storms. |
 |
 |
Glazing options
There are almost as many glazing options for storm windows as there are for primary windows. Here are a few of them:
- Thicker “double-strength” glass to decrease noise pollution
- Obscure glass for privacy
- Acrylic thermoplastic, polycarbonate sheets or laminated impact glass for protection against storm debris
- Low-e glass for higher energy efficiency
- Tinted glass to reduce light transmittance
Custom sashes and color
Ideally, the storm window’s meeting rail should match the meeting rail of the primary window. The standard order is for a 60:40 or 40:60 ratio of lower to upper sash, but if the primary window has a unique meeting-rail level, then the window needs to be measured so that the fabricators can size the sashes accordingly. There’s an upcharge of $3 to $5 for this custom order.
Some fabricators offer vinyl frames in addition to, or instead of, aluminum frames. White is the most common color, but many fabricators offer additional colors such as beige, brown, bronze, and black.
Mounting locations
There are two basic mounts for storm windows: inset mount (also called blind-stop mount, flush mount, or Western style) and outer mount (also called casing mount, overlap mount, or Eastern style)
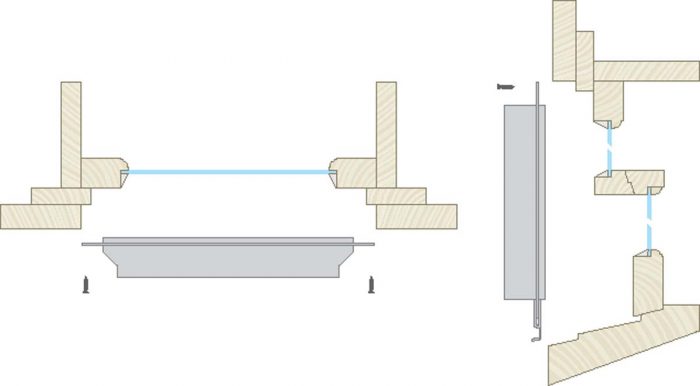
Inset-mount storm windows require a blind stop, against which the upper window sash registers. The storm window is fastened to the blind stop, which places the front of the storm window in plane with the exterior casing.
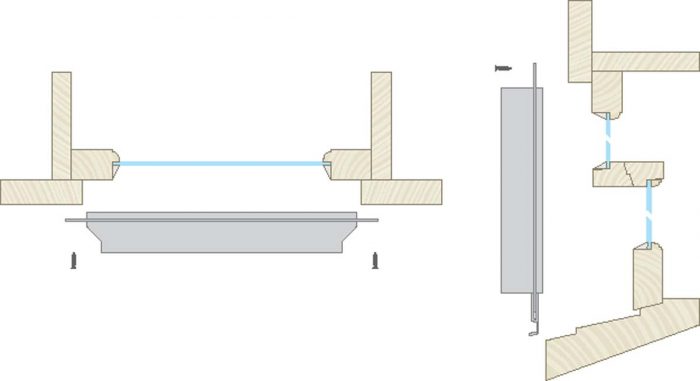
Outer-mount storm windows attach to the face of the window casing. Outer-mount models are appropriate for older window styles that rely on the exterior trim as the blind stop. This model can also be used on windows with a blind stop. The outer-mount storm projects beyond the plane of the trim and siding.
Measuring for size
Whether ordering for inset- or outer-mount positions, take the measurements at the same spots—inside the exterior casing. Supply the measurements for each window when ordering, and note whether the windows will be inset mount or outer mount. The fabricator will automatically adjust window dimensions for the mount location and to match the standard incremental manufacturing measurements: Inset-mount models will be slightly undersized, and outer-mount windows will be oversized to overlap the casing enough so that the screw holes align with solid wood. Allow one to two weeks for delivery.
Installing new storm windows
It’s worth spending a little extra time prepping the window jambs, sills, and trim before the new storms are installed. It’s the last chance for unfettered access to repaint and tend to any damage or decay. This prep work is most of the job; new storm-window installation only takes 15 min. to 30 min.
Dry-fit the first storm window to gauge the overlap of the flange on the blind stop or trim. This will guide your placement of the bead of sealant. (You can apply sealant to the back of the flange, but you may get the sealant on yourself when handling the window.)
Run a bead of sealant on the casing or stop sides and top, but not on the sill. Align the bead with the screw holes in the storm window’s flanges.
Remove the old storms
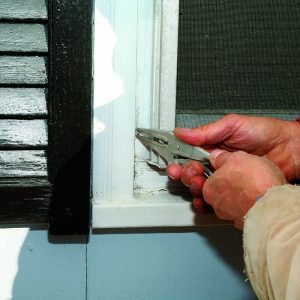
Paint often fills the Phillips slot on old storms’ screw heads and bonds the screws to the flange. A solid rap on a screwdriver usually seats the tip in the screw and breaks the paint bond. Use locking pliers to remove stripped-out screws.
Prep for the new storms
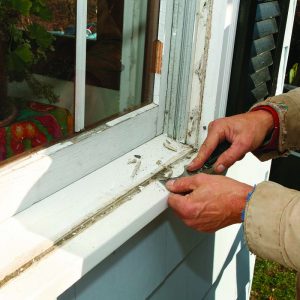
After removing the old storm, scrape off the old caulk, fill the old screw holes, clean and sand surfaces, and paint the area. Repair rot or replace the sill if it’s unsound before installing a new storm window.
Pin the window in place
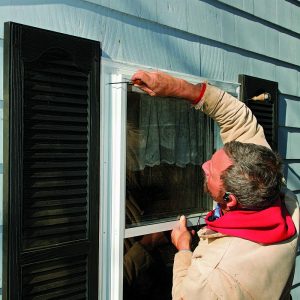
Raise the storm window in the opening, center it, and secure it in place temporarily with a pair of awls driven into the casing through the top corner holes. Check the storm window for square. If the primary window is in good condition and square, you can use the margin of the flange to the trim as a guide. If the primary window is out of alignment, then it’s important to check the square of the storm window to ensure smooth operation and a tight air seal between the sashes and the frame.
Install the screws
 |
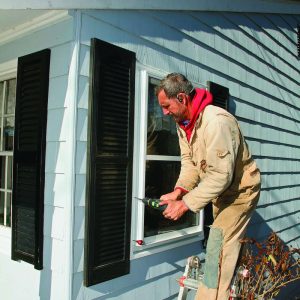 |
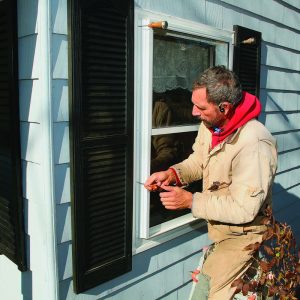
Use another awl to create pilot holes for quick screwing. Be careful driving screws when using a drill/driver. It’s easy to strip them out and chip off their finish. You may want to use a hand screwdriver, which is a little slower but less likely to damage the screws or the window finish.
Wear the sill expander
 |
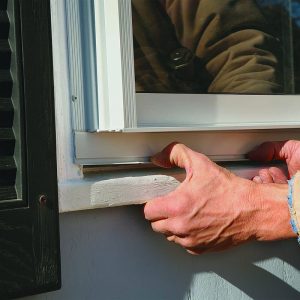 |
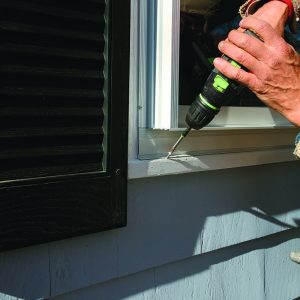
Generally, I do not caulk the expander down to the sill and instead toe-screw the bottom lip to the sill to keep it in place. There should be at least two weep holes or indentations on the bottom of the sill expander. Leave them open to permit seasonal moisture to drain.
Apply a bead of sealant
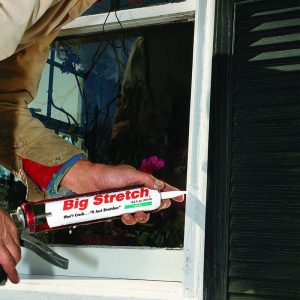
What’s the best sealant to use? The differential movement between the storm-window frame and the wood trim or blind stop may break the bond of inexpensive painter’s caulk. I like to use an elastomeric sealant, which expands and contracts without breaking its bond. Often labeled as “window and door” sealants and as ASTM C920 compliant (read the fine print for this designation), these sealants cost $5 to $7 per tube.
For more photos, drawings, and details, click the View PDF button below:


