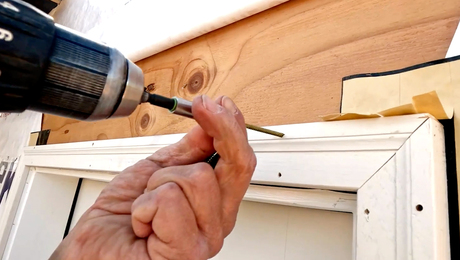
If you want to cover up unsightly screw heads in woodwork, consider making your own wood plugs. A countersink drill bit will leave a hole that accommodates the head of a screw. To conceal that screw, you can you use a plug cutter that matches the size of the countersink drill bit. Using a scrap board that is similar in color and grain configuration, bore a series of holes with the plug cutter. Then pop them free with a flathead screwdriver. To set them, dip the plug in wood glue, match up the grain orientation, then insert the plug and tap it into place with a hammer. Lastly, trim the plug flush, and use a sanding block to complete the job.
Up Next
Video Shorts
Featured Story

Get expert guidance on finding a fixer-upper that's worth the effort.
Featured Video
Builder’s Advocate: An Interview With ViewrailRelated Stories
-
 Podcast Episode 688: Obstructed Ridge Vent, Buying Fixer-Uppers, and Flashing Ledgers
 -
 Podcast Episode 687: Flat Roofs, Spray Foam vs. Loose-Fill Insulation, and Building Your Own Cabinets
 -
 Podcast Episode 686: Brick Steps, Ground-Source Heat Pumps, and Greenhouses in Nova Scotia
 -
 Fine Homebuilding Issue #332 Online Highlights
Discussion Forum
Highlights
"I have learned so much thanks to the searchable articles on the FHB website. I can confidently say that I expect to be a life-long subscriber." - M.K.
Fine Homebuilding Magazine
- Home Group
- Antique Trader
- Arts & Crafts Homes
- Bank Note Reporter
- Cabin Life
- Cuisine at Home
- Fine Gardening
- Fine Woodworking
- Green Building Advisor
- Garden Gate
- Horticulture
- Keep Craft Alive
- Log Home Living
- Military Trader/Vehicles
- Numismatic News
- Numismaster
- Old Cars Weekly
- Old House Journal
- Period Homes
- Popular Woodworking
- Script
- ShopNotes
- Sports Collectors Digest
- Threads
- Timber Home Living
- Traditional Building
- Woodsmith
- World Coin News
- Writer's Digest


View Comments
Sounds like something we use a lot when we're plumbing. There's a good lot of very handy plug material that will help you to get a good seal on metal and plastic piping if you head down to your hardware store and look around!
Could someone please explain the concept of matching grain and direction of the veneered face of the stair tread scrap board and then inserting the "matching" face into the hole first, exposing the unmatched inner grain from whatever piece the stair tread factory was trying to hide?
I do a number of plugs in the way you described, except:
After I cut the plugs, I cover them with masking tape.
Then I cut through the wood blank on my band saw making the plugs the depth I wish.
When done, I simply pull on the masking tape and they all come out together at the size I wanted.
I normally try to use a scrap of wood from the original that I'm building so it's easier to match the grain direction etc.
Hope this helps.
Can't tell what brand of countersink/plug cutter you're using but the high quality ones will chamfer the end to make entering the hole easy. Your's either doesn't cut the chamfer or you didn't bottom the bit to the wood surface. The benefit of a chamfered plug edge is there's lower risk of bruising the workpiece than when inserting a square edge plug.
And ideally you don't want to glue the bottom of the plug. Best practice is to swab the rim of the hole with a little glue and insert the plug. Ear swabs work good to spread the glue and there are specialized bottle applicators.
One can tell from the video that your plug cutter did put a chamfer on at least some of your plugs. However, by installing the plugs with the "top" (unchamfered end of the plug) inserted first, a more visible seam around the plug will result. Installed chamfer-end first, the taper will create a very tight seam as the plug is driven home. With a good grain match, the plug will be nearly invisible.
One has to drill the plugs pretty much full depth to get the chamfer created. Short plugs will not have a chamfer.
We use plugs extensively in yacht joinery. A hopefully-helpful tip is to drill them all, then run the block through a bandsaw to free the plugs. This gives them a smooth top so they drive evenly into the hole. After installing, strike the plug on the end-grain side with a chisel about 1/8-3/16 above the surface you are plugging. This will break most of the plug off and give you information on the whether the grain of the plug is or isn't parallel to the surface and will leave a thin enough piece of wood above the surface that a sharp chisel and a paring cut (with some practice) will let you easily shear of the remaining wood leaving a flush surface. Make the paring cut from the low side if the grain angle is higher on one side of the break than on the other. this will help prevent the plug chipping during the cut, as might happen if cutting from the 'high' side of the plug.
Sorry, but there is nothing 'clever' about using a veneered piece of glued up stock to create plugs, especially if you are planning on using the veneer to be your finished face. If that was the only piece of scrap you had, you should have turned it over, and planned on using plugs cut from the middle of the glued-up pieces.
Back to apprentice-school! NO cookies for you!!!!!