
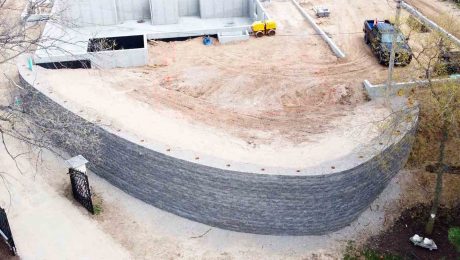
Most privacy fences are unimaginative, solid expanses of cedar or pressure-treated slats attached to rails, perhaps with a strip of premade lattice at the top. These fences are functional, but they do little to add character to the landscape or to complement the home.
When replacing my old chain-link fence, I wanted something that would complement my Craftsman bungalow without overwhelming its small yard. I knew that a little forethought and extra effort during construction could make a world of difference, transforming a fence into a feature that would fit the home and its setting.
Where to Start
I began by defining functional goals: I wanted a fence that would suit the style of my home and site, that would be easily repairable, and that would look good from both sides. I looked at scores of fences online and in the neighborhood, seeking ways to go from simply functional to spectacular.
Typical fence design places 4×4 posts 8 ft. on center. This makes good use of 8-ft. stock, but choosing a different distance between posts allows you to tailor a fence to the size of the yard—for example, to use tighter post spacing in a smaller yard. It also provides the chance to change the ratio of panel width to panel height for a different appearance or to accommodate changes in grade. My fence uses two widths of board arranged in a repeating pattern. That feature and the lattice at the top repeat some of the details on my bungalow.
When a project calls for digging, be sure to call 811 a week or so ahead to have the underground utilities located. It’s free, required by law, and can save you from putting a shovel through a buried gas or electrical line.
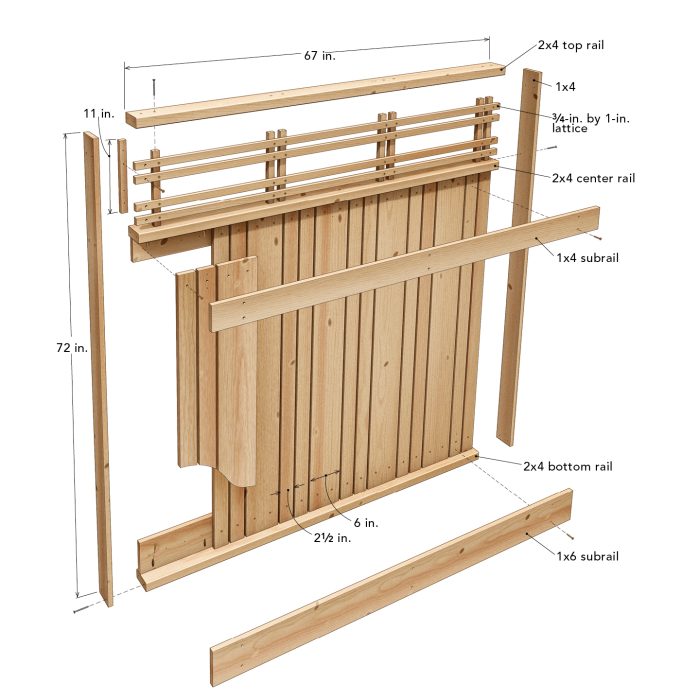
The Parts and Pieces of a Privacy Fence
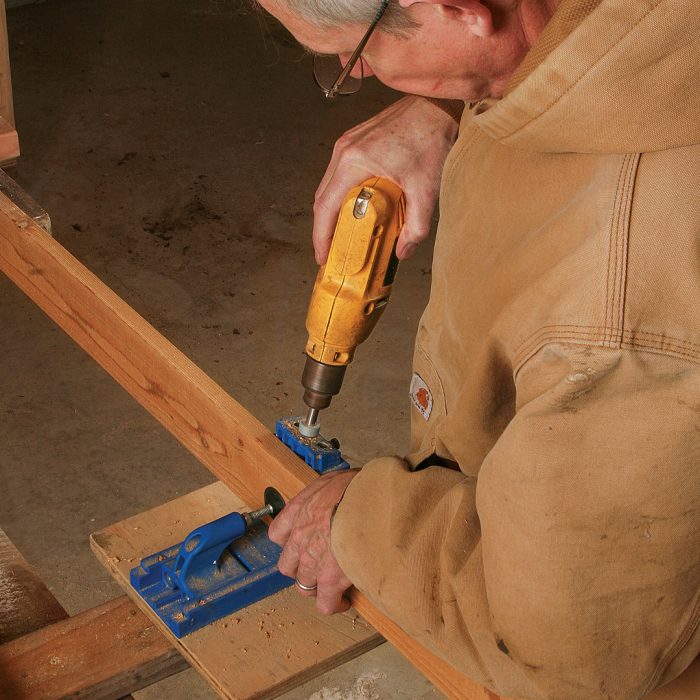
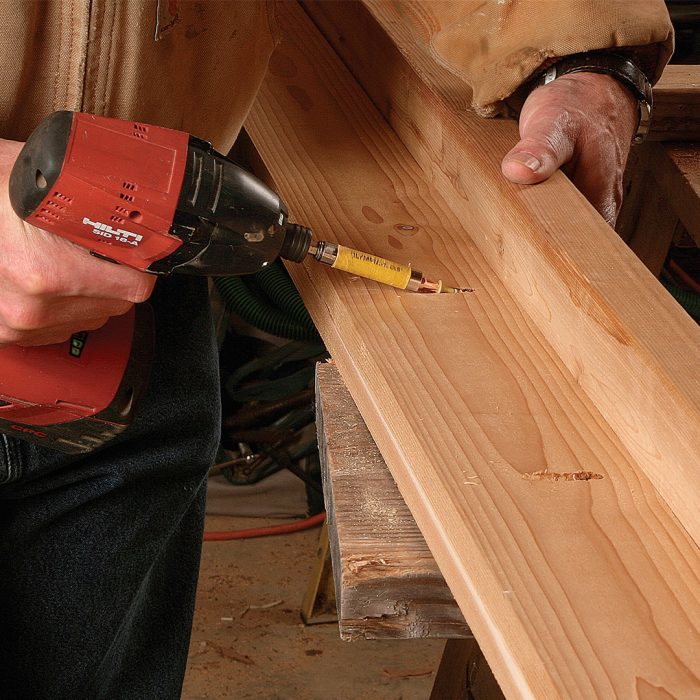
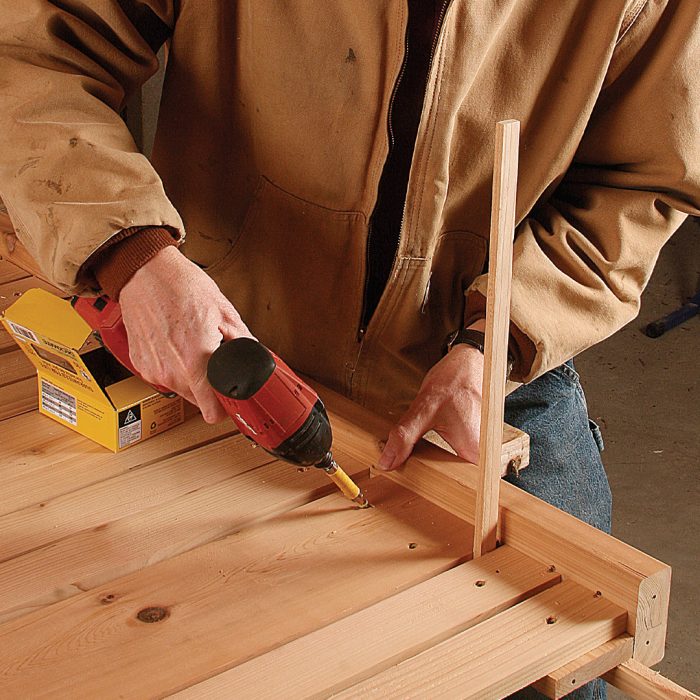
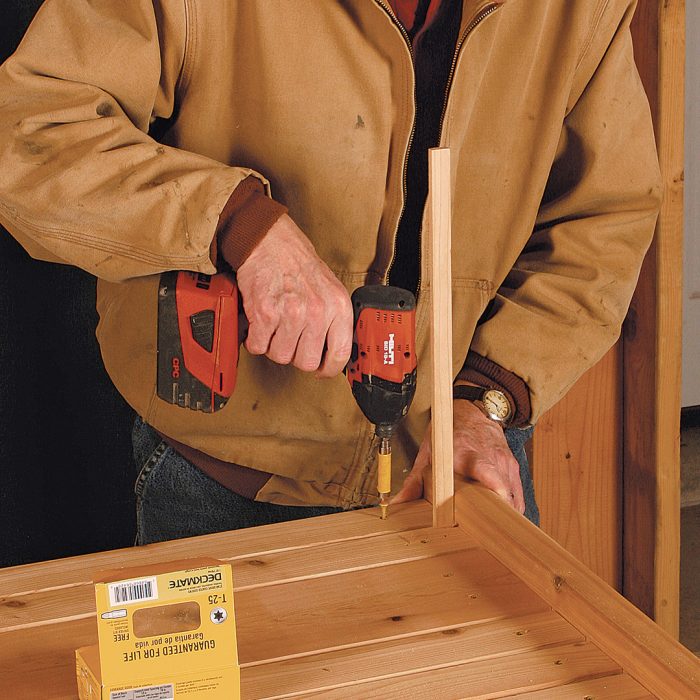
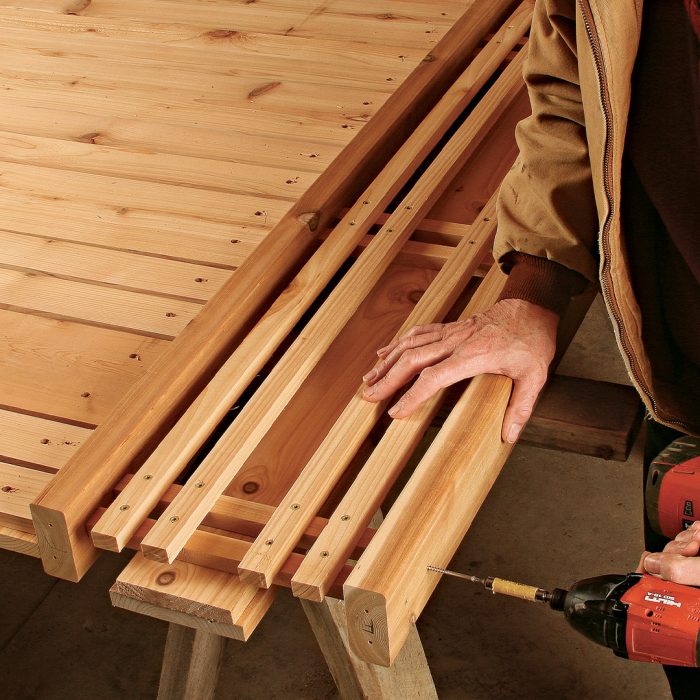
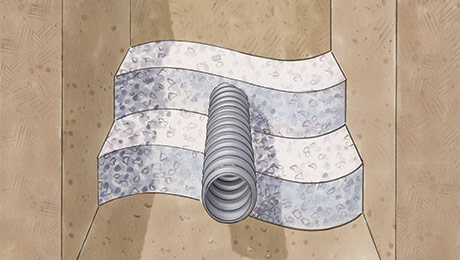
Pressure-treated posts sunk in the ground support the 6-ft.-long sections of this #2 cedar fence. On the side of the fence that faces the yard, rails attach to subrails with hidden pocket screws. The vertical boards are screwed to these subrails, and the remaining subrails are face-screwed to the vertical boards. A lattice infill breaks up the monotony of a solid board fence, while the vertical 1x4s on the end screw to the rails and in turn screw to the posts, connecting the entire assembly.
 |
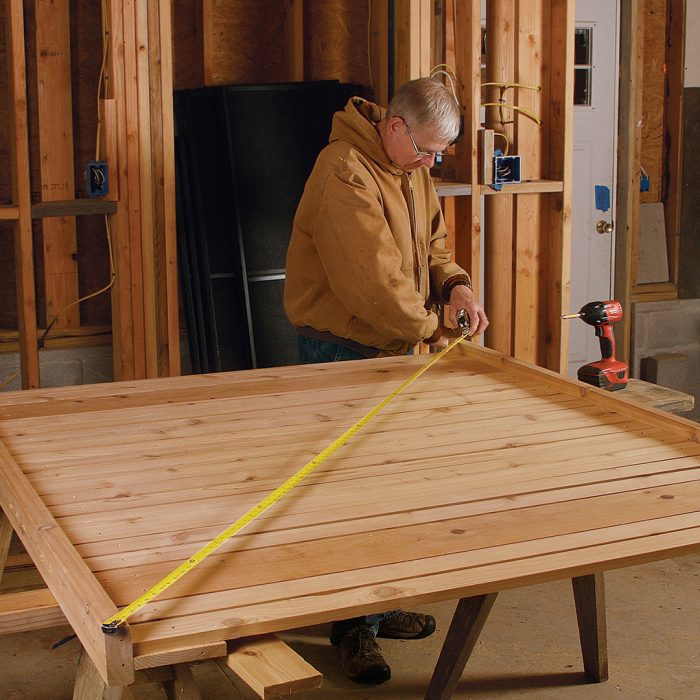
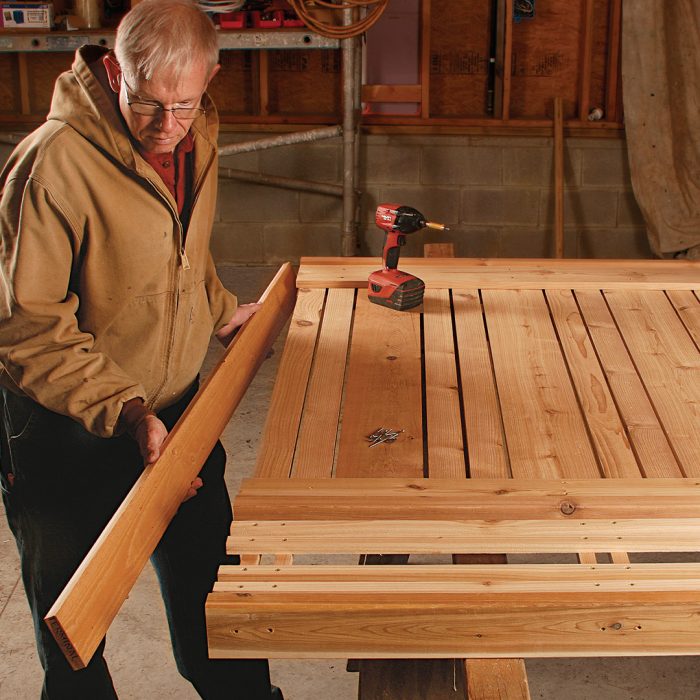
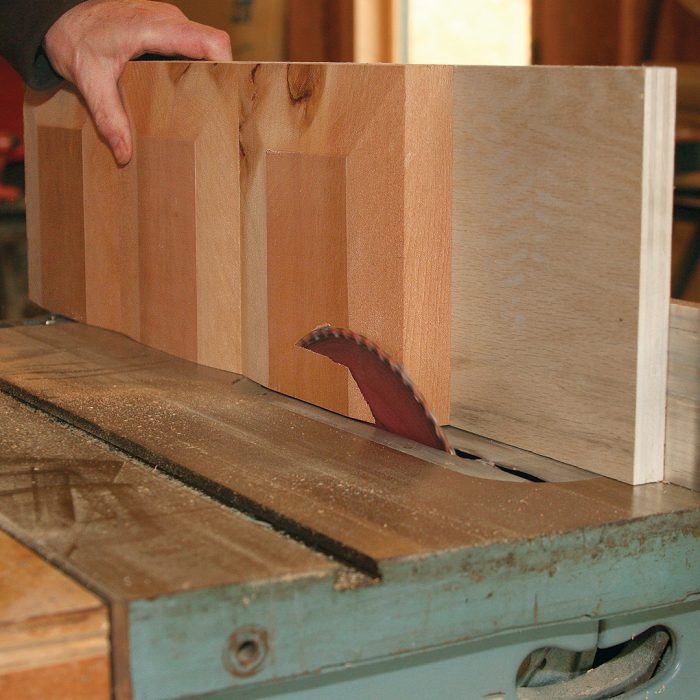
Build the Panels and Lattice
 |
 |
 |
 |
 |
 |
 |
 |
The Posts
Stainless-steel trim screws fasten the vertical 1x4s at the ends of the panels to the treated posts. The final step is screwing the 1×6 faces to the posts. These lap the edges of the 1x4s, hiding the joints between them and the rails.
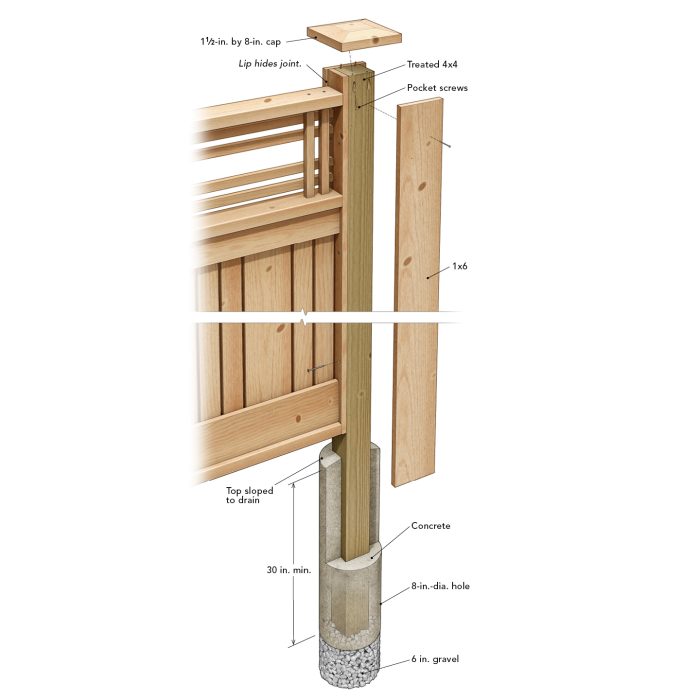 |
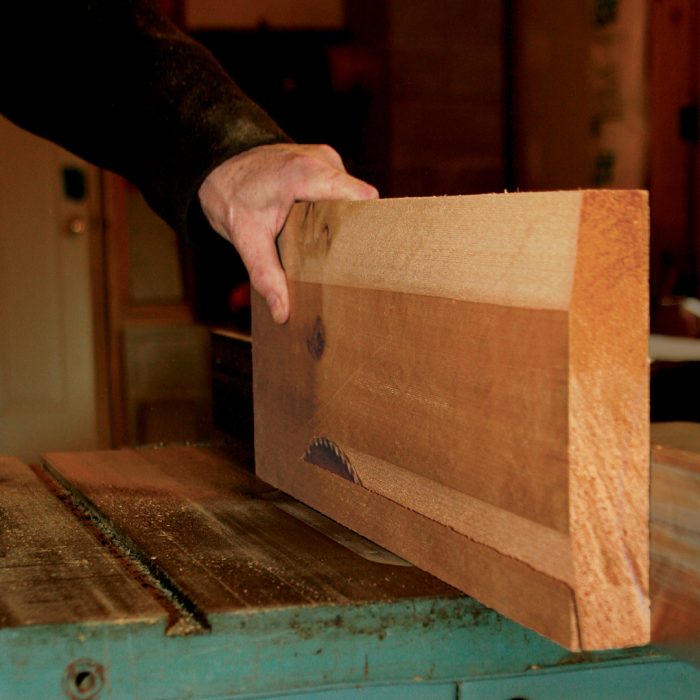
A Safer Way to Make Post Caps
The post caps are 8 in. sq. and are cut from 2×10 cedar, with tops beveled at 7° to shed water. Cutting the bevels requires the use of a tablesaw, so safety is paramount.
 |
 |
 |
— Michael Crow is a writer and woodworker from Tacoma, Wash. See more of his work at 1910craftsman.com. Photos by Patricia Steed, except where noted.
RELATED STORIES


View Comments
Would it be at all beneficial potentially for longevity to use some kind of thin spacer where wood meets would face to face to encourage better drying? Or is that overkill?
What about using 6x6s? Overkill? I’m in climate zone 5b Nebraska. Fine enough to use 4x4s and space every 6? Was planning on doing a tiny gap between the fence boards so it will allow some air through