FHB Logo Facebook LinkedIn Email Pinterest Twitter X Instagram Tiktok YouTube Plus Icon Close Icon Navigation Search Icon Navigation Search Icon Arrow Down Icon Video Guide Icon Article Guide Icon Modal Close Icon Guide Search Icon Skip to content
Subscribe
Log In
  • How-To
  • Design
  • Tools & Materials
  • Restoration
  • Videos
  • Blogs
  • Forum
  • Magazine
  • Members
  • FHB House
  • Podcast
Log In

Fine Homebuilding Project Guides

Decks

Guide Home
  • Design & Planning
  • Tools & Materials
  • Footings & Foundations
  • Framing a Deck
  • Installing Decking
  • Installing Railings
  • Deck Stairs
  • Custom Details
  • Finishes, Repairs, and Maintenance
  • Complete Deck Builds
How-To

How to Lay Out Deck Footings

Use this fast and accurate method to get footings in the right spots.

By Greg DiBernardo

Synopsis: Getting the footings in the right spots is a crucial first step in building a deck. In this article, deck builder Greg DiBernardo shows how to determine the centerline of the footings with a simple line parallel to the house. You locate the footings on the line by first finding the edge of the deck with a line squared off the house. Photo: Andy Engel


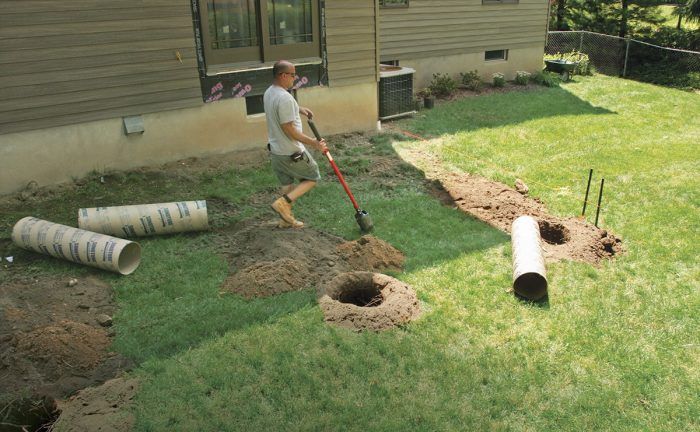
Installing deck footings is rigorous work. Even though I use a machine-driven auger instead of digging by hand, clearing rocks and mixing and placing concrete is still hard.

The vast majority of decks are rectangular and are supported by being bolted to the house on the inside and by a built-up beam on the outside. Most deck beams are “dropped,” that is, set below so that the joists rest on the beam and cantilever beyond by a couple of feet. In some cases, the beam is “flush,” or set at the same level as the joists, which attach to the beam with joist hangers. In either case, the beam location determines how far the footings will be from the house. The first step in footing layout is to establish the line of the deck beam parallel to the house. I do this with stakes and string, extending the line beyond where I know the ends of the deck will be. Then I locate and lay out one side of the deck so that it’s square to the house, and I use that as a reference for spacing the footing locations.

Deck footings have to be placed just right so that the posts they support land in the center of each footing. Pay attention to the framing plans. They might not call out the location of the footings, but they will at least show the centerline of the beam and the spacing of the posts.

String the layout straight

Any deck begins with a plan, whose theoretical outline has to be transferred to the ground in order to locate the footings and begin construction. String is the right tool for establishing the straight lines and square corners of a deck. Although any string will do, braided mason’s line is strong, stretches less than other string, and comes in highly visible colors.

String the layout straight

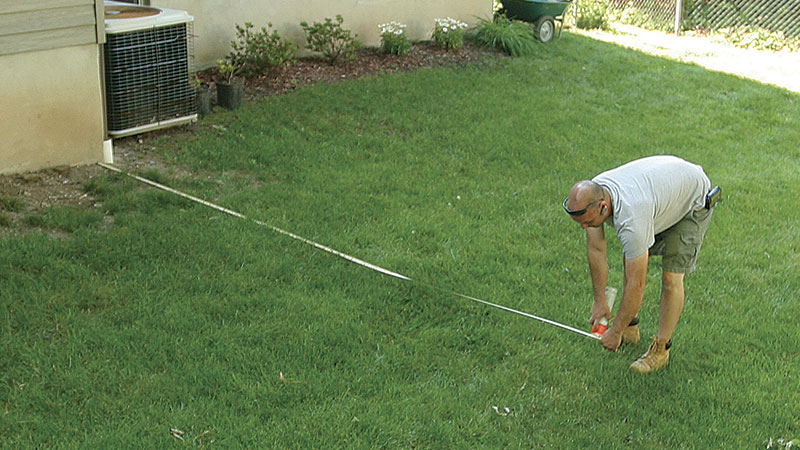
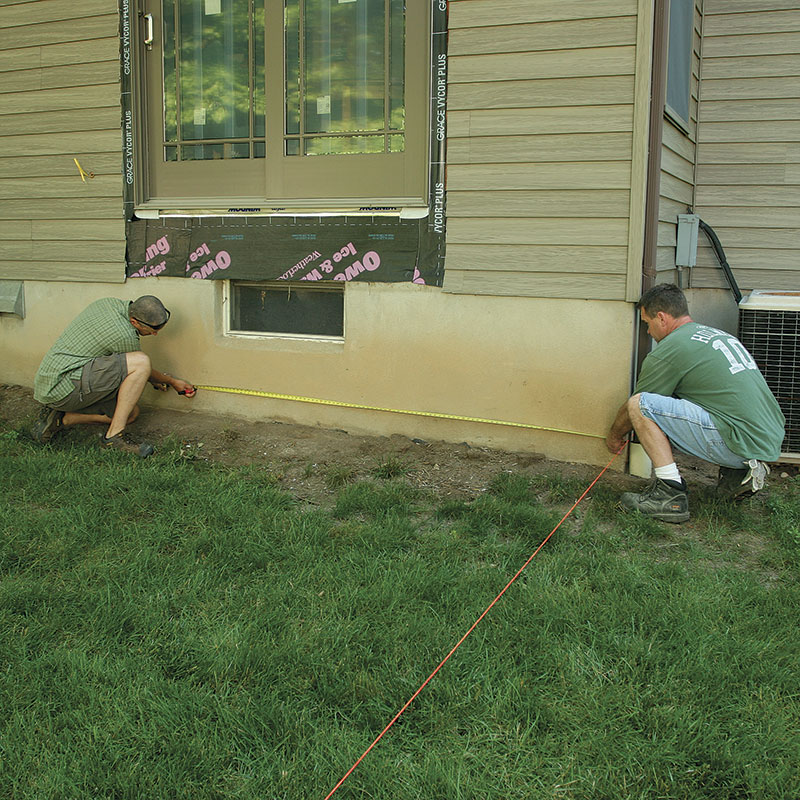
1. Determine where the footings will go. Measure out from the foundation to where the centerline of the footings will be. Mark the ground with paint at each side of the future deck, a short distance beyond its ends.

String the centerline.
Set a second string square to the first
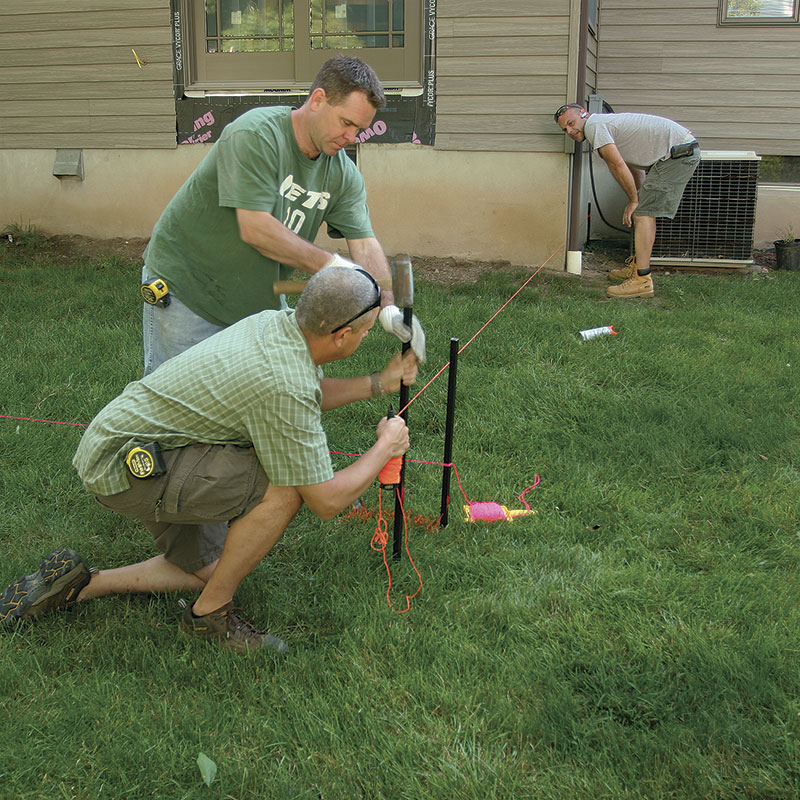
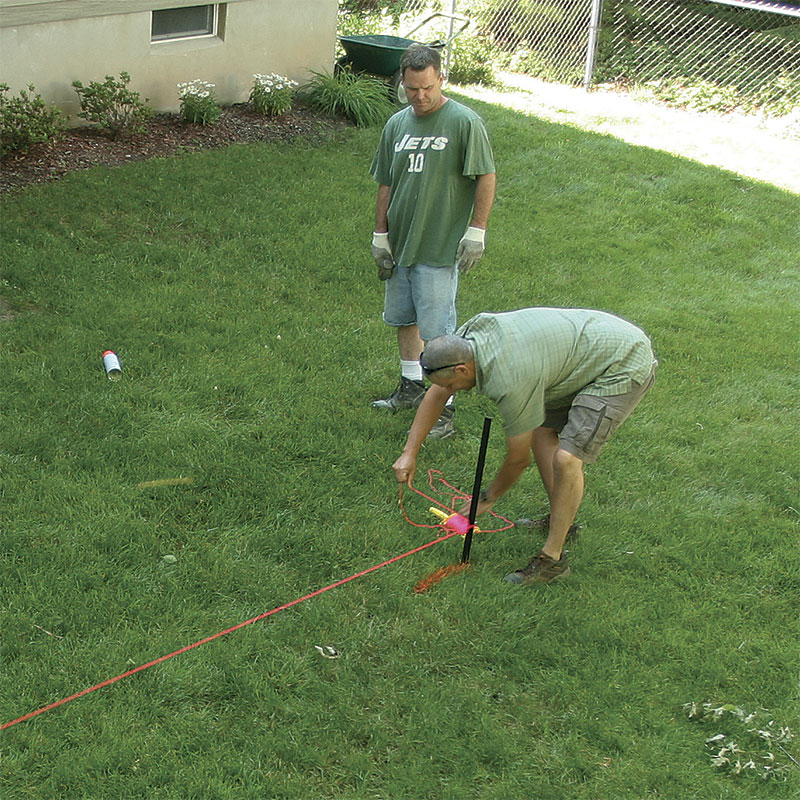
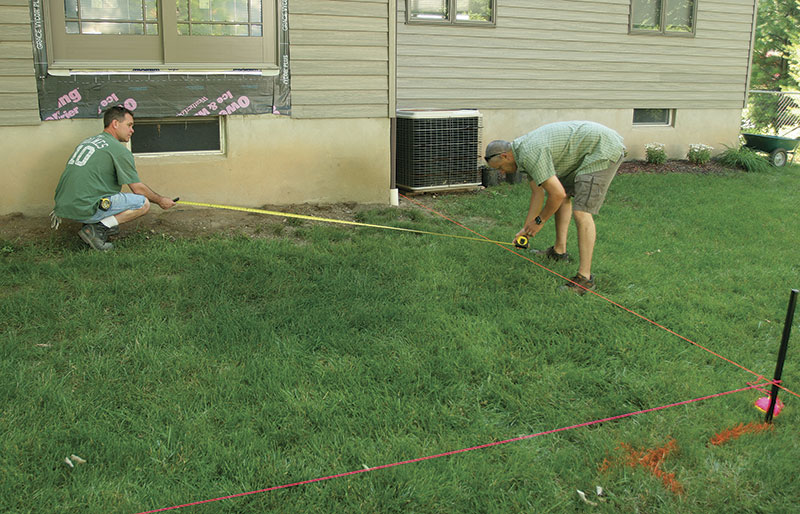
2. String the centerline. Drive a stake at each end of the deck. Stretch a string tightly between the stakes, then double-check its distance from the foundation. 3. Set a second string square to the first. If there’s a foundation corner or jog, the easy way to square up the footings is to drive a stake tight to the foundation, sight the string so that it’s parallel to the adjoining wall, and set the outer stake

Verify square with Pythagoras

While you often can start a square layout by eyeballing a string stretched along a foundation corner, foundation corners are not always square. Because of this, square should still be verified with a version of the Pythagorean theorem. Any triangle whose sides measure 3, 4, and 5 (or multiples of those numbers, such as 6, 8, and 10) has a square corner opposite the hypotenuse. With this knowledge, it’s easy to verify that your string is square to the house using only a tape measure.

Mark the wall Mark the string
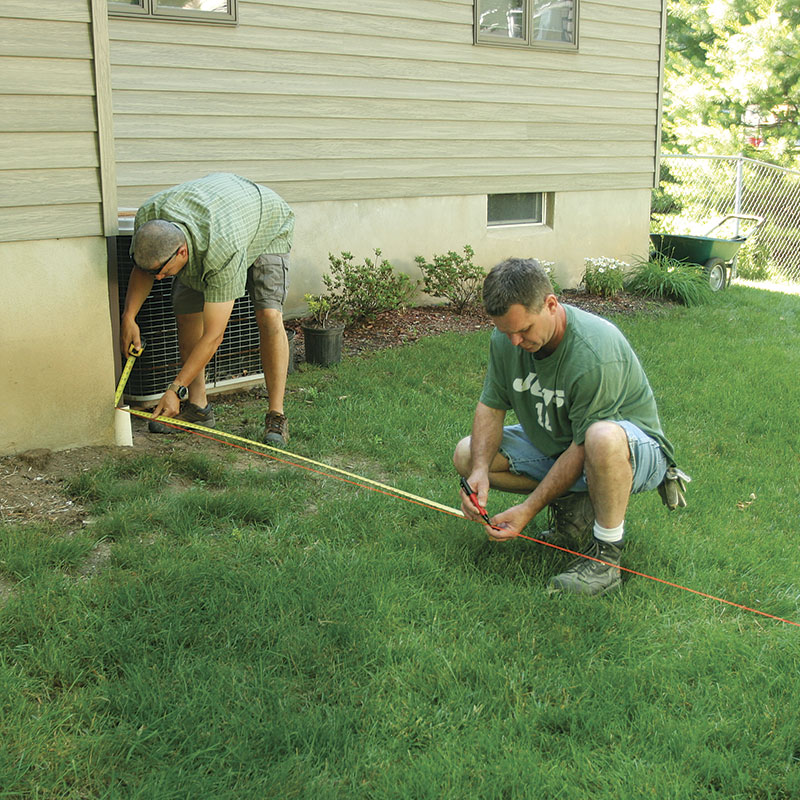
1. Mark the wall. For accuracy, use a 6, 8, 10 triangle. Mark the wall at 8 ft. from the string. 2. Mark the string. Being careful not to stretch it, mark the string at 6 ft. from the wall.

Verify a square corner

3. Verify a square corner. Pull a tape from the 8-ft. mark on the foundation to the 6-ft. mark on the string. Verify a 10-ft. measurement on the tape or the stringline will need to be adjusted square.


Mark the footing locations

Once you’ve strung the line of the footings parallel to the house and measured their locations so the deck will end up square and the footings properly spaced, it’s time to mark the ground. Upside-down spray paint in bright colors makes marks that won’t get lost in the job-site shuffle.

X marks the spot
X marks the spot
1. X marks the spot. Using the post spacing from the plans, measure from the perpendicular string and paint the center of the first footing location on the ground. 2. Avoid math. You could add the post spaces together to locate subsequent footings, but simply measuring off the previous footing location eliminates the chance of an addition error.

Accurate layout

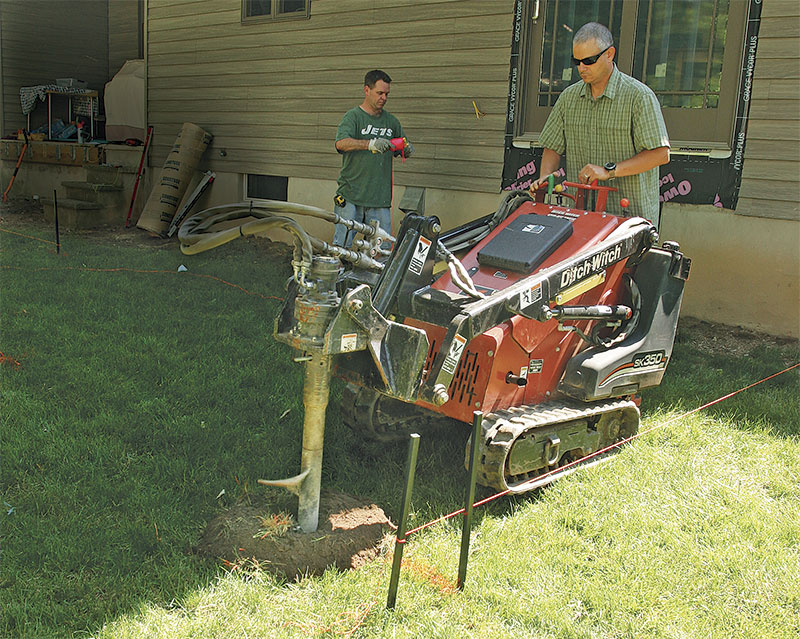
3. Dig ‘em out. Whether you use a mechanical auger or dig by hand, an accurate layout will keep you from putting a hole in the wrong spot. (These mini-skid steers can be rented.)

Find the centers of the footings

Deck posts should be centered on their footings. Depending on the post base used, the accuracy of the footing layout can be critical. Some post bases—Simpson’s CBSQ, for example—require a minimum of 3 in. between the edges of the concrete and the sides of the base. If you’re using a 6×6 post, that leaves very little wiggle room on a typical 12-in.-dia. footing. other bases, such as Simpson’s ePB44PHDG, require a minimum of 3 in. of concrete to the sides of the anchor bolt in the center of the base. That allows almost 6 in. of play in locating these bases on a 12-in. footing. If the

deck beam is to be supported on a 4×4 post, you can use the planned distance from the center of the beam to the house as the center of the footings. However, a common detail is to support the beam on a notched 6×6 post. In that case, because the post is wider and will be offset from the beam, the footing is centered under the posts by being placed 11⁄4-in. back from the center of the beam.


RELATED STORIES

A Solid Deck Begins with Concrete Piers

How to Precisely Lay Out Deck Footings

Locate and Dig Deck Footings

For more photos, illustrations, and details, click the View PDF button below:

Fine Homebuilding Recommended Products

Fine Homebuilding receives a commission for items purchased through links on this site, including Amazon Associates and other affiliate advertising programs.

Standard Marking Chalk

We like white chalk because it’s non-permanent and wears off easily — this is especially helpful when marks are exposed and need to disappear.
Buy at Amazon

Metal Connector Nailer

This time-saving tool is the fastest way to install hardware. The tip is designed to locate the hole in the hardware, then all you have to do is pull the trigger.
Buy at Amazon

Drill Driver/Impact Driver

Whether you're pre-drilling holes or driving screws, this Milwaukee® compact cordless driver is the way to go when it comes to building decks.
Buy at Amazon

Sign up for eletters today and get the latest how-to from Fine Homebuilding, plus special offers.

Signing you up...

This site is protected by reCAPTCHA and the Google Privacy Policy and Terms of Service apply.
See all newsletters
See all newsletters
View PDF
Previous: IRC Footing Table Makes Sizing Deck Footings Easier Next: 5 Steps to Laying Out Concrete Piers

Guide

Decks

Chapter

Footings & Foundations

Log in or create an account to post a comment.

Sign up Log in

Become a member and get full access to FineHomebuilding.com

Decks

Decks

Hundreds of articles and videos by top deck-building pros on how to design and build a beautiful, sturdy, and safe deck

View Project Guide

View All Project Guides »

Become a member and get unlimited site access, including the Decks Project Guide.

Start Free Trial

Design & Planning
  • Basic Design Options
  • Generating Plans
  • Calculating Deck Loads
  • Code Compliance
Tools & Materials
  • Deck Building Tools
  • Foundation and Framing Materials
  • Decking Materials
  • Fasteners and Hardware
Footings & Foundations
  • Choosing a Foundation
  • Sizing and Laying Out Footings
  • Excavation
  • Pouring the Foundation
Framing a Deck
  • Framing Overview
  • Installing the Ledger
  • Setting Posts and Beams
  • Installing Joists
Installing Decking
  • Decking Basics
  • Installation Process
  • Adding Fascia and Other Decorative Elements
Installing Railings
  • Installing Deck Railing Posts
  • Building Wood Rails and Balustrades
  • Non-Wood Railing Options
  • Installing Nonwood Balustrades
Deck Stairs
  • Deck Stairs Overview
  • Laying Out, Cutting, and Installing the Stringers
  • Installing Treads, Risers, and Stair Railings
Custom Details
  • Benches, Planters, and Privacy Features
  • Pergolas
  • Lighting
Finishes, Repairs, and Maintenance
  • Deck Finishes
  • Cleaning and Refinishing
  • Inspection and Repair
Complete Deck Builds
  • Grade-Level Decks
  • Raised Decks

Fine Home Building

Newsletter Sign-up

  • Fine Homebuilding

    Home building tips, offers, and expert advice in your inbox.

  • Green Building Advisor

    Building science and energy efficiency advice, plus special offers, in your inbox.

  • Old House Journal

    Repair, renovation, and restoration tips, plus special offers, in your inbox.

Signing you up...

This site is protected by reCAPTCHA and the Google Privacy Policy and Terms of Service apply.
See all newsletters

Follow

  • Fine Homebuilding

    Dig into cutting-edge approaches and decades of proven solutions with total access to our experts and tradespeople.

    Start Free Trial Now
    • Facebook
    • Instagram
    • X
    • LinkedIn
  • GBA Prime

    Get instant access to the latest developments in green building, research, and reports from the field.

    Start Free Trial Now
    • Facebook
    • YouTube
  • Old House Journal

    Learn how to restore, repair, update, and decorate your home.

    Subscribe Now
    • Facebook
    • Instagram
    • X

Membership & Magazine

  • Online Archive
  • Start Free Trial
  • Magazine Subscription
  • Magazine Renewal
  • Gift a Subscription
  • Customer Support
  • Privacy Preferences
  • About
  • Contact
  • Advertise
  • Careers
  • Terms of Use
  • Site Map
  • Do not sell or share my information
  • Privacy Policy
  • Accessibility
  • California Privacy Rights

© 2025 Active Interest Media. All rights reserved.

Fine Homebuilding receives a commission for items purchased through links on this site, including Amazon Associates and other affiliate advertising programs.

X
X
This is a dialog window which overlays the main content of the page. The modal window is a 'site map' of the most critical areas of the site. Pressing the Escape (ESC) button will close the modal and bring you back to where you were on the page.

Main Menu

  • How-To
  • Design
  • Tools & Materials
  • Video
  • Blogs
  • Forum
  • Project Guides
  • Reader Projects
  • Magazine
  • Members
  • FHB House

Podcasts

  • FHB Podcast
  • ProTalk

Webinars

  • Upcoming and On-Demand

Podcasts

  • FHB Podcast
  • ProTalk

Webinars

  • Upcoming and On-Demand

Popular Topics

  • Kitchens
  • Business
  • Bedrooms
  • Roofs
  • Architecture and Design
  • Green Building
  • Decks
  • Framing
  • Safety
  • Remodeling
  • Bathrooms
  • Windows
  • Tilework
  • Ceilings
  • HVAC

Magazine

  • Current Issue
  • Past Issues
  • Magazine Index
  • Subscribe
  • Online Archive
  • Author Guidelines

All Access

  • Member Home
  • Start Free Trial
  • Gift Membership

Online Learning

  • Courses
  • Project Guides
  • Reader Projects
  • Podcast

More

  • FHB Ambassadors
  • FHB House
  • Customer Support

Account

  • Log In
  • Join

Newsletter

Get home building tips, offers, and expert advice in your inbox

Signing you up...

This site is protected by reCAPTCHA and the Google Privacy Policy and Terms of Service apply.
See all newsletters
See all newsletters

Follow

  • X
  • YouTube
  • instagram
  • facebook
  • pinterest
  • Tiktok

Join All Access

Become a member and get instant access to thousands of videos, how-tos, tool reviews, and design features.

Start Your Free Trial

Subscribe

FHB Magazine

Start your subscription today and save up to 70%

Subscribe

We hope you’ve enjoyed your free articles. To keep reading, become a member today.

Get complete site access to expert advice, how-to videos, Code Check, and more, plus the print magazine.

Start your FREE trial

Already a member? Log in