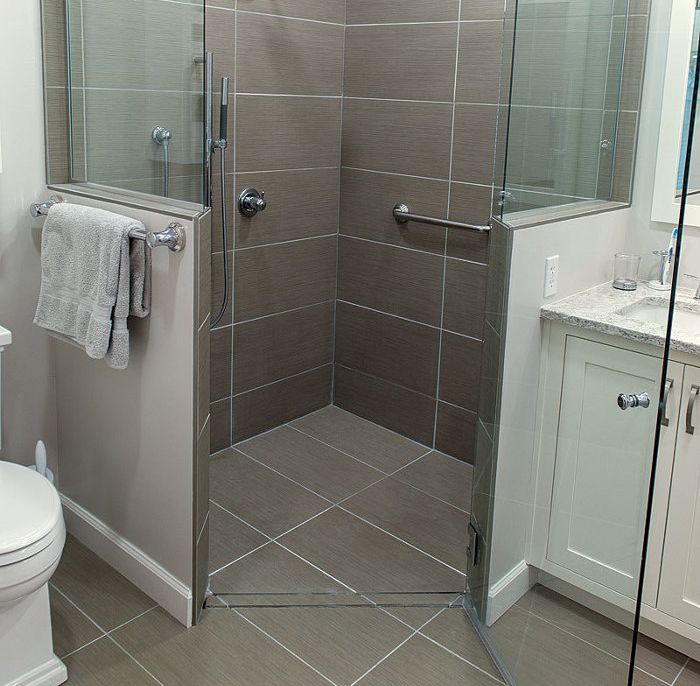
Curbless Shower: Build Up, Not Down
Construct a curbless shower quickly and at less cost than the traditional method.

Synopsis: Building a curbless shower typically requires cutting into the floor joists to create a slope to the drain. The joists then have to be reinforced and a new subfloor installed. In this article, contractor Jake Bruton describes how to build a curbless shower with a linear drain positioned at the shower entrance. This allows the shower to be built on top of the existing subfloor and simplifies the project.
Combining elegance and practicality, a tiled shower with a curbless entry is hard not to appreciate. I have installed many of these showers by employing an atypical method that eliminates having to cut down into the joists in order to achieve the proper slope. My method—a completely different approach—saves time and money.
To install a curbless shower, a carpenter typically would remove the subfloor and cut up to 3 in. off the top of the joists to accommodate a prefab tray, such as in a Schluter shower system, that slopes backward. The joists, in turn, would then be reinforced to regain their structural integrity. By installing a linear drain at the shower’s entrance, however, I am able to build up instead of down.
During the bidding process, I check the span of the floor joists, identify the subfloor material, and determine the subfloor’s thickness. By following the standard L/360 load calculation, I ascertain if a Schluter prefab tray can be installed directly over the existing subfloor. This is crucial because if another layer of subfloor is needed for reinforcement, the tray will be too high for a curbless entry.
Cost reductions of approximately $1000 can be expected from savings in framing materials and in the elimination of what would typically be a day of labor for two workers.
Consider these components of the project:
Floor: The difference in height between the tray, which is 7⁄8 in. at its thinnest, and the bathroom floor is accommodated by adding 1⁄2-in. underlayment and Ditra XL uncoupling membrane to the bathroom field.
Drain: To prevent water from bypassing the drain, rough wall framing should finish at the metal edge of the drain flange, allowing the drain’s preattached waterproofing material to turn vertically up the drywall just outside the drain. This waterproofing attaches directly to the waterproofing on the walls, the shower floor, and the bathroom floor, making one continuous surface broken only by the drain. As needed, the drain can be supported with Kerdi-Board.
Walls: A curb or half-wall on each side of the shower provides the funnel to the drain. As with any Kerdi membrane installation, it does not matter what direction the waterproofing-membrane sheets lap, as long as they lap at least 2 in. Kerdi has a permeability rating of 0.90, so it can be installed over drywall without concerns about moisture damage.
Tray: The prefabricated tray is cut and positioned with the slope running directly to the drain. Its single slope (1⁄4 in. per ft.) allows the use of large-format tile. Any areas not covered by the tray are filled using offcuts that are set in thinset and taped with Schluter Kerdi-Band.
Subfloor: The existing subfloor must be rigid enough to properly support tile. Rigidity is measured using the L/360 formula, which means a joist should not deflect more than the length of its span between supports (L) divided by 360 when a 300-lb.-per-sq.-ft. load is placed on the center of the span.
To see a complete diagram of this project with more information, click the View PDF button below:


View Comments
Which Kerdi kit or product did you use for the Build Up, Not Down curbless shower? My HOA does not permit modification of the subfloor in upstairs bathroom.