
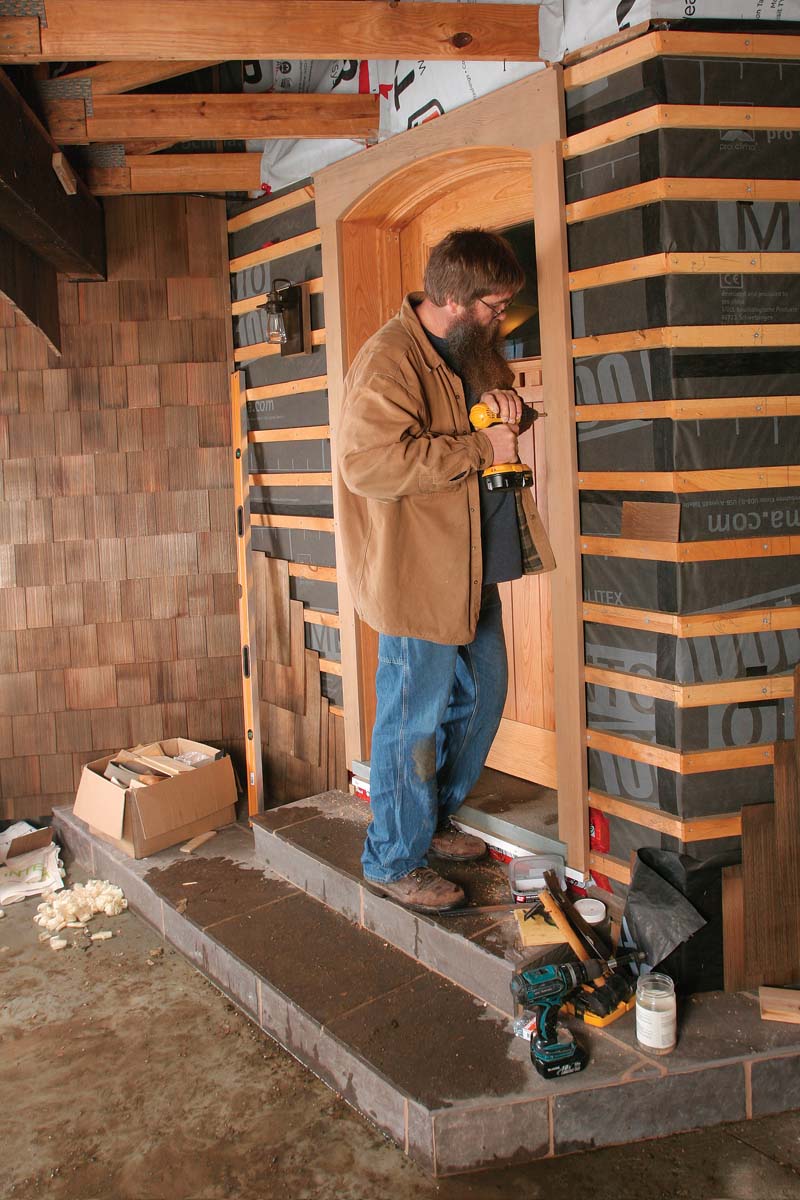
Build a High-Performance Exterior Door
This beautiful door is ideally suited to energy-efficient homes and can be made with common building materials.
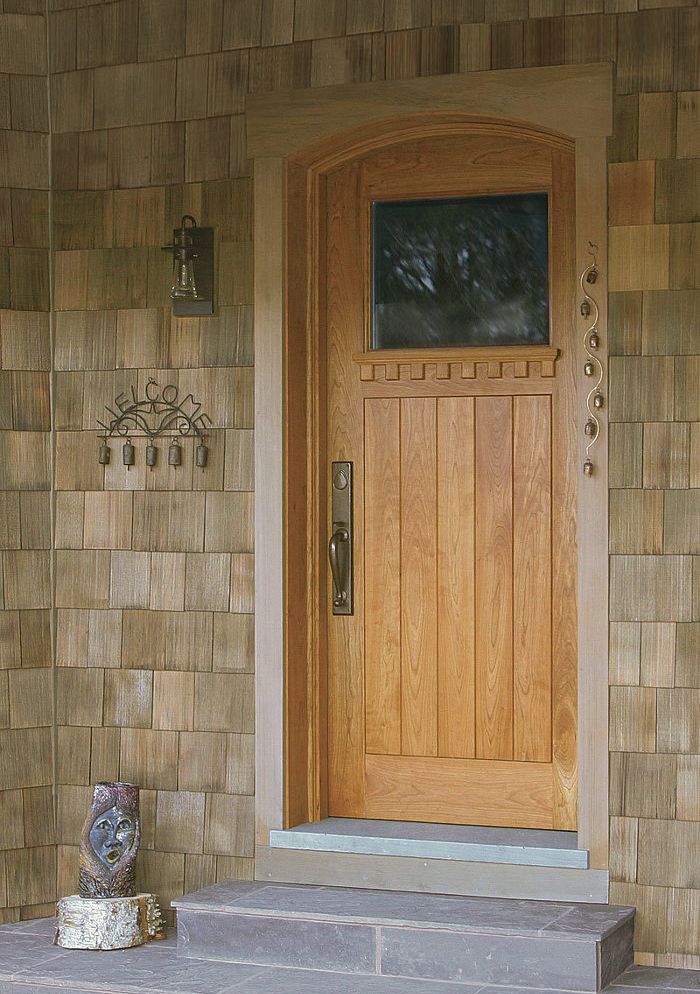
Synopsis: Natural builder Ben Graham and custom woodworker Mike Lamp demonstrate how they recently designed and built a 3-1/2-in.-thick R-10 wood door using salvaged cherry lumber. The door’s construction details, product selections, and design choices are explained thoroughly. The second half of the article shows how Graham and Lamp installed the 140-lb. door and integrated it into the home’s building envelope. Exploded drawings show how the door and its two-piece jamb assembly are constructed.
We recently completed a deep-energy retrofit to an 80-year-old Vermont farmhouse. The many improvements we made included new windows, new mechanical systems, and the addition of 4 in. of exterior mineral-wool insulation. Not surprisingly, the project also called for new energy-efficient exterior doors to complement the home’s high-performance building envelope.
For an ultra-efficient house like this one, entry doors are often sourced from Europe, where high-performance doors are more mainstream than in the United States. Unfortunately, most European offerings have a sleek, modern appearance, and our clients wanted something that would fit the style of their farmhouse. With limited options, we set out to build a pair of attractive entry doors that would rival the efficiency of the best-performing units on the market. In addition, we wanted to do so by using common building materials that are readily available.
The 31⁄2-in.-thick R-10 doors that we built are made from site-harvested cherry. They are filled with 2-in. rigid-mineral-wool insulation and include triple-pane low-e glass. We installed the doors in custom-built jambs with a crucial double-weatherstripping detail to help make the entry airtight. Finally, we outfitted each door with the best-built hardware we could find.
Aesthetics and performance drive design
One of the first decisions we had to make was whether to build inset or overlay doors. In the United States, virtually all residential entry doors are inset. The door swings into the frame and lands on a stop. High-performance European doors, which are described as overlay, close onto their frame. Proponents of overlay doors say they seal tighter and are therefore more efficient. However, overlay doors require rabbeted or post-style hinges, which are costly and hard to find in the United States. Rather than order hinges from Europe for several hundred dollars, we decided to build inset doors and add a second layer of weatherstripping to boost their airtightness.
For weatherstripping, we opted to use silicone flipper seals from Research Conservation Technology along the head and side jambs. These soft silicone weatherstrips easily compress to accommodate a wood door’s seasonal movement, and they make the door easy to close. The strips are installed in one saw kerf that aligns with the door’s rabbeted edge and in a second kerf cut into the applied stop. On the bottom of the door, we installed a brushed sweep to seal the door to its bluestone threshold.
Perhaps the most challenging aspect of the doors’ design was finding suitable hardware. For high-performance homes, we encourage all of our clients to select multipoint locks for their doors. The bolts at the top and bottom can help prevent a wood door from warping, increase airtightness by providing even pressure against the door’s weatherstripping, and boost security. Multipoint locks are relatively easy to get through special order, but finding a setup that works with a 3-1⁄2-in.-thick door is not as easy. In fact, the units we found that would fit are distinctly modern in appearance. Given the options, our clients decided to forego the multipoint lock and instead install a high-quality traditional mortise lockset from Rocky Mountain Hardware, which accommodates the door’s thickness and is in tune with the farmhouse style.
Another essential component was the glazing, as each door’s design included a window, a thermal weakpoint in any entry door. To retain efficiency, we selected triple-pane low-e glass panels from Cardinal Glass. The 1-9⁄16-in.-thick insulated windows have a U-factor of 0.24, which is roughly the equivalent of R-4.
Performance Hinges On Installation
We assembled the doors and jambs in the shop to make installation easier. The doors are installed like any other prehung unit, with some extra complications due to their 140-lb. weight and their two-part jambs that accommodate the home’s extra-thick walls.
We devoted the same amount of attention to insulating and air-sealing during the installation that we put into the construction of the doors so that air leaks would not compromise the doors’ efficiency. We started by pulling the hinge pins and removing the door from the jamb. We then shimmed the hinge-side jack stud plumb with flat shims and screwed the door frame to the jack studs with structural screws, being careful to place the screws so they’d be hidden later by the applied stop. We then installed the jamb extensions, which are joined to the structural jambs with a rabbeted half-lap joint. The joint is also hidden behind the stop, which makes the two-piece jamb look like a single piece of wood. We carefully taped the door frame to the home’s housewrap with air-sealing tape and then filled around the frame with canned spray foam before installing flat casing that matches the home’s window casing.
Doors like this aren’t cheap, but they cost about the same as high-end entry doors from Europe. Prices for the type of hardware we installed range from $500 to $1500. Each door required 100 hours of custom woodworking labor, 60 board feet (bd. ft.) of 4/4 cherry, 15 bd. ft. of 8/4 cherry, and 8 bd. ft. of 4/4 red oak. The doors have performed admirably during Vermont’s frigid winter weather, keeping the homeowers comfortable and saving energy. But more than that, we all think the doors look great, and so does everyone else who visits the house.
High-Performance Components
An ultra-efficient entry door depends on durable, high-quality components. Weatherstripping, glass, and insulation all contribute to a door that looks good, saves energy, and operates easily.
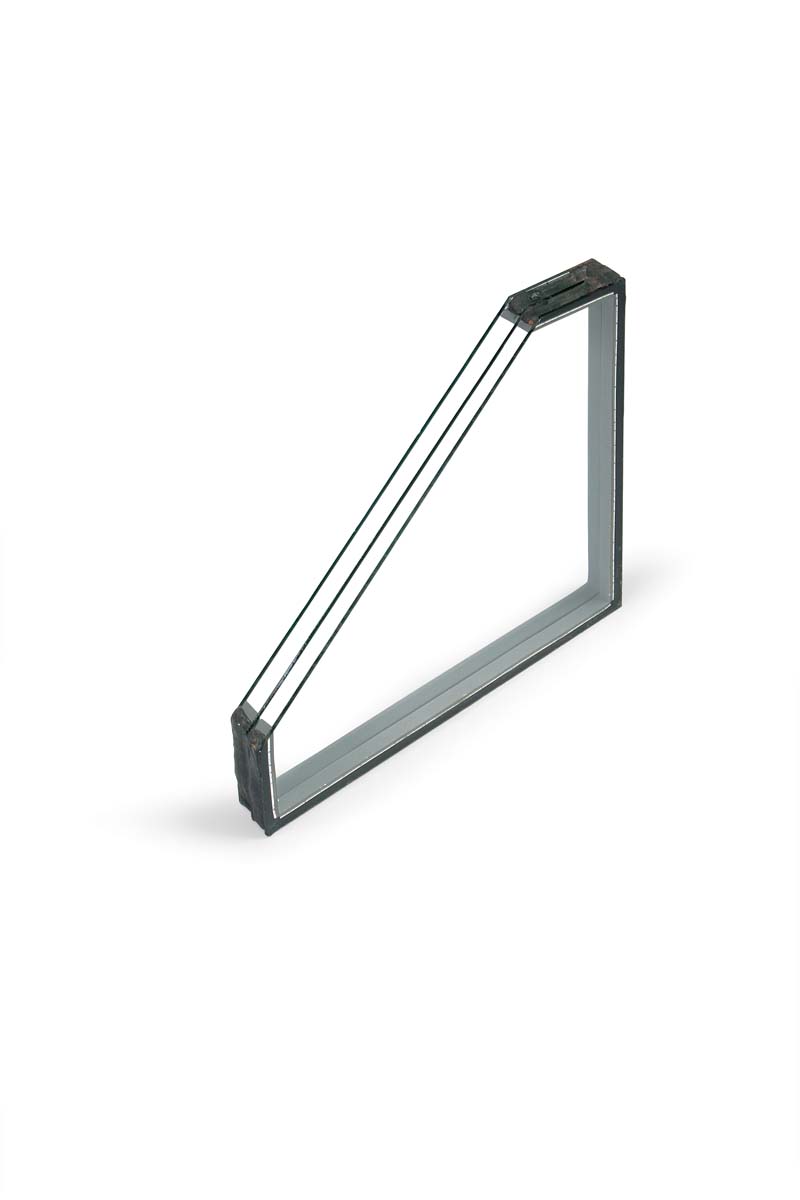 |
Insulated glass Triple-pane low-e glass with 0.24 U-factor |
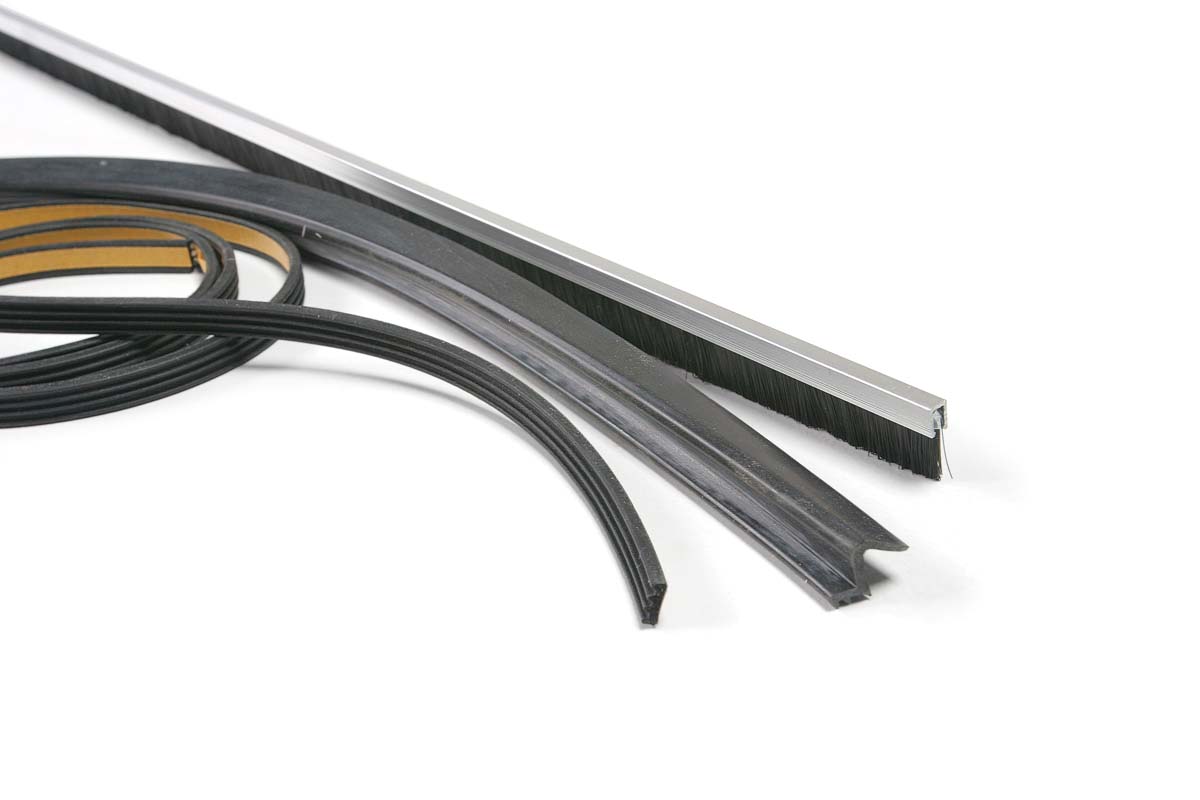 |
Weatherstripping WS64 brush sweep WS15 silicone weatherstripping GG05 foam weatherseal |
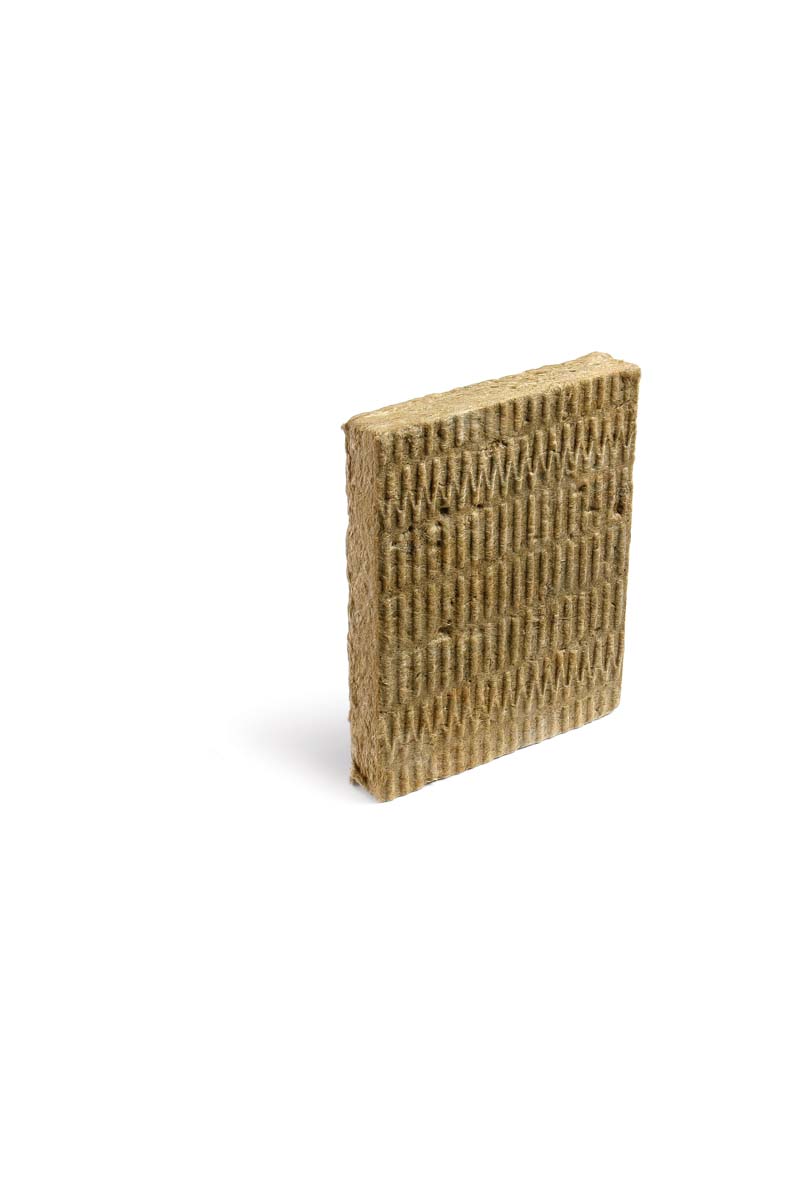 |
Insulation Roxul ComfortBoard IS mineral wool |
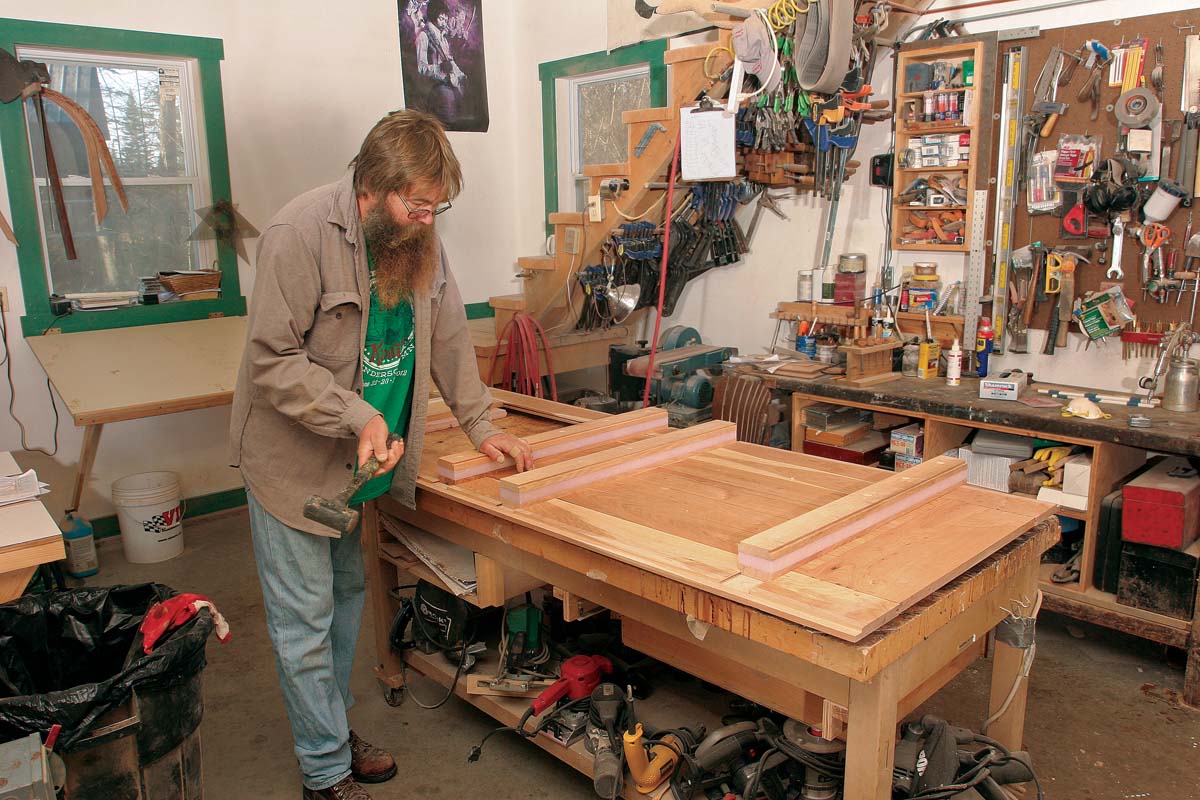
An Insulation Sandwich
Once all of the door’s parts were milled, the exterior-side components were assembled by capturing the tongue-and-groove planks that make up the door’s lower half in a glued-up frame. It was critical for all of the parts to be in perfect alignment so the cleats that attach the front of the door to the back would fit without struggle. The rest of the assembly was driven largely by an anticipation of wood movement and attention to airtightness.
 |
Drive in the cleats. Once the glue is dry on the exterior panel, the three cleats are driven into the sliding dovetails. The cleats are made from two layers of quartersawn white oak with a 1-in. XPS-foam thermal break in between. They are held together with countersunk 1⁄4-in. bolts. |
 |
 |
|
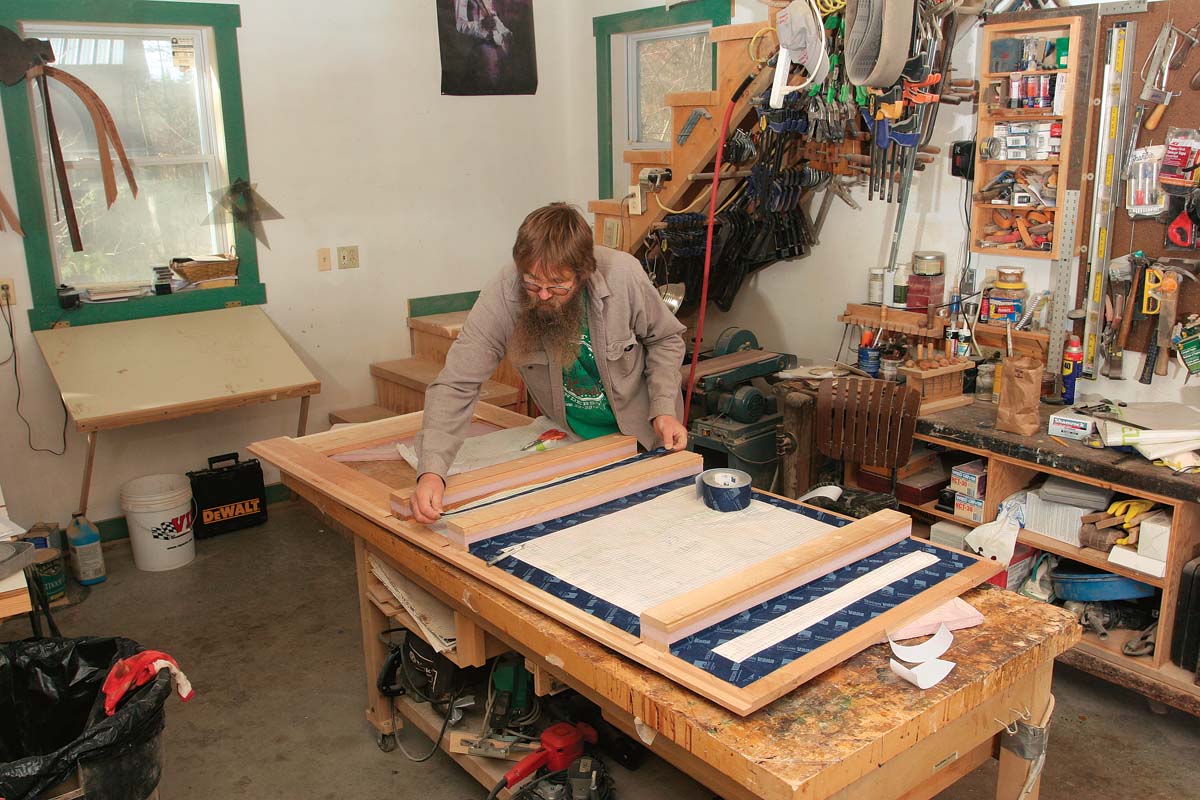
Add an air barrier. The tongue-and-groove boards that make up the front and back panels are gasketed for weathertightness, but a breathable weather barrier on the exterior side of the door provides a second line of defense. It’s sealed to the door skin with weathersealing tape. |
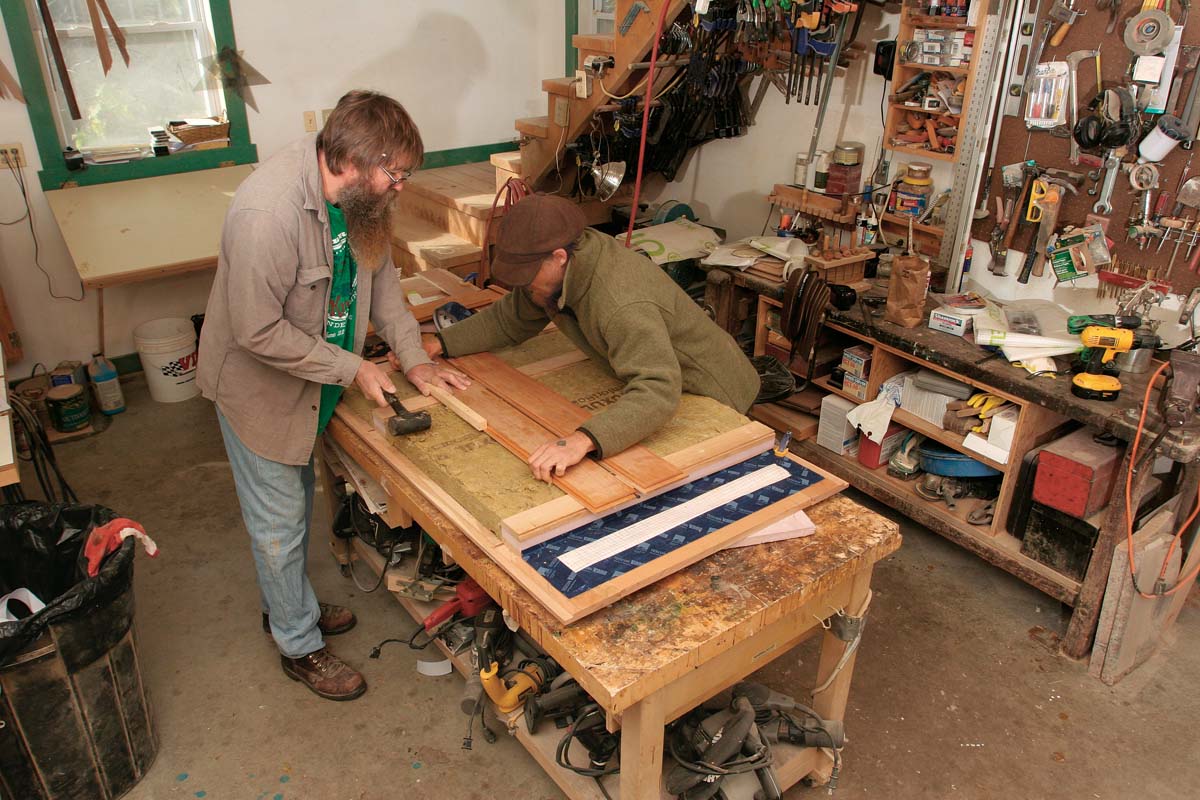
Assemble the back. With the door’s center already insulated with 2-in. rigid mineral wool, the boards that make the door’s interior panel are slid on the dovetails one at a time. Paste wax makes the process easier. The center board has tongues on both edges to receive boards on both sides. |
 |
 |
|
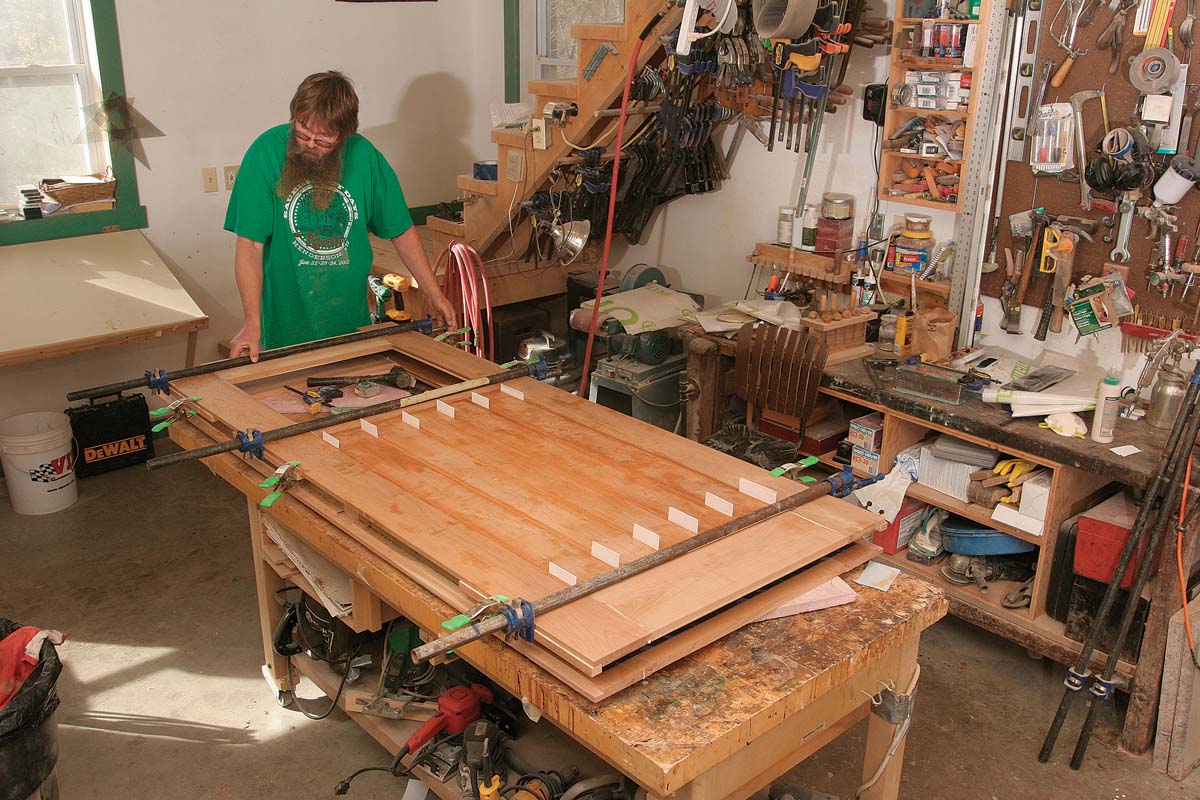
Glue up the panel. The stub-tenon joints where the door’s rails and stiles meet are secured with waterproof glue and then clamped with pipe clamps. Temporary spacers (card stock about 3⁄32 in. thick) ensure even gaps between the tongue-and-groove boards during assembly. |
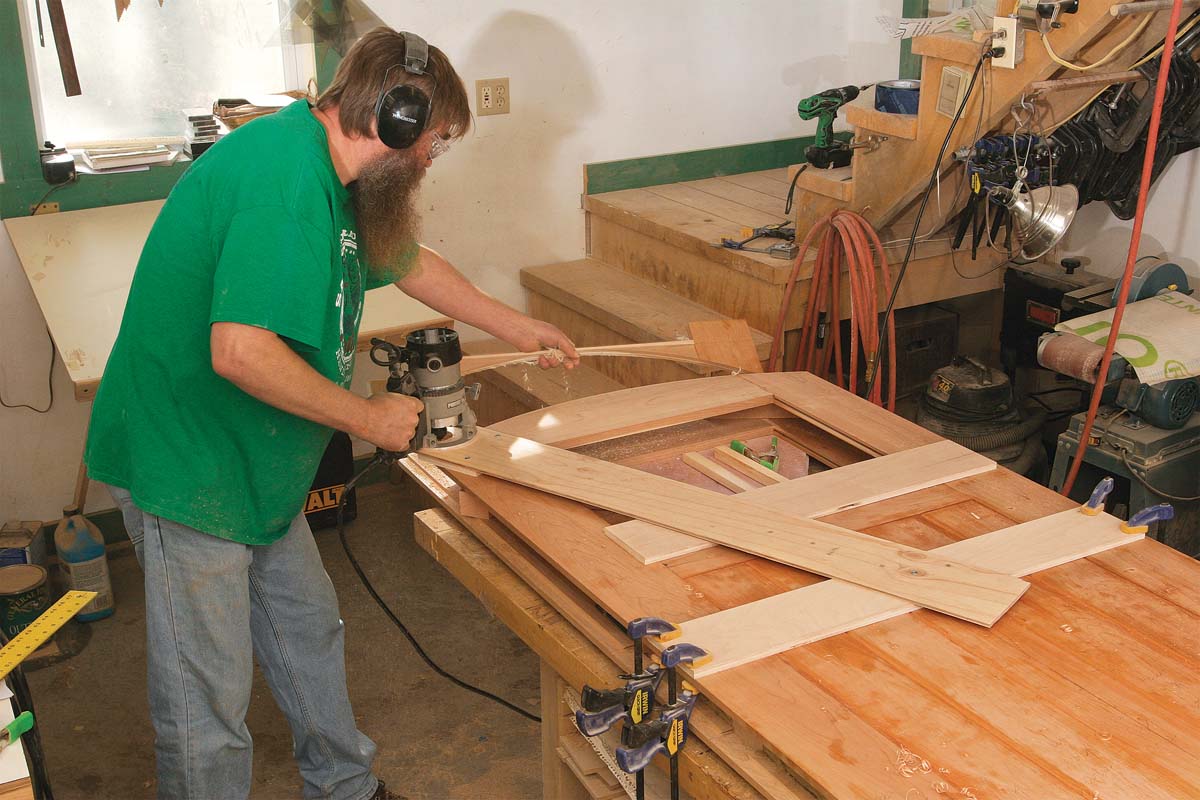
Cut the arched top. The door has an arched top that’s cut in three passes with a router on a trammel arm. With the door’s curved top as a starting point, curved laminations of 3⁄16-in.-thick stock will be made later for the door’s top edge, head jamb, and curved stops. |
A Heavy Door In A Thick Wall
The home’s 4 in. of exterior insulation meant that the door jambs had to be 11 in. wide, so they were built in two parts with the joint hidden by the applied stop. The stop has two layers of soft silicone weatherstripping, ensuring that the door is airtight but closes easily. To stop air infiltration further, the home’s water-resistive barrier was carefully taped to the jambs with air-sealing tape.
 |
 |
|
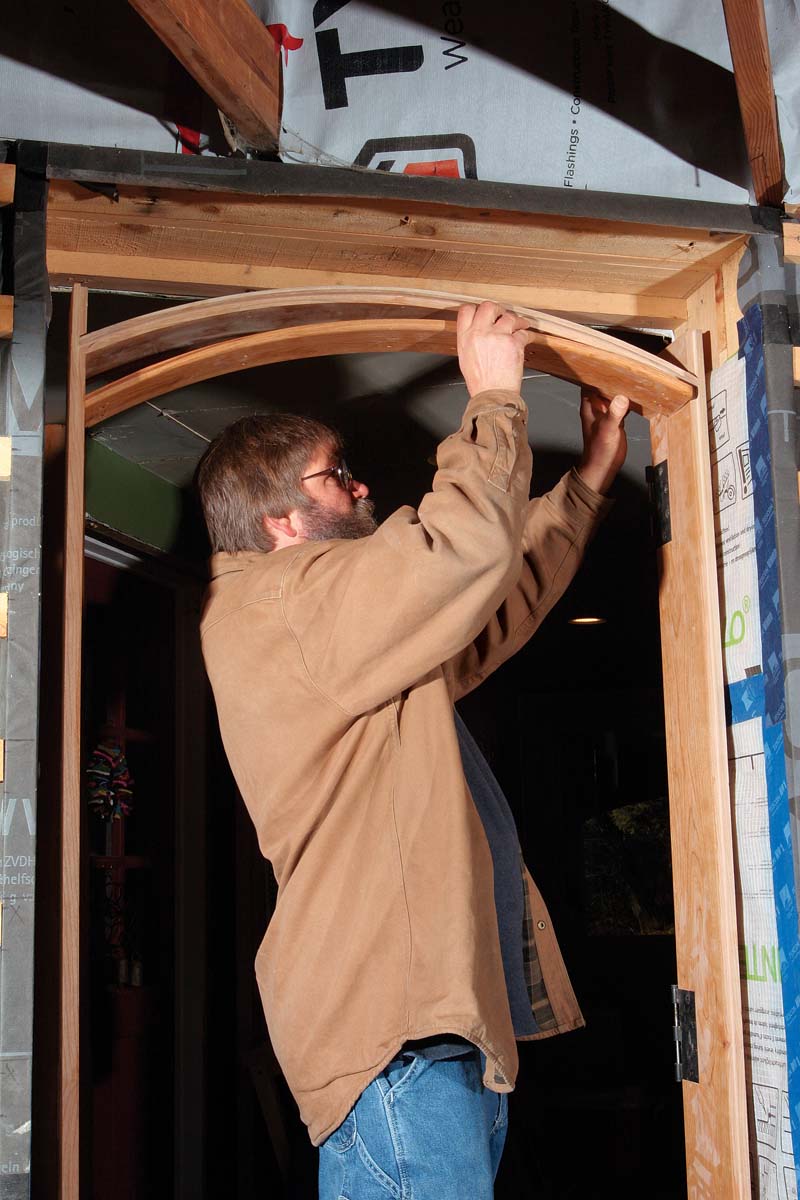
Fasten the jambs and install the stop. Once the side jambs are plumb and securely fastened with structural screws, the first layer of the two-layer stop is fastened to the head jamb with 1-in. screws. Then the side stops are coped around the head stop and screwed in place. The screw heads will be hidden by the second stop. |
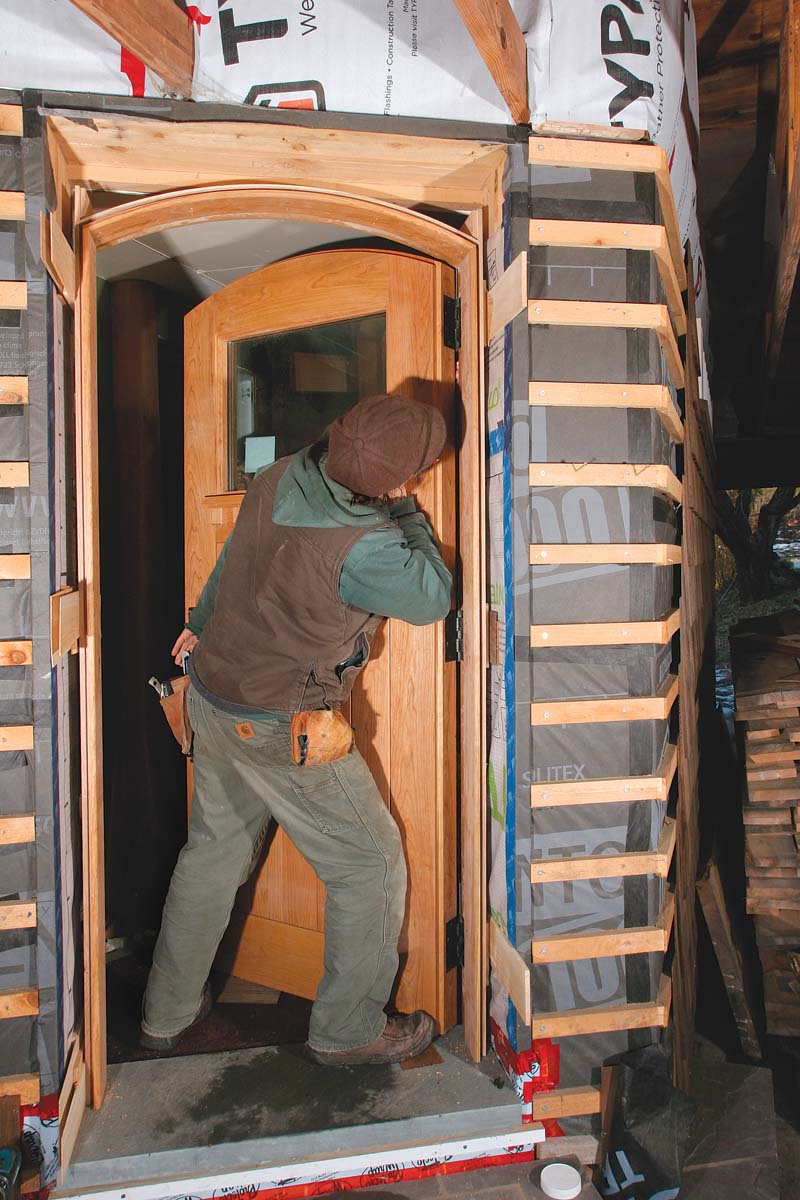
Hang the door. Once the first-layer stops are in place, the door is hung from its hinges and closed. The second stop is then held tight to the door and fastened through counterbored holes that will be filled with grain-matched cherry plugs later. |
 |
 |
|
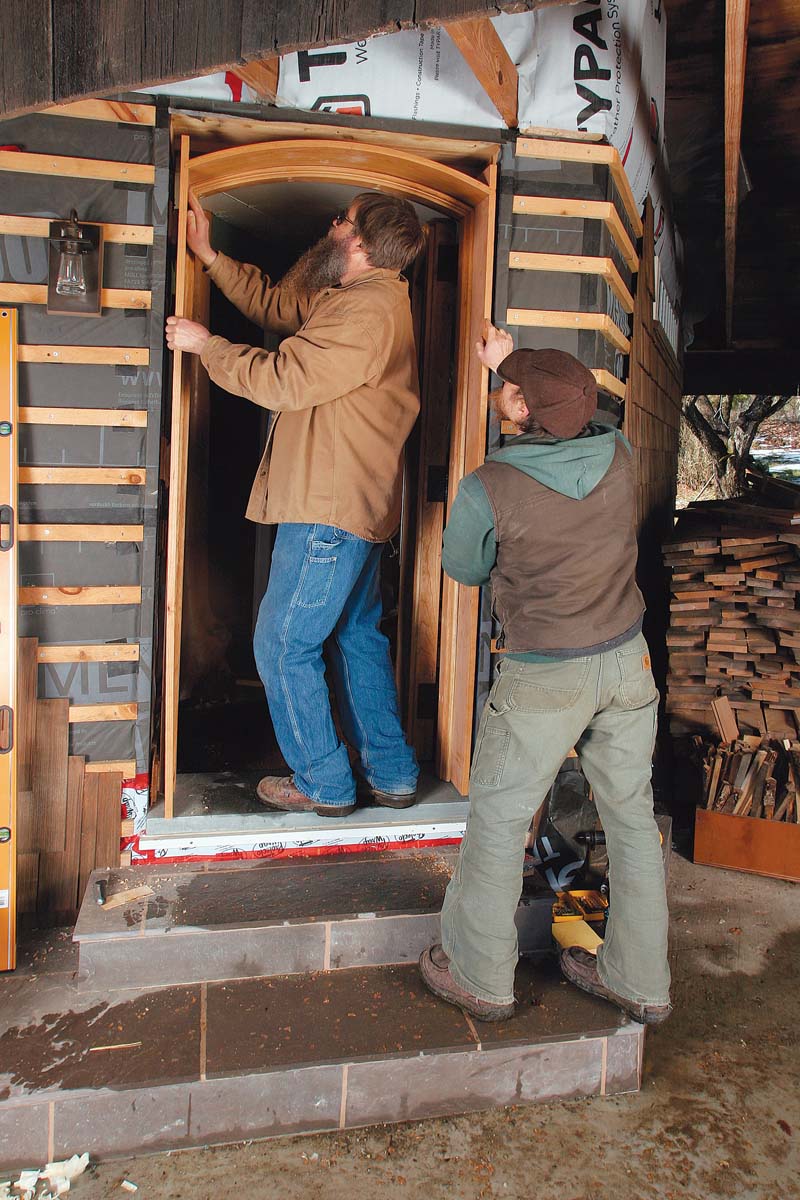
Slip in the jamb extension. Once both stop layers are in place, the assembled, three-sided jamb extension is fit to the main jamb with a rabbeted half-lap joint. A 1⁄4-in. gap in the joint between the main jamb and the jamb extension allows for seasonal expansion. The gap is hidden by the stop. |
Install the casing. The jambs are taped to the house’s water-resistive barrier with air-sealing tape, and then the casing is installed with screws. The screw holes are counterbored so they can be plugged later. |
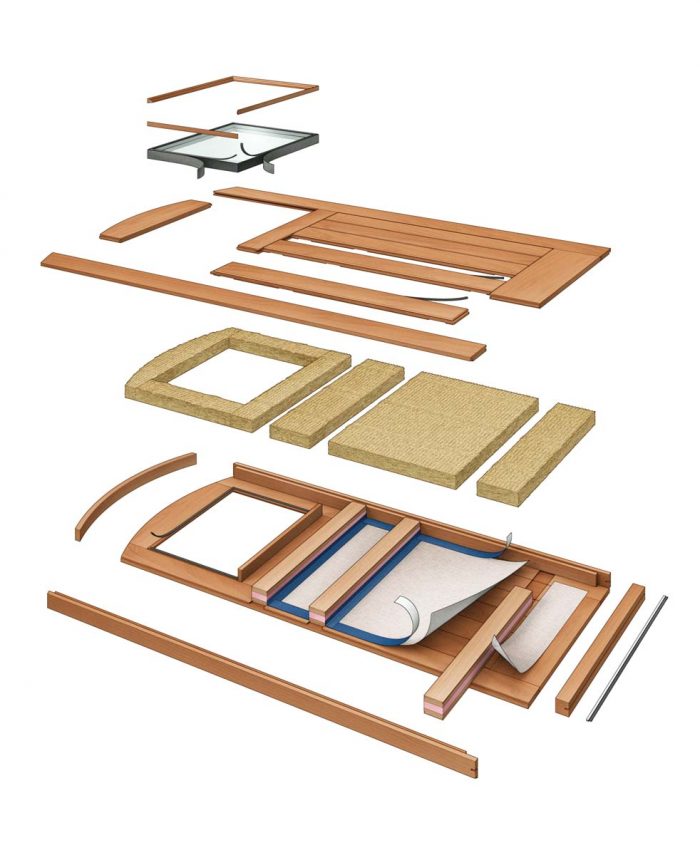 A Look Inside An Insulated Wood Door

The vertical boards that form the door’s front and back sides have unglued tongue-and-groove joints that allow the door to move with changes in temperature and humidity. Gaskets in the grooves and an air barrier on the back side of the front panel keep the door airtight and watertight. The rails have stub tenons that are glued into the grooved stiles.
Read more at this link for relevant extra details.
Download the SketchUp model for this exterior door.
For more photos, drawings, and details, click the View PDF button below:

View Comments
Great door, thank you for the inspiration. I have just built one very similar to this one from Western Red Cedar. Also, the insulated glass unit is arched at the top instead of the top rail being arched, so it gives it a slightly different appearance. Hardest part is finding the door hardware for a 3.5" thick door! Only place I could source it was Rock Mountain Hardware, as you did. Again thank you for the leadership and inspiration - much appreciated
Hi.
Any chance the rational for using Roxul board could be explained? I can guess maybe sound attenuation, or perhaps just builder preference/what's on hand. Is it lighter? Other factors?
Hi Tyler,
The clients chose rockwool because it has it has lower global warming potential (GWP) than XPS foam. They insulated the whole house with rockwool for the same reason. EPS and poliso also have much lower GWP than XPS.
Patrick McCombe senior editor
Any chance the sketchup model for this still exists? I'm very interested in building some similar style doors for my shop, but would like just a little more detail.