Installing Cedar Shingles with Woven and Flared Corners
Remodeler Nick Schiffer shares how he installs this unique cedar-shingle siding detail over a rainscreen.
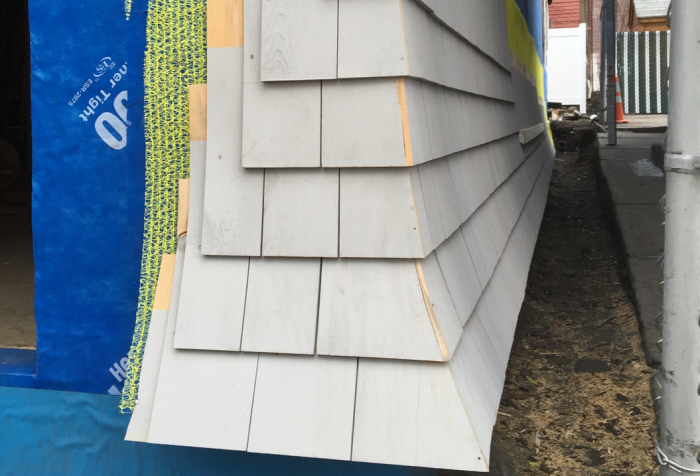
One of our recent projects called for WC (white cedar) shingles with woven and flared corners and while we were familiar with how to install these corners. It was a first to install them while also using a rainscreen.
Sheathing Prep
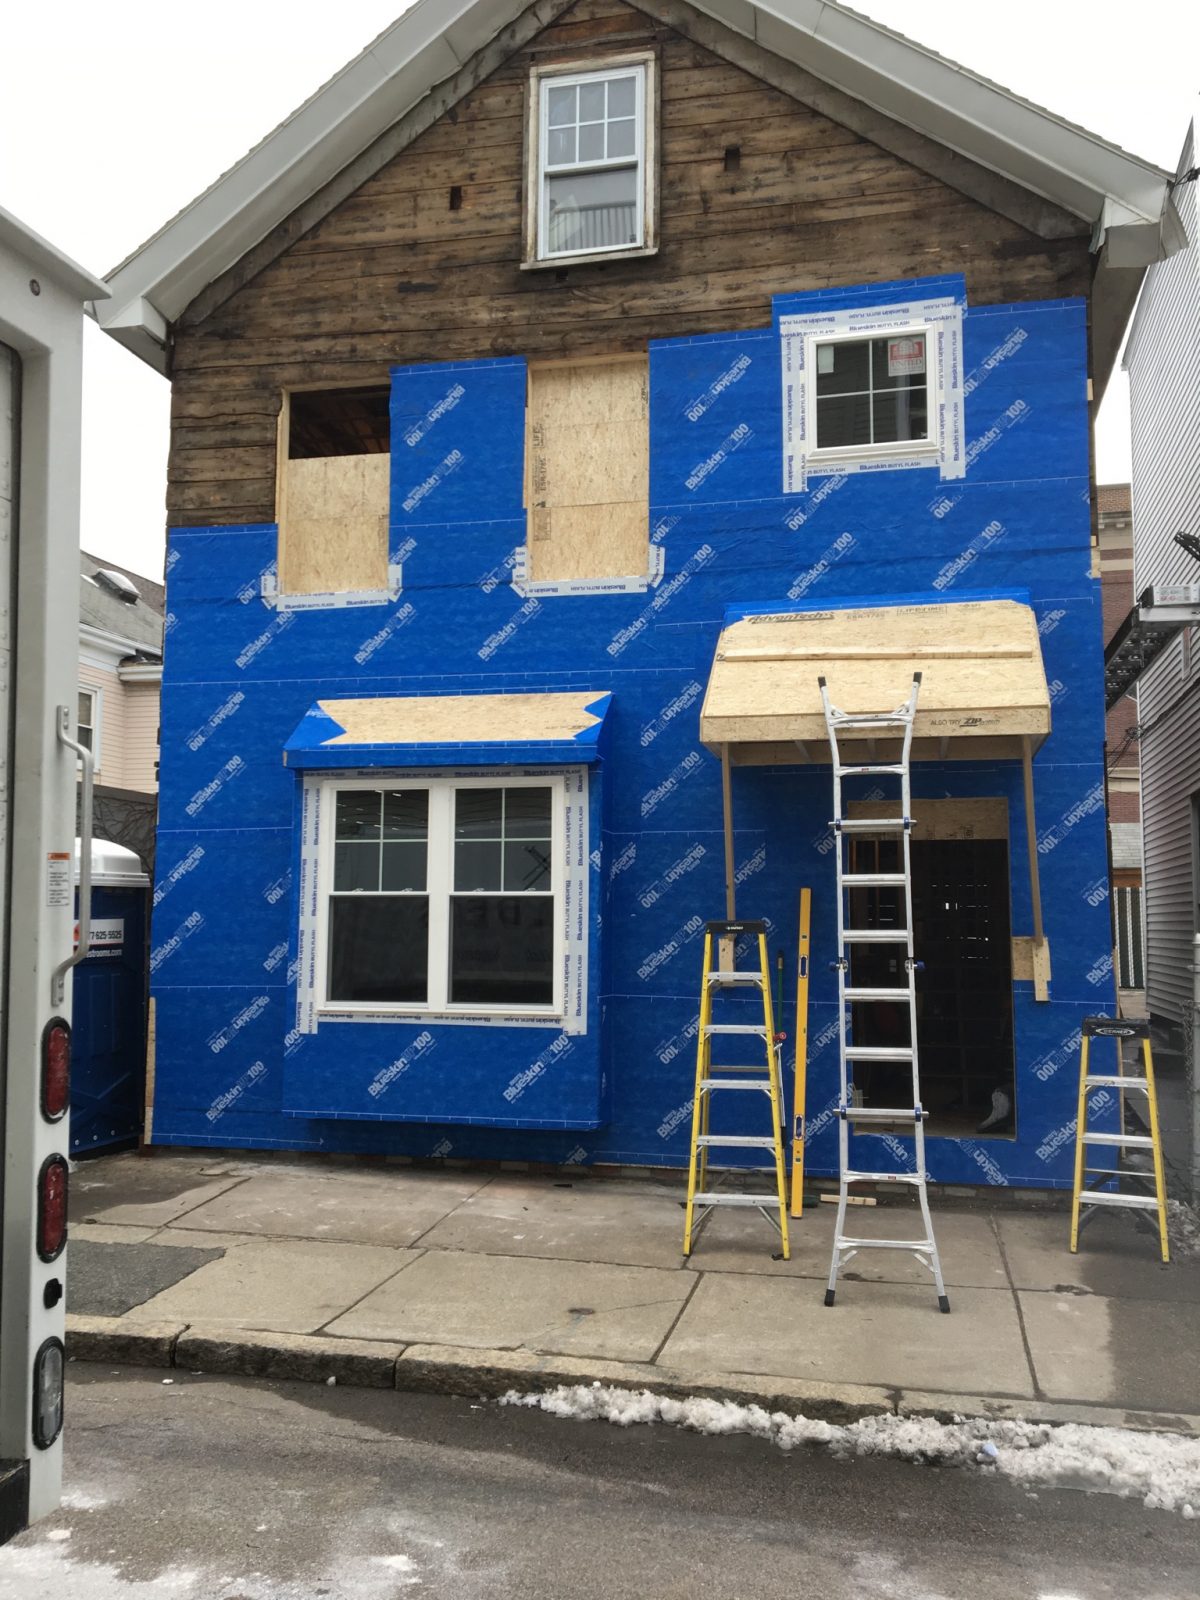
Lets first chat on how we prepped this 115 year old house. Like any renovation we moved windows and doors, fixed rotted and broken sheathing and added architectural elements to the facade. So, we began with patching the old board sheathing and wrapped the whole house with Henry VP100 Blueskin, a peel and stick “house wrap.” We then installed Obdyke Home Slicker rainscreen in preparation for the shingles.
The Flare
First off, why the flare? Well because it looks awesome… but also this house is located in the city and deals with tremendous grade issues with the abutting homes. And with the foundation being well below grade our goal was actually to create a faux foundation wall to help prevent water from penetrating the sheathing.
So below the flare we actually installed Henrys below grade sheet flashing which is wrapped up and under the plywood. This area will later receive a stone or brick “foundation” wall. So we needed the flare to cover the top of what will soon be this faux foundation wall. An odd, but important detail on this home.
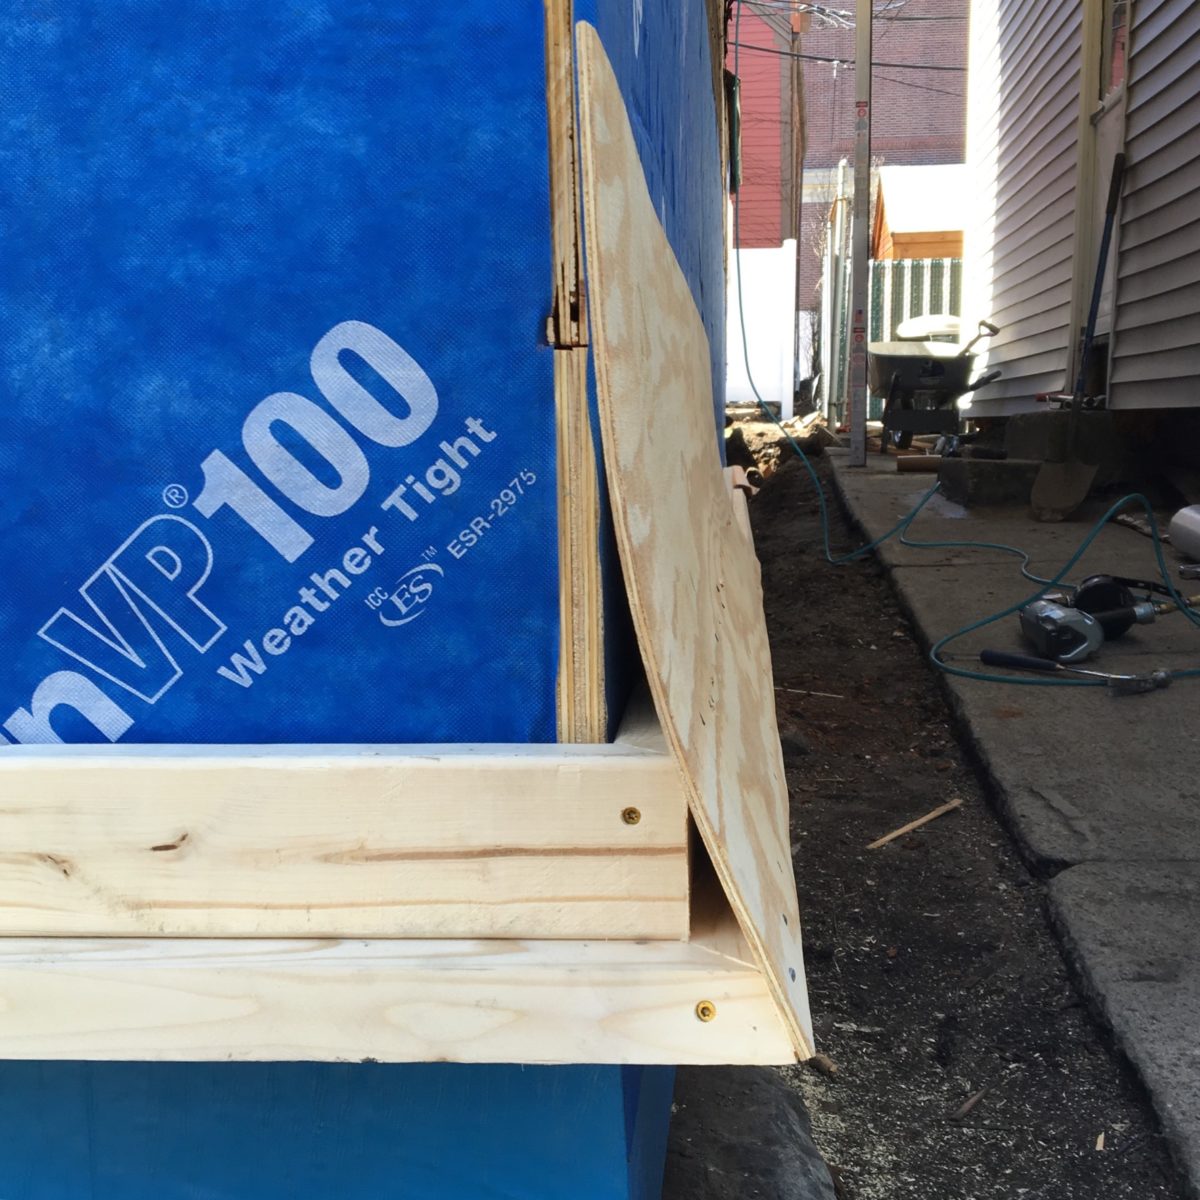
We made a few mockups and came up with this design, keeping the construction simple. The very bottom is a 2×4 with a 20-degree bevel on it, screwed to a vertical 2×4. Installed around the entire home and mitered in the corners to keep things tight.
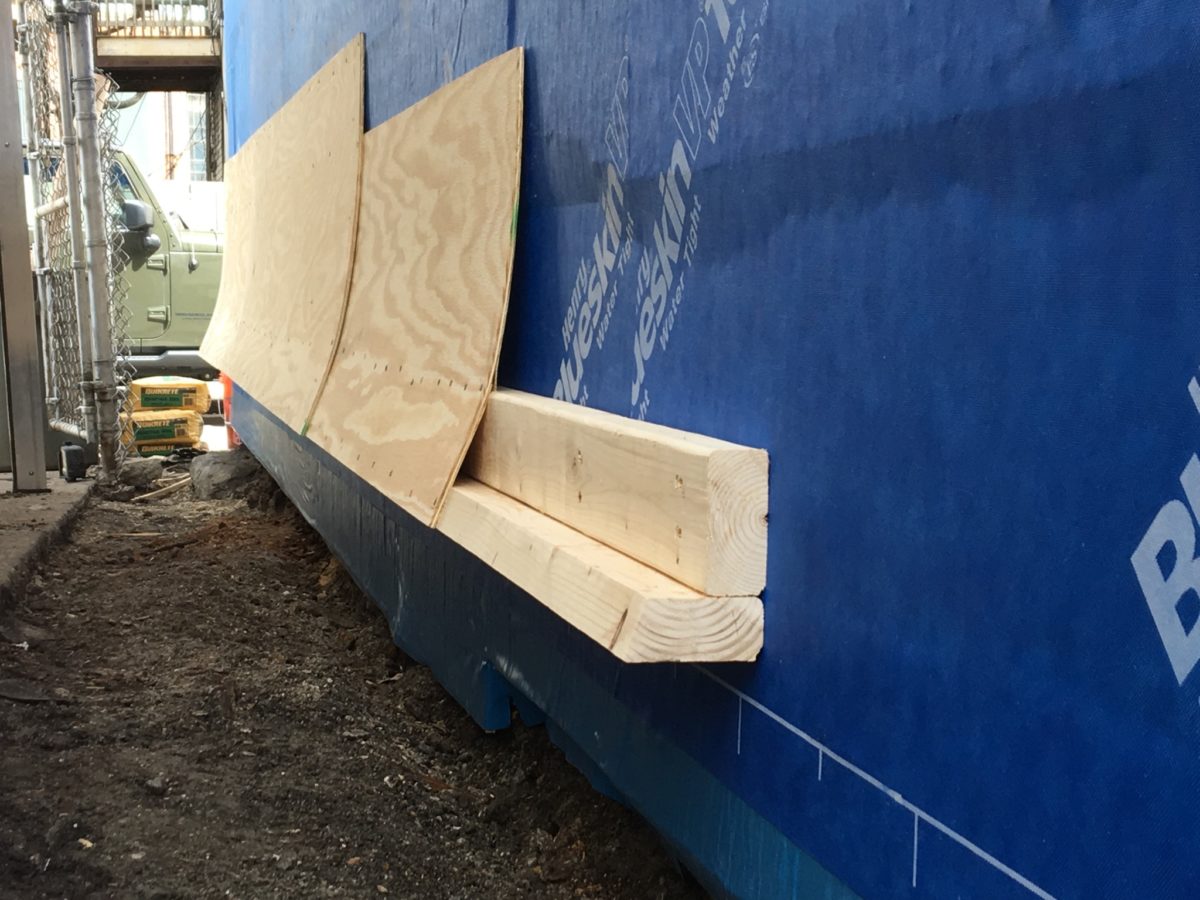
Next we installed (2) layers of 1/4″ plywood. (1) 18″ tall and (1) 24″ tall. We actually tried installing these both ways, the 18″ first and then the 24″ first. We found that the 18″ first allows for a smoother transition. The corners we cut with jig saw in place and used a router to flush them up with each wall.
We doubled up here and installed the Henry VP100 over the flare as well and topped it off with the rainscreen. Well, except the corners.
The Corners
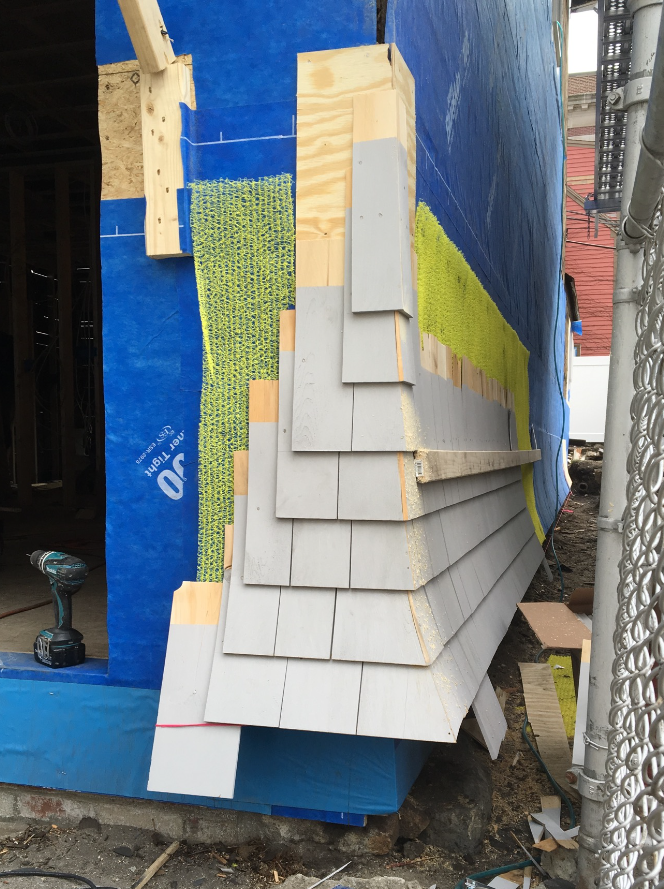
We tried, and tried and tried to install the corner shingles on top of the rain screen down at the flare. But went through a box of unsuccessful attempts. We opted to install 6″ of 1/4″ plywood up the entire corner. The 1/4″ mated up well against the 6mm rainscreen. This additional layer of plywood allowed a solid surface to to nail our flared and woven shingles against. It also allowed a nice smooth surface to run our trim router against to make the first cut on each woven corner. How do we cut the shingles? First shingle runs long, 1/4″ or so, take your trim router with 1/4″ flush trim bit and run the bearing along the plywood corner. Start the opposite shingle the same way, run it long and then run the router against the previously installed shingle. (See Router-scribed shingles) Make sure you alternate your overlap on each course. Finally we take a small ring shank nail, pre-drill a hole 1″ up from the bottom of the shingle in the very corner and nail the two shingles together. This will help prevent them opening up over time.
Installation Wrap-up
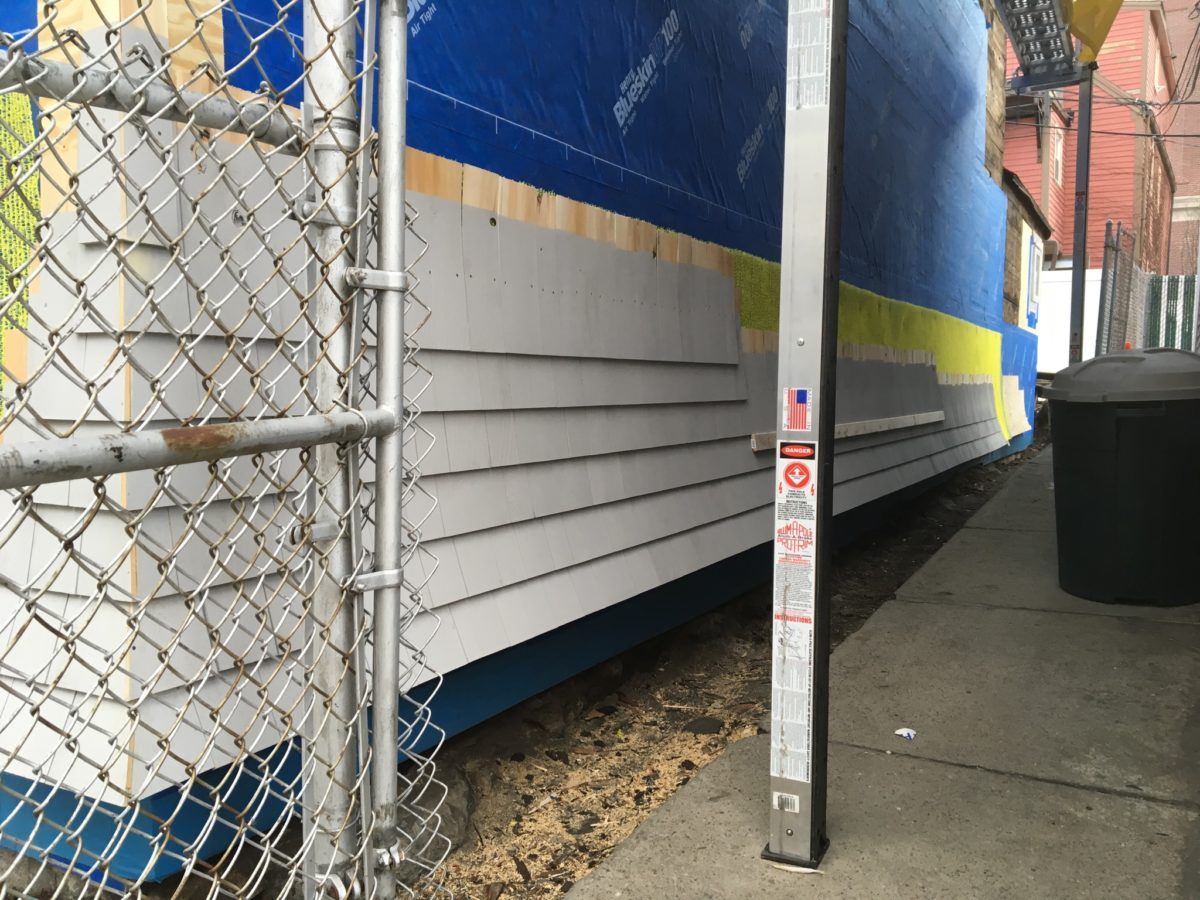
We ran the corners all the way up, and then fell back and ran the shingles between them.
For that stubborn flare, we soaked the shingles that would be installed on the first three courses to help “mold to” the curve as they were installed.
Final thought… the flare was intense, almost too intense. I think the next time we do it, we would flare the same amount out, but transition it up more than 18″/24″. We lost a lot of good shingles because that second course was just too tight of a curve.
Fine Homebuilding Recommended Products
Fine Homebuilding receives a commission for items purchased through links on this site, including Amazon Associates and other affiliate advertising programs.

Handy Heat Gun

Reliable Crimp Connectors

Affordable IR Camera


View Comments
Great read!
Many thanks for sharing your experience and knowledge. I'm about to start a very similar renovation. Can you offer any more insight to working with the particular rainscreen product? Is it spongy when fastening? Staples vs nails?
Very helpful! How did you build the faux foundation? I'm trying to figure out how to build one on my cottage (it has a block foundation, but I'll need to space the stone veneer out from the block, and run it up an over the lower portion of the existing stick built wall).
How do you install downspouts to not hide the woven corners on a straight (not flared) application? Thanks