Right-priced Spray Rig
Although some aspects of the setup are awkward, and it lacks some of the features found on higher-end kits, this is a true bang-for-your-buck miracle.
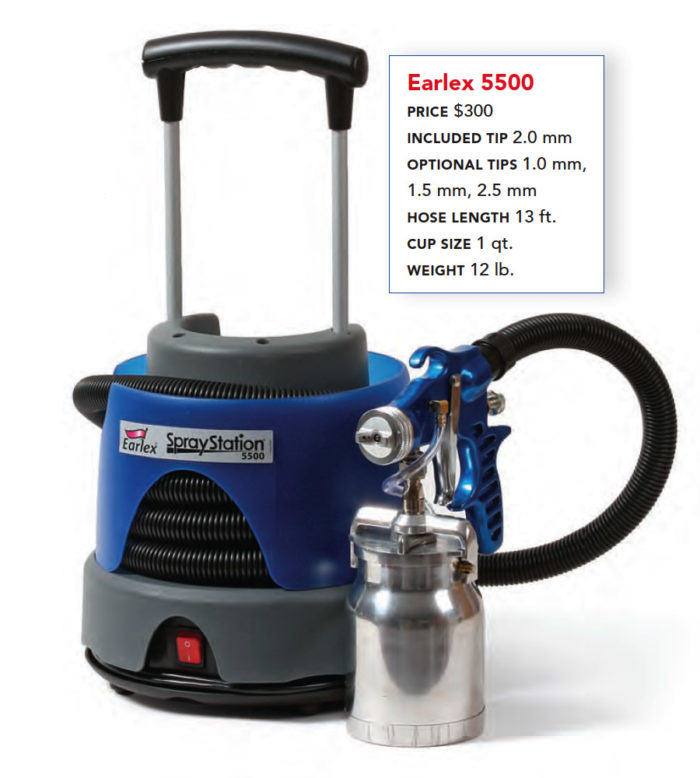 Despite years of practice and the best-flowing finishes I could lay my hands on, my results with a paintbrush have plateaued somewhere around mediocre on the quality scale. I’ve dreamed of switching to an HVLP (high volume, low pressure) spray setup to avoid brush marks and to get a more professional cabinet-shop level of finish, but I assumed that anything affordable had to be junk. After reading some positive feedback on the Earlex 5500 ($300), including a review from some trusted folks at Fine Woodworking, I decided to take the chance on it’s being as good as people said.
This HVLP spray kit is close to ready right out of the box. The setup is simple: There’s a turbine, a gun, and a hose that connects them together. The turbine unit provides a space for setting the gun down between uses, and it has a tall carry handle that will leave your other hand free for toting a gallon of paint, a roll of masking paper, or a cup of coffee. Unfortunately, the setup isn’t perfect. First, the hose storage is a hassle, forcing you to disconnect the 13 ft. of hose from the gun and turbine for storage in a slot that’s too narrow. Also, the rocker-style on/off switch is on the very bottom front of the unit and is recessed from the unit’s plastic shroud, making it hard to find. There’s also no on-board storage for the tip wrench, cleaning brush, and viscosity cup, which I consider must-haves on every spraying job.
The spray gun has just one point-of-flow adjustment: a metal knob at the back that increases flow when opened and restricts flow when tightened. It’s simple and works well. At the business end, the air cap can be pushed in and rotated to three different positions: horizontal spray, vertical spray, and round (a tightly focused pattern for getting into tight spots). The rig includes a 2.0mm fluid tip, which is suitable for general-purpose paint spraying, but I bought a 1.5mm kit that offers an even finer spray. Kits with 2.5mm and 1.0mm tips are also available. These kits sell for $30 to $35 each.
For latex paint (you can also spray oil-based finishes), fill the spray cup with paint to the bottom of the angled shoulder, then add one viscosity cup’s worth of clean water, which thins your mixture by about 10%. Stir the contents in the spray cup until the paint and water are mixed fully. Attach the cup to the gun, and do some test spraying to determine if the paint has been properly thinned. Some paint/primer combo products might need to be thinned up to around 15%, but I had fine results spraying Benjamin Moore Regal Select at about 10%.
Cleanup is a cinch, requiring a wrench for just one part. At the back of the gun, unscrew and remove the spray-control knob, and slide out the stainless-steel needle. At the front, unscrew the air-cap ring, then lift out the air-distributor assembly to expose the fluid tip, which is loosened with the included wrench for removal and cleaning. The quart-size, nonstick PTFE-coated container is wide enough to easily fit my whole hand. Finally, flush the feed tube with water or solvent.
BOTTOM LINE
This kit offers impressive results for $300. I had no trouble achieving a smooth finish. Even the first trial runs — which were a bit too plagued by orange-peel texture for my liking (the result of a lack of paint filtration and an overly open spray-control knob) — produced a finish that looked better than one with brush marks. Although some aspects of the setup are awkward, and it lacks some of the features found on higher-end kits, this is a true bang-for-your-buck miracle.


