Prepping for Demolition
Before you take the first swing, protect the rest of the house.
Remodeler Tyler Grace is a stickler for organized and clean job sites, so it’s no wonder he uses that same philosophy on demolitions. Grace follows a few basic rules for a successful demolition: Have a plan, protect the home, work methodically, and keep everything clean. Taking meticulous care earns him accolades from his clients and makes putting the space back together easier, saving time and money overall. His process for demolishing a kitchen, detailed in FHB #271, isn’t just for pros. Homeowners can use his process to save some cash they can pocket or reinvest into their home upgrade.
Before the demolition begins, Grace puts things in place to protect the rest of the house and its occupants. Dust and debris are unavoidable, but they are manageable.
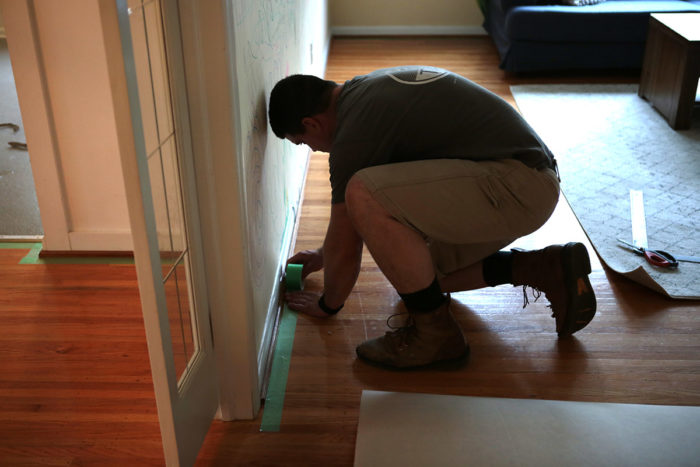
Flooring—especially hardwood flooring—is expensive and needs protection. At a minimum, you’ll want to protect the floor all the way from the room getting demoed to the door you’ll use to get to the dumpster. That way, any debris that gets stuck to your shoes won’t get ground into carpets or scuff wood or tile. As durable as hardwood flooring is, heavy-duty tape can make a mess of the finish. To protect the finish, put delicate-surface tape around the perimeter of the room first. This tape removes easily without marring the finish, and heavy-duty tape sticks to it just fine. After the delicate-surface tape is in, you can tape heavy-duty paper like Ram Board to it. For stair treads, try something like Econo Runner, which has a non-slip surface that holds it in place and can be taken up at the end of each day and reused.
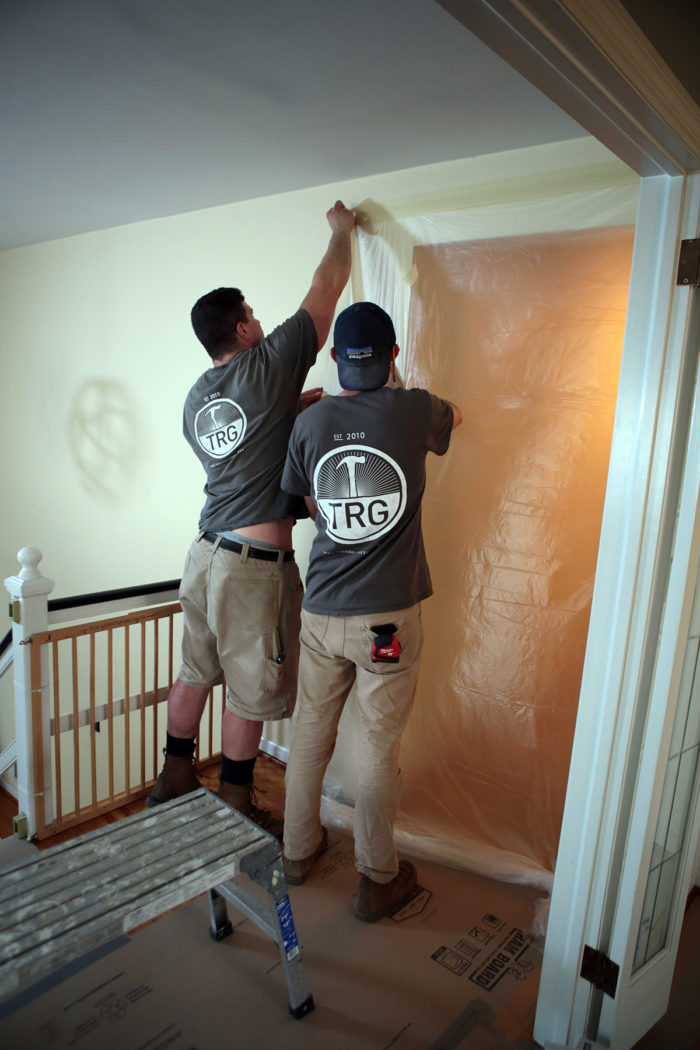
Confining dust to the area being demolished is important—especially if someone is living in the house during the demo. Temporary dust walls are easy to install. Grace uses plastic sheeting held in place with telescoping poles and sealed around the perimeter with tape. Plastic can also be taped right over doors and windows to prevent dust from escaping the work zone.
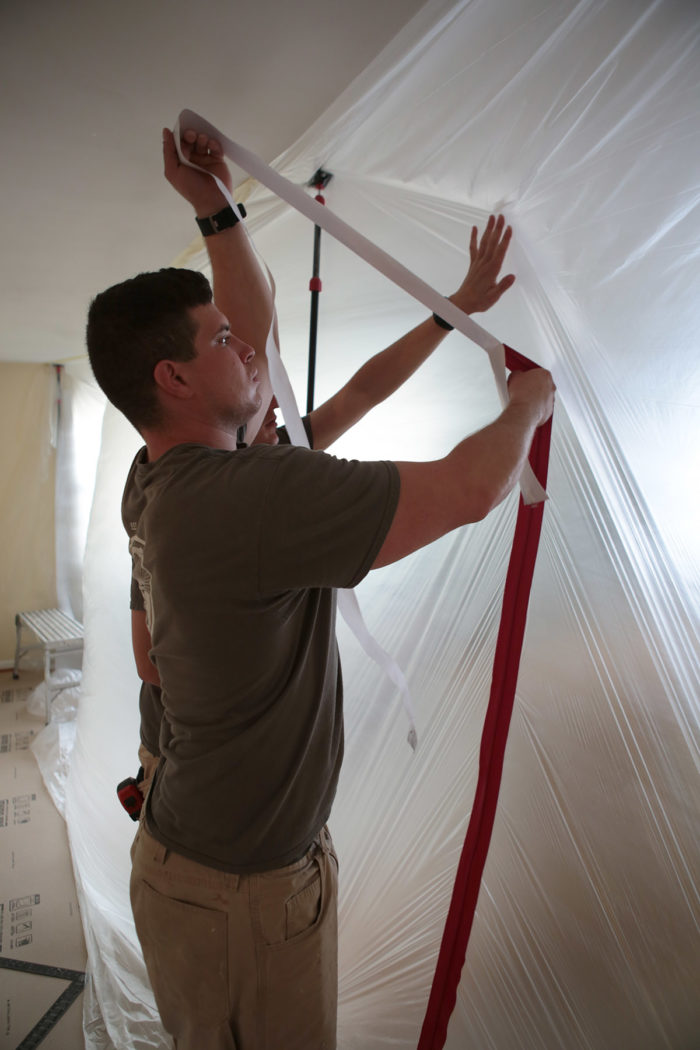
Temporary dust walls keep dust from escaping a work site, but you still need a door to get in and out. Some folks just cut a slit for a door and close it up with tape, which isn’t all that secure. Zippers are a better solution. ZipWall zippers adhere right to the plastic sheeting of a dust wall. Then you unzip the zipper, slit the plastic down the zipper’s length using the included tool, and presto—you’ve got a door. Quick tip: If you go through the trouble of buying the zippers, don’t just slit the plastic with a utility knife; the edges of the cut plastic will get stuck in the zipper and cause you a world of frustration.
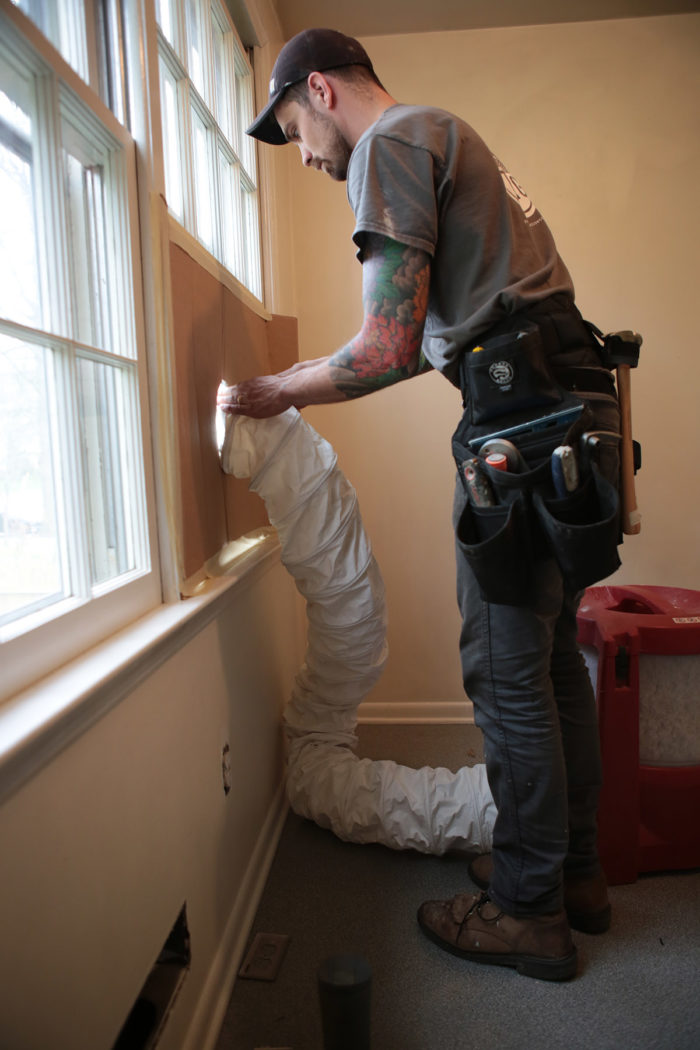
For extra insurance against dust escaping into the rest of the house, it’s a good idea to create negative pressure in the workspace. You can achieve this by installing a box fan in a window, but that just blows the dust outside, making it everybody’s problem (if you’ve seen American Wedding, you get the picture). A better alternative is to create that negative pressure using an air scrubber, which filters the air before pumping it outside. To create negative pressure with the scrubber, seal a piece of cardboard to an open window, cut a hole the size of the scrubber’s exhaust hose in the cardboard, and run the hose through the hole. You’ll create negative pressure in the space, scrub the air in the space clean, and exhaust clean air outside.
Check out the full article, “DIY Kitchen Demolition,” in issue #271. Plus, read more of Tyler Grace’s demolition tips here:
Photos by Brian McAward.


