FHB Logo Facebook LinkedIn Email Pinterest Twitter X Instagram Tiktok YouTube Plus Icon Close Icon Navigation Search Icon Navigation Search Icon Arrow Down Icon Video Guide Icon Article Guide Icon Modal Close Icon Guide Search Icon Skip to content
Subscribe
Log In
  • How-To
  • Design
  • Tools & Materials
  • Restoration
  • Videos
  • Blogs
  • Forum
  • Magazine
  • Members
  • FHB House
  • Podcast
Log In

Fine Homebuilding Project Guides

Insulation

Guide Home
  • Energy Efficiency
  • Air-Sealing
  • Choosing Insulation
  • Installing Insulation
  • Water Management
Tools & Materials

Dense-Pack Cellulose Insulation Done Right

How to tell the difference between a good cellulose insulation job and a bad one.

By Jon Riley Issue 272 - Dec 2017/Jan 2018
  • X
  • facebook
  • linkedin
  • pinterest
  • email
  • add to favorites Log in or Sign up to save your favorite articles

My first weatherization job was helping my dad insulate and air-seal the attic of the old farmhouse where I grew up. This was in the early 1990s, when he was running a weatherization and affordable-homeownership program in Sanford, Maine. Shortly after I graduated high school in 2000, my dad decided to go out on his own. He offered energy audits to homeowners and introduced the Energy Star Homes program to builders and architects. Eventually his business moved to New Hampshire, where public utilities better subsidized residential energy services. With my dad as inspiration, I started my first weatherization company in 2008.

I’ve always liked dense-pack cellulose because it does an excellent job of stopping air movement, and its hygroscopic nature allows it to absorb and release moisture throughout the seasons. When it comes to customers who want a better insulation than fiberglass batts, I’m often competing with contractors who install spray foam. Spray foam installs faster, but cellulose costs less—plus, it’s made of recycled material, is non-toxic, and is highly flame and pest resistant (see “Cellulose: The Perfect Insulation,” FHB #268).

cellulose loader in the truck
Teamwork. Although often separated by over one hundred feet of hose, the cellulose loader in the truck outside and the installer inside the house work as a team. One feeds bales of cellulose into an agitator to loosen the fibers so they can be pushed through the hose on a powerful stream of air. The other, at the business end of the hose, fills the cavities and controls the airflow using a cord with an on/off switch plugged into the end.

And unlike the VOC-heavy spray-foam process, which requires that the work site be completely evacuated, homeowners can live their lives and work can continue while we dense-pack. Dense-pack cellulose can also be installed in freezing temperatures without the expense of temporary heat.

In the beginning I wanted to follow directly in my dad’s footsteps, advising builders and homeowners on how to solve their home-performance issues. Soon it became clear that there were few folks who were willing to do the projects without shortcuts. With Dad ever supportive, I decided to buy the equipment and get to work. Unfortunately, most insulation contracts are decided based on price rather than who does the best job. Admittedly, a quality dense-pack job is nearly indistinguishable from an inferior one. The difference is how tightly the cellulose is packed into the cavities, and you often can’t tell just by looking at it.

We blow to a density of 3-1/2 lb. to 4 lb. per cu. ft., which feels like a very firm mattress. At this density, the cellulose packs together tightly enough to virtually stop airflow and so it won’t settle over time. It takes a long time to insulate to this density (days for a whole house or large addition), so poorly trained or price-pressured contractors don’t take the time to do it right. We’ve been doing this long enough to know how long a job will take, and we keep a careful count of the bags we blow so we can double-check the density of the assemblies we insulate.

We use the manufacturer’s coverage chart (click here for more info on the chart) to calculate how many bags it takes to achieve the correct density. The thicker the framing, the denser the cellulose will need to be in order to be self-supporting. In general, one 25-lb. bag of cellulose will cover approximately 15 sq. ft. of 2×6 wall at 3.5 lb. per cu. ft. or 6 sq. ft. of 2×12 rafters at 3.8 lb. per cu. ft.

New work requires netting

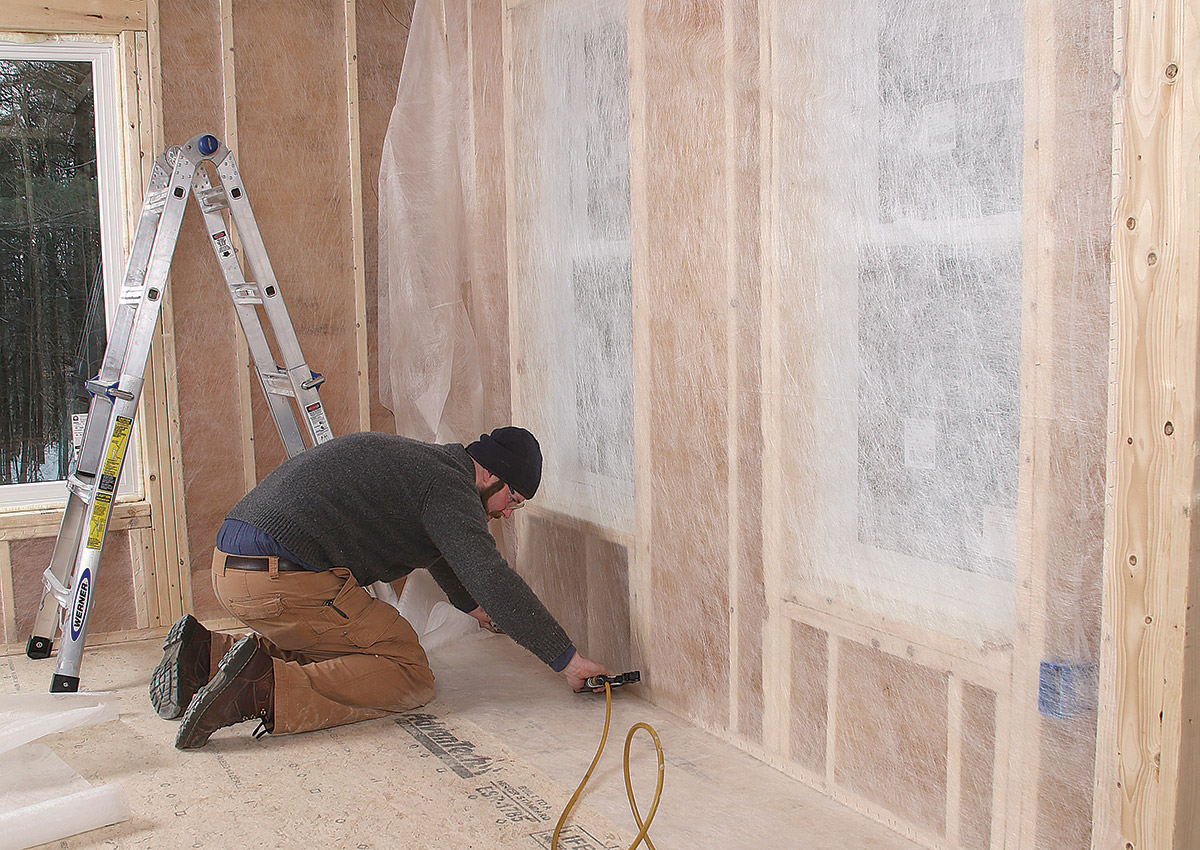
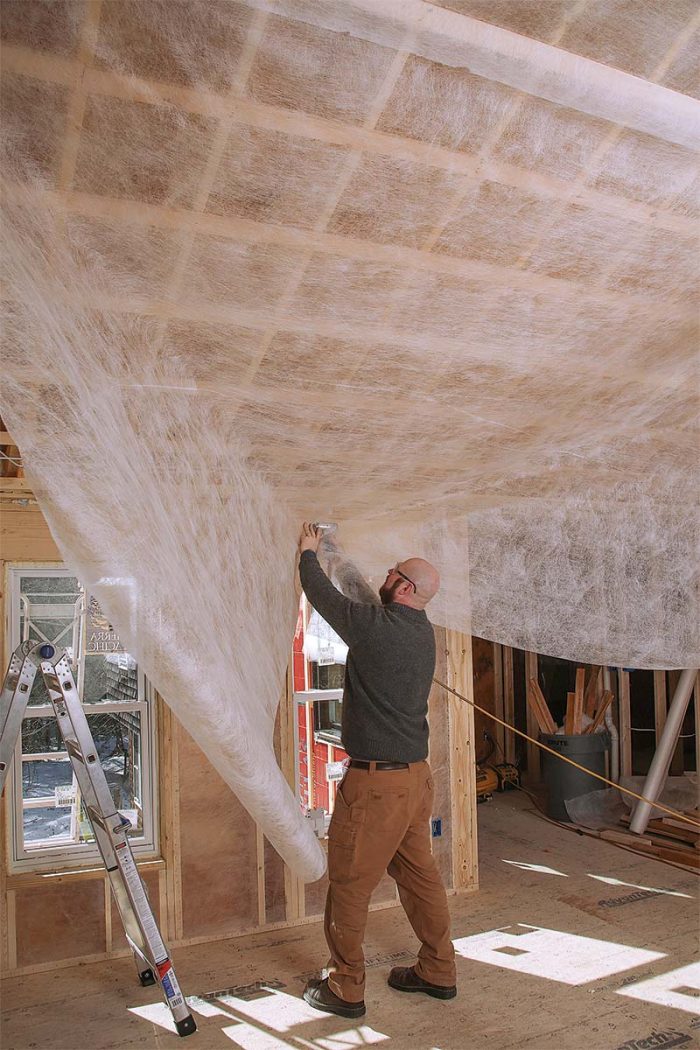
In new construction, dense-packing insulation requires stapling an air-permeable netting (Insulweb is the brand we use) over the framing to contain the insulation while we dense-pack. It’s important to keep in mind that the netting isn’t meant to hold the insulation in the walls, because when properly installed, dense-pack cellulose is self-supporting. Otherwise, it settles over time, creating cold spots and condensing surfaces. The netting simply seals off the last face of what then becomes a six-sided cavity, holding the insulation in place while we build up enough density to make it self-supporting.

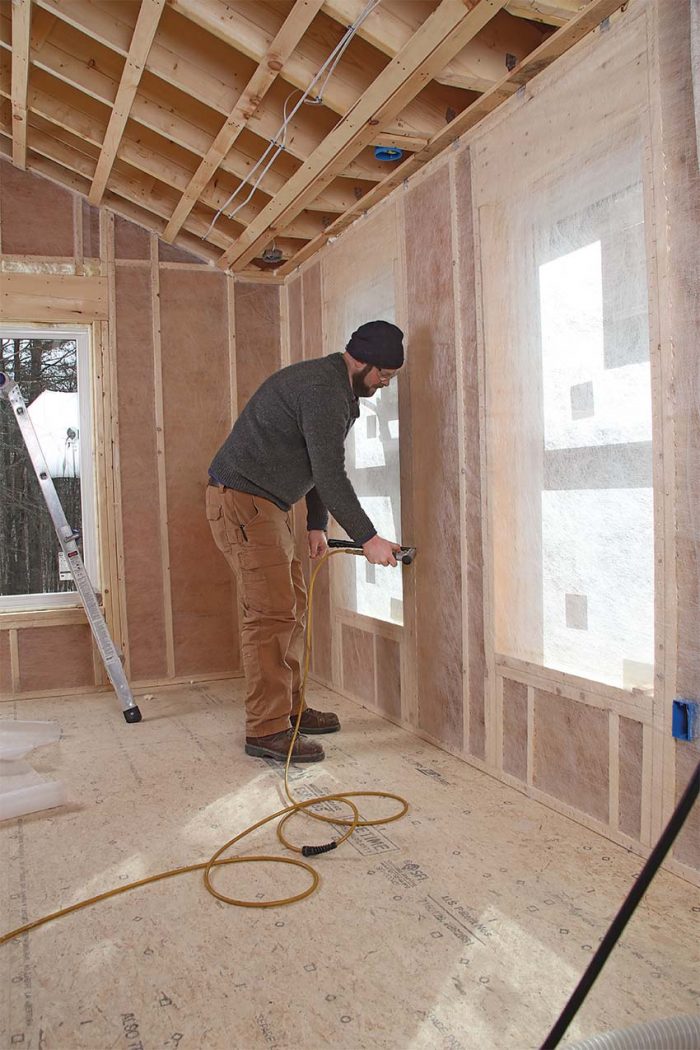
We staple up the netting, ensuring that it’s free of wrinkles, which can cause problems when attaching drywall later. First, we staple the netting to the top and bottom plates and then to the outside corners of the studs (or whatever evenly spaced framing members we’re covering). Stapling the corners is important. This step, described by cellulose installers as lip-stitching, puts continuous lines of staples on the stud or framing corners. These lines of staples contain the intense pressure of the blower and allow the netting to bulge slightly in the center without stretching too far beyond the stud faces. If the insulation bows beyond the framing, it interferes with drywall installation, so we use a special roller to flatten the filled cavities. Lip-stitching controls the bulge enough so we don’t have to remove excess material.

installing netting for dense-pack cellulose insulation
Start at the top. The netting is first fastened along the top plate and allowed to hang down to the floor. Then the netting is pulled tight and stapled along the bottom plate.
Lip-stitch the studs to install netting for dense-pack cellulose insulation
Lip-stitch the studs. Once the netting is face-stapled around the assembly perimeter, it’s stapled to both front corners of the studs or framing members with staples placed about 1 in. apart. This method, called lip-stitching, draws the netting even tighter across the cavity to help prevent bulging.
Trim around doors and windows to install netting for dense-pack cellulose insulation
Trim around doors and windows. Excess netting is trimmed along the bottom plate and around the perimeter of framed openings where it covers doors and windows. The non-woven material cuts easily with a fresh blade.
Cut small pieces on the floor when installing netting for dense-pack cellulose insulation
Cut small pieces on the floor. Precision isn’t critical for the small pieces of netting used to divide cavities, but using a measured piece as a template helps speed the work of cutting a stack of the small rectangles needed to divide the 16-in.-deep rafter cavities.
Divide deep cavities when installing netting for dense-pack cellulose insulation
Divide deep cavities. Cavities deeper than 12 in. should be divided into cells using small pieces of netting spaced about 6 ft. o.c. The smaller space makes it easier to reach all corners, ensuring the cellulose is installed at the correct 3-1⁄2-lb.- to 4-lb.-per-cu.-ft. density.
Drape and pull when installing netting for dense-pack cellulose insulation
Drape and pull. Ceiling cavities are tackled much the same as walls. The netting is fastened to the ridge and allowed to hang down, then pulled tight and fastened along the bottoms of the rafters before lip-stitching.
Fill from the bottom up
Fill from the bottom up … In an 8-ft. or 9-ft. stud cavity, the whip is inserted near the middle and pushed all the way to the bottom plate. As the cavity fills, the whip is slowly withdrawn. When the cavity is half filled, the whip is removed.
Whip pushed to the top plate
… and then from the top down. With the reinserted whip pushed to the top plate, the cavity is then filled from the top down. As the cavity fills, the whip is backed out and withdrawn. Installed correctly, the cellulose is packed tight enough that patching the hole is unnecessary.
Beware of blind spots
Beware of blind spots. Odd-shaped and hidden cavities are marked with a Sharpie during the netting stage so the insulator remembers to fill these spaces. Blind corners created by adjoining walls are best filled through multiple holes spaced a couple of feet apart, with the hose plunged horizontally into the hidden part of the cavity. Cavities smaller than 2 in. are filled with canned spray foam.

Getting the right density

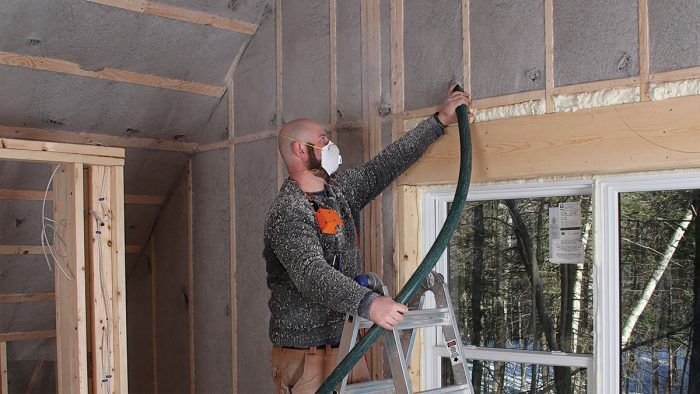
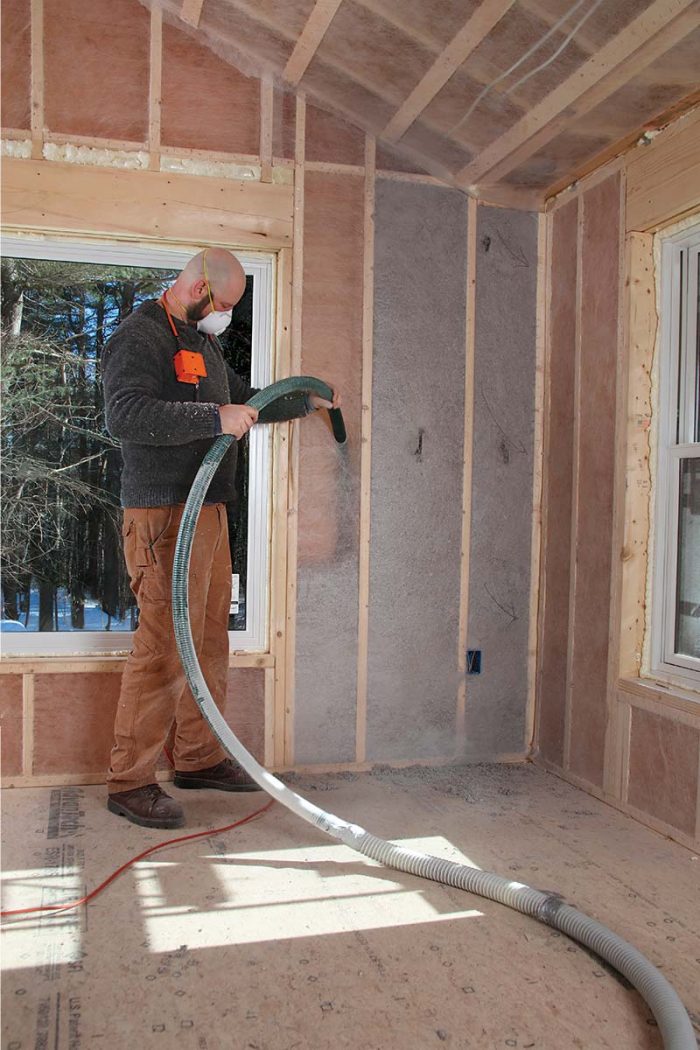
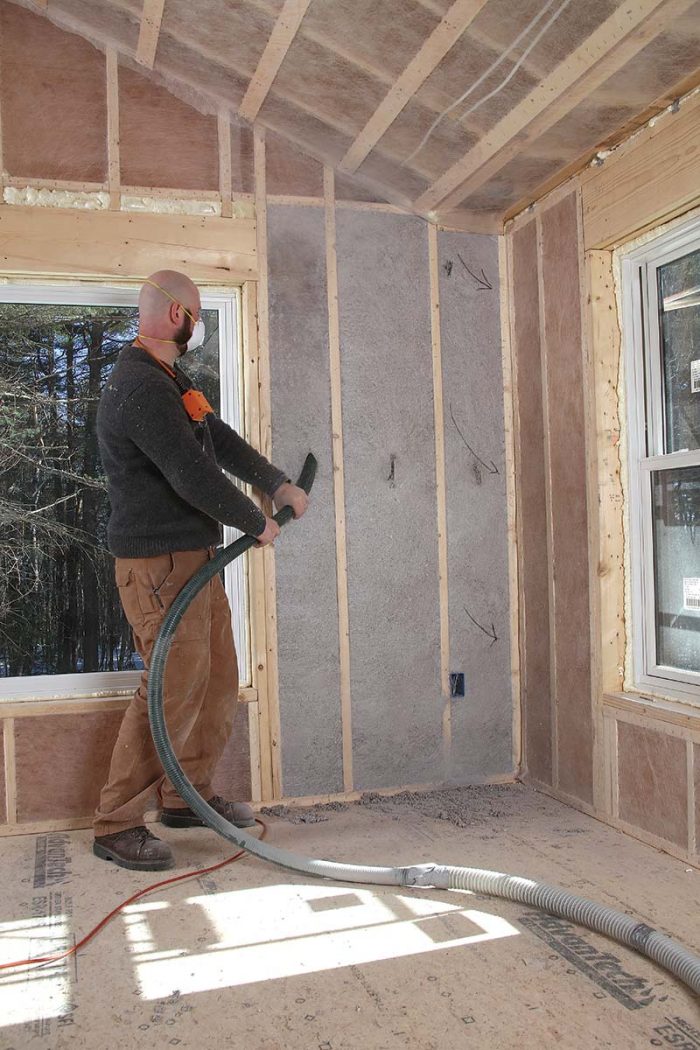
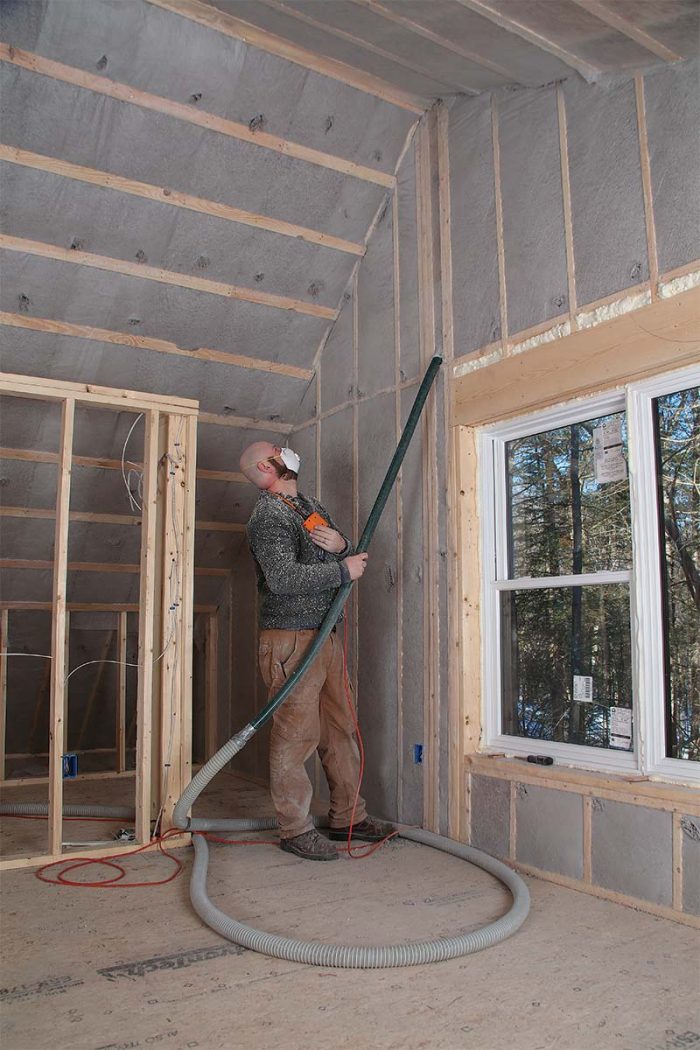
To achieve the critical 3-1/2-lb.- to 4-lb.-per-cu.-ft. density, installers need to fill the cavities with a small-diameter hose. Our blowers are connected to a hose that steps down gradually. First there’s 100 ft. of 3-1/2-in.-dia. hose connected to 50 ft. of 2-1/2-in.-dia. hose, which ends with a 6-ft.-long 1-1/2-in.- or 2-in.-dia. hose, called a whip. The whip is the secret to getting a good dense-pack job. I’ve seen folks try to use a 3-1/2-in.- or 4-in.-dia. hose to fill a deep roof or double-stud wall, but with such a large-diameter hose, any material more than a few inches from the hose end will not be packed tightly enough to prevent settling.

When filling double-stud walls and deep rafter bays, we section off the cavities with small pieces of netting. Since he’s filling a smaller space, the installer can reach all corners, ensuring the entire cavity is at the correct density. Inferior dense-pack jobs have low-density spots, which are common around utilities and inside complex or deep cavities.

Having the right stuff

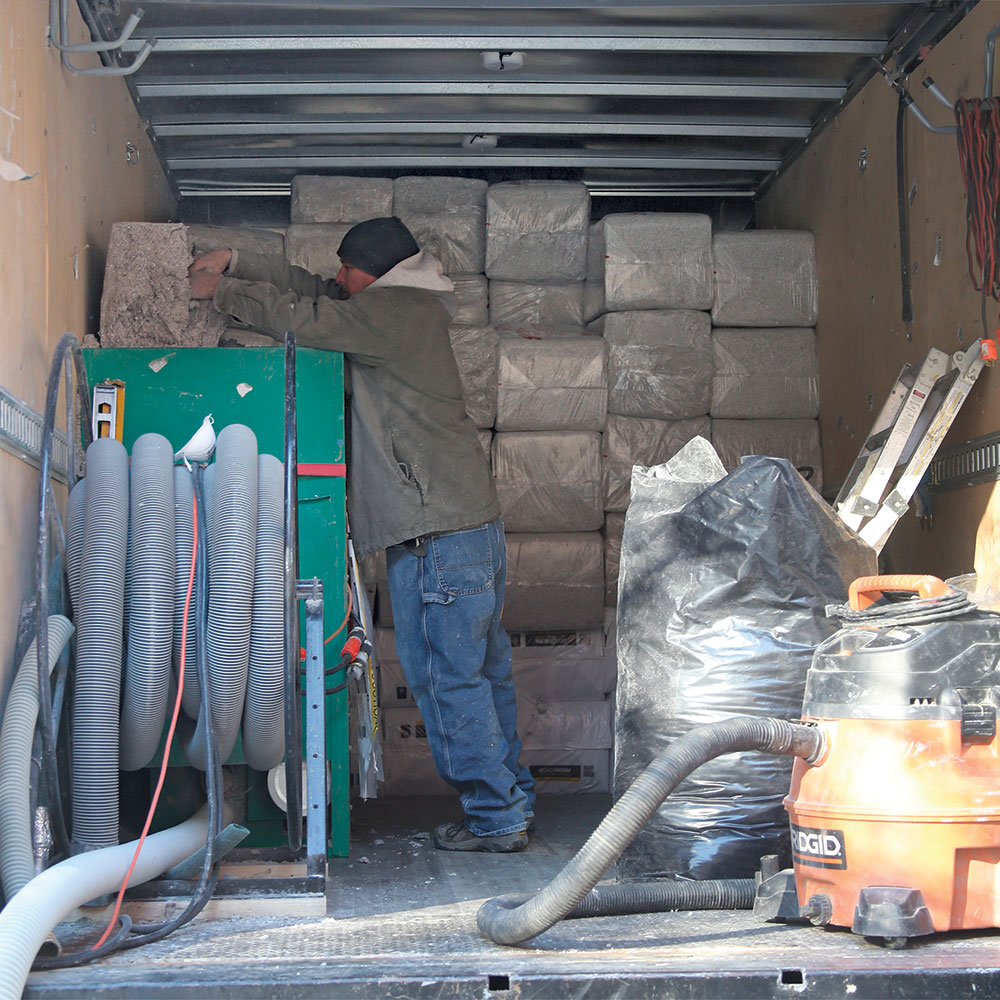
Our company carries insulation and equipment in our two 20-ft. Isuzu box trucks equipped with Accu1 9400 cellulose blowers. The blowers are reliable and easy to field-repair, requiring only a few simple tools and a small collection of spare parts.

We use Beno-Therm–brand cellulose and have found it to be the cleanest product on the market today. It has no foreign materials—­­no plastic streamers or trash mixed in—and it’s treated with only boric acid, no ammonia or magnesium sulfate. Ammonia and magnesium sulfate are cheaper than boric acid, but they’re more corrosive and can have an unpleasant odor. The cellulose at the big box stores typically has both plastic contaminants and ammonia-based fire retardants, so I advise contacting a local supplier for the good stuff.

A dense-packed day in the life

We typically run a three-person crew. When we get to the site, two people begin air-sealing and installing the netting that holds the cellulose, a process we call netting. The third runs power to the insulation blower and runs the hoses to the work area. As soon as we have a wall or rafter assembly fully netted, we get the truck going with one person loading the hopper and one blowing insulation. The third crew member works ahead, air-sealing and netting. On a good day, we are blowing within 30 minutes of arriving at the site, but more often it’s 45 minutes to an hour. Throughout the day we monitor the bag count to make sure we are in the right ballpark in terms of material density and production. At the end of the day, we put the truck to bed and clean our work area thoroughly, which improves our relationship with the other trades with whom we’re sharing the workspace.

Don’t try this at home

Although some DIYer’s claim success dense-packing cellulose with rental machines from home centers, these low-pressure machines make the process very slow and achieving a density sufficient to resist settling is difficult. The process is best left to
a specialty subcontractor with a more powerful insulation blower. But before you hire someone, here are some things to keep in mind:

  •  You’ll want to prepare your site for access and you can expect the insulation contractor’s box truck or trailer to be on site several days for larger jobs.
  • You’ll also need power—the author’s rig requires two 15-amp circuits, which is typical.
  • Once the work starts, insist that your installer save the empty bags of cellulose so you can compare the number of bags installed to the cubic feet of space you’re insulating.

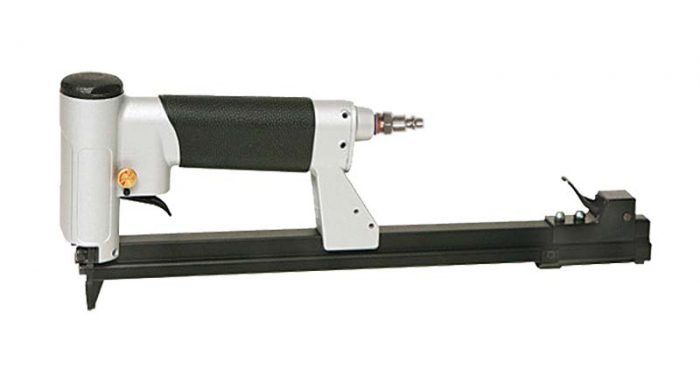
Get the right stapler

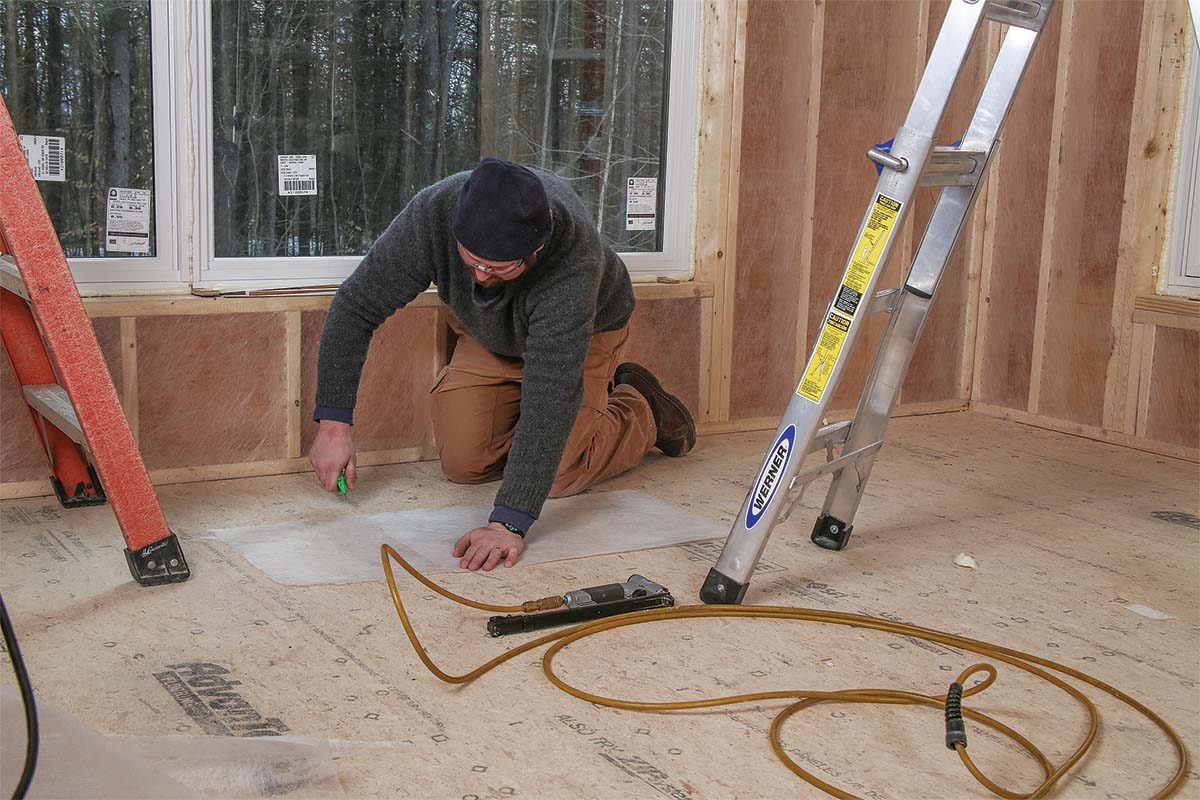
Installing cellulose netting requires driving thousands of staples. For this work, pros use an adjustable-speed auto-fire upholstery stapler. The tool shown below, a Spotnails A-11 series stapler (about $150), can hold 168 staples in its extra-long magazine.

Staple gun

Photos by Patrick McCombe


RELATED STORIES

  • An Easy Way To Build a Well-Insulated House
  • Thermal- and Moisture-Control Layers for an Energy-Efficient House
  • How to Insulate Walls with No Sheathing

Fine Homebuilding Recommended Products

Fine Homebuilding receives a commission for items purchased through links on this site, including Amazon Associates and other affiliate advertising programs.

Insulation Knife

If you like insulating with mineral wool, this knife makes cuts that are clean, neat, and easy — it's much better than a utility knife which can be slow and messy.
Buy at Amazon

Great Stuff Foam Cleaner

It’s important to clean and maintain a professional foam-dispensing gun, and this product fits the bill. It has a spray applicator for general cleaning, plus it screws onto the dispensing gun so you can clean the inside.
Buy at Amazon

Loctite Foamboard Adhesive

When foam board installations require an adhesive, it’s important to use compatible products like this adhesive from Loctite.
Buy at Amazon
View PDF
Previous: Thermal- and Moisture-Control Layers for an Energy-Efficient House Next: An Easy Way To Build a Well-Insulated House

Guide

Insulation

Chapter

Installing Insulation

Sign up for eletters today and get the latest how-to from Fine Homebuilding, plus special offers.

Signing you up...

This site is protected by reCAPTCHA and the Google Privacy Policy and Terms of Service apply.
See all newsletters
See all newsletters

View Comments

  1. user-6130221 | Nov 17, 2017 12:49pm | #1

    Jon, great article! I salute you for using a respirator during the installation process and am glad FHB chose to include a picture of you wearing one on the cover. This is an oft-ignored but critical piece of safety gear. I do want to point out, however, that facial hair that extends into the sealing area of the respirator will impede the effectiveness of the respirator. OSHA even states that "beards present serious problems for tight-fitting facepiece respirators". Don't mean to nitpick but thought I'd pass this info along.
    Once again thanks for a great, informative article.
    Best regards,
    Tom Carroll

  2. magnolia33 | Feb 22, 2023 08:08am | #2

    What length leg on the staples? 1/2"? Great article, thanks for the info!

Log in or create an account to post a comment.

Sign up Log in

Become a member and get full access to FineHomebuilding.com

Insulation

Insulation

Trusted, comprehensive guidance from the pros for a home that is healthy, comfortable, and energy efficient

View Project Guide

View All Project Guides »

Become a member and get unlimited site access, including the Insulation Project Guide.

Start Free Trial

Energy Efficiency
  • Understanding Energy and Houses
  • Building Energy-Efficient Homes
Air-Sealing
  • Air-Sealing Basics
  • Air-Sealing Tools and Materials
  • Foundations and Floors
  • Walls, Windows, and Doors
  • Attics and Roofs
Choosing Insulation
  • Insulation Basics
  • Material Choices
Installing Insulation
  • Insulating Attics and Roofs
  • Insulating Walls
  • Insulating Floors, Footings, and Slabs
  • Insulating Foundation Walls
Water Management
  • Water-Management Principles
  • Materials
  • Installation Methods

Fine Home Building

Newsletter Sign-up

  • Fine Homebuilding

    Home building tips, offers, and expert advice in your inbox.

  • Green Building Advisor

    Building science and energy efficiency advice, plus special offers, in your inbox.

  • Old House Journal

    Repair, renovation, and restoration tips, plus special offers, in your inbox.

Signing you up...

This site is protected by reCAPTCHA and the Google Privacy Policy and Terms of Service apply.
See all newsletters

Follow

  • Fine Homebuilding

    Dig into cutting-edge approaches and decades of proven solutions with total access to our experts and tradespeople.

    Start Free Trial Now
    • Facebook
    • Instagram
    • X
    • LinkedIn
  • GBA Prime

    Get instant access to the latest developments in green building, research, and reports from the field.

    Start Free Trial Now
    • Facebook
    • YouTube
  • Old House Journal

    Learn how to restore, repair, update, and decorate your home.

    Subscribe Now
    • Facebook
    • Instagram
    • X

Membership & Magazine

  • Online Archive
  • Start Free Trial
  • Magazine Subscription
  • Magazine Renewal
  • Gift a Subscription
  • Customer Support
  • Privacy Preferences
  • About
  • Contact
  • Advertise
  • Careers
  • Terms of Use
  • Site Map
  • Do not sell or share my information
  • Privacy Policy
  • Accessibility
  • California Privacy Rights

© 2025 Active Interest Media. All rights reserved.

Fine Homebuilding receives a commission for items purchased through links on this site, including Amazon Associates and other affiliate advertising programs.

  • Home Group
  • Antique Trader
  • Arts & Crafts Homes
  • Bank Note Reporter
  • Cabin Life
  • Cuisine at Home
  • Fine Gardening
  • Fine Woodworking
  • Green Building Advisor
  • Garden Gate
  • Horticulture
  • Keep Craft Alive
  • Log Home Living
  • Military Trader/Vehicles
  • Numismatic News
  • Numismaster
  • Old Cars Weekly
  • Old House Journal
  • Period Homes
  • Popular Woodworking
  • Script
  • ShopNotes
  • Sports Collectors Digest
  • Threads
  • Timber Home Living
  • Traditional Building
  • Woodsmith
  • World Coin News
  • Writer's Digest
Active Interest Media logo
X
X
This is a dialog window which overlays the main content of the page. The modal window is a 'site map' of the most critical areas of the site. Pressing the Escape (ESC) button will close the modal and bring you back to where you were on the page.

Main Menu

  • How-To
  • Design
  • Tools & Materials
  • Video
  • Blogs
  • Forum
  • Project Guides
  • Reader Projects
  • Magazine
  • Members
  • FHB House

Podcasts

  • FHB Podcast
  • ProTalk

Webinars

  • Upcoming and On-Demand

Podcasts

  • FHB Podcast
  • ProTalk

Webinars

  • Upcoming and On-Demand

Popular Topics

  • Kitchens
  • Business
  • Bedrooms
  • Roofs
  • Architecture and Design
  • Green Building
  • Decks
  • Framing
  • Safety
  • Remodeling
  • Bathrooms
  • Windows
  • Tilework
  • Ceilings
  • HVAC

Magazine

  • Current Issue
  • Past Issues
  • Magazine Index
  • Subscribe
  • Online Archive
  • Author Guidelines

All Access

  • Member Home
  • Start Free Trial
  • Gift Membership

Online Learning

  • Courses
  • Project Guides
  • Reader Projects
  • Podcast

More

  • FHB Ambassadors
  • FHB House
  • Customer Support

Account

  • Log In
  • Join

Newsletter

Get home building tips, offers, and expert advice in your inbox

Signing you up...

This site is protected by reCAPTCHA and the Google Privacy Policy and Terms of Service apply.
See all newsletters
See all newsletters

Follow

  • X
  • YouTube
  • instagram
  • facebook
  • pinterest
  • Tiktok

Join All Access

Become a member and get instant access to thousands of videos, how-tos, tool reviews, and design features.

Start Your Free Trial

Subscribe

FHB Magazine

Start your subscription today and save up to 81%

Subscribe

We hope you’ve enjoyed your free articles. To keep reading, become a member today.

Get complete site access to expert advice, how-to videos, Code Check, and more, plus the print magazine.

Start your FREE trial

Already a member? Log in

Privacy Policy Update

We use cookies, pixels, script and other tracking technologies to analyze and improve our service, to improve and personalize content, and for advertising to you. We also share information about your use of our site with third-party social media, advertising and analytics partners. You can view our Privacy Policy here and our Terms of Use here.

Cookies

Analytics

These cookies help us track site metrics to improve our sites and provide a better user experience.

Advertising/Social Media

These cookies are used to serve advertisements aligned with your interests.

Essential

These cookies are required to provide basic functions like page navigation and access to secure areas of the website.

Delete My Data

Delete all cookies and associated data