Step-by-Step Guide for Connecting PEX to Copper
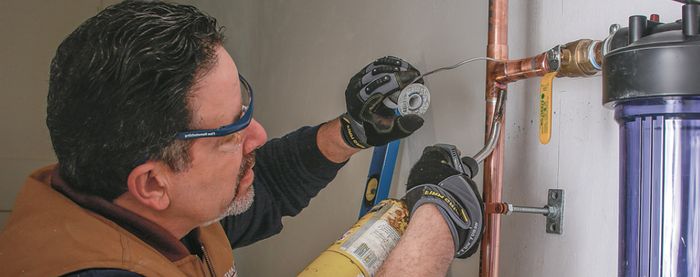
Sweat adapters create a solid connection between copper and PEX supply lines.
Connecting PEX to copper is a common thing to do when adding new supply lines to an existing home. Sweat adapters make this transition simple.
Female sweat adapters come in many varieties for different kinds of PEX fitting systems (check out the article “Connecting PEX Plumbing” for a rundown of the major PEX fitting systems ). These adapters are soldered—or “sweated”—onto the copper tubing, allowing for a solid connection between the copper and the PEX. Here we’ll use an adapter designed to transition from copper to a PEX crimp connection.
Start by cleaning the outside of the copper tubing with plumber’s cloth, and the inside of the fitting with a wire brush. Then, use an acid brush to apply tinning flux to both the outside of the copper and the inside of the fitting. Then slip the fitting onto the tubing with a slight twist, making sure it’s fully seated.
Unroll about 6 in to 8 in. of lead-free silver solder and bend it at 90° about 2 in. from the end to make it easier to solder around the joint. For 1/2-in. tubing, you’ll only use about 1/2 in. of solder per joint.
Heat the fitting at the connection with a torch, keeping the tip of the brightest part of the flame in contact with the surface. The heat will transfer through the fitting to the pipe.
Soon after the flux starts to bubble, test to see if the tubing is hot enough by touching the tip of the solder to the copper where it meets the fitting. Once it’s hot enough to melt the solder, remove the flame to avoid overheating, and touch the solder to the top of the joint. The solder will run down and around the joint and be sucked into the fitting by capillary action. You can also run the solder around the joint—the hook makes this easier.
With the solder still molten, use a dry rag to clean up any excess solder. When it’s cool, connect the PEX to the end of the adapter. With this crimp fitting, slide the crimp ring onto the PEX first, then push the PEX onto the adapter, slide the ring over so that it’s about 1/8 in. from the end of the tubing, and crimp it with a crimping tool.
FAQs Related to Connecting PEX to Copper
Can you use SharkBite fittings on PEX? Yes. SharkBite Universal brass push-to-connect fittings can be used on PEX as well as copper, C-PVC, PE-RT, and HDPE pipe.
Can PEX be used outside? Yes, but not if it’s exposed to sunlight. Ultraviolet rays cause it to deteriorate when connecting PEX to copper but if it’s underground or otherwise protected, PEX is a great material for outdoor piping.
How long does PEX last? On average, you can rely on PEX piping for more than 50 years. It’s generally more durable than copper.
What temperature can PEX handle? The maximum safe temperature for PEX tubing is 200 degrees Fahrenheit, 180 degrees for plumbing projects. (Usually, the temperature limitation is printed somewhere on the tubing).
More resources for cutting copper tubing and PEX fitting systems:
- How to Cut Copper Pipe
- Connect PEX With Viega PEX Press Fittings
- Connect PEX With Crimp Fittings and Stainless-Steel Clamps
- Connect PEX With ASTM F1960 Expansion Fittings and ProPEX Rings
- Connect PEX With ASTM F2080 Expansion Fittings and Compression Sleeves
- Connect PEX With Push Fittings
- Connect PEX With Crimp Fittings and Crimp Rings
- Connecting PEX Plumbing


View Comments
As you remodel, walls and ceilings open up. Instead of spot-fixing corroded copper pipe, replace as much as is visible with PEX pipe--entire runs, including tie-ins to toilet, sink, shower, etc.
Thank you very much for such fabulous idea.