Vent Flashing Done Right
Back up roof vent boots with flashing, counterflashing, and proper shingling to prevent leaks.
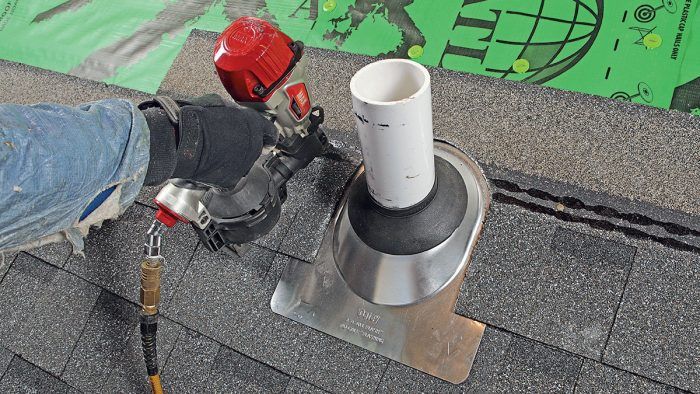
Synopsis: Mike Guertin describes his method for flashing roof vent boots, a main source of roof leaks. Because the vent flashing boot’s rubber collar is typically thin and seals only to the vent pipe, Guertin adds an additional seal with EPDM flashing tape with a butyl adhesive backing. In a series of step-by-step photographs, he shows how to flash the pipe, how to flash over and under the pan, and how to finishing by shaping the shingles.
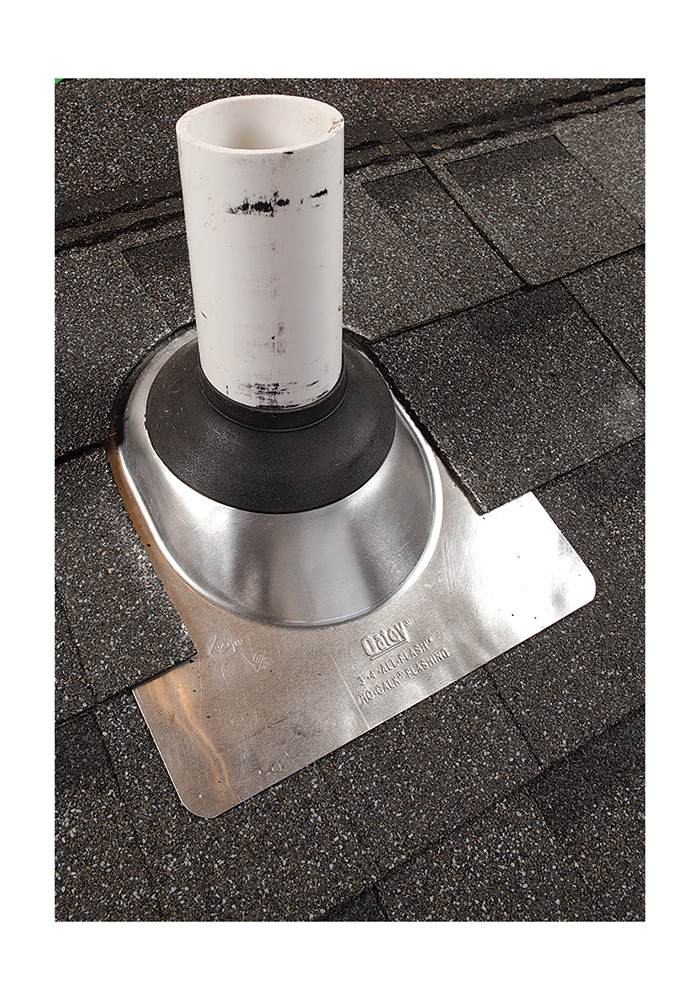
Roofs generally don’t leak in the field of shingles unless there is some kind of damage. Other than ice dams, leaks usually occur at flashings around chimneys, roof-to-wall connections, and penetrations like exhaust vents. Of all the calls to investigate roof leaks I’ve received in the last few years, there’s been one main culprit: plumbing vent flashing boots. Often I find the rubber collar on the boot has split or been damaged by a falling branch or a critter chewing at the rubber. In some cases, the collar is fine, but the leak is due to how the shingles were detailed around the flashing pan.
Whatever the cause, the leak can lead to damage. When the roof has a vented attic below, the leak usually evidences itself as a stain in the ceiling beneath the attic, with little damage other than to the drywall and paint. Where the leak can be more devastating is on roofs where the rafters or trusses have been insulated with spray foam applied directly to the roof sheathing. There, the leak can persist for years before it’s noticed, all the while rotting the surrounding sheathing and framing.
Rubber collar: the weak link
Today’s roof shingles are much longer lasting than earlier generations. Many vent flashing boots, on the other hand, haven’t improved to match. Most boots have a thin rubber collar that seals to the vent pipe. There’s often no additional seal beneath the collar, so if—or when—the collar is damaged or splits, water can find a path into the house. Whether using a standard vent flashing boot, as I did here, or one of the premium products, back it up by sealing the vent pipe to the roofing with flashing tape. I do this with 6-in.-wide strips of uncured EPDM flashing tape with a butyl adhesive backing. My preferred tape for this is Protecto Wrap’s Form Flash 2 EPDM. It’s durable, rated for UV exposure, and very flexible; it adheres and seals aggressively; and it works at low and high temperatures. You’ll need two strips of tape to flash the pipe to the roof, each at least 6 in. longer than the pipe opening so that they’re long enough to get a good overlap.
Flash the pipe
 |
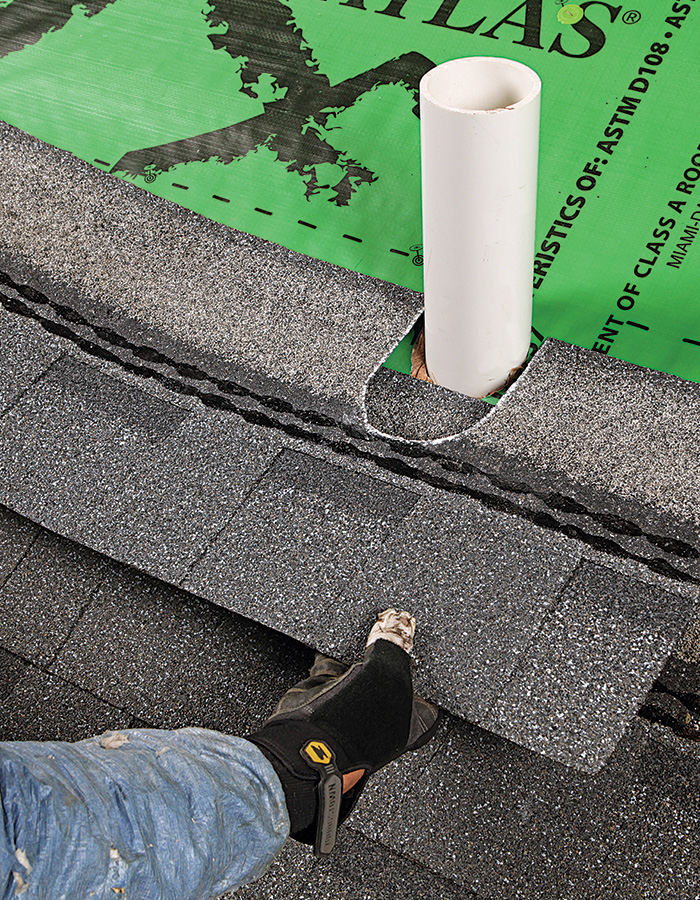 |
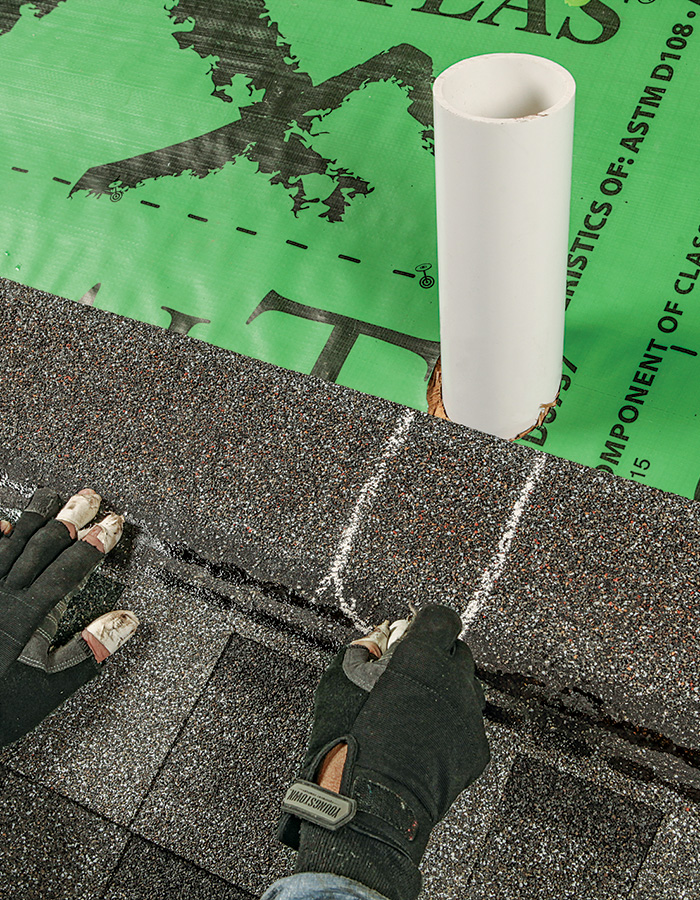
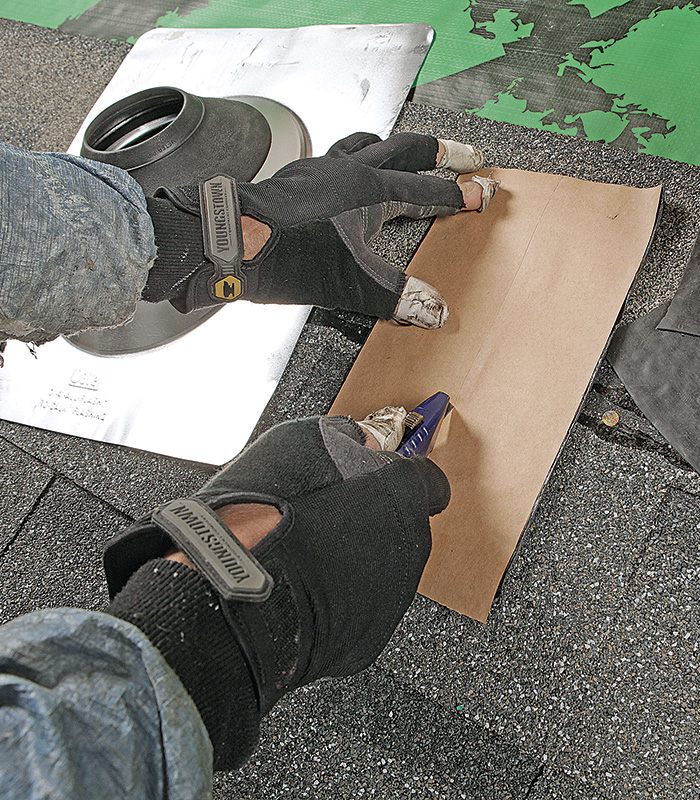
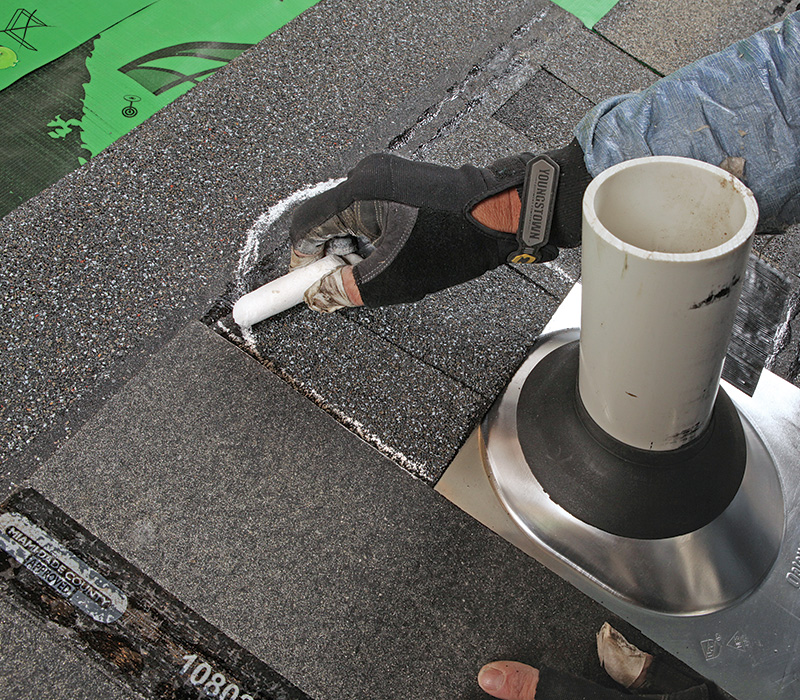
| Shingle up to and around the pipe. The top edge of the last course of shingles to go on before the flashing tape should extend at least to the middle of the pipe, but no further up than the self-seal strip on the shingle. Hold the shingle in place below the pipe and mark the cutout with chalk. |
 |
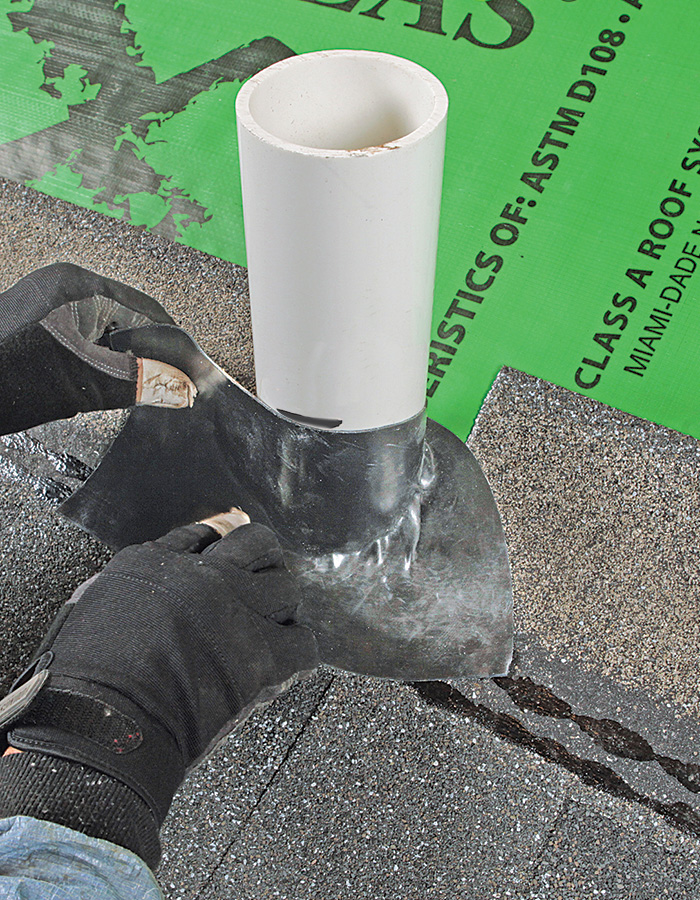 |
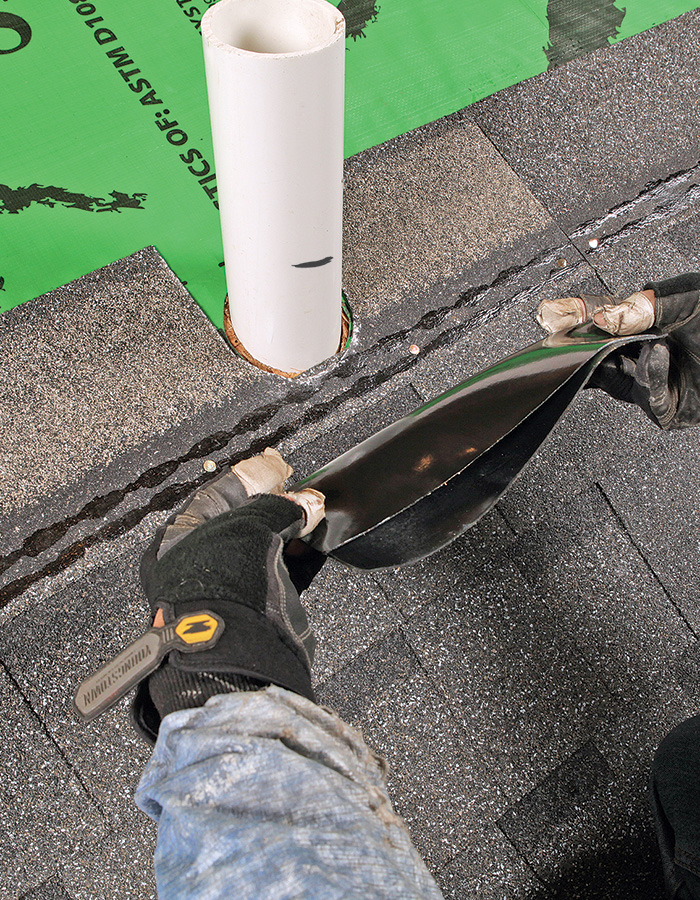
| Tape the downslope. First, mark a line on the pipe representing the top of the vent boot’s collar. Fold the tape in half lengthwise, with the adhesive side out, and, starting from the middle and 1 ⁄ 2 in. below the mark, wrap the tape around the pipe, working one side at a time. |
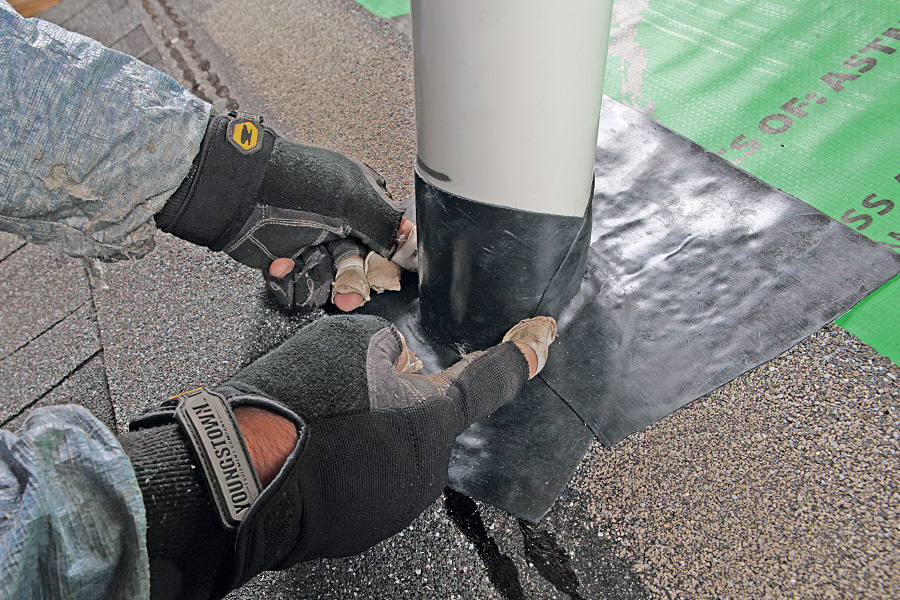 |
| Tape the upslope. Using the same method as the downslope side, apply the second piece of tape so it overlaps the first around the pipe, again staying 1 ⁄ 2 in. below the collar mark. |
Flash the pan like a window
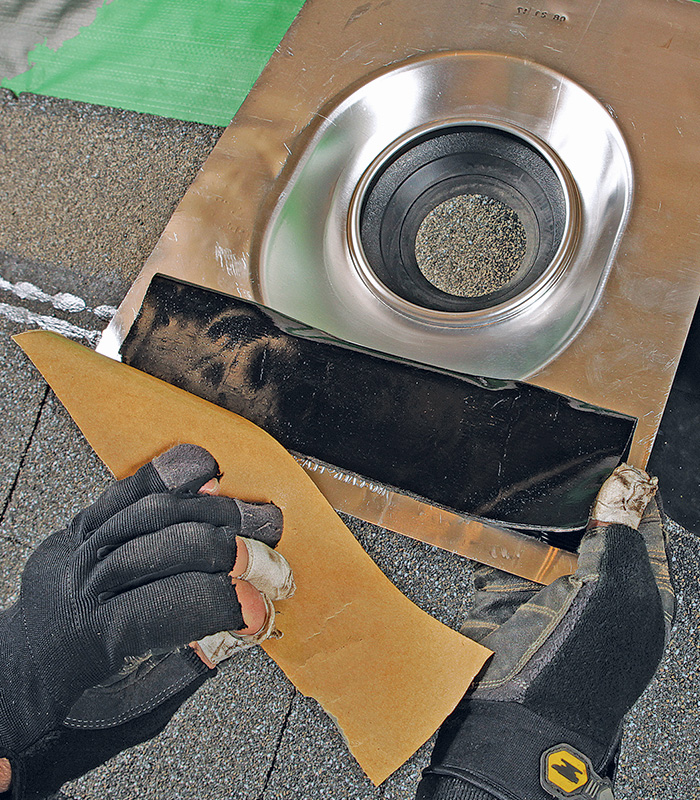
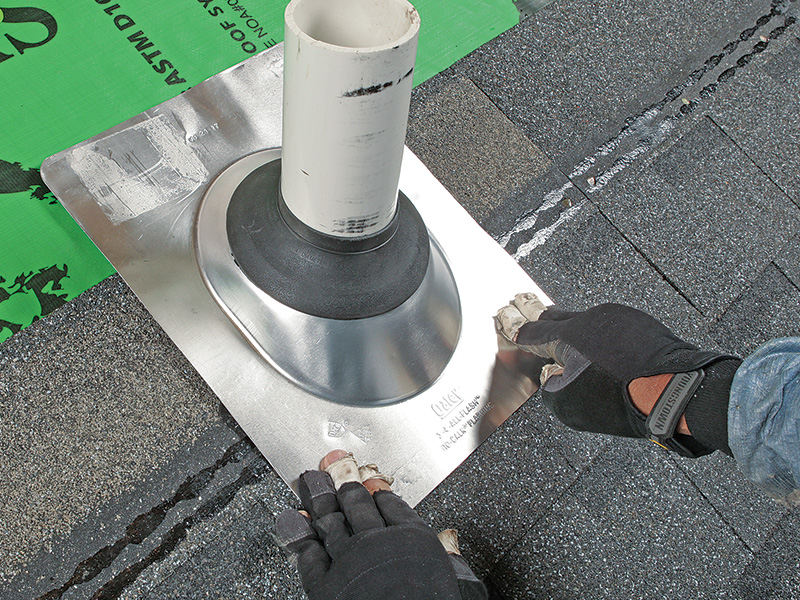
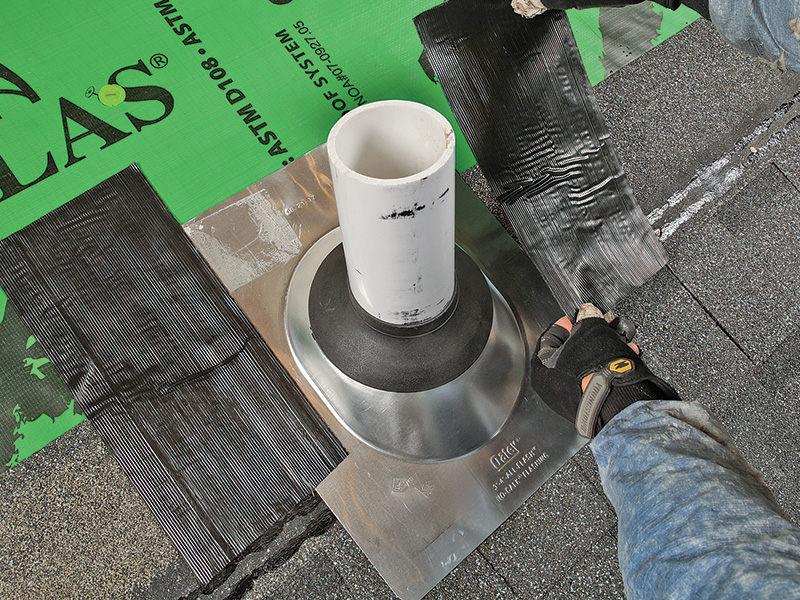
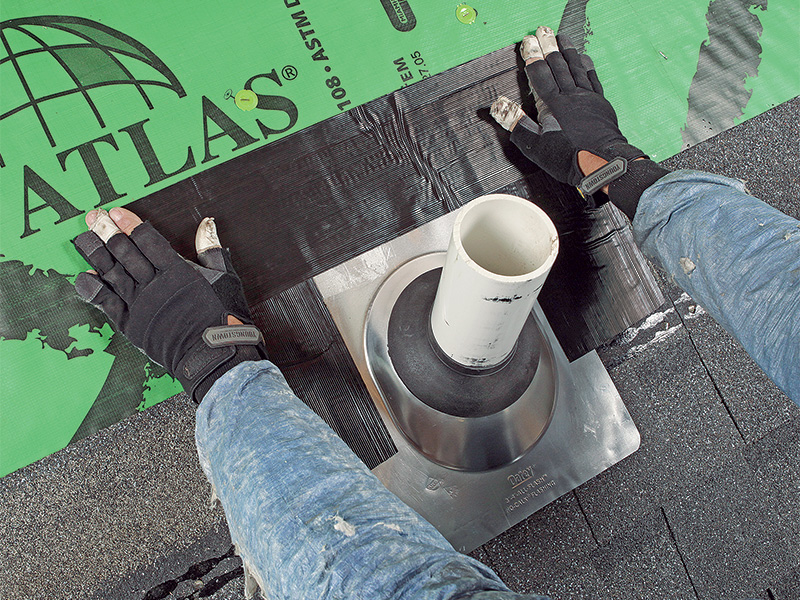
Pans for flashing boots don’t have a wide flange to overlap with the surrounding shingles. Most installers seal the shingles to the pan with roof cement, which may dry and crack (and leak) before it’s time to reshingle the roof. Instead of cement, I use flashing tape to extend the pan’s perimeter and seal it to the shingles and underlayment to make it more storm-resistant. I also add a rain dam strip along the underside of the bottom of the pan to bond the bottom edge to the shingle and resist wind-driven rain. After flashing the boot, I tuck an extra piece of underlayment beneath the next underlayment joint above, and lap it over the top of the boot’s metal flashing to serve as counterflashing, so the system doesn’t just rely on adhesive bonds to keep water out.
Flash under the pan
Flash over the pan
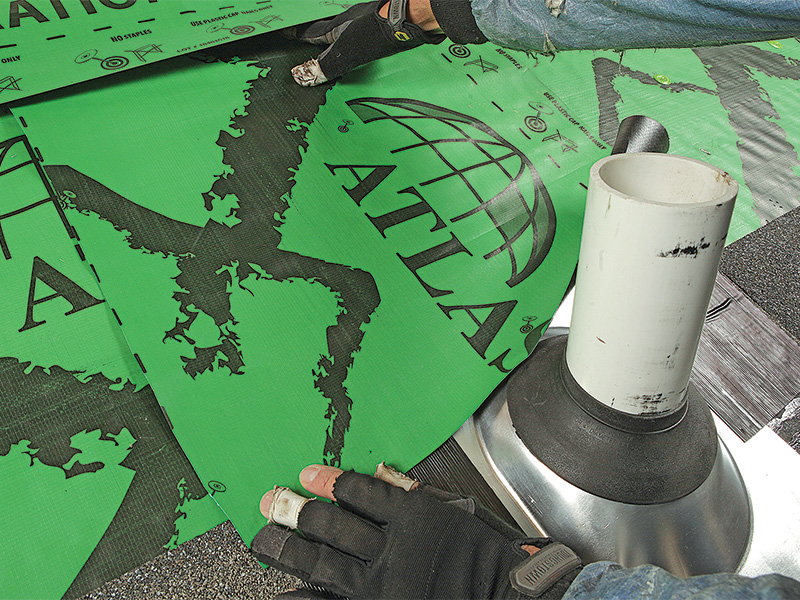 |
| Extra protection. Cut and install a piece of underlayment that laps 6 in. beneath the next underlayment joint above, and down onto the top of the flashing boot’s pan. |
Shape the shingles
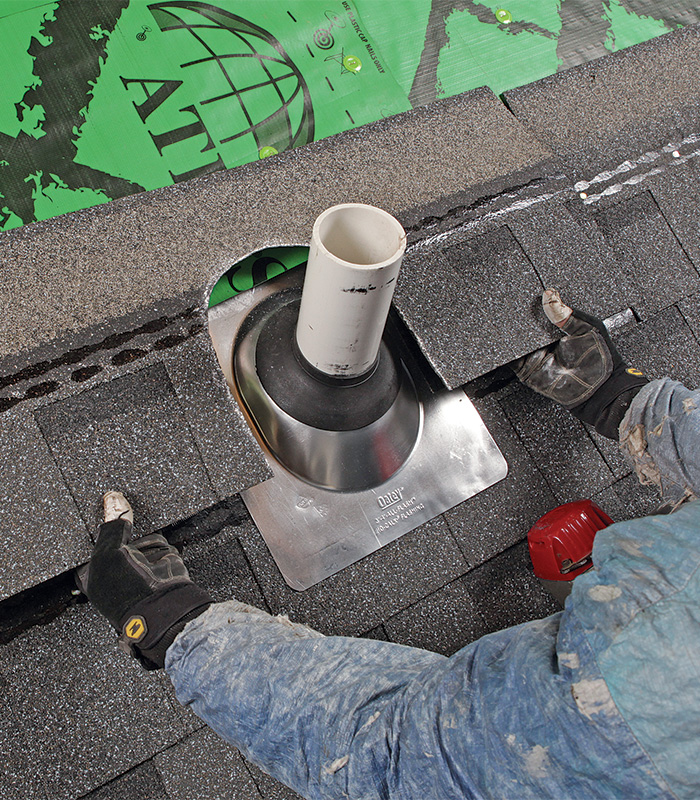 |
| Shingle on. With the cutout made, put the shingle in place. |
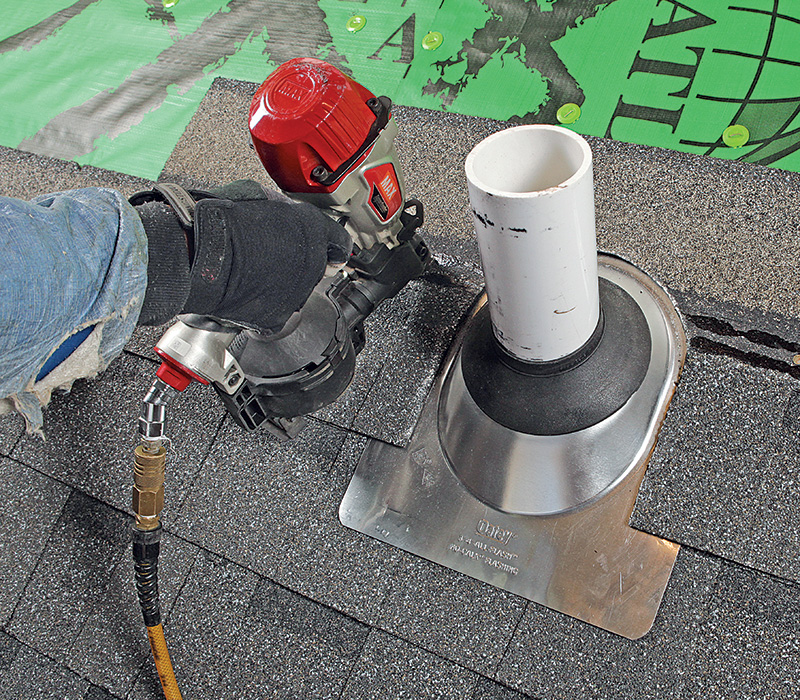 |
| Nail it. Depending on your shingle’s exposure, you’ll have to mark a cutout on the next course as well. |
Mike Guertin is Fine Homebuilding’s editorial advisor. Follow him on Instagram @mike_guertin.
Photos by Matthew Millham.
From Fine Homebuilding #276
For other articles related to this topic, please check out these links:
- Vent Flashing Done Right
- A Guide to Better Boot Flashings
- Back Up Your Vent Pipe Flashing
- Better Boot Flashings Last Longer, Seal Better
- Plumbing Vent Boot Flashing Repair: Method 1
- Plumbing Vent Boot Flashing Repair: Method 2
For details and many more photos in this article, please click the View PDF button below.
Fine Homebuilding Recommended Products
Fine Homebuilding receives a commission for items purchased through links on this site, including Amazon Associates and other affiliate advertising programs.
Roof Jacks
Flashing Boot Repair
Shingle Ripper



View Comments
I prefer lead flashing, though squirrels can chew on it.