Podcast Episode 133: Martin is Back!
Heat-pump efficiency at different altitudes, radiant barriers and heat transfer through a roof, and ways to retrofit insulation
Greenbuildingadvisor.com editor Martin Holladay returns to the show to tackle tough building science questions like heat-pump efficiency at different altitudes, radiant barriers and heat transfer through a roof, and ways to retrofit insulation.
Question 1, from Micah:
Hey guys, this question is a follow up on the discussion you had a few weeks ago regarding high-efficiency furnaces for the fellow in Colorado. Most of you chimed in that a heat pump would be the simplest solution. I live at 5000 ft. and am looking at replacing a 20-year-old furnace. I like the idea of installing a heat pump, but have heard that they don’t make sense at higher elevations, due to lower humidity.
First question: Is this true?
Second question: If it is true, how would you go about deciding what the best option would be, from a cost standpoint as well as an ecological standpoint?
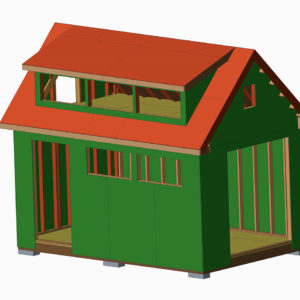
Hey Fellas, I have storage-shed project in my future this fall. My design is roughly the same size and shape as Justin’s “Budget-Friendly Shed” from Issue #258, but I’m going to add an attic floor. The thought is that my two young girls will use the attic as a playhouse/treehouse, and when they get a little older and no longer use it, I can reclaim the space for storage. Bill’s hot-porch-roof question from Episode 129 got me thinking about the temps in this space. The shed is going to be an unconditioned space. I planned to have continuous soffit vents and a ridge vent. The design has a shed dormer with awning windows. What else can I do to limit the heat gain in the attic play space? And since I’ll have two small noggins close to the underside of the roof, I guess I’ll need to address the nails coming through the roof deck from the shingles. Maybe there’s a solution that will help with both issues? I’d love to hear your input!
Question 3, from John:
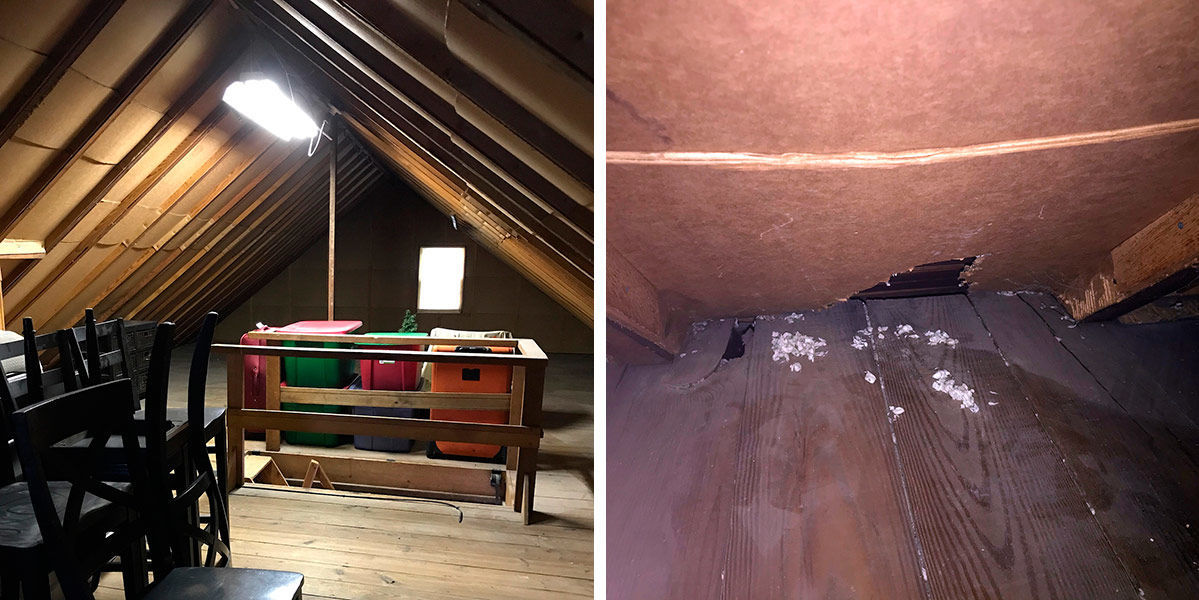
After buying our house, I noticed that one part of the roof is missing some insulation, down near the eaves. I’d like to replace it with a couple of 4-ft. Rockwool batts, which I discovered thanks to this podcast. Here’s my concern: The roof slopes through the second floor, such that the distance from the attic floor down to the subfascia is approximately 6 ft., and there are numerous roofing nails sticking out up to maybe 1 in. I’m uncertain how to push the first batt down to the edge of the roofline without compressing or tearing them by pushing on the end. There is some loose mineral wool lying in the cavity (which is the insulation used throughout the rest of the house, I think) that I hope I can remove with a shop vac.
The rafters are 2x6s, 20-1/2 in. on center. I’m pretty sure that means I’ll have to cut down 23-in. batts, and the best I’ll be able to use is R-23 Rockwool batts, which are 5-1/2 in. thick.
Is it even possible to install 4-ft. batts to the end of a 6-ft. cavity filled with nails without compromising R-value (as low as it may be by today’s standards)? Or should I just give up and hire someone to blow in cellulose? My experience in this area so far is that anything that requires hiring a contractor means substantial cost and several months lead time, so I’d really like to do it myself.
Question 4, from Bruce:
I am updating my family camp in the northern Adirondacks (Climate Zone 6) that was built in the early 1900s. We primarily use the camp from May through Labor day, with occasional ski trips in the winter. Heating is handled by woodstove and propane heaters, and the water is turned off in the winter.
We recently had the approximately 1700-sq.-ft. cottage seated on Techno Metal Posts and I-beams as the foundation. We replaced the failing floor structure with new 2×8 joists that have exterior XPS rigid foam below them, joist bays filled with fiberglass insulation, and housewrap as a vapor barrier below the subfloor. (This may be less than perfect, but it’s done and we’re learning.)
We also just rebuilt the entire roof assembly from the sills up, using 2×6 roof rafters, on top of which is 1×6 pine decking viewable from inside as the cathedral ceiling. Exterior of the pine decking is another 2×6 frame which is filled with closed-cell spray-foam insulation, covered with synthetic underlayment, and sheathed with metal roofing. Perhaps we should have used sheathing here too, but it’s also done now.
My question has to do with updating the wall assembly in the coming months. The current “assembly” is 2×4 walls with pine clapboard siding with lead paint and simple wainscot inside, with little more than mouse dung as insulation.
My idea for the wall assembly is as follows:
- Remove cladding
- Install and tape Zip System Sheathing against exterior studs.
- Outside of the Zip, install two staggered layers of foil-faced 1-1/2-in. XPS rigid foam and tape
- Install 1×3 furring strips as drainage plane outside of foam
- Clad with LP SmartSide or similar
- Inside, fill stud bays with Rockwool insulation.
- Finish interior with simple tongue-and-groove boards.
Given that we don’t use much heat or any A/C in the summer, and only use it a few weekends per winter with wood heat, do I need a vapor barrier in here? What are the weaknesses in this assembly?
Also, would it be OK for the foam to be exposed over the winter if we can’t get to cladding this season?
Question 5, from Kyle:
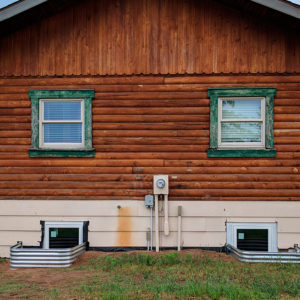
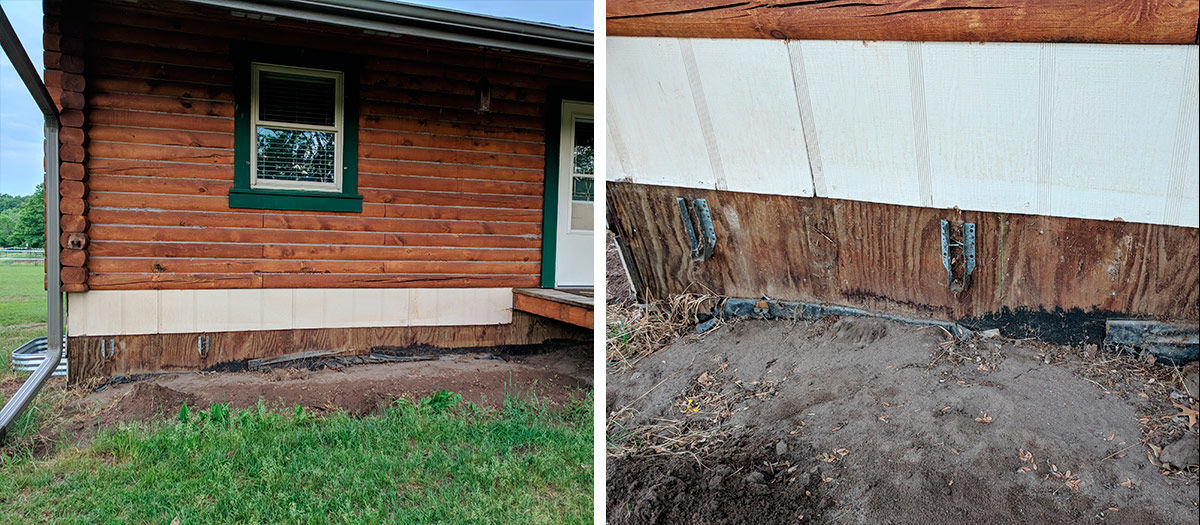
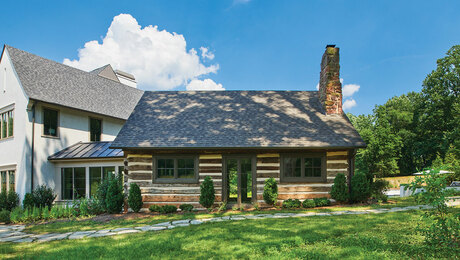
We (my wife and two kids) live in a log home built on top of a PWF (Permanent Wood Foundation) in Climate Zone 6A (Eau Claire, Wiss.). We are currently addressing the foundation, as the home was built in 1980 and needs some attention. In the front of the house the PWF is about 2 ft. 6 in. above grade, and as you make your way to the back of the house it is 4 ft. 6 in. above grade. Currently it is sided with pressboard (or hardboard) siding, which is more than likely original as it is not looking so good. Since it is a log home, we are trying to replace elements that require little maintenance, as maintaining the logs is enough work in itself. So, we are leaning toward corrugated steel siding to replace the pressboard. Currently there is nothing between the siding and the PWF sheathing (treated plywood). Where the siding ends, right above grade, there is black poly that has scrap pieces of plywood strapping to secure it to the PWF. My assumption is that this is continued down to the base of the foundation.
- Option 1: Excavate around the house. Apply new 6-mil poly right below the logs. Then apply 1-in. by 3-in. strapping horizontally, which will then be used to fasten the corrugated steel siding. Then obviously properly flash from where the logs and foundation meet, over the top of the corrugated steel siding.
- Option 2: Instead of poly, use a dimpled foundation mat. Apply that the whole height of the PWF. Could I then fasten the corrugated steel siding directly over the top of the dimpled mat, since it would have a drainage plain behind it? Or would I still need/want to attach some strapping? The challenge with no strapping is I would need to go through the corrugated steel siding and make sure to hit the PWF studs, which are 12 in. on center.
- Option 3: Install poly, then the dimpled mat over the poly. At that point should I install the dimpled mat starting at 6 in. above grade? That might be more of a pain as the amount of foundation above grade changes from the front to the back of the house. The question still remains—do I need strapping for the dimpled mat?.
This episode of the podcast is brought to you by OLFA.
This episode of the Fine Homebuilding podcast is brought to you by Benjamin Moore. Everyone can paint. This is true. But not everyone can get the project done right. And Benjamin Moore knows that’s why you’re on the job. You’re more than a paintbrush and a ladder. Your client can buy those things at a hardware store, but they hired you for your skills and expertise. You know every paint job is different and that it takes more than one coat for the best finish. Benjamin Moore believes in doing things the right way. Because everyone can paint, but to do it right, it takes an expert contractor, it takes more than one coat and it takes Benjamin Moore. Paint like no other.
This episode of the Fine Homebuilding podcast is also brought to you by OLFA. It’s time to upgrade your blade to a new OLFA Contractor Grade X-Design utility knife. Make blade changes quick and easy with OLFA’s super-strong snap-off blades. Work 25% sharper with their pre-loaded Ultra-Sharp, Black carbon steel blades. And work stronger with the durable fiberglass-reinforced anti-slip grip handles. Find OLFA X-Design in three contractor grade sizes: extra heavy-duty 25 mm, heavy-duty 18mm, and high-precision 9mm. Ditch your old knife and learn how to upgrade your blade at OLFA.com/FHB.
We hope you will take advantage of a great offer for our podcast listeners: A special 20% off discounted rate to subscribe to the Fine Homebuilding print magazine. That link goes to finehomebuilding.com/podoffer.
The show is driven by our listeners, so please subscribe and rate us on iTunes or Google Play, and if you have any questions you would like us to dig into for a future show, shoot an email our way: [email protected]. Also, be sure to follow Justin Fink and Fine Homebuilding on Instagram — and “like” the magazine on Facebook. Note that you can watch the show above, or on YouTube at the Fine Homebuilding YouTube Channel.
The Fine Homebuilding Podcast embodies Fine Homebuilding magazine’s commitment to the preservation of craftsmanship and the advancement of home performance in residential construction. The show is an informal but vigorous conversation about the techniques and principles that allow listeners to master their design and building challenges.
Links for this episode:
- Calculating the minimum thickness of rigid foam
- Rules of thumb for ductless minisplits
- Are radiant barriers necessary or even helpful?
- All FHB podcast show notes: FineHomebuilding.com/podcast.
- #KeepCraftAlive tee-shirts support scholarships for building trades students. So go order some shirts at KeepCraftAlive.org.
- The direct link to the online store is here.











View Comments
Anyplace in NYS w/o local building code is covered under NYS Building Code similar to IBC to
All towns have inspectors
Many are very serious even in most rural / poorest areas and vacation homes don't get cut a break usually
It is fascinating that all three of you find, presumably from experience across the country, find that rural areas are exempt from code and inspection. It speaks volumes for the lack of effective government in most states. Allowing novices to mistake their way to disaster and professionals to cost cut their way to millions is indefensible for any state govt which after all is only there to PROTECT the people.
Thanks for great SIMPLE explanation of proportioning perm non per insulation