Of Roof Decks and Duck Boards
As-Built: The History of Home Building
When I was a lad in the 1960s, “outdoor living” was confined mostly to masonry patios. The now ubiquitous wooden deck built of exposed dimensional lumber was rare, having only recently migrated from California (200-ft.-tall Redwood trees are scarce on Long Island). Some houses did have flat roof decks, built as a way of obtaining a view and catching a breeze—no small advantage in the days when most houses lacked central air conditioning. But in spite of the advantages, flat roofs were used sparingly, mostly as sleeping porches and balconies. The problem was the lack of a durable, low-maintenance membrane at a reasonable price, something that had plagued builders for a long, long time.
The largest flat-roof project I was ever involved in was during the restoration of Montpelier, the home of President James Madison. When Madison asked Thomas Jefferson to design wings for his existing brick Georgian residence, Jefferson specified flat roofs. Jefferson, the “great egalitarian,” found gable roofs to be distressingly common, and avoided them despite the lack of practical alternatives on the Virginia frontier.
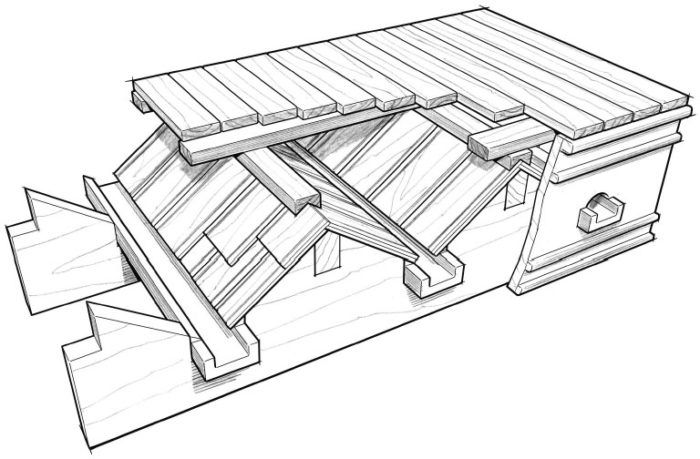
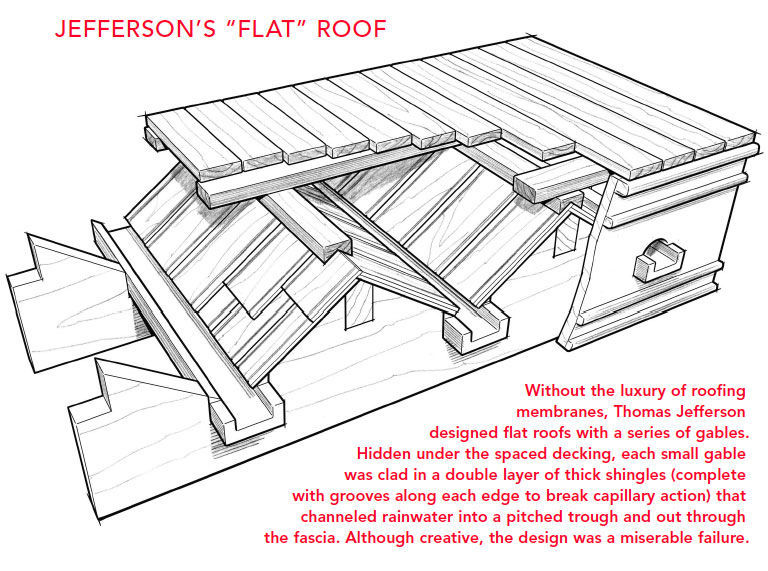
So, in the spirit of Jeffersonian self-contradiction, his flat roofs weren’t really flat; they were serrated, owing to the lack of a seamable membrane or even sheet metal. Essentially, the roof was a series of ridges and valleys, like a row of gable roofs attached side by side. Although his later flat roofs employed small sheets of tin as a valley flashing, the earliest versions were built entirely of wood. The ridges were covered with thick, nontapering shingles that extended into inclined troughs hewn into the lower joists, with a frieze concealing the zigzaggy ends of the rooflets.
Then, over all of this, the builders installed duck boards—panels consisting of sleepers overlaid with spaced decking—to protect the roofing and create a walkable surface.
By all accounts, the serrated roofs at Montpelier were a miserable failure. With a fireplace roaring on the inside during the winter and no insulation, water ran freely in the middle of the roof, only to be blocked by ice at the eaves. When Madison eventually sold his estate, the new owner lost no time tearing off those infernal presidential roofs and replacing them with a proper Virginia hip roof.
Long before that job, in the mid-1970s, I was a fledgling carpenter/handyman faced with my first flat roof deck. Built over a garage on a pre- World War II residence, the roof had tongue-and-groove fir deck boards that had been covered in canvas, which (I would find out later) was customarily pressed into a heavy paste of “white lead” (a sort of thickened oil paint). Through age or lack of maintenance, this membrane had deteriorated and now leaked.
Feigning competence, I attacked the canvas with a putty knife and soon discovered that its edges and seams were fastened with hundreds of copper tacks that refused to budge when the canvas was torn up, leaving crusty strands of cotton clamped under their tiny heads. The tacks had to be extracted one-by-one, a task I accepted with stoic resignation.
When I finally had the deck clean, I resurfaced it with asphalt “roll-roofing”—essentially the same stuff asphalt shingles are made of in the form of a 3-ft.-wide sheet. For low-slope applications, we used “double-coverage,” which had only half the width of the sheet surfaced with gravel. The ungravelled upper half was overlapped by the next course, with roof cement sandwiched between the layers. The process was smelly and messy but straightforward. The only other options were flat-seamed copper with soldered joints (which was expensive), or hotmopped tar (which was expensive and dangerous).
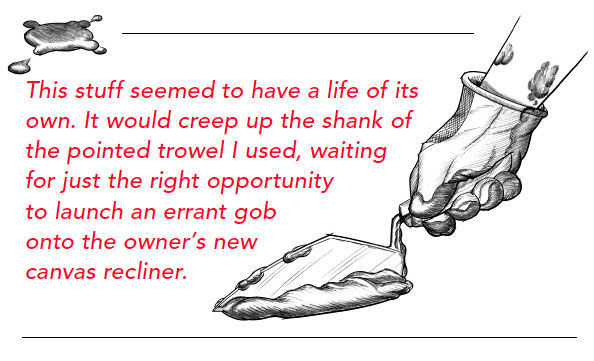
One of the challenges with roll roofing was keeping the viscous black roof cement from getting on your hands and your clothes. The stuff seemed to have a life of it’s own. It would creep up the shank of the pointed trowel I used, waiting for just the right opportunity to launch an errant gob onto the owner’s new canvas recliner. As my helper became acquainted with the ravages of the “Black Death,” he refused to bring his Volvo sports coupe to work for fear of defiling its cherry-red upholstery. I had to pick him up each morning in my liberally besmirched Chevy van.
When I became more of a contractor than a handyman in the 1980s, I was happy to hand off my low-slope roofing projects to a subcontractor. He used a roll product called modified bitumen, which has a nice scientific ring to it. We called it by its street name: “Torch Down.” Instead of gluing the laps, they were melted with a king-size propane torch. The finished membrane was a big improvement over asphalt roll roofing. It was tougher, lasted longer, didn’t shrink, and—best of all—didn’t involve any roof cement. The only drawback was that it could (and occasionally did) set the owner’s house on fire.
It was in the early ’90s that I first encountered EPDM, a rubber sheet adhered with contact cement. The material conforms neatly to a substrate, with just enough give to accommodate irregularities. Although the fumes are obnoxious and potentially flammable, there is no ever-present flame to worry about. (Water-based adhesive is now used widely, though it is slower to tack up in cold weather.) EPDM can withstand occasional foot traffic, and it even comes in white. The only improvement one could ask for would be greater longevity— the current life expectancy is 20 years. That becomes a problem when rubber on a low-pitch roof extends up under steep-roof claddings or siding materials that last longer. Claddings that are easy to remove and replace, such as asphalt shingles or lap siding, don’t present too much difficulty when it’s time to replace adjoining rubber, but wood shingles or a standing-seam metal roof are onerous to remove. On sidewalls, you can incorporate a removable trim board that will make future replacement of a rubber membrane less painful.
Whatever type of membrane or cladding is used for a flat roof, experience has taught me to educate myself on the details. The penalty for failure is high, and gravity won’t help much to cover sins. When the installation is complete, remember that golden adage: “Don’t expect, in-spect!” Crawl over the job with a fine-tooth comb before the siding goes on above the deck, and hold off on drywall below until the job has been tested by a few good rains or soaked with a hose. Don’t just look for drips—poke around between the framing with a flashlight and a moisture meter.
Of course, soliciting horror stories from other builders is a wise precaution as well. I certainly have some of my own to share.
Drawings: George Retseck
Old House Journal Recommended Products
Fine Homebuilding receives a commission for items purchased through links on this site, including Amazon Associates and other affiliate advertising programs.

Get Your House Right: Architectural Elements to Use & Avoid

Homebody: A Guide to Creating Spaces You Never Want to Leave
Flashing Boot





View Comments
Great account,brief but accurate. It doesn't matter how many hundreds of square feet you install, just one leak is a defeat.