Podcast Episode 141: Is Water-Heater Maintenance Worth the Hassle?
Removing a corroded anode, more talk about wet basements, recommendations for clear wood finishes, and deciding whether or not wood-burning fireplaces are safe in today’s homes.
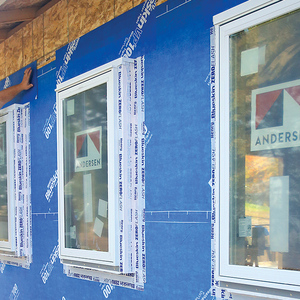
Patrick McCombe, Rob Wotzak, and Colin Russell kick off the podcast with a discussion about water-resistive barriers (the materials under your siding that protect the walls from moisture intrusion) before answering listener questions about prolonging the life of a water heater, dealing with humidity and rot in an old stone basement, providing makeup air for a fireplace, and finishing clear-cedar wainscoting.
Question 1: What’s the deal with water-heater maintenance?
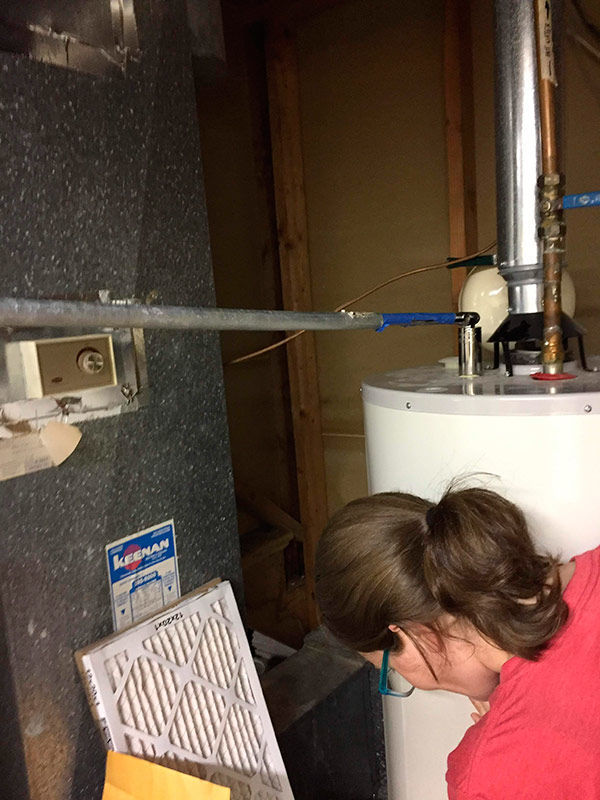
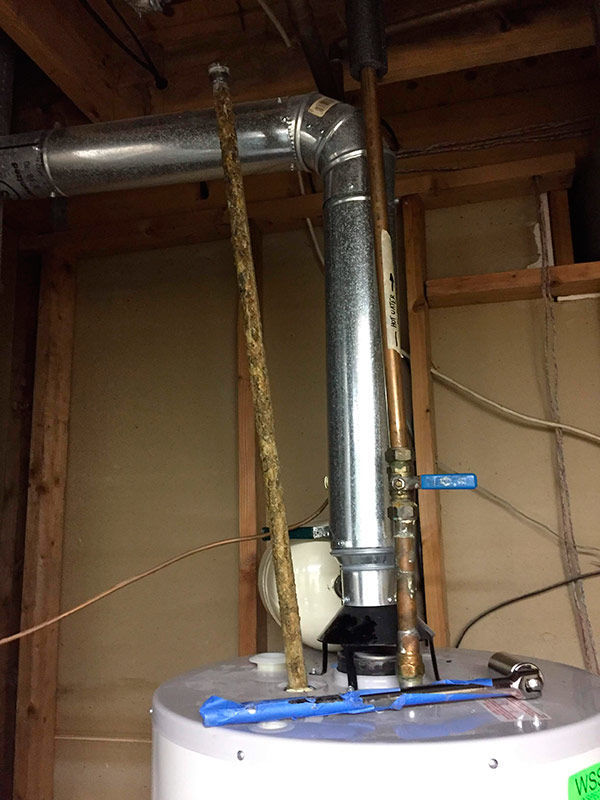
Jonathan writes: Gentlemen, I recently removed the sacrificial anode rod from my seven-year-old (gas-powered) water heater. It was a bear to remove. I needed 3 ft. of breaker bar to break it free! My wife held down the tank while I worked the wrench.
 |
 |
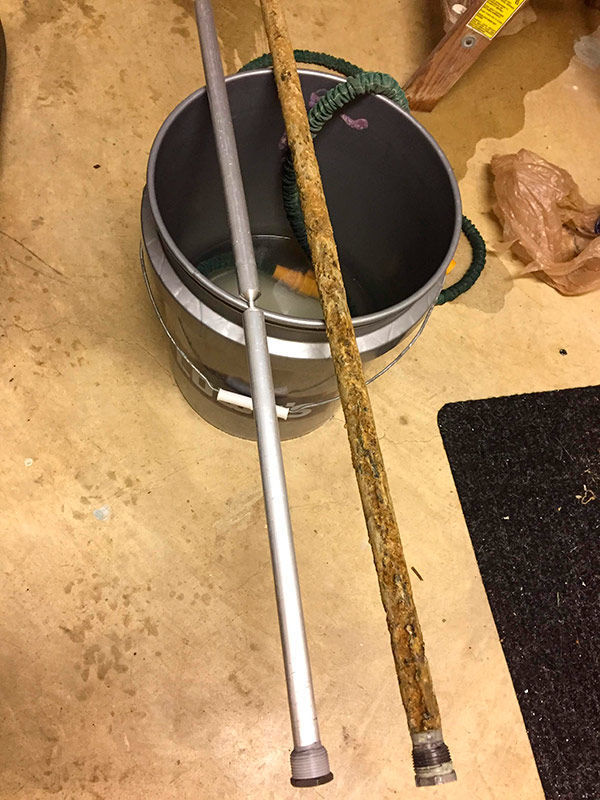 |
I have good reason to believe the previous owners never changed the rod or did any other maintenance, like periodically draining the tank to remove sediment. I don’t know any homeowner who actually has this important maintenance done. People just wait until it breaks and replace the whole dang thing!
I also drain the tank twice a year. It gives me great pleasure to see the rusty-colored water coming out of the tank.
My questions are:
- How often should anode rods be replaced?
- How often should I drain the tank?
- If I religiously maintained the tank, it could last for decades—right?
- What about plastic tanks? Is the extra cost worthwhile? I realize they are not compatible with gas.
Thanks for the great advice and inspiration.
Plumber Mike Lombardi suggests: An easy and effective way to lengthen tank life is to flush it at the drain cock at least twice a year; accumulated sediment at the tank bottom can insulate that portion of the tank from the protection provided by the anode. You can get an idea of how much sediment is present in your water supply by looking in a toilet tank. Water heater anode rods should be inspected every two years; however, water-treatment systems with ion-exchange water softeners can hasten the anode rods’ corrosion. Under those circumstances, the anode should be inspected once a year.
The water heater’s relief valve should be inspected and exercised yearly; this valve is one of the most important safety devices in your home. Installing a correctly charged thermal-expansion tank can add to tank life. Water-heater tanks expand and contract with fluctuating pressure and temperature; the expansion tank will absorb some of the excess pressure and reduce the stress on the tank.
Repair any obvious leaks, especially at the top of the water heater; even a small drip onto the jacket or tank can cause corrosion. Inspect all of the connection points at the tank, and carefully remove the thermostat covers on electric water heaters to inspect the heating elements.
There are electric-powered anode rods (electric anode on Amazon) that will replace the standard sacrificial rods; these anodes are permanent and do not corrode, and they can double or triple the life of a water heater’s tank.
In cases of extreme water-supply pressures (80 psi and up), water heaters (and the entire water piping system) will benefit from a pressure-reducing valve. These valves usually have a check feature that isolates expansion; a thermal expansion tank installed near the water heater is a must in these instances.
Residential private water systems always used to have a storage-type water tank with an air charge that would absorb heated water expansion. The new ECM constant velocity / pressure well water systems use very small “buffer” tanks that have little room for expansion.
Related links:
- Water-Heater Payoff: Will an Expensive Water Heater Save Enough Energy to Justify the Purchase Price?
- Plastic Water Heater With a Lifetime Warranty
Question 2: Wet and moldy basement
Spencer writes: Hey guys, I recently moved into a 1890 farmhouse near Lake Ontario in Canada. My cousins own the place and have been updating it over the last five years as they can, since they don’t live here, and all in all it’s doing OK. There was a large addition in the living room before them, the windows are pretty new double panes, there’s a new shingle roof, and some new electrical work, and the siding is vinyl and looks mostly well done.
The main issue I’ve found is the basement. The floor is a poured slab with one floor drain, and the stemwalls are a mix of poured concrete and stacked stone. A few years ago, my cousin and a handyman cut trenches in the concrete and filled them with gravel leading to a sump to help with standing water, of which there was plenty. The place still smells musty, and the old round timber rafters are spongy and molded. Someone added a few 2×4 support walls at some point, but they don’t look sufficient. Water generally drains away from the house, but not aggressively.
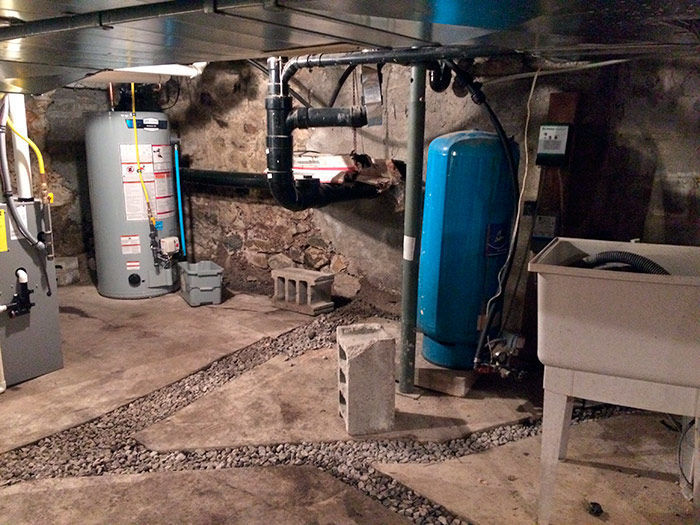
I’m concerned with three issues.
- Air-sealing the basement to isolate it from the main living space. A woodstove in the living room is the main source of heat, and there’s no makeup-air system, so I’m worried about drawing in nasty basement air in the winter when we have the fire going all day. You can smell this happening when you stand near the basement door. In addition to whatever we do, we’ll probably install a continuous fan to get some negative pressure in there.
- Moisture intrusion into the basement through the walls and floor. Particularly because the furnace and ductwork are down there, we’d have to be selective about what stays in the conditioned space.
- The structure. That is maybe priority 1, but pretty straightforward.
The basement houses the propane furnace and solid ductwork, which is new but is used less than the woodstove, water-purification system, and a small wine cellar. The ceilings are low, and it would be nice to be able to walk down there, but air quality and structural soundness trump extra space and storage.
I don’t think we could get under everything to run a continuous air or vapor barrier, but maybe we could spray-foam the walls and ceiling and leave the floor as is? Maybe it’s a combo spray-foam/vapor-barrier situation?
Curious what your take is. Budget is always a concern, but I’d say $10,000 is a doable amount to clean up our air.
Love the podcast. Cheers from Ontario!
Related links:
- Q&A: Wet-Wall Woes
- Top 10 Blunders That Rot Your House, Waste Your Money, and Make You Sick
- Building Science Insights: Rubble Foundations
Question 3: Clear finish on cedar wainscot
David writes: Hey guys, about a year ago I installed some cedar wainscoting and trim in my dining room. Shortly after installing it, I tested several oils on scrap pieces and settled on boiled linseed oil. I then used rags to rub on a coat and haven’t done anything to the wood since.
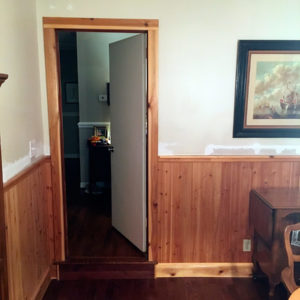
I also don’t really want to go with something that will give it a glossy finish, if I can help it. One of the reasons I went with the boiled linseed oil is because it didn’t give the wood a sheen. At this point, though, sealing it up is more important.
Eventually I’m going to change the kitchen’s window and door trim to match because it shares the same room space with the dining room. The window is over the kitchen sink, so that will obviously need to be sealed when it is installed.
A little background on its installation:
I knew little when I started, but I had ideas in my head that I wanted to do rather than following traditions or guidelines. So the wainscoting is about 8 in. to 10 in. higher than it should be (rather than 1/3 of the height of the room), and I had two tries at it before getting it all installed.
The first try was putting up the 1/4-in. tongue-and-groove by itself on blocking and studs. It became apparent quickly that wasn’t going to work because it’s way too thin to nail through the tongue or groove, and I didn’t want nail holes in the middle. Nor was there enough surface-area contact to use glue.
So I ripped those pieces out and added a layer of 1/4-in. underlayment. This allowed me to use adhesive on the boards and nail the ends that would be covered by trim.
For the trim, rather than pay through the nose for something custom, I bought 1×3, 1×4, and 1×6 boards and used roundover and roman-ogee bits in routers to make profiles.
I used a trim router for most of it, although the baseboard was such a pain that I managed to find a friend with a router table to help me finish that portion.
We insulated the exterior wall but left the interior walls empty.
Love the podcast. If this question is used on the show, let me know so I can jump ahead. I started with episode 1 when I began listening, and I’m only up to episode 114 so far.
Thanks guys, and keep up the good work!
Related links:
- Fine Woodworking Forum: Varnish on Top of Danish Oil?
- What’s That Finish?
- Interior Finish for a Timber Frame
Question 4: Smokey Smell
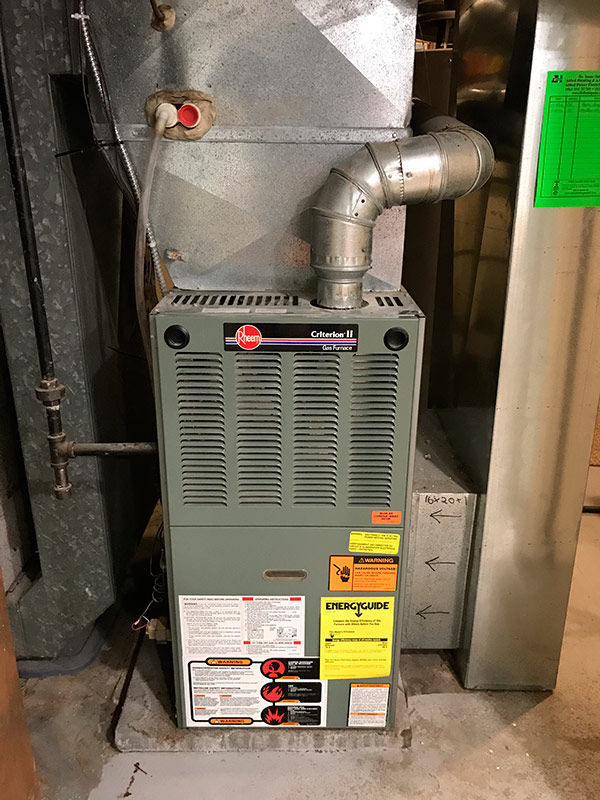
Michael writes: Gentlemen, I have a fireplace question tied to air-sealing, home pressure, and HVAC. I live in a 1922 colonial in Milwaukee that has been tastefully remodeled, including an addition, by prior owners. The house measures roughly 2700 sq. ft. and has two HVAC zones supplied by separate furnace and AC units. Both AC units are obviously outside; one furnace is in the basement, and one is in the attic. Both furnaces are 80% gas units with exhaust flues that lead out through the roof. The basement and the attic are within the home’s conditioned envelope. The basement is not finished, but it has a return duct and supplies. The attic has old rafter batt insulation along the roofline. The house also has a large, open wood-burning fireplace, which leads into my question.
 |
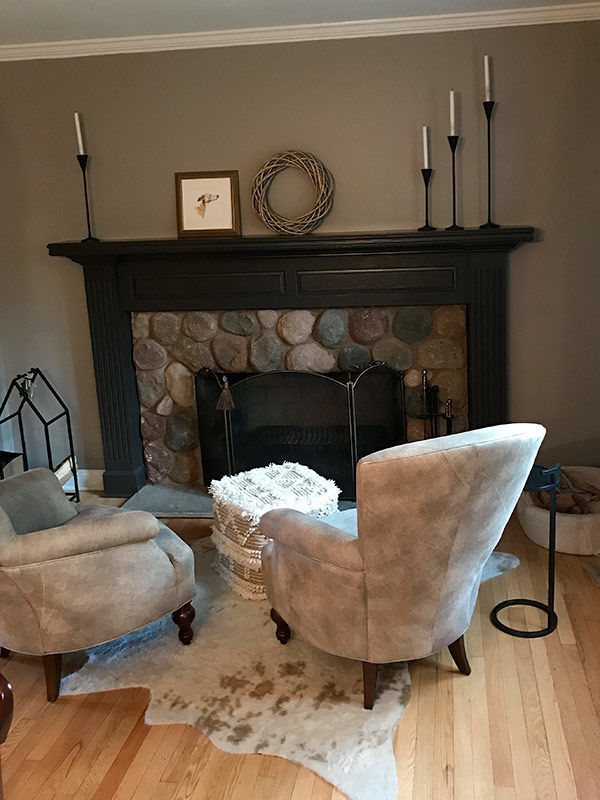 |
For 24 to 72 hours following a fire in the home, the first floor of the house will smell of creosote—not just in the room with the fireplace, but often even more so elsewhere on the first floor. Prior to our ownership of the house, the firebox and chimney top were rebuilt, inclusive of a damper on top. I had the chimney inspected and cleaned two months ago with no concerns identified in the report. I believe this to be a negative-pressure situation, but I don’t know how to remedy it. Last winter I attempted to pipe in a fresh-air intake with a damper into the cold-air return for the basement unit in hopes of providing an alternative for makeup air (assuming the house is pulling air down from our chimney). It’s likely from what I’ve read that our chimney damper, although tight, simply doesn’t seal enough to prevent inward airflow. Obviously humid outdoor conditions from fall rains amplify the issue. How can I solve this so my wife doesn’t put a halt to having fires altogether?
Appreciate any help you can offer. Thanks for your efforts. I’ve learned a lot from listening.
Related links:
- Brick Chimneys Are Incompatible With Airtight Homes
- Choosing a Chimney Flue-Top Damper
- Solving Severe Downdraft in Chimneys
This episode of the podcast is brought to you by Benjamin Moore, Titebond, and Versetta Stone.
This episode of the Fine Homebuilding podcast is brought to you by Benjamin Moore. Everyone can paint. This is true. But not everyone can get the project done right. And Benjamin Moore knows that’s why you’re on the job. You’re more than a paintbrush and a ladder. Your client can buy those things at a hardware store, but they hired you for your skills and expertise. You know every paint job is different and that it takes more than one coat for the best finish. Benjamin Moore believes in doing things the right way. Because everyone can paint, but to do it right, it takes an expert contractor, it takes more than one coat and it takes Benjamin Moore. Paint like no other. Visit BenjaminMoore.com.
This episode of the Fine Homebuilding podcast is also brought to you by Titebond. Bonding heavy materials to vertical surfaces is a real challenge. To meet that challenge, you need a durable adhesive with grabbing power you can trust. Titebond’s Ultimate TITEGRAB Adhesive has twice the vertical strength of most other adhesives, and is uniquely designed for bonding a wide variety of building materials, including, stone, brick, and concrete. TITEGRAB is ideal for indoor and outdoor applications, and is 100% waterproof. Available at building supply stores, lumber yards and home improvement stores. Visit TITEBOND.COM for more details.
This episode of the Fine Homebuilding podcast is also brought to you by Versetta Stone. Re-creating the beauty of stone starts by creating a revolutionary product. Versetta Stone is a one-of-a-kind, mortarless, cement-based stone veneer that installs with screws or nails. This unique panelized design allows contractors ease of installation, saving time and money without sacrificing beauty. Accomplish exactly what your customers are looking for with Versetta Stone. To learn more about Versetta Stone, visit VersettaStone.com.
We hope you will take advantage of a great offer for our podcast listeners: A special 20% off the discounted rate to subscribe to the Fine Homebuilding print magazine. That link goes to finehomebuilding.com/podoffer.
The show is driven by our listeners, so please subscribe and rate us on iTunes or Google Play, and if you have any questions you would like us to dig into for a future show, shoot an email our way: [email protected]. Also, be sure to follow Justin Fink and Fine Homebuilding on Instagram, and “like” the magazine on Facebook. Note that you can watch the show above, or on YouTube at the Fine Homebuilding YouTube Channel.
The Fine Homebuilding Podcast embodies Fine Homebuilding magazine’s commitment to the preservation of craftsmanship and the advancement of home performance in residential construction. The show is an informal but vigorous conversation about the techniques and principles that allow listeners to master their design and building challenges.
Links for this episode:
- Make More of Basement Remodels
- All FHB podcast show notes: FineHomebuilding.com/podcast.
- #KeepCraftAlive T-shirts support scholarships for building trades students. So go order some shirts at KeepCraftAlive.org.
- The direct link to the online store is here.









View Comments
Patrick noted his preference for asphalt impregnated tar paper as a WRB rather than plastic housewrap. I agree with that. He also noted that he likes to use #30 tar paper rather than #15 because it's heavier and that #15 tar paper only weighs about 7 lbs per 100 sq ft. The interesting thing to me is there's more than one type of #15 tar paper on the market and the IRC only permits one type to be used as a WRB - That's ASTM D 226 rated tar paper which weighs 11.5 lbs to 12.5 lbs per 100 sq ft. What you typically find in home centers and lumberyards is either unrated #15 tar paper that can weigh as little as 7 lbs per 100 sq ft or "roofing underlayment" which follows the ASTM D 4869 standard and weighs 8 lbs to 9.7 lbs per 100 sq ft.
Wouldn't it be nice if there was one standard for #15 tar paper.