Podcast Episode 143: Get Rid of That Scary Knob-and-Tube Wiring
The pitfalls of old house wiring, rotting retaining walls, and poorly installed shingle siding
The Fine Homebuilding editors discuss what to do if your house has an ancient electrical system, whether or not shoring up a steep hillside is a DIY project, and how much of a gap you really need to leave when nailing up cedar shingles. Plus, they sneak in yet another wet-basement question. As usual, they also share stories about their own home-remodeling projects.
Editors’ home project updates:
Rob Wotzak talks about ditching house projects to work on his classic pickup truck. He also wonders if using a thermostat-controlled fan to redistribute heat from a sunroom will use more power that it saves.
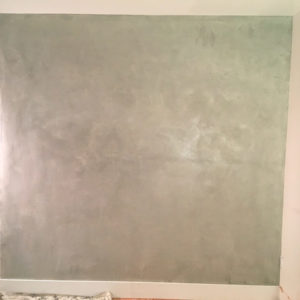
Matt Millham shows off his newly plastered wall and talks about the forgiving nature of lime plaster.
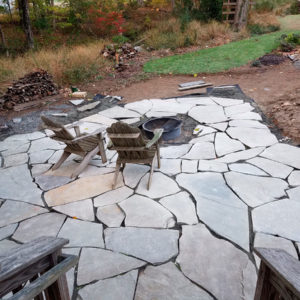
Patrick McCombe is still working on his stone patio, although the additional cost and effort has him contemplating using pea gravel for the remaining walkways in his yard.
Related links:
 |
 |
 |
Question 1: Is it safe to leave old knob-and-tube wiring in place?
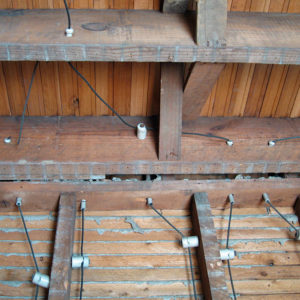
Because knob-and-tube wiring can’t be buried under new insulation, have an electrician replace any old wires in the attic before adding insulation. Ideally, all junction boxes should be raised above the level of the insulation. When elevating the junction boxes isn’t an option, you should install clearly marked permanent tags that can be seen above the insulation level.
While I am working in the attic, I like to install two electrical conduits (one line voltage and one telecom/low voltage) between the attic and the basement or the crawlspace to make any future wiring upgrades easier to accomplish.
Related links:
Question 2: Rescuing a rotten retaining wall
Jonathan writes: Hi guys, I have a retaining wall holding in my backyard from a relatively steep slope behind my house. The slope is more gradual on one side. I don’t know how old the wall is but it appears to be pressure treated 6 x 6 timbers in steps. Probably put in after the 46-y/o house judging by the condition of the wood. The top tier has poor drainage and no vertical timbers to buttress the retaining wall.
Since I took these photos last winter, a crevasse about 2 feet wide opening up in the dirt as the wall has slowly tilted further and further away from the house due to the pressure of the saturated soil. (All our downspouts terminate below the wall but the rain hitting the backyard has nowhere to go in this awful clay.)
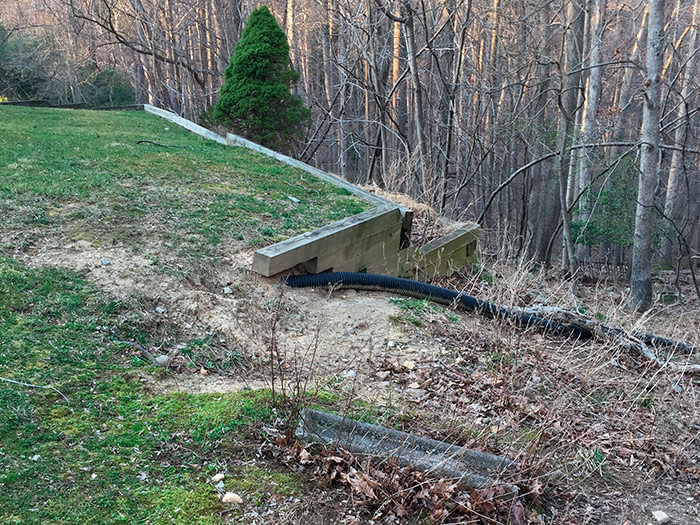
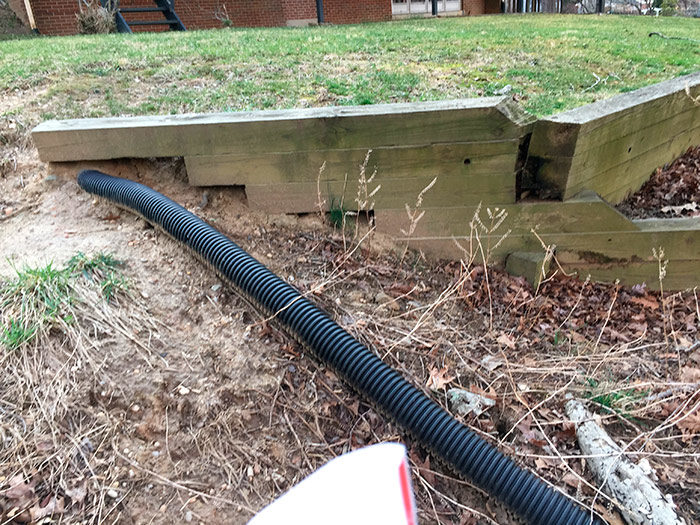
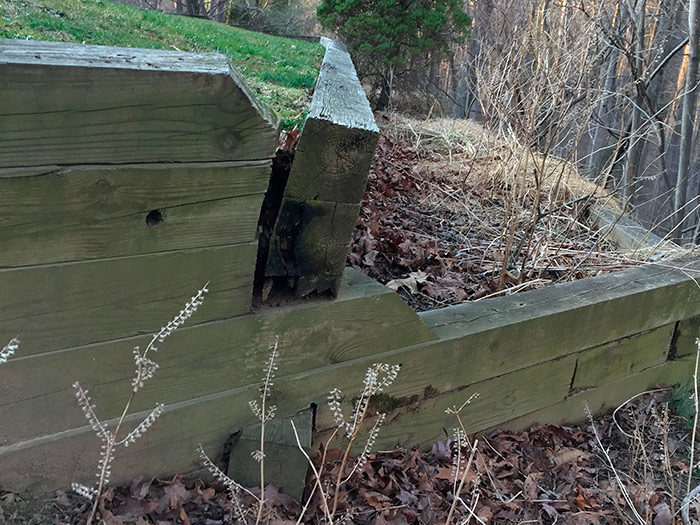
I thought about renting an excavator (first time) to dig a trench to re-plumb the top section of the retaining wall with new timbers. I’d make sure to put dead men in and some drainage system (French?).
Is this s job for a DIYer? Are there other options to save our backyard from eroding away like our neighbor’s? What about a riprap wall or giving up on the retaining wall and having a few loads of dirt delivered to create a more gradual slope? I’m curious to hear you unpack this.
Related link:

Question 3: Weepy Basement Wall
Podcast producer Jeff Roos jumps in with a question about his own home (we can’t seem to get through a week without bringing up at least one leaky basement!)
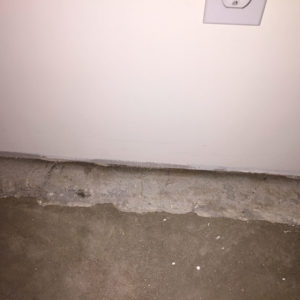
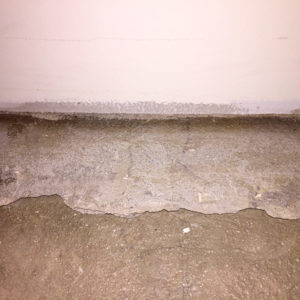
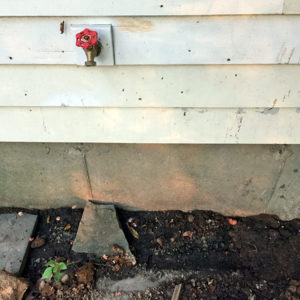
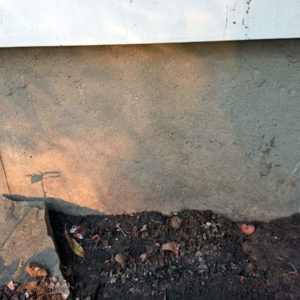
I have a walk out basement so the floor of the basement is about one to two feet above grade in the back of the house. Recently I noticed some dampness on the top the foundation wall in this area. I don’t know if the moisture is coming in under the mudsill or up through the concrete. I dug a small exploratory hole next to the foundation and the concrete doesn’t appear to have been sealed when the house was built.
If it’s coming in under the mudsill can use spray foam to fill the small gap where the clapboards hang down over the foundation? If it’s coming up through the concrete is there anything I can do short of excavating down to the footing and sealing it?
The attached photos were taken about 5 days after some heavy rain.
 |
 |
 |
 |
Related links:
Question 3: Gapping cedar shingles
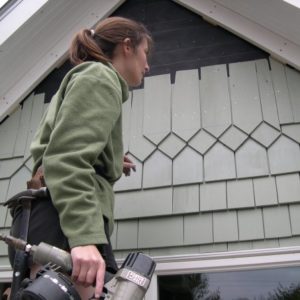
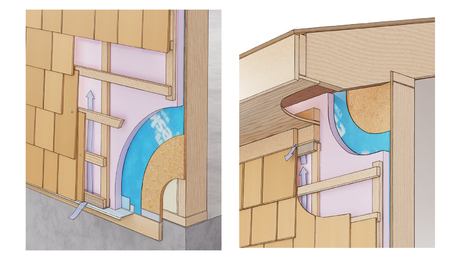
Every official looking installation details source, e.g. the Wall Manual from the Cedar Shake and Shingle Bureau, calls for keyways of 1/8″ to 1/4″ depending on individual shingle width. I’m trying to reconcile that with the seemingly high percentage of shingle sidewalls that I see around here (Pacific Northwest) done with the shingles butted tight to one another.
I’m generally a follow-published-practices kind of guy, but the keyed look is less appealing. I routinely see shingles butted tight with no visible ill effects and and I’m tempted to go for this, but I’m left scratching my head.
PREPARING TO INSTALL—GENERAL RULES
- It is best to work from the bottom to the top.
- Calculate the number of courses to be installed by measuring the surface area to be covered and divide it by the desired exposure.
- Adjust the exposure to produce even courses.
- Draw lines on the wall or use a board to align shingles horizontally. Use a story pole. Use a gauge block—5 in. scrap with fender washers screwed to bottom.
- Leave a keyway space of at least 1/8” between shingles. The edges must not touch.
- Use 2 fasteners per shingle at about 3/4” from each edge, and at 1” above the buttline of the overlapping shingle.
- The shingles come in random widths. Joints of successive courses must always be offset by at least 1 1/2. Never allow joints from any 3 consecutive courses to line up.
- Clearances are very important to ensure the performance of the shingle and maintain its warranty. The butt line of the starter course must have a minimum 6” clearance with the ground according to your local building code. Keep the shingles 2” from roof shingles
This episode of the podcast is brought to you by ProVia and BuildDirect PRO.
This episode of the Fine Homebuilding podcast is brought to you by ProVia—makers of vinyl siding, manufactured stone, and energy-efficient windows and entry doors. When you arrive at a new jobsite to replace a door and pull out your measuring tape does your heart sink when you discover the door is not a standard size? Custom sizes don’t have to be a hassle and they don’t have to be time-consuming. Every ProVia door can be built to a custom width and height and shipped off to you in two weeks. Talk to your local ProVia dealer to learn more. You can find them at Provia.com
This episode of the Fine Homebuilding podcast is also brought to you by BuildDirect PRO. Looking for quality flooring materials at wholesale prices, but also want to cut out that time consuming “looking” part? Stop driving from store to store searching for a product that might not even be in stock. Let BuildDirect PRO do it for you. For free. As a BuildDirect PRO you’ll be connected with a personal account rep that sources your products to spec, at the lowest tiered price, and manages the logistics and delivery of your order directly to your jobsite. Plus you get added perks like unlimited free samples delivered overnight, and up to $5000 credit on product purchases throughout the year. Join for free at BuildDirect.com/BDPros.
We hope you will take advantage of a great offer for our podcast listeners: A special 20% off the discounted rate to subscribe to the Fine Homebuilding print magazine. That link goes to finehomebuilding.com/podoffer.
The show is driven by our listeners, so please subscribe and rate us on iTunes or Google Play, and if you have any questions you would like us to dig into for a future show, shoot an email our way: [email protected]. Also, be sure to follow Justin Fink and Fine Homebuilding on Instagram, and “like” the magazine on Facebook. Note that you can watch the show above, or on YouTube at the Fine Homebuilding YouTube Channel.
The Fine Homebuilding Podcast embodies Fine Homebuilding magazine’s commitment to the preservation of craftsmanship and the advancement of home performance in residential construction. The show is an informal but vigorous conversation about the techniques and principles that allow listeners to master their design and building challenges.
Other related links:
- All FHB podcast show notes: FineHomebuilding.com/podcast.
- #KeepCraftAlive T-shirts support scholarships for building trades students. So go order some shirts at KeepCraftAlive.org.
- The direct link to the online store is here.








View Comments
Love the weekly podcasts and have listened since Episode One. Justin Fink has always been a mainstay, but suddenly he seems to have dropped off the planet without explanation. What happened?
Very useful information!