
How to Frame Walls Plumb and Straight
When carpenters use consistent and efficient methods for framing a house, it makes the entire build go much more smoothly.

Synopsis: Straight walls are important—for making a house look better and for making the construction process easier for everyone from plumbers and drywallers to finish carpenters and flooring installers. In this article, contractor Brian McCarthy describes his step-by-step process for making walls plumb and straight, including the right time to frame and straighten walls; the best lumber stock to use; and the sequence of mounting the bracing, plumbing the corners, and straightening the outside and inside.
Before becoming a full-time framing contractor, I spent some time in the Marine Corps, so it shouldn’t be surprising that I value becoming an expert through repetition. When my crew and I plumb and straighten the walls on one of our projects, we always follow the same steps and in the same order for two important reasons. First, when you do something the same way every time, it’s harder to forget a step. Second, knowing the steps makes a process more efficient by eliminating unnecessary and redundant movements. Straight walls are important. They make a house look better, and getting them right makes the construction process easier for everyone down the line. If you don’t get the walls plumb and straight, everyone from plumbers and drywallers to finish carpenters and flooring installers has a harder time making their respective parts of the house fit together and look good.
The right time
Although timing is not always something we can control, in general it’s easier to straighten the walls on frames that go together quickly in good weather. Walls exposed to multiple cycles of wetting and drying are the hardest to straighten.
There are two schools of thought among framers about the right time to straighten the walls. Some framers wait to straighten until all the interior bearing and nonbearing walls are in place, but I think the better way is to frame and straighten only the walls that are needed to get the next deck installed. This includes all exterior walls, interior bearing walls, walls with point loads, and any walls that might make framing the stairs easier. If you frame just what you need at this point, not only will you have less bracing in your way, but you will have more room to work when installing the floor joists or ceiling joists above. The remaining interior walls can be framed when the next deck is on and the ceiling is strapped. Plus, I find that the nonbearing walls go up faster and straighter when framed later because it’s so easy to transfer the layout to the ceiling with lasers and skip the straightening and bracing part altogether.
Where to start?
Making a house’s walls straight starts at the lumber pile. We use the longest, straightest stock for plates, and we pull our stud layout from an outside corner, almost always on the longest wall. We square and sheathe the exterior walls while they’re lying on the floor. We then stand the walls, plumb them, and tack the corners. Lightly nailing the corners allows us to straighten them later if things move, as they always do. When we install interior beams with multiple layers (either dimensional or engineered lumber), we tack the plies together with a framing nailer, but we don’t fully nail the plies tight. This means that they’re easier to push and pull when it’s time to straighten them. Once all the structural elements are in place, we install the second top plate.
Rim joist before string
With the second top plate in place, we install the rim joist by toenailing it to the top of the wall. Installing the rim at this point is much easier than when there are multiple braces holding up the exterior walls, which make it harder to move material and to position stepladders, and easier to knock something out of alignment.
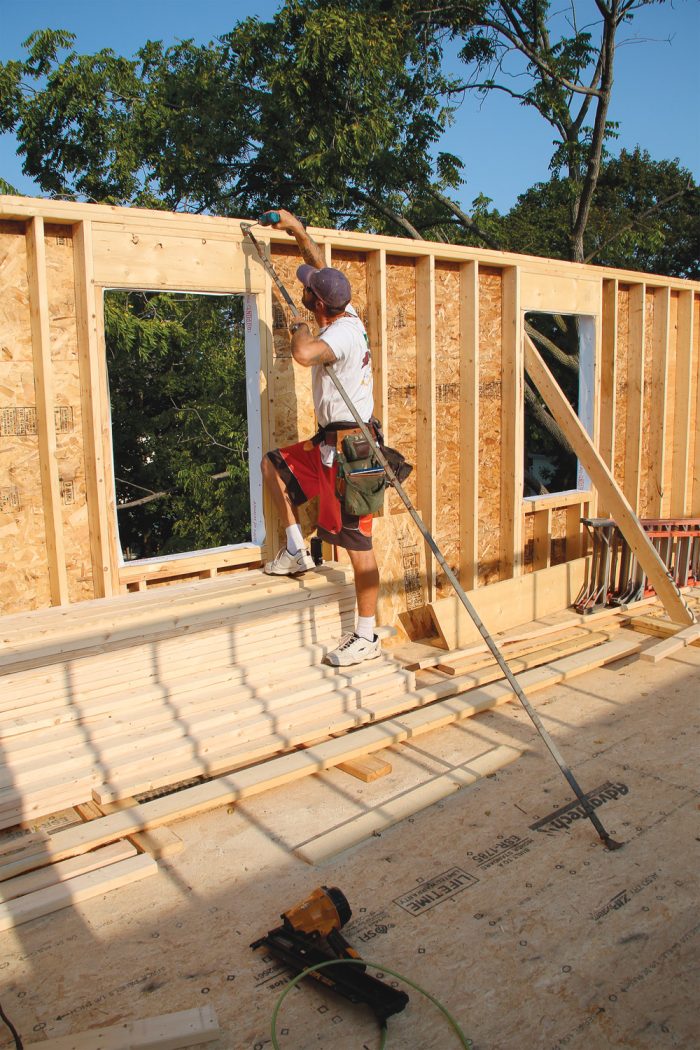
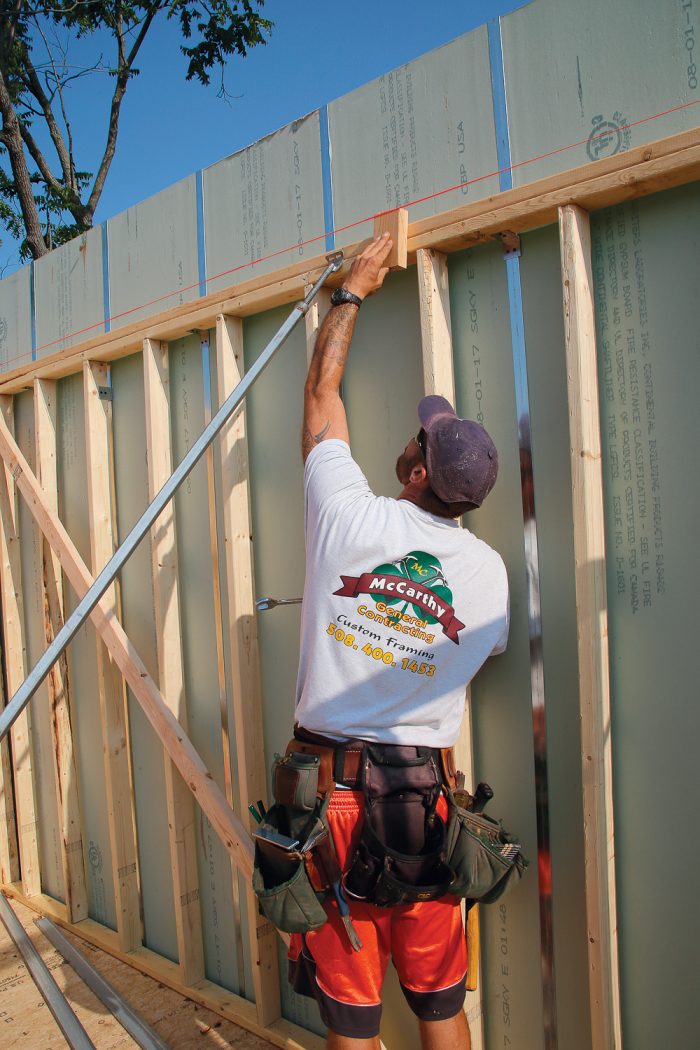
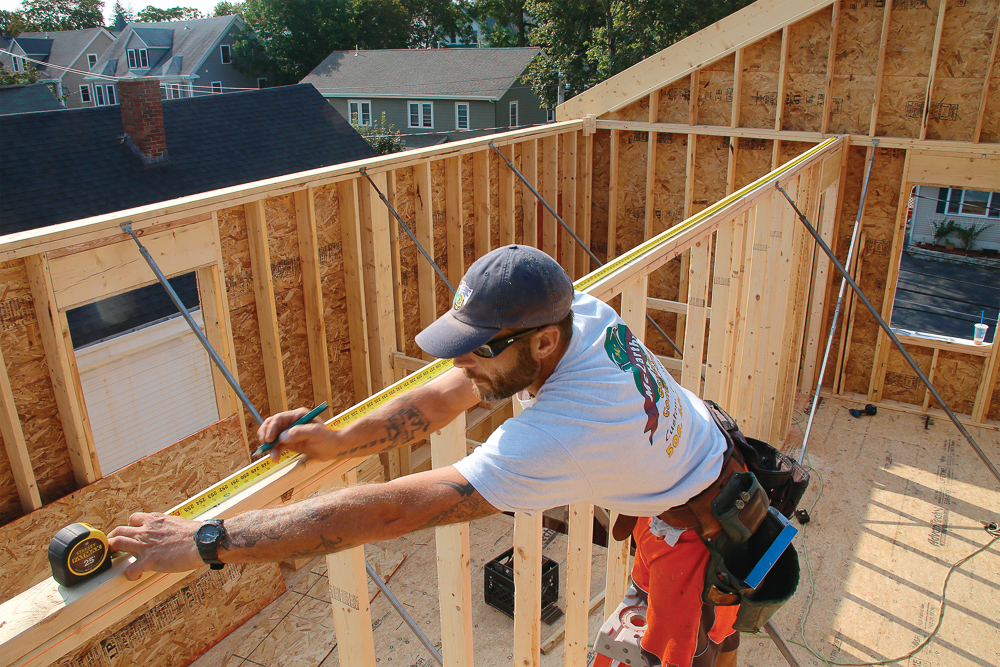
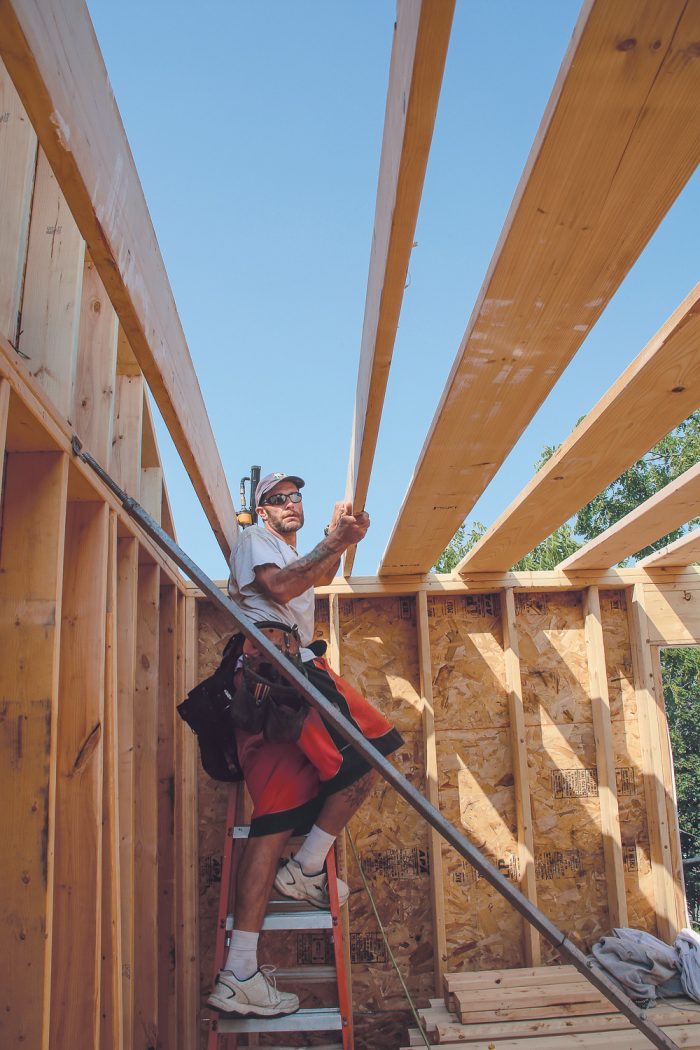
Once the rim joist is in place, we can straighten the walls. We start with exterior walls by stretching string along their interior. (If we’re plumbing and straightening the top floor, as in the photos, there is no rim joist. Instead, the rafters, not floor joists, bear on the top plate.) Often we stretch string on several exterior walls to save time. One carpenter on a three-person crew can be putting up the strings while the others are procuring the bracing from the tool trailer or the floor below. Using scraps of 2x lumber, we space the string 1-9⁄16 in. from the wall, which is just enough room to slip a 2x gauge block between the wall and the string.
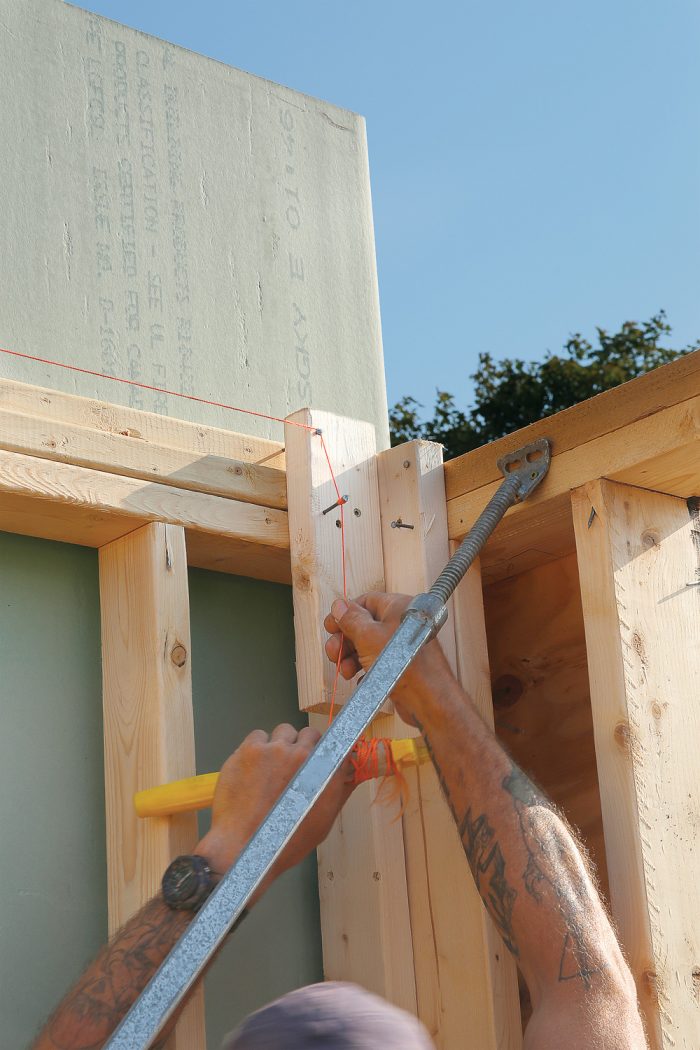
Install the bracing
Once the string is in place, we start fastening the adjustable wall braces (qualcraft.com) to the top plate, spacing them about every 8 ft., starting with one at the center of the wall. We make sure the threaded part of the brace is near the middle of its adjustment, and we fasten the top and bottom with 2-in. screws. These braces, which cost about $55 each, are a good investment for anyone who does even occasional framing. The brace’s large screw is adjusted with a 1-in. wrench from 10-1⁄2 ft. to 11-1⁄2 ft., so even the most resistant wall can be pushed or pulled easily and precisely. The wrench fits on the brace’s square tubing, so you can adjust it anywhere along its length.
Unlike when using wooden spring boards for straightening, the steel braces allow one carpenter working alone to straighten and plumb a wall. I have bought 20 of these braces over several years. In the early days, I got by with fewer of them by swapping the adjustable steel braces for wood braces as the walls were straightened. But now I have enough to frame a 5000-sq.-ft. house.
If you’re on a tight budget, concrete-form turnbuckles (ellismanufacturing.com) attach to 2x lumber and adjust in length similar to the Qualcraft braces and work nearly as well for $25 each.
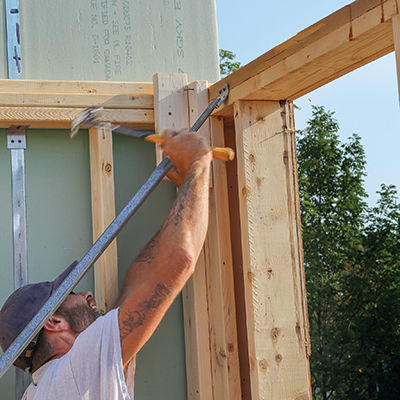
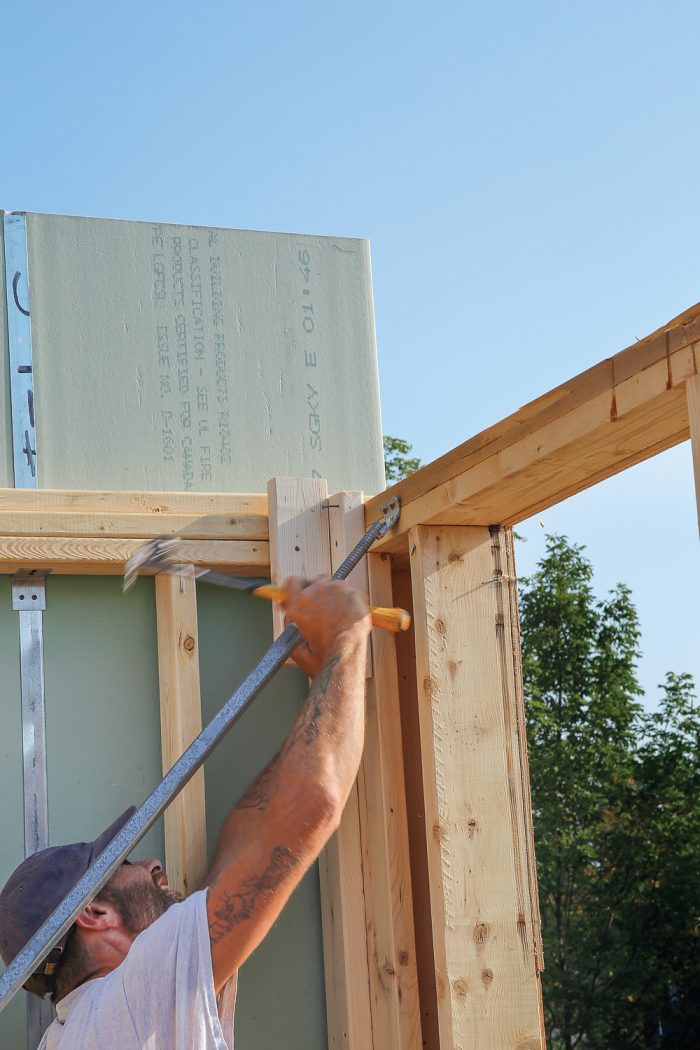
Plumb corners, then straighten walls
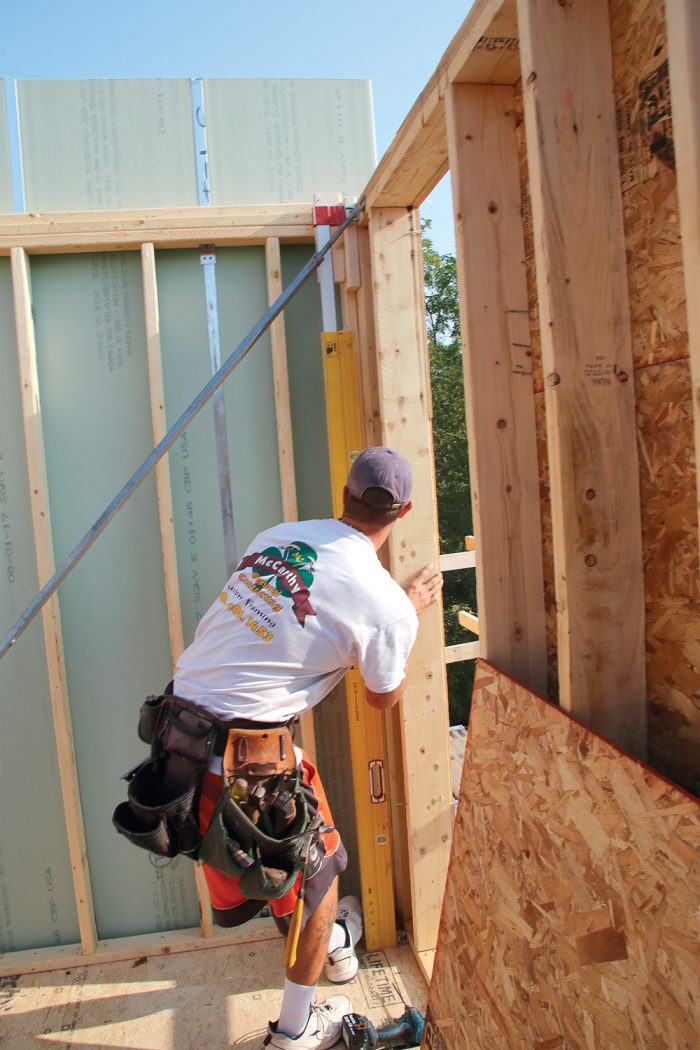
Once all of the braces are in place, we plumb the exterior corners using a plate level. The height-adjustable plate level only touches the wall at the top and bottom plates, keeping any warp in the studs from transferring to the level. When a corner is plumb in both directions, we fully fasten it together before moving on to the next corner.
After we have confirmed that all the corners are plumb, we move on to straightening the walls, generally starting with the longest exterior wall. Once that wall is straight, we proceed to the next-longest adjacent exterior wall until we’ve made it the whole way around the house. Then we plumb and straighten any interior bearing walls and any interior walls with point loads. Finally, we straighten any structural beams.
With all the structural elements on the floor plumbed and straightened, we frame and sheathe the floor above. This locks everything in place, so we can remove the bracing—which is in the way immediately after we’re done with it—and stand the partitions.
In our region, it’s common to install perpendicular strapping to the ceiling joists. This allows us to stand partition walls with the floor system above already in place. After we install the strapping on the ceiling, we snap lines on the floor to locate the remaining partition walls. We frame the partitions lying down on the subfloor and then raise them on the snapped lines. We plumb them with a level and make a few checks with a laser measure to ensure that everything is square. Then we slip in a second piece of strapping between the top plate and the strapping on the ceiling and nail through the top plate into the strapping above.
Mount the bracing
Plumb the corners
Straighten the outside…
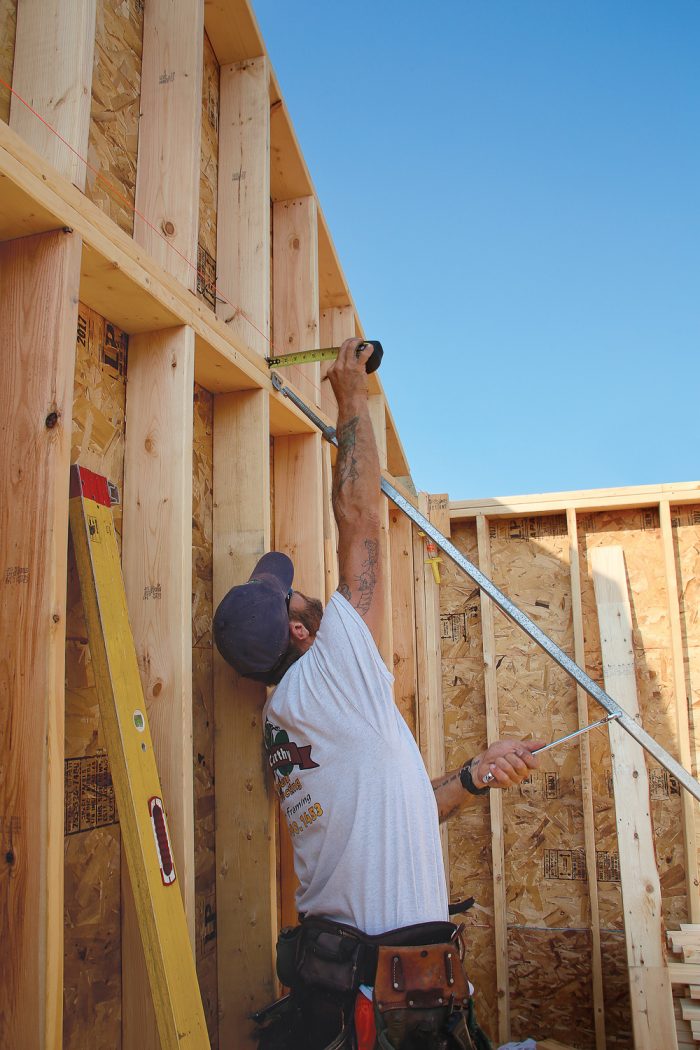
1⁄8 in. over 12 ft. if you’ve used straight plate stock that’s free of weird grain.
…Then move inside
Photos by Patrick McCombe.
More about framing:
From Fine Homebuilding #281
To view the entire article, please click the View PDF button below.
Fine Homebuilding Recommended Products
Fine Homebuilding receives a commission for items purchased through links on this site, including Amazon Associates and other affiliate advertising programs.

Speed Square

Tajima Chalk Rite Chalk Line

Sledge Hammer

View Comments
It's fantastic!!
Very good sir!
Psssh! I don't think the framing crews who do most of the houses in my area even know how to used a level or plumb bob. They are hard workers, though. And cheap!
Very nice!
very hardworking
nice sir
fascinating
excellent work
good job!
Sorry about the late comment but just saw this in my feed and I had to add my two cents. I've only been doing this for 42 years but if you skip the step of adding the non load bearing walls and do them later then all you are doing is creating much more work for you later on. Trying to frame those walls later will cause so many unnecessary problems I'll try to name only the most obvious.
1) Your bracing for the other walls will be in your way for framing the missing walls.
2) Adding your top plate for the new walls will be really hard to do.
3) Not having some of those interior walls in place removes some of the walls you could use to add bracing to for when you plumb the other walls.
4) The other thing missing is on the walls that he is bracing he has nailed off the sheeting but he hasn't put in the required blocking between the studs prior to nailing off the sheeting. If he has any bowed studs it will be difficult to put the blocking in and he will have to custom cut each or many of the blocks going in.
I do like the brace he is using to rack the wall though.
Joe