FHB Logo Facebook LinkedIn Email Pinterest Twitter X Instagram Tiktok YouTube Plus Icon Close Icon Navigation Search Icon Navigation Search Icon Arrow Down Icon Video Guide Icon Article Guide Icon Modal Close Icon Guide Search Icon Skip to content
Subscribe
Log In
  • How-To
  • Design
  • Tools & Materials
  • Restoration
  • Videos
  • Blogs
  • Forum
  • Magazine
  • Members
  • FHB House
  • Podcast
Log In

Fine Homebuilding Project Guides

Finish & Trim Carpentry

Guide Home
  • Trim Design
  • Tools and Materials
  • Interior Trim Basics
  • Window and Door Casings
  • Baseboard and Crown Molding
  • Wainscot and Paneling
  • Mantels and Fireplace Surrounds
  • Coffered Ceilings
How-To

Precision Window Trim

This systematic approach to cutting and assembling window casing ensures better joints and a faster installation.

By Anthony Vitale Issue 281 – Feb/Mar 2019
  • X
  • facebook
  • linkedin
  • pinterest
  • email
  • add to favorites Log in or Sign up to save your favorite articles

Synopsis: Finish carpenter Anthony Vitale explains his approach to window and door casing. He starts with tips for repairing window and door jambs so they won’t complicate the trimwork, including the window trim. He then details the production of the casing, including tips for efficiency when cutting and gluing (which he does on a table to guarantee the joints will come out right) and a step by step process for assembly.


Somewhere along the way, we’ve decided that it’s the apprentice’s job to run base or to find and mark studs. There’s nothing really wrong with that, but I also like to throw window and door casing into the mix. The skills required to case an opening are fundamental to finish carpentry, and the conditions are pretty similar from one opening to the next. Learning how to case from the get-go teaches you prep; detailing; nailing pattern; understanding the difference between level, plumb, and straight; and how to set and sight reveals. You’ve got 12 different tools you’re going to use to get through the process.

The method I teach apprentices started somewhat out of frustration. Various factors can throw off miter joints when you stick-build a casing around an opening, and it can take a lot of time and effort to get the joints right. Throw a junior carpenter into the mix and the results aren’t always great. But that’s not the case with bench building. Doing the assembly work on a tabletop takes the irregularities of an opening out of the equation and makes the process simple enough that anybody on the crew can do it. That frees up senior carpenters from having to micromanage and troubleshoot, and makes it easy to scale up for big jobs.
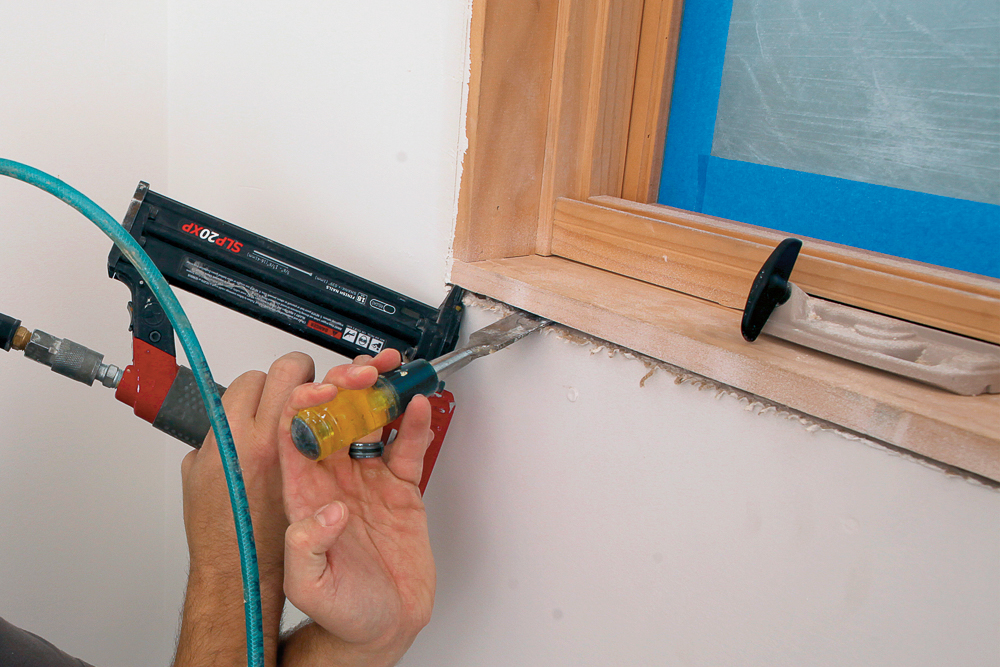
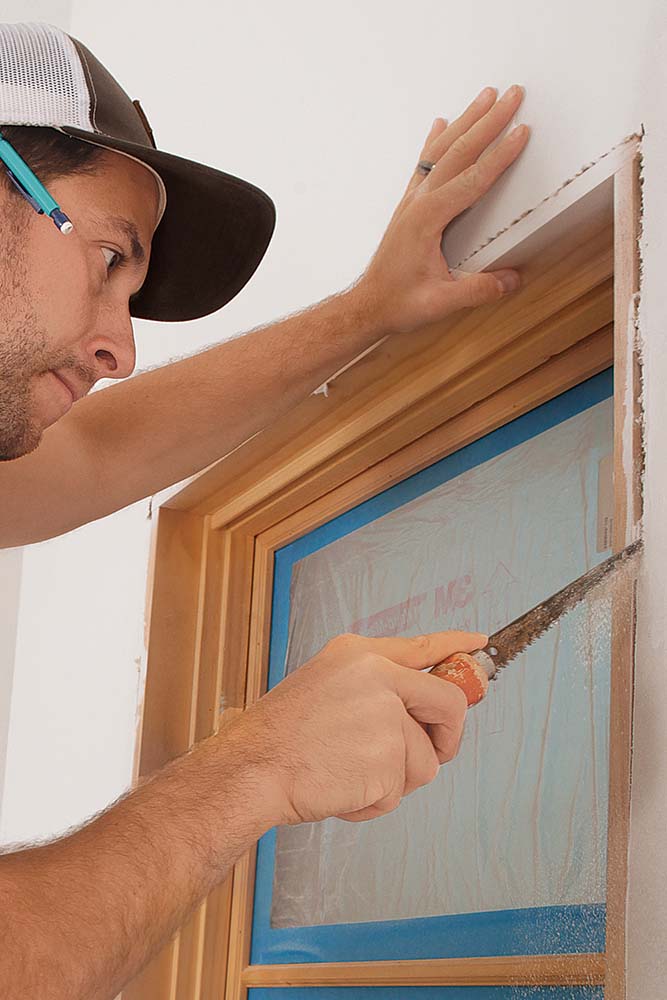
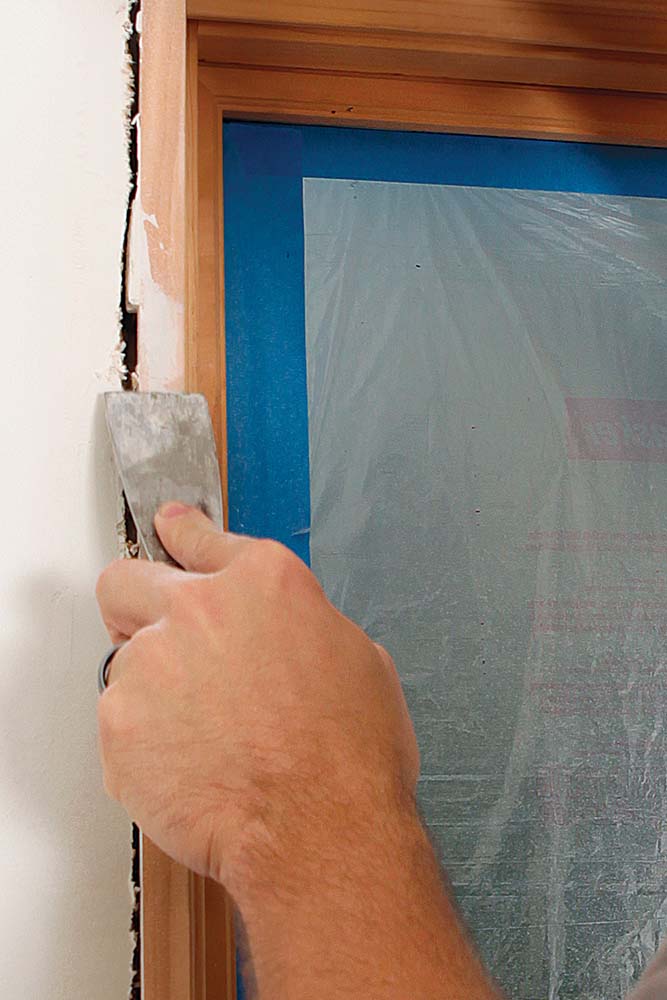
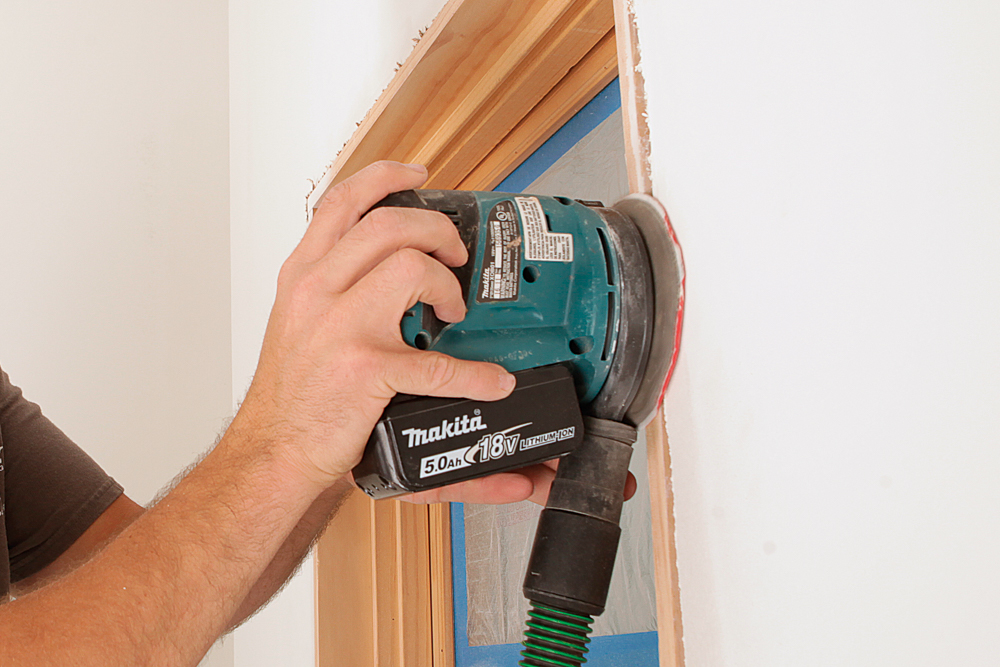
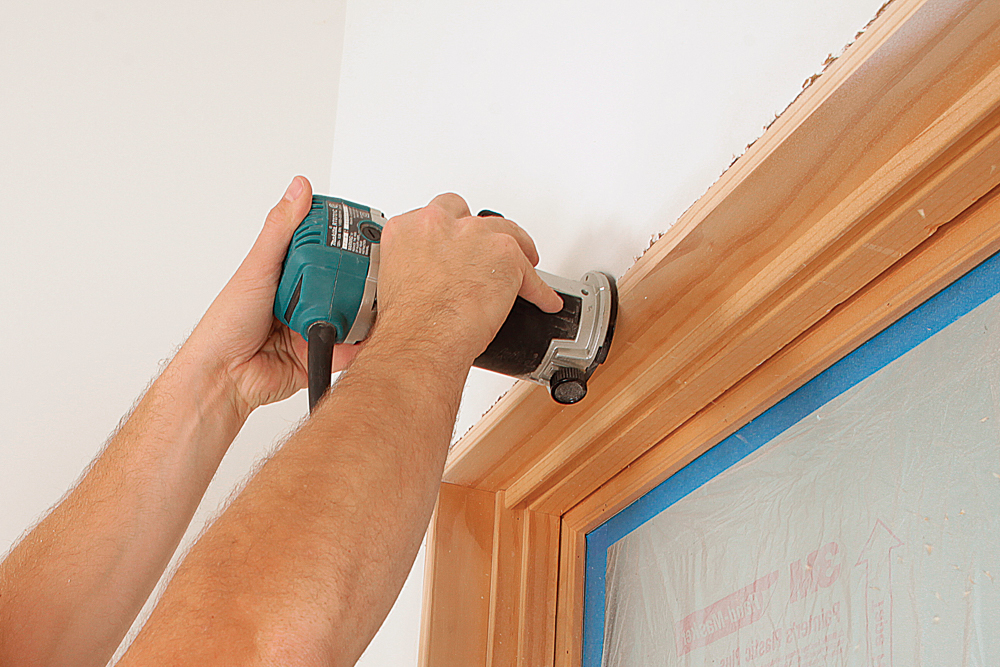
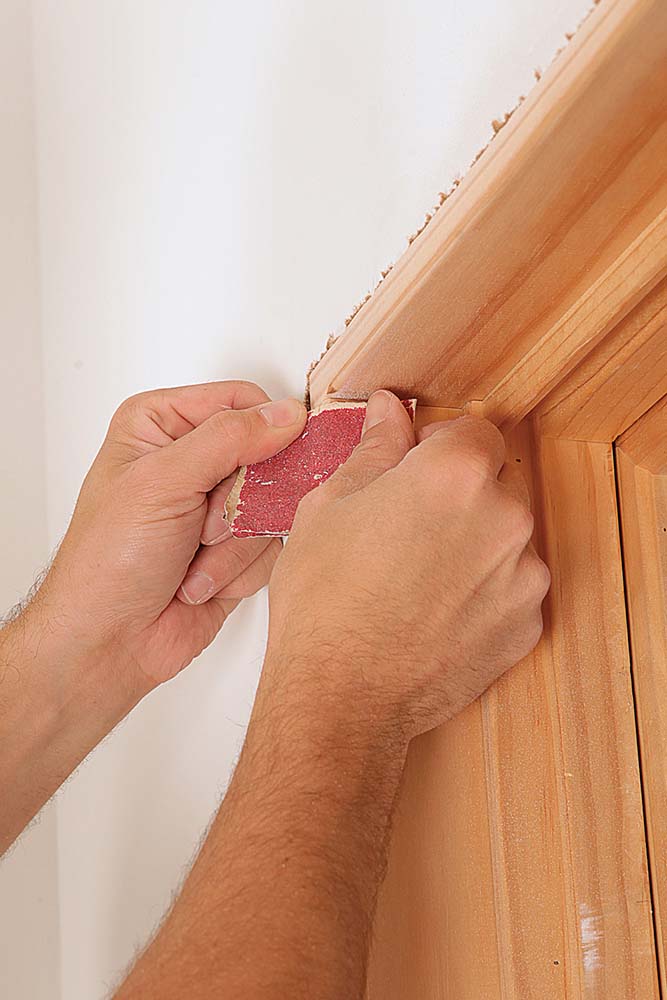
Openings need work

Window and door jambs tend to get banged up and dirty during construction, and we need to clean and repair them so they don’t compromise and complicate the trimwork we’re installing. Although not comprehensive, the photos shown here reflect some of the most common fixes we make when working our way through a house.

Joints getting levered closed, and nailed off.
Fix the jambs. Lever joints closed, and nail them off. Glue down chips, then sand them flat. Chips and open joints will show in the finished opening and must be fixed while fully accessible.
Using a wallboard saw to cut back drywall around a window
Reestablish the gap. Use a wallboard saw to cut back the drywall around the window, which frees up the jambs so that they have room to be nudged into proper alignment if necessary.
Using a chisel to scrape errant drywall compound
Scrape it down. Clean up any errant drywall compound with a scraper or chisel, taking care not to damage the jamb. Skip this, and the trim won’t make continuous contact with the jamb.
Using a sander across the faces of the jambs to get a clean surface and to flush up the corners; window trim
Sand out imperfections. Keeping the sander flat, sand across the faces of the jambs to get a clean surface and to flush up the corners. Sanding takes you down to clean wood and ensures a more consistent finish.
A compact router and a roundover bit adding a slight roundover on jamb edges; window trim
Round it over. Jamb edges often show dings, and even if they don’t, a sharp edge doesn’t hold paint as well as a slight roundover, which can be added with a compact router and a 1⁄8-in. roundover bit.
sandpaper being used to finish off the inside corners of the jambs, matching the router bit’s radius; window trim
Ease the corners. Use 150-grit sandpaper to finish off the inside corners of the jambs, matching the router bit’s radius where the router can’t reach.

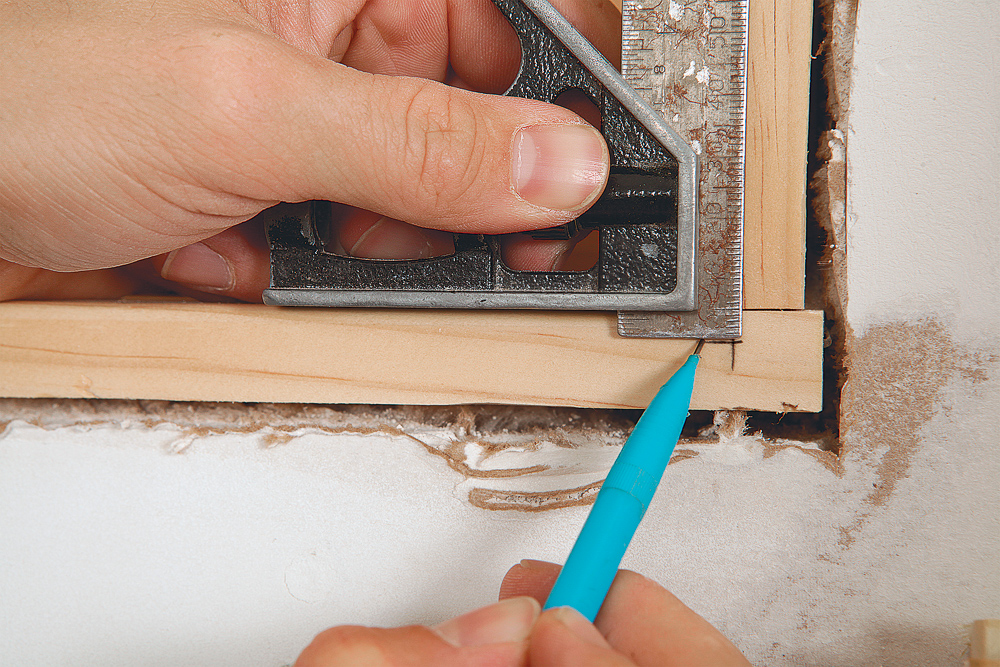
Develop a production mindset

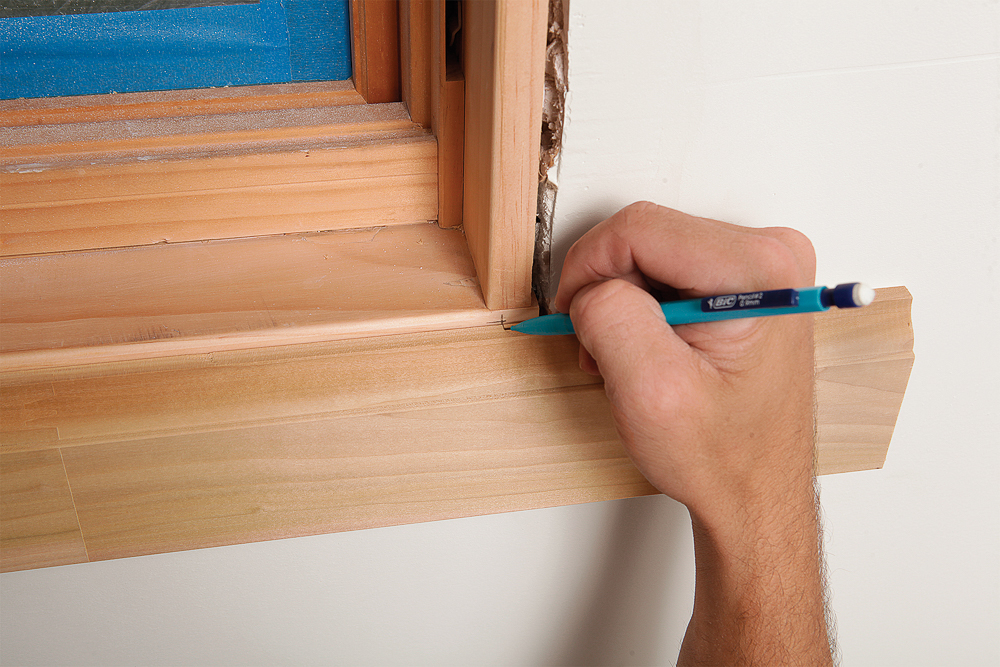
Keeping the tape measure in your tool bag and marking stock in place eliminates read and transfer errors. Once you’ve measured the opening and cut the stock to rough lengths, put the tape away. For rough sizing, I like to cut stock about a foot longer than the opening—or even more than that with wider casing. That sounds like a lot, but with this 4-in.-wide casing, it really only leaves 4 in. of wiggle room once you subtract the 4 in. for each miter. I want my crew to be methodical about rough sizing, but I don’t want them to lose time doing it. The critical accuracy comes when marking the stock in place on the opening and cutting to those lines.

A quick tip on getting the most out of your stock: Cut the long lengths first (usually door legs and larger openings), and use the cutoffs from those for smaller openings. That way, you’re not chopping down 16-footers for 3-ft. windows and can use your cutoffs a bit more efficiently.

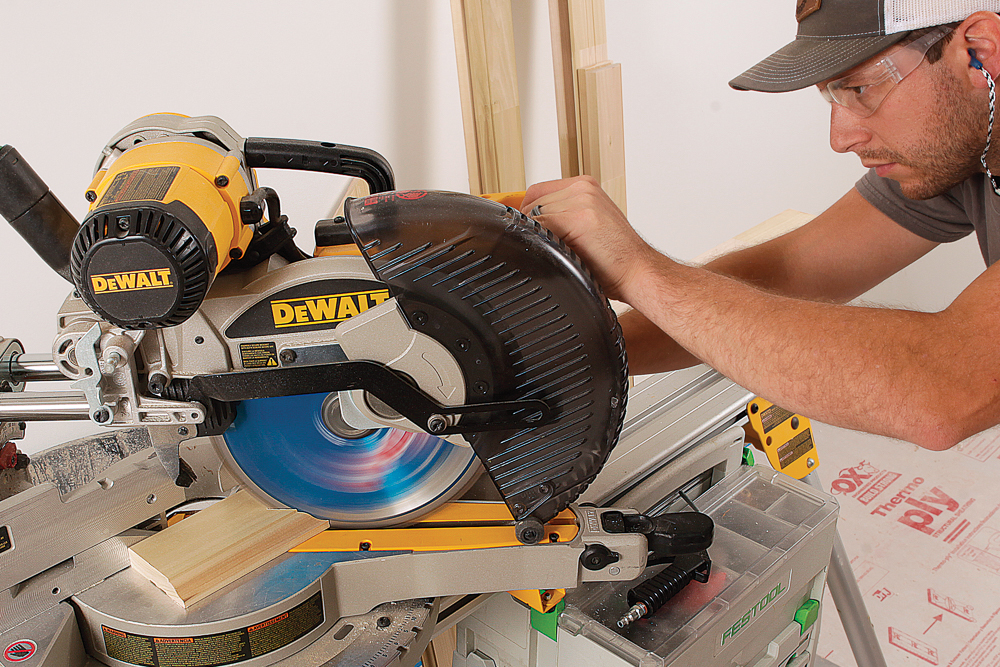
When casing a whole house, a lot of the efficiency comes from using production methods. That generally means doing one task with one tool— say, cutting all of the miters for all of the casing in a room or floor of the house—before moving on to the next step in the process. This cuts down on setup and adjustments, and you don’t have to keep track of 10 different tools at once.

marking combination square for finished casing; window trim
Mark reveals. Set a combination square to 3/16 in., and mark reveals at each corner. Even on stain-grade work, the resulting crosshairs will get hidden behind the finished casing.
labeling piece for placement on window; window trim
Mark in place. Transfer the marked reveals to the stock, and label each piece to indicate its place on the opening—top, bottom, left, and right—and the opening it belongs to.
Cutting all of the left-hand miters; window trim
Kiss the line. Cut all of the left-hand miters, then swing the saw to 45° the other way to cut all of the rights. Take most of the line to ensure that the finished casing will hide the reveal marks.
Aligning a biscuit joiner to a common spot on the casing; window trim
Cut the slots. Align a biscuit joiner to a common spot on the casing, aiming to keep the biscuits close to the short point of the miter, which is the more vulnerable to opening up. Register the joiner to the show side of the casing when possible to aid in keeping the faces of the intersecting pieces in plane.

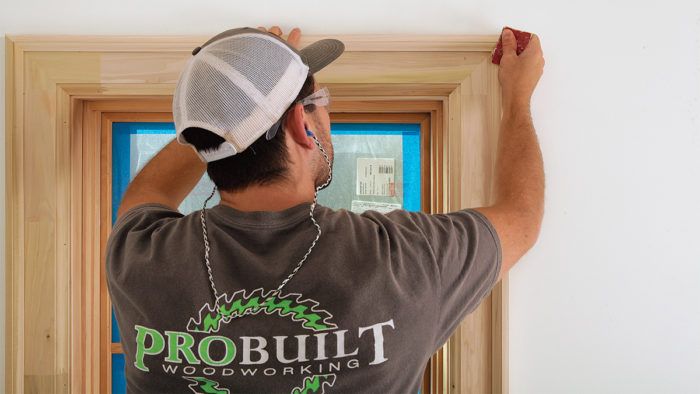
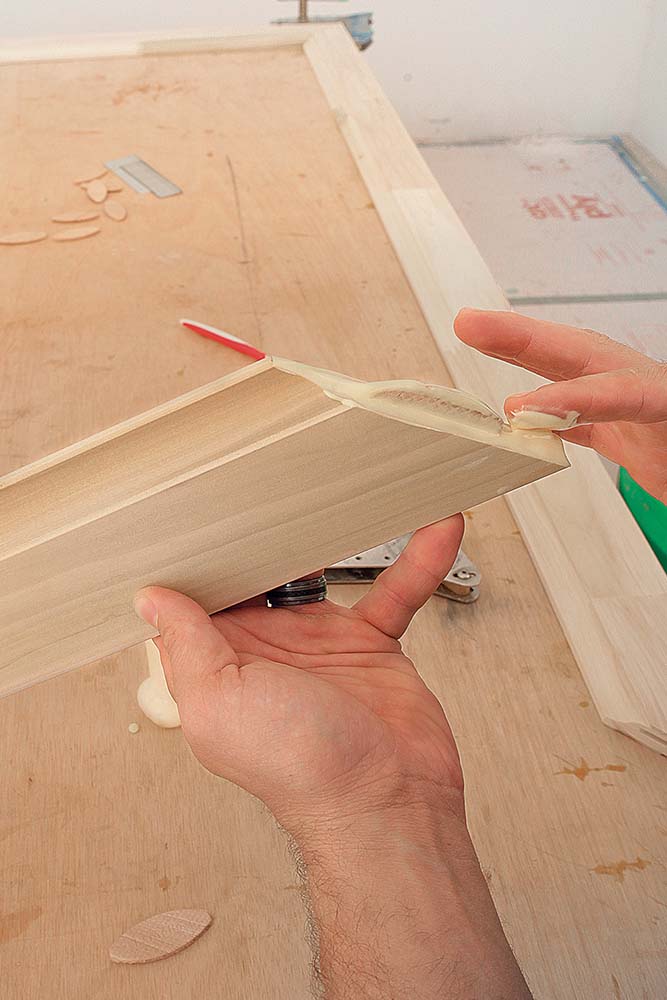
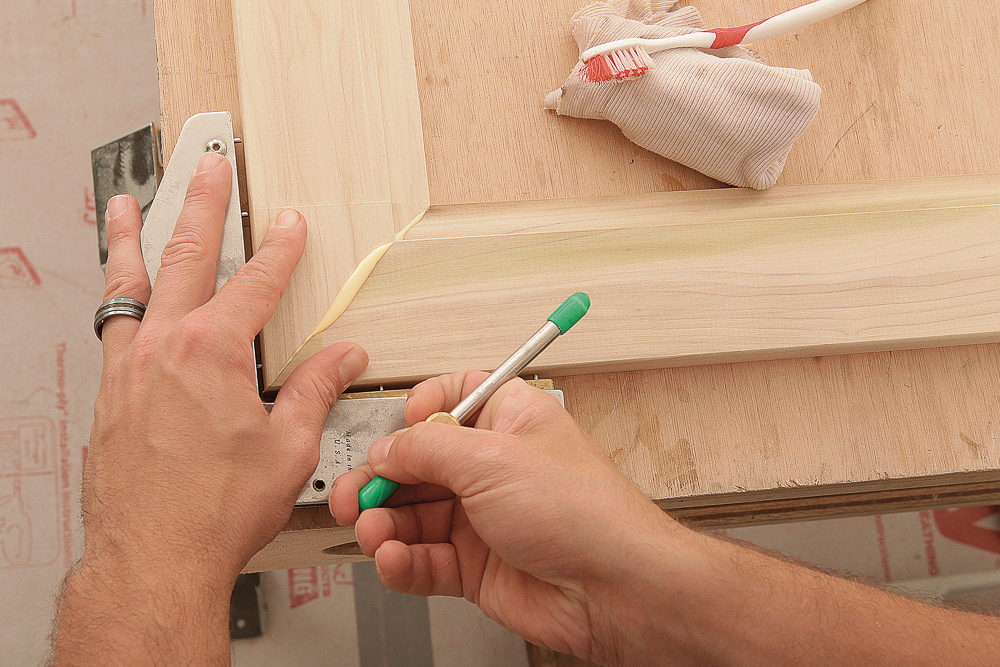
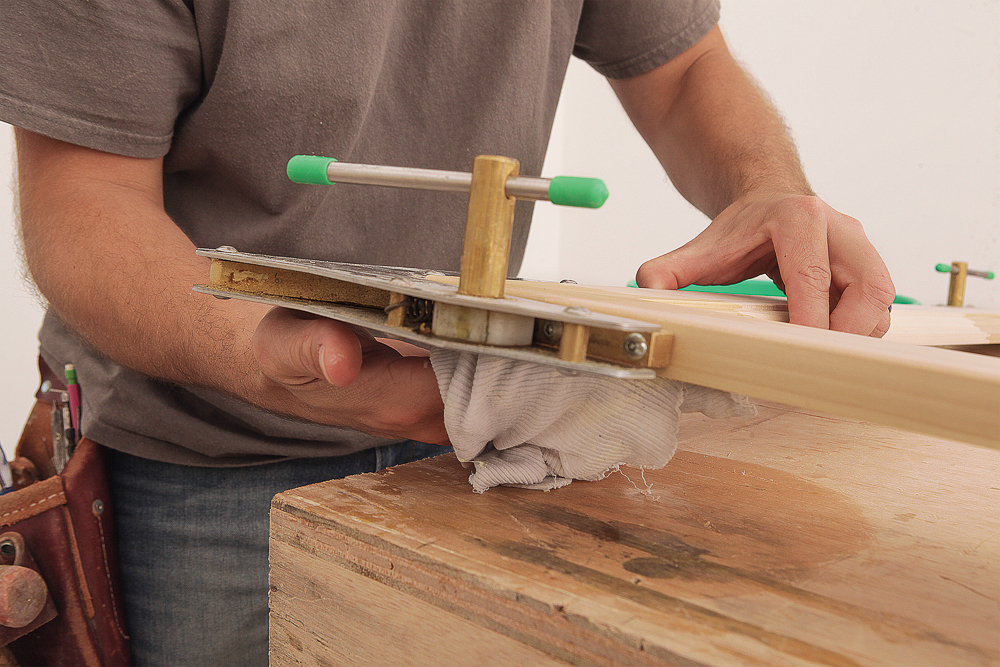
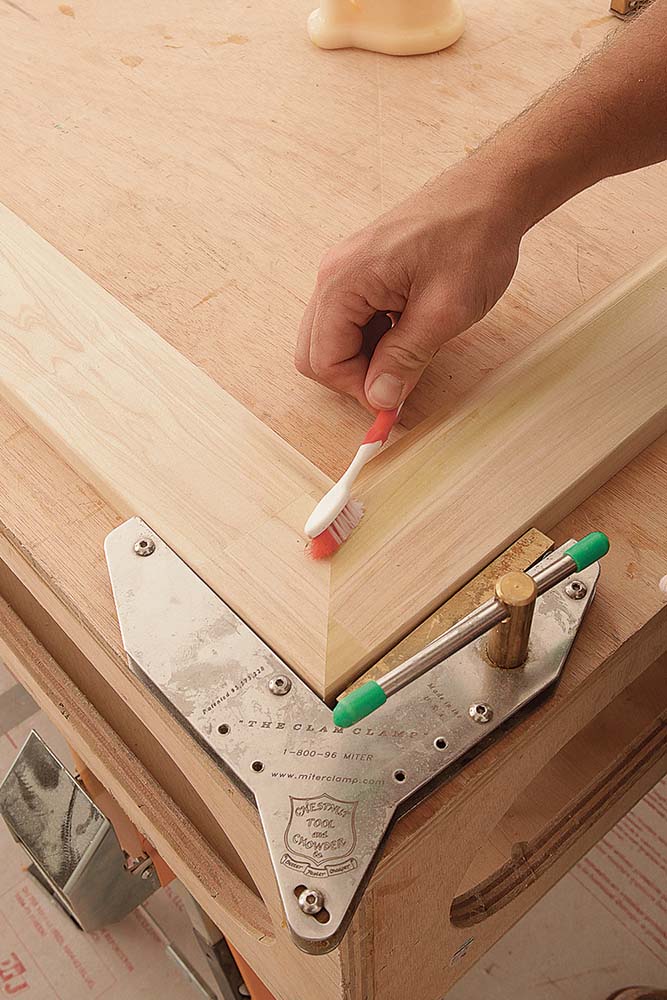
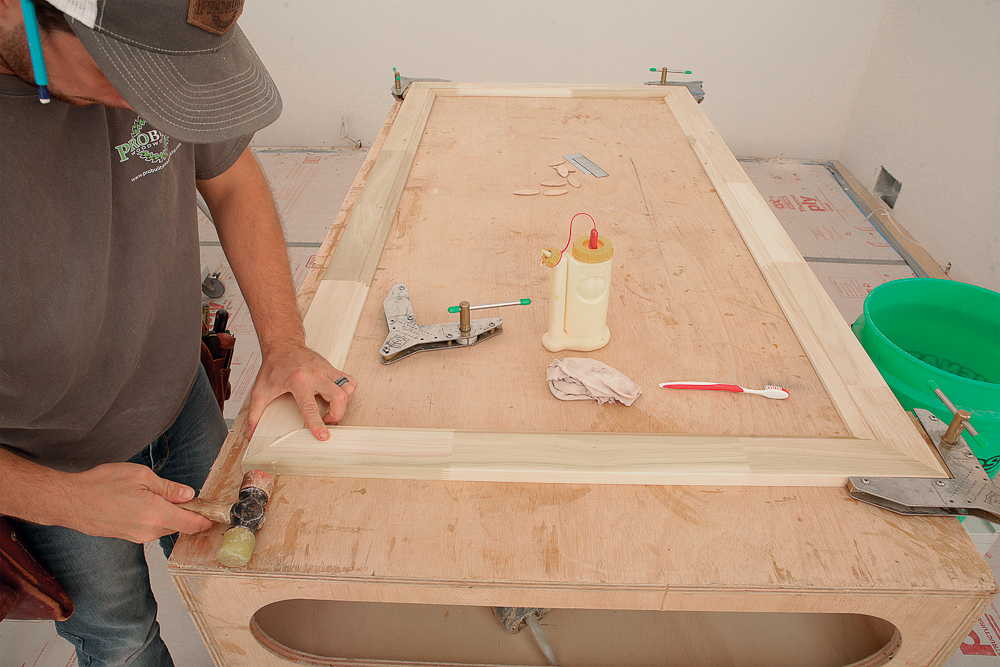
Glue it up, set it aside

cleaning up materials at the ready; window trim
Set the stage. Arrange all of the parts in their proper position, stage biscuits and clamps at each corner, and have glue and cleanup materials at the ready.

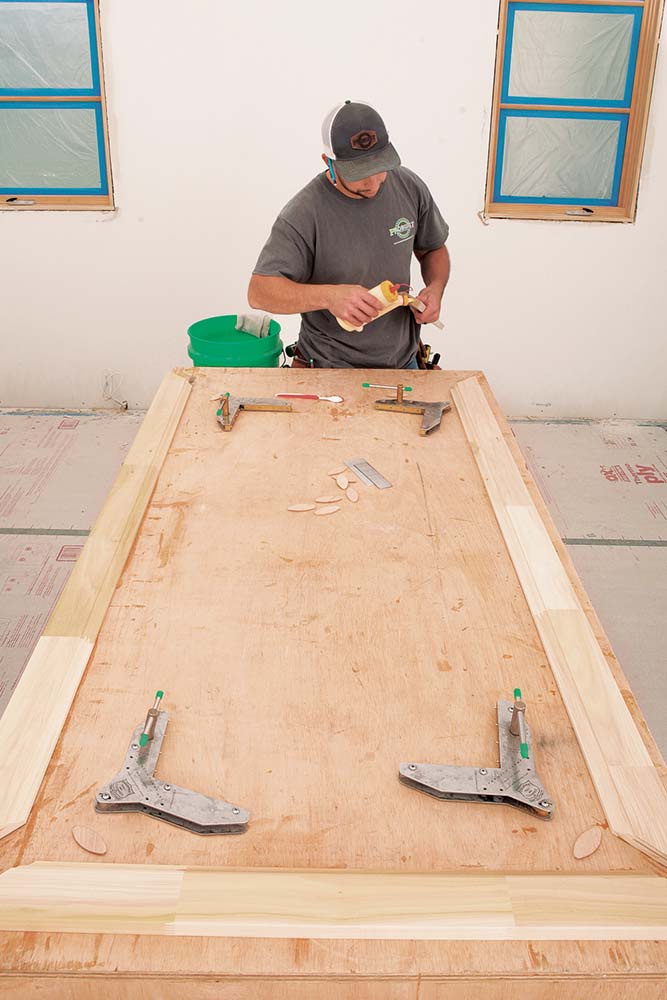
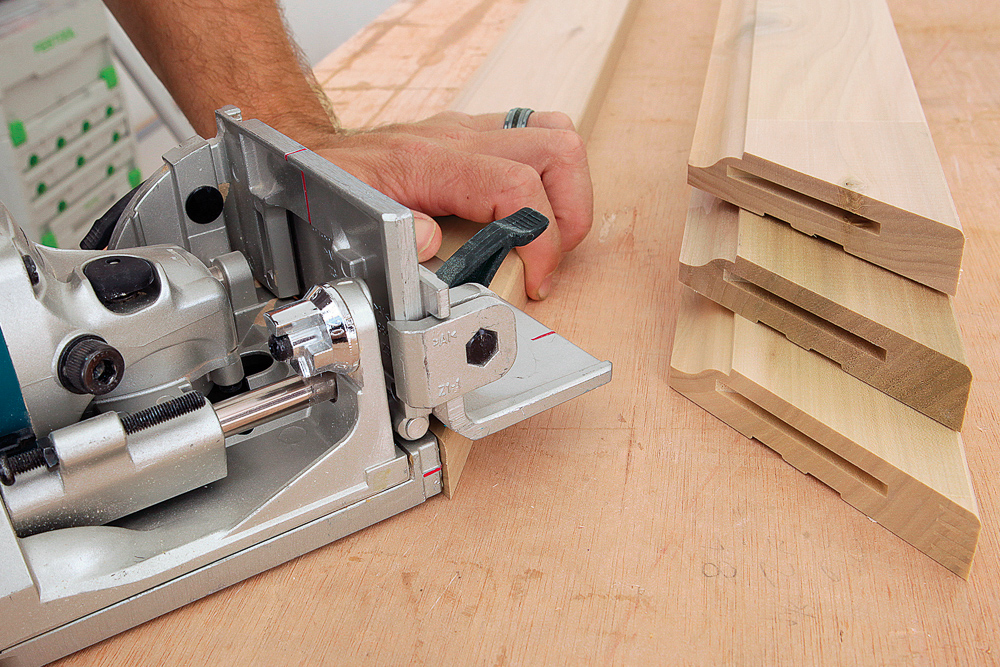
Have a bucket of clean water, a rag, and a toothbrush at the ready to clean up squeeze-out. I like to use Titebond II for casing joinery. Clam Clamps are my go-to for mitered casing joints because their multiple grab points lock the casing together in three dimensions, allowing me to move the glue-up as soon as it’s assembled and make room on the table for the next. Pinch clamps just don’t have the same grab and stability, especially not on wide casing. As each casing is completed, set it against its opening to dry out and fully cure, which takes about a day. Don’t rush this; the joints should be completely set up prior to final sanding and fastening them in place. Assemble the casing on a large flat table or workbench. I have a handful of these lightweight torsion-box benchtops that sit on sawhorses.

smearing glue around with a finger; window trim
Don’t starve. Squeeze glue into the biscuit slot and onto the face of one side of the miter, insert a #20 biscuit, and smear the glue around with a finger. There should be plenty to coat the other workpiece.
pushing miters tight by hand; window trim
Assemble and clamp. Starting at the head and going one at a time, assemble each joint flat on the bench, aligning the corners and pushing the miters tight by hand while tightening the clamp.
A damp rag removing squeeze-out from the back of the joint and from the table
Clean the joint. After clamping a miter, use a clean, damp rag to remove the squeeze-out from the face and back of the joint and from the table. Rinse the rag in a bucket between joints.
damp toothbrush removing glue from the profile
Brush the profiles. Use a damp toothbrush to remove glue from the profile, wiping the brush clean on a damp rag frequently.
a few taps with a soft-faced hammer
Bottoms in. Because the legs are already locked in, both of the bottom joints must be assembled at the same time. A few taps with a soft-faced hammer help with positioning.

Photos by Matthew Millham.


More about installing window casings:

  • Well-Proportioned Trim
  • Trimming Windows
  • Video Vault: Upgrade Interior Window Trim

Fine Homebuilding Recommended Products

Fine Homebuilding receives a commission for items purchased through links on this site, including Amazon Associates and other affiliate advertising programs.

Musings of an Energy Nerd: Toward an Energy-Efficient Home

Fine Homebuilding readers know Martin Holladay well and love his practical, cost-effective approach to energy-efficiency and green building. In this book, he walks you through every step of planning an energy-smart home that is healthy, durable, and comfortable.
Buy at Amazon

Get Your House Right: Architectural Elements to Use & Avoid

If you are designing or remodeling a traditional home and want to make sure that you get all the finish details right, this book is for you. Marianne’s drawings are illustrative, covering every aspect of interior and exterior finishes.
Buy at Amazon

All New Kitchen Ideas that Work

Kitchens are one of the most important rooms in the house. It's where we pack in the most function and spend the most money, so you want something that's convenient and inspiring — this book will help you get there.
Buy at Amazon
View PDF
Previous: Making Mitered Window Casing Next: Trimming a Window on a Paneled Wainscot Wall

Guide

Finish & Trim Carpentry

Chapter

Window and Door Casings

Sign up for eletters today and get the latest how-to from Fine Homebuilding, plus special offers.

Signing you up...

This site is protected by reCAPTCHA and the Google Privacy Policy and Terms of Service apply.
See all newsletters
See all newsletters

View Comments

  1. LauraWilliams | Jan 15, 2019 05:04am | #1

    Good Work!!

  2. DeweyMessier | Jan 16, 2019 02:55am | #2

    Really Appreciated!!

  3. BenjaminShaw | Jan 17, 2019 05:28am | #3

    Very good

  4. KevinHuggins | Jan 25, 2019 03:18am | #4

    Good!

  5. jeffwoodwork | Feb 20, 2019 03:39pm | #5

    Where are you finding finger joined popular case?

  6. RonaldTague | Mar 08, 2019 02:11am | #6

    I appreciate your work

  7. JohnMartin12 | Mar 09, 2019 03:35am | #7

    Excellent!

  8. WesleyParks | Mar 15, 2019 07:59am | #8

    great

  9. JohnPrice6 | May 15, 2019 03:56am | #9

    well done!

  10. ArmandLewis | May 16, 2019 12:55am | #10

    super work

Log in or create an account to post a comment.

Sign up Log in

Become a member and get full access to FineHomebuilding.com

Finish & Trim Carpentry

Finish & Trim Carpentry

Trusted, comprehensive guidance from the pros for creating perfect trim details in any room of the house

View Project Guide

View All Project Guides »

Become a member and get unlimited site access, including the Finish & Trim Carpentry Project Guide.

Start Free Trial

Trim Design
  • Trim Style and Design
Tools and Materials
  • Tools
  • Materials
Interior Trim Basics
  • Tips and Tricks
  • Techniques
  • Using Jigs
Window and Door Casings
  • Windows
  • Doors
Baseboard and Crown Molding
  • Baseboard
  • Crown Molding
  • Specialty Crown Situations
Wainscot and Paneling
  • Beadboard Wainscot
  • Paneled Wainscot
  • Chair Rails
  • Wall Treatments
Mantels and Fireplace Surrounds
  • Design
  • Installing Mantels and Surrounds
Coffered Ceilings

Fine Home Building

Newsletter Sign-up

  • Fine Homebuilding

    Home building tips, offers, and expert advice in your inbox.

  • Green Building Advisor

    Building science and energy efficiency advice, plus special offers, in your inbox.

  • Old House Journal

    Repair, renovation, and restoration tips, plus special offers, in your inbox.

Signing you up...

This site is protected by reCAPTCHA and the Google Privacy Policy and Terms of Service apply.
See all newsletters

Follow

  • Fine Homebuilding

    Dig into cutting-edge approaches and decades of proven solutions with total access to our experts and tradespeople.

    Start Free Trial Now
    • Facebook
    • Instagram
    • X
    • LinkedIn
  • GBA Prime

    Get instant access to the latest developments in green building, research, and reports from the field.

    Start Free Trial Now
    • Facebook
    • YouTube
  • Old House Journal

    Learn how to restore, repair, update, and decorate your home.

    Subscribe Now
    • Facebook
    • Instagram
    • X

Membership & Magazine

  • Online Archive
  • Start Free Trial
  • Magazine Subscription
  • Magazine Renewal
  • Gift a Subscription
  • Customer Support
  • Privacy Preferences
  • About
  • Contact
  • Advertise
  • Careers
  • Terms of Use
  • Site Map
  • Do not sell or share my information
  • Privacy Policy
  • Accessibility
  • California Privacy Rights

© 2025 Active Interest Media. All rights reserved.

Fine Homebuilding receives a commission for items purchased through links on this site, including Amazon Associates and other affiliate advertising programs.

  • Home Group
  • Antique Trader
  • Arts & Crafts Homes
  • Bank Note Reporter
  • Cabin Life
  • Cuisine at Home
  • Fine Gardening
  • Fine Woodworking
  • Green Building Advisor
  • Garden Gate
  • Horticulture
  • Keep Craft Alive
  • Log Home Living
  • Military Trader/Vehicles
  • Numismatic News
  • Numismaster
  • Old Cars Weekly
  • Old House Journal
  • Period Homes
  • Popular Woodworking
  • Script
  • ShopNotes
  • Sports Collectors Digest
  • Threads
  • Timber Home Living
  • Traditional Building
  • Woodsmith
  • World Coin News
  • Writer's Digest
Active Interest Media logo
X
X
This is a dialog window which overlays the main content of the page. The modal window is a 'site map' of the most critical areas of the site. Pressing the Escape (ESC) button will close the modal and bring you back to where you were on the page.

Main Menu

  • How-To
  • Design
  • Tools & Materials
  • Video
  • Blogs
  • Forum
  • Project Guides
  • Reader Projects
  • Magazine
  • Members
  • FHB House

Podcasts

  • FHB Podcast
  • ProTalk

Webinars

  • Upcoming and On-Demand

Podcasts

  • FHB Podcast
  • ProTalk

Webinars

  • Upcoming and On-Demand

Popular Topics

  • Kitchens
  • Business
  • Bedrooms
  • Roofs
  • Architecture and Design
  • Green Building
  • Decks
  • Framing
  • Safety
  • Remodeling
  • Bathrooms
  • Windows
  • Tilework
  • Ceilings
  • HVAC

Magazine

  • Current Issue
  • Past Issues
  • Magazine Index
  • Subscribe
  • Online Archive
  • Author Guidelines

All Access

  • Member Home
  • Start Free Trial
  • Gift Membership

Online Learning

  • Courses
  • Project Guides
  • Reader Projects
  • Podcast

More

  • FHB Ambassadors
  • FHB House
  • Customer Support

Account

  • Log In
  • Join

Newsletter

Get home building tips, offers, and expert advice in your inbox

Signing you up...

This site is protected by reCAPTCHA and the Google Privacy Policy and Terms of Service apply.
See all newsletters
See all newsletters

Follow

  • X
  • YouTube
  • instagram
  • facebook
  • pinterest
  • Tiktok

Join All Access

Become a member and get instant access to thousands of videos, how-tos, tool reviews, and design features.

Start Your Free Trial

Subscribe

FHB Magazine

Start your subscription today and save up to 70%

Subscribe

We hope you’ve enjoyed your free articles. To keep reading, become a member today.

Get complete site access to expert advice, how-to videos, Code Check, and more, plus the print magazine.

Start your FREE trial

Already a member? Log in

Privacy Policy Update

We use cookies, pixels, script and other tracking technologies to analyze and improve our service, to improve and personalize content, and for advertising to you. We also share information about your use of our site with third-party social media, advertising and analytics partners. You can view our Privacy Policy here and our Terms of Use here.

Cookies

Analytics

These cookies help us track site metrics to improve our sites and provide a better user experience.

Advertising/Social Media

These cookies are used to serve advertisements aligned with your interests.

Essential

These cookies are required to provide basic functions like page navigation and access to secure areas of the website.

Delete My Data

Delete all cookies and associated data