Podcast Episode 157: Insulating Attics, Restoring Old Staircases, and Replacing Interior Doors
The Fine Homebuilding editors offer advice for several old-home upgrades, compare notes on their favorite home-building books, and invite listeners to stop by our mobile podcast studio at the International Builders' Show.
Follow the Fine Homebuilding Podcast on your favorite app. Subscribe now and don’t miss an episode:
 |
 |
Patrick, Matt, and Rob share some great listener feedback about questions from previous shows (keep that feedback coming, folks!) before they discussed attic and staircase remodels in Maine, a garage-workshop in New Jersey, and a possible door replacement project in who knows where. There are a few special details to report this week: IBS is just around the corner, and we’re looking for folks to chat with on the podcast while we’re at the show; there’s also a sweepstakes going on where anyone can enter to win a $500 shopping spree in the Taunton Bookstore. See details below.
Editors’ updates:
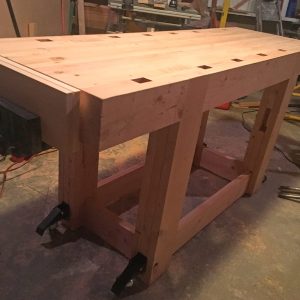
Matt’s workbench – bench done; on to making bench dogs
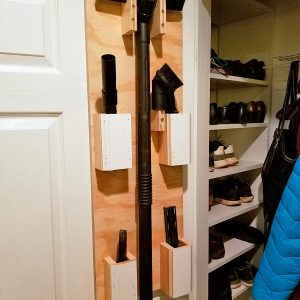
Patrick’s closet – he made handy tool-storage shelves on the closet door, not because he needs them, but because–being the frugal guy he is–he didn’t want to waste the scraps left over from the closet trim.
Rob – not much to report, other than that his latest version of his bicycle-powered snow plow worked well in the recent snow storm
 |
 |
 |
Related links:
Listener Feedback: Regarding accessible home discussion in #153 and drywall tape:
Doug writes: When my wife and I started planning our retirement home we wanted a house we could stay in for a very long time. We started researching accessibility design and tried to plan for future needs. We had already planned on things such as lever door handles and backing for grab bars. When the blasting cost forced us to re-site our home site from a hillside to a level area and go with slab-on-grade. This allowed a step free entry. We have 3-foot doorways and 4-foot hallways. The one surprise was that our 6-foot double entry door only allows a 34-inch entry. We picked up some other ideas at home shows. One of which was to raise the dishwasher 12 inches from the floor. This makes loading and unloading much easier. Since I was building all of the cabinets it didn’t affect cost. I also built a raised area in the laundry room for the front-loading washer and dryer. This only added a little 2×12, plywood and backer board to the cost rather than buying bases for the machines.
A few months after we moved in our oldest son came to live with us because his MS had reached the point where he could not live alone. This pointed out things that could have been done better. He uses a large power chair and it requires a little more room. He took over what we intended to be the guest suite. The bathroom in there is a little tight and it has a tub shower combo.
We chose an engineered strand bamboo as the flooring. The finish is a little slick. Something with more grab would have been better. Zero clearance door hinges are something else to consider. The additional width provided by the hinges might minimize the damage to door trim. A power chair with an operator with an unsteady hand can do damage. The entry door has an aluminum sill that projects up about 1/2 inch. When his chair goes over it he receives a jolt. I have since learned that we could have ordered a door with an ADA compliant threshold although I don’t know what that would cost.
These ramblings cover part of what we have learned. I hope as time goes on more builders will spend more time with their clients to discuss future needs..
Related links:
- Podcast Episode 153
- A remodel proves that individuality rules, even in accessible design
- 3-Tiered Checklist for Aging in Place
Bill from Austin writes: I am about to start a 600sf addition drywall project, and was planning to use FibaFuse non-woven tape. A question in Episode 154 concerned joint cracking where mesh tape had been used, and you strongly suggested using paper tape. Does the issue refer to FibaFuse or the old style adhesive fiberglass tape? Thanks.
Related links:
Question 1: How should I insulate and finish my attic?
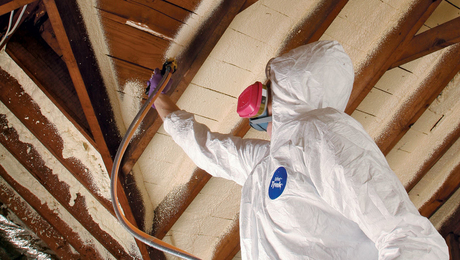
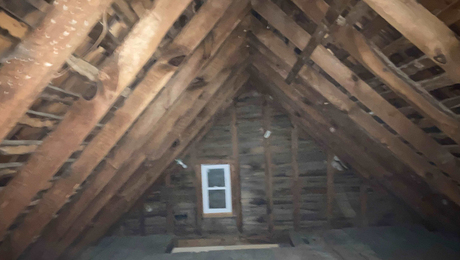
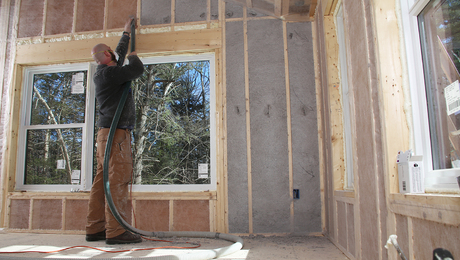
Isaiah from Franklin county Maine writes: Hey guys, love the show and I have a question about insulating an attic. I would like to convert my attic space into a living space and I need to insulate it. A couple of years ago there was some blown-in insulation put in behind the knee walls in the attic. There are 2×6 rafters that are spaced at 2 feet on center. The floor joists are 2×6 as well and span 26 ft. with a beam at the 13 foot mark. Also, we heat our home exclusively with a wood stove. Just so you know though the floor is insulated in the attic just not the roof. I appreciate this help because I am currently in high school building construction vocational program and me and my dad really enjoy the show and we would like to remodel this attic.
Related links:
- How to Insulate the Attic in a 1910 Remodel
- Are Dew-Point Calculations Really Necessary?
- How to Build an Insulated Cathedral Ceiling
Question 2: How can I fix my droopy and abused stairs?
Jeff from York Maine writes: Hi guys, I love the podcast and all of the tips and advice you have. I continuously learn new things from listening to your podcasts and enjoy it a lot! Keep up the good work!!
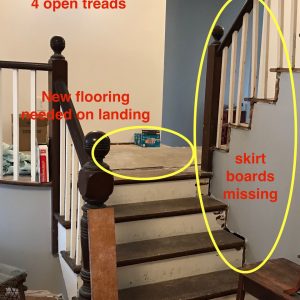
My question involves a set of stairs in an old house. We are currently in the process of renovating an historic home in Maine. Built in 1892, the house was previously carved up into apartments, and in so doing the staircase was half buried in a wall to separate apartment units. Further, the staircase was tiled with linoleum at one point and metal edges were affixed to the front of each tread. Subsequently, industrial carpet was glued on top of the treads and risers. All of this occurred many years ago, and the staircase was definitely showing signs of distress!
To make matters worse, we found that the beam that the staircase was anchored to was cut at some point leaving the stairs floating and secured to nothing. As a result of that the stairs were drooping about 3 inches on the left side and felt very “squishy”.
We fixed the structural problems and installed a new beam, and properly secured and leveled the staircase. Now however, we are into the finish of the stairs, and this is where my question comes in.
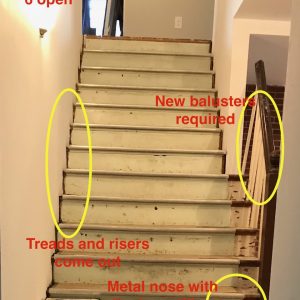
The treads and risers will all need to be replaced due to the previous abuses suffered. The skirt boards were mostly all removed a long time ago, and the floor on the landing is half gone already so will also need to be replaced.
 |
 |
I have been looking and studying the various ways of installing stairs and skirts, and I am looking for what you would suggest as the best way to finish these stairs. They will be non-carpeted so everything will show. I am trying to choose the best method to do this right, and am trying to decide on the method to use to re-finish the stairs. The 3 methods I am choosing between are:
1) Set the skirt boards in place first, then use a jig to cut treads and risers to fit exactly in the space and butt up against the skirt board hopefully with no gaps.
2) Set the treads and risers first in place and then scribe the skirt board to match the profile of the stairs thus hiding all imperfections (in theory) after cutting the profiles perfectly.
3) Routing the risers and treads into the skirt and shimming and gluing them into the skirt after install to close gaps.
Given that this is an historical house, and this is the main staircase in the house that will be on display from here forward, I would like to do this the right way. I am curious whether you have any thoughts or suggestions on this task? Perhaps there is another method that I have not considered yet?
Thanks for any insight or advice!
Related links:
Question 3: Should I replace or repair interior doors?
Nate writes: Hi there, I was just browsing through a house for sale and had a thought cross my mind. Based on the difficulty/hassle of replacing interior doors, is it easier to repair/paint the ones you have? What type of considerations are there for a whole house replacement? Reason for new tools? Function, hardware, appearance are all factors. I thought you’d like to discuss!
Related links:
Question 4: How can I work around existing wiring when insulating my garage/workshop?
Kris from Maplewood NJ writes:
Hi, guys: I’m writing to you to ask for help insulating my 18-ft. by 18-ft, two-car garage that I use for woodworking.
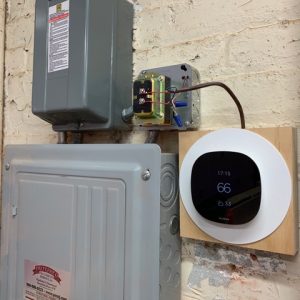
I hired an electrician a few years ago to run a line out to my garage, install a sub-panel, and a few circuits for my woodworking tools and an electric heater. As you can see from the pictures, everything is mounted to the brick walls.
 |
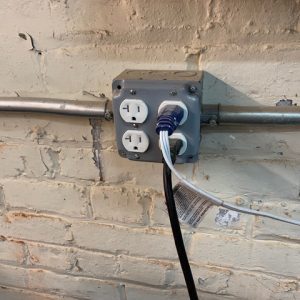 |
I can manage to frame, insulate and sheath the walls, but I generally stay away from electrical. I am looking for the best approach to insulate the walls. I was thinking about rigid foam and studs with bat insulation. Unfortunately, I’m not sure what to do with all the existing electrical work. I hope this makes sense.
Thanks in advance.
Related links:
Vote for your favorite house in the 2019 Readers’ Choice Sweepstakes
You can vote once a day from January 28th through February 22nd for more chances to win a $500 shopping spree in the Taunton Bookstore.
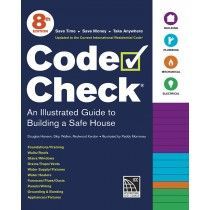
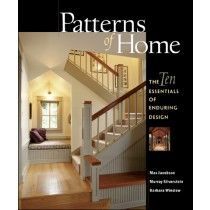
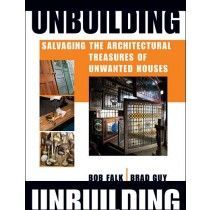
Editors’ book picks:
 |
 |
 |
Fine Homebuilding at the 2019 International Builders’ Show
If you can make it to IBS (Feb. 19th – 21st) in Las Vegas this year, you can get FREE tickets to the floor show courtesy of Fine Homebuilding.
Also, if you definitely plan to be at the show, email us at [email protected] if you would like a chance to join us for the taping of one our 6 episodes at the Fine Homebuilding booth (at 10am and 3pm each day of the show).
This episode of the podcast is brought to you by Benjamin Obdyke and MiTek
This episode of the Fine Homebuilding Podcast is brought to you by Benjamin Obdyke would like to use the special occasion of our 150th anniversary to thank the nuisances that builders and homeowners despise. Our premium products protect from those pesky things like rain, snow, UV rays, and the neighbor’s sprinkler system. Take HydroGap, a drainable housewrap that eliminates moisture from your wall assembly. Or the new InvisiWrap UV, an all-black WRB, perfect for long-term moisture protection behind open joint siding. Come hang out with our awesome team and see our sexy new solutions at the International Builder’s Show, booth C7250.
Also brought to you by MiTek for Breakthroughs in Building. MiTek offers integrated Solutions…for more affordable, sustainable, safe, healthy, efficient and resilient homes. As a diversified, global supplier of software, engineered structural connections, engineering services and automated manufacturing equipment, MiTek provides a technologically advanced, high-quality, and reliable approach to building better homes with better technology. Work with the industry leader to solve the labor shortage, reduce cycle times and eliminate waste.
We hope you will take advantage of a great offer for our podcast listeners: A special 20% off the discounted rate to subscribe to the Fine Homebuilding print magazine. That link goes to finehomebuilding.com/podoffer.
The show is driven by our listeners, so please subscribe and rate us on iTunes or Google Play, and if you have any questions you would like us to dig into for a future show, shoot an email our way: [email protected]. Also, be sure to follow Justin Fink and Fine Homebuilding on Instagram, and “like” the magazine on Facebook. Note that you can watch the show above, or on YouTube at the Fine Homebuilding YouTube Channel.
The Fine Homebuilding Podcast embodies Fine Homebuilding magazine’s commitment to the preservation of craftsmanship and the advancement of home performance in residential construction. The show is an informal but vigorous conversation about the techniques and principles that allow listeners to master their design and building challenges.
Other related links
- All FHB podcast show notes: FineHomebuilding.com/podcast.
- #KeepCraftAlive T-shirts support scholarships for building trades students. So go order some shirts at KeepCraftAlive.org.
- The direct link to the online store is here.

