Add a Belgian-Block Driveway Apron
Learn how to install granite pavers to add style and strength to any driveway. This illustrated tutorial covers every step, from creating a solid base to finishing the mortar joints.

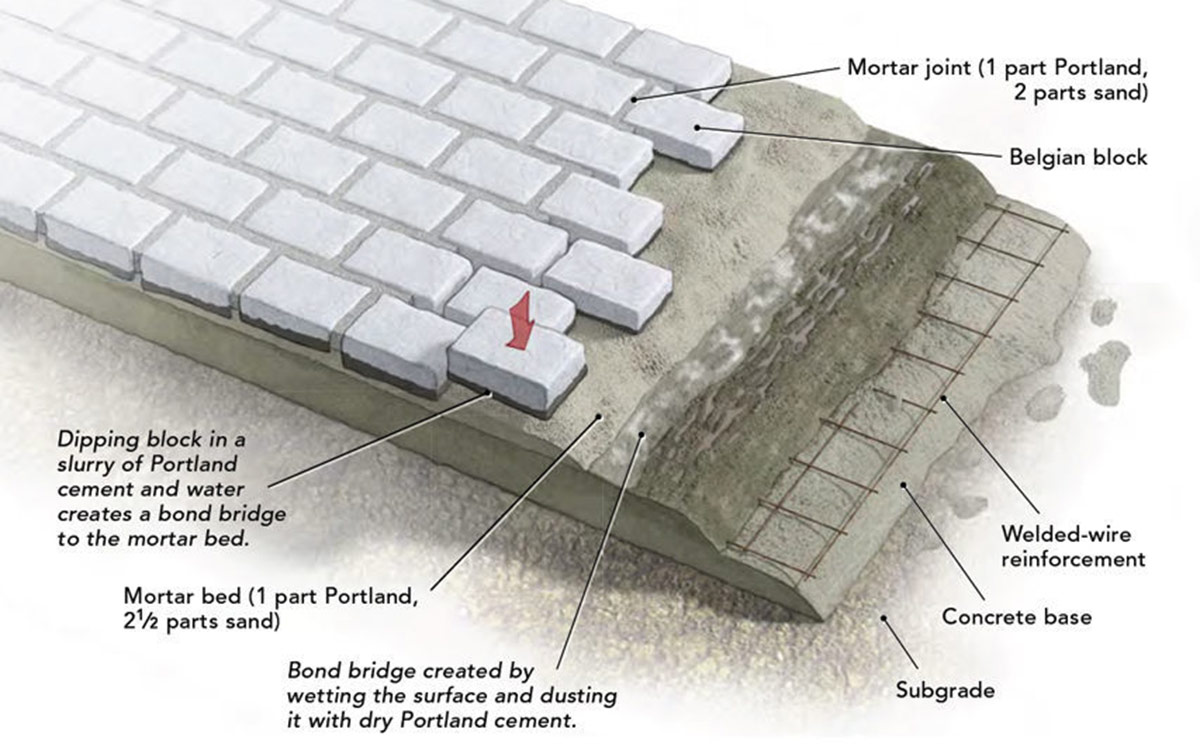
Synopsis: Mason Fabiana Cruz gives a step-by-step tutorial on installing a Belgian-block driveway apron, from setting the base to cutting, laying, setting, and jointing the block, illustrated with photos from a recent apron installation. He includes details of the ratios of Portland cement to sand to create the bond bridge, mortar bed, and mortar joints for the three-layered installation, and descriptions of the tools that help get the job done.
Back in the horse-and-buggy days, it was common to see Belgian blocks paving American city streets. There’s a lot of sketchy scholarship about where these granite blocks came from and how they got their name, but this much is true: They can take a pounding and look good doing it. Despite these advantages, they were pretty much done for when cheaper and easier concrete and asphalt pavements came on the scene.
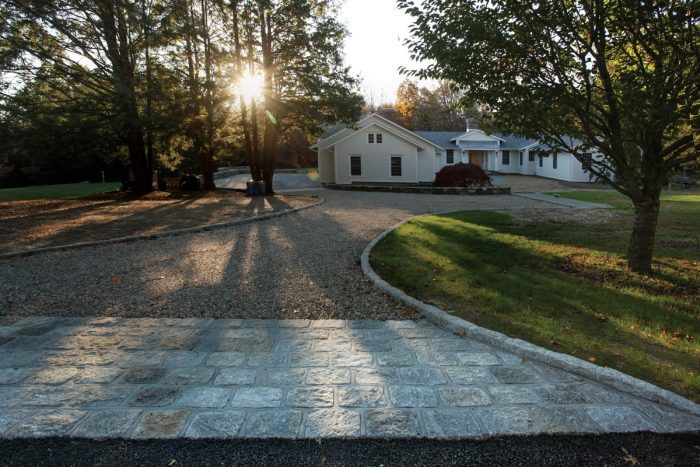
Still, Belgian blocks are a popular go-to when cities or homeowners want to dress up a space. You probably see them most often in curbs along streets and paths. In the part of Connecticut where I live, a lot of driveways have Belgian-block aprons. These aprons add more than style; they also provide a visual transition from the blacktop of the residential streets to the (usually) gravel driveways, and they keep the small stones from spilling into the road. At this house, a second apron also provides a transition from the gravel drive to a blacktop parking area by the garage.

Because these aprons are so common in this area, a lot of masons are asked to build them, and often they’re treated like a castpaver installation. I’ve seen many that have gone bad. If Belgian blocks are laid on a base of gravel and sand—common practice for some segmental pavements—they’ll rut and shift. Belgian blocks don’t interlock like concrete or clay pavers, so they need a solid base and hard joints to handle vehicle traffic. Get those details right and Belgian-block aprons (or entire driveways, for that matter) will stay where you put them and last a lifetime.
Build the base

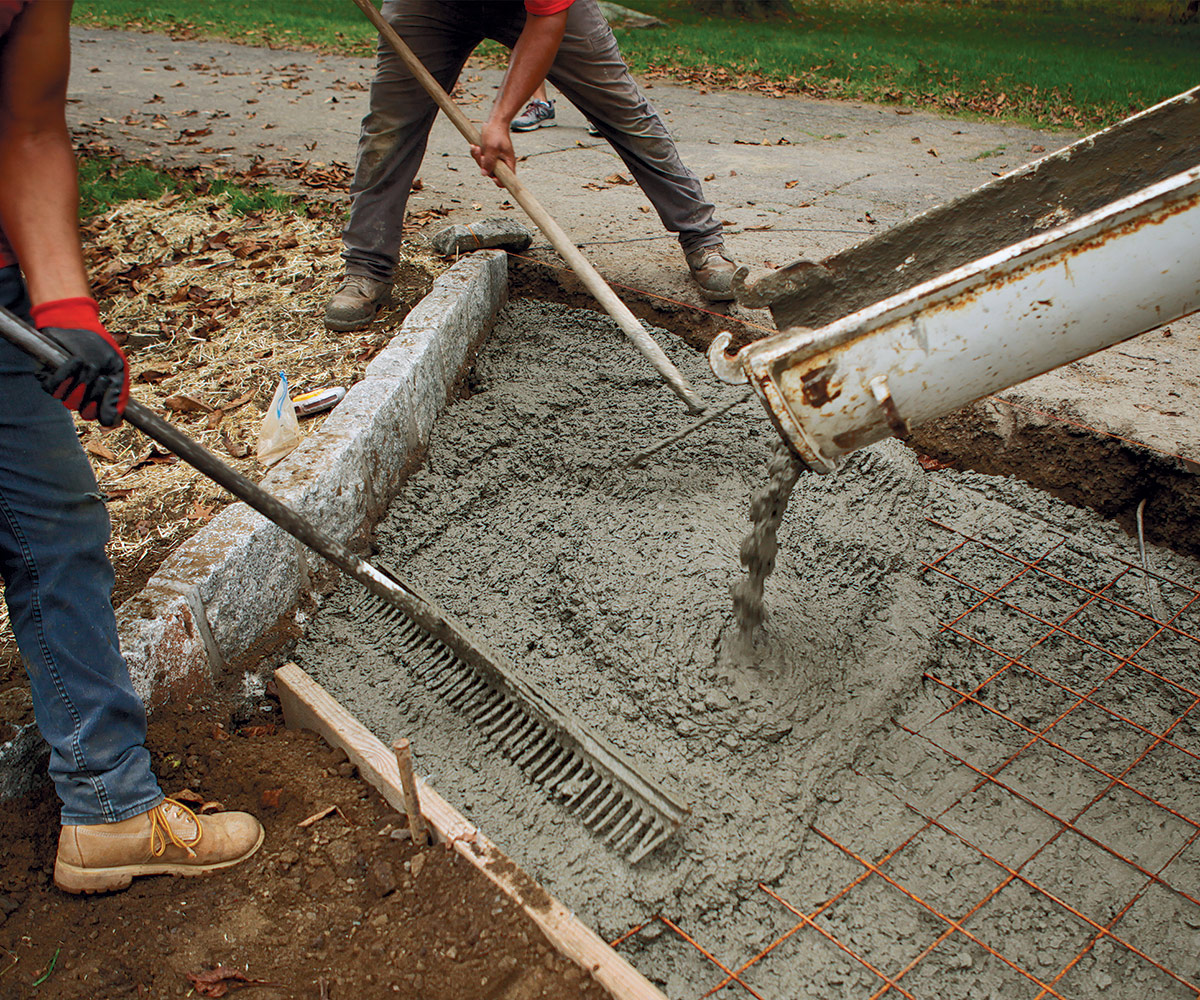
To stand up to heavy loads, these aprons should be constructed in three layers: a reinforced concrete base, a mortar bed, and the mortar-jointed Belgian blocks on top. The whole assembly is about 1 ft. thick and should be built on undisturbed soil. The concrete base is 6 in. thick, but it doesn’t require the precision of a normal slab. Here we set a stringline on one edge and measure down to check our concrete depth along that side, and use a 2×8 form board as reference on the other. We place half the concrete, lay-in welded wire reinforcement, place the rest of the concrete, rake it roughly flat, and compact it with the faces of the rakes.
Also see: How to Cut Belgian Block

From Fine Homebuilding #282
To view the entire article, please click the View PDF button below.
Fine Homebuilding Recommended Products
Fine Homebuilding receives a commission for items purchased through links on this site, including Amazon Associates and other affiliate advertising programs.

The New Carbon Architecture: Building to Cool the Climate

All New Bathroom Ideas that Work

Code Check 10th Edition: An Illustrated Guide to Building a Safe House


