Podcast Episode 183: Work Trucks, Workshops, and Painting Brick
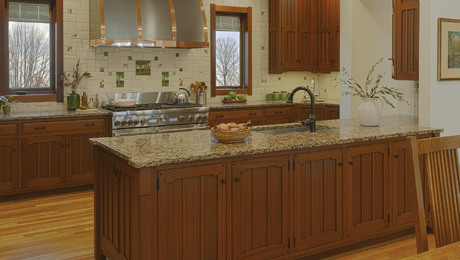
Patrick, Matt and Kiley talk about keeping kitchen remodels affordable before moving onto listener questions about strengthening a roof in one of the country's snowiest places, converting a barn to a workshop, and insulating a home without a WRB.
Follow the Fine Homebuilding Podcast on your favorite app. Subscribe now and don’t miss an episode:
 |
 |
Reader Feedback
Brent from Canada writes: Hi FHB team, First off thanks for the great content on the podcast and magazine I have learned so much from listening and reading. I thought I would drop you a quick note about 2 of the items you talked about in podcast 180.
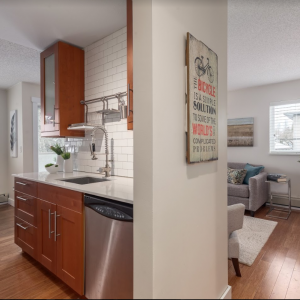
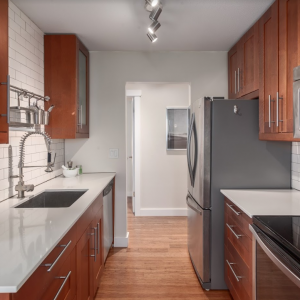
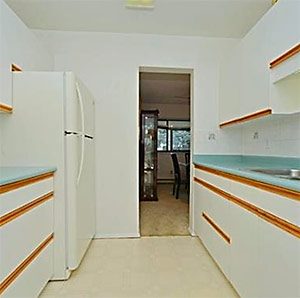
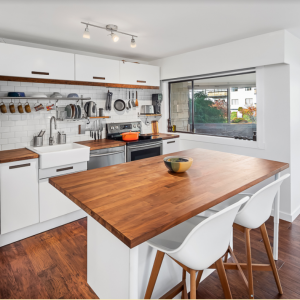
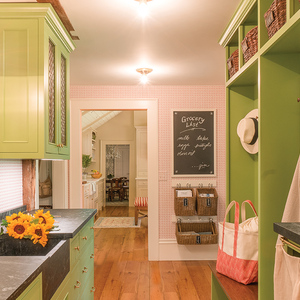
On keeping the costs down in a kitchen remodel I have a bit of experience with the as I have hacked my way through 2 apartment kitchen remodels as per photos. I only have before pictures for the second one, the first one was so bad when we moved in the dishwasher caught on fire when the inspector turned it on. They both cost around $15K in Canadian paseos so about 450 bucks converted to USD ;). I am an engineer by trade so I really over-analyzed the costs and I think I learned some takeaways to save money on kitchen renovations:
1) Plan Plan Plan– It sounds geeky but without keeping track of the costs of your different options with a spreadsheet or something you will never know where you are spending or could save $$. Scrutinize the big ticket items first and work through to the less expensive things.
 |
 |
 |
Article: House Flipping How-Tos
2) Plan for standard sized appliances– you wont be able to find as many deals if you need a 27” refrigerator.
3) Stick with a range– Going for a slide in range with downdraft or separate cooktop and in wall oven will add thousands.
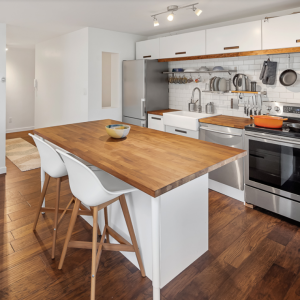
4) Keep things out of the island– Resist the temptation to put the sink or range in the island, the ventilation, electrical and plumbing costs will explode. Put it on wheels if the electrical inspector tells you to put an outlet in it 😉
 |
 |
 |
 |
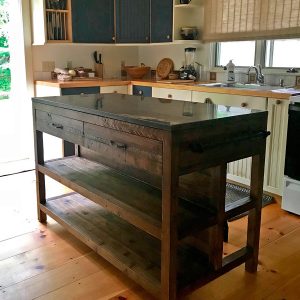
Cue: Kiley’s Kitchen Island
5) Countertops– If you like wood go for it. You can replace the wood countertops in my second renovation 8 times before you hit the cost of the quartz ones in the first renovation. The wood holds up pretty well and it gets character over time.
Discussion forum: Maple butcher block top
Discussion forum: Maple countertop
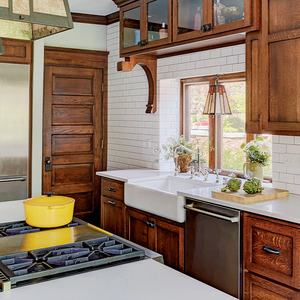
6) Sink– If you can find a cheaper farmhouse sink that goes the full depth of the counter like the one in the above photo you can save a few hundred on countertops and the install is super easy.
7) Cabinets– If you are going budget you can’t beat ikea. The next cheapest option is minimum 50% more, the hardware is great and the carcases are fine and have a warranty. If you want to go bougie you could order custom fronts for them. Also keep the number of drawers to a minimum and consider open shelving.
8) Finishes– Pay attention to the costs of tile you don’t use much but the difference between the high and low end can be as much as 10X and you can make the cheaper stuff look good if you are creative.
9) Contractors– Have a crazy detailed plan ready for them before they arrive, hang around when they are doing the work and have them charge you time and materials. We planned the routes for wires and plumbing, marked out exact locations for fixtures, opened up walls ahead of time, had the key to the electrical room, all the fixtures were on site etc. If you are paying $100+ per hour you want the person to be spending the time doing what they are trained for not discussing if you want an outlet at 18” or 24”.
Article: Working with a Contractor
10) Do as much work as you can on your own– duh.
About work trucks

(Honda Civic has an 850-lb payload capacity.)
Andrew from Victoria BC writes: Hi fhb podcast, Love your podcast keep up the great work. I am listening to the episode about the grumpy listener scolding you guys for not promoting green vehicles lol. Gas guzzling trucks and vans will be around for a long time unfortunately. I think trying to get workers to get rid of there trucks would be harder to change than changing the way they build. That being said I do think there needs to be more greener options. I am very happy with my diesel sprinter. It get 19-20 mpg loaded with tools. Before I got it I was looking at the zenith van. Which is an all electric van. It’s basically a dodge pro master body. The range would’ve been good enough for me, around 100 miles, but the top speed was a turn off. 55 mph is a no-go on highways that have a limit of 70mph and honestly we go 75-80 on. One awesome truck option that is not out yet but looks promising is the Atlis pickup and SUV. All electric with a 500 mile range with other crazy specs. If this thing comes out fulfilling all the specs on final production I think it could be a real contender to the trucks we see on the jobs today.
 |
 |
Editor Projects
Kiley: Defending her property
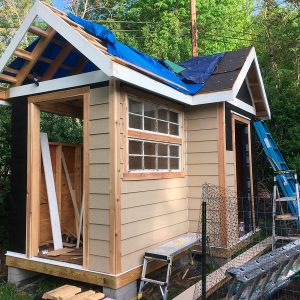
Matt: Update on his garden shed. Using LP Smartside OSB.
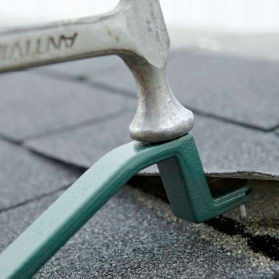
Patrick: You want tools! I love the Roof Snake.
 |
 |
 |
Question 1: How do I fix my sagging rafters and replace a bearing wall?
Doug from Whitefield, NH writes: Hi guys, Love the show. My wife and I are buying a 1950s single-story cape in northern New Hampshire. We had a contractor look over some planned remodeling, and we need a little guidance.
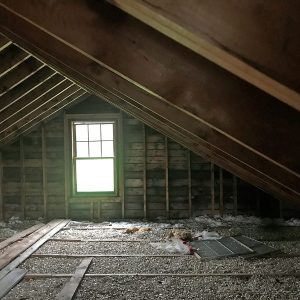
1) The roof rafters are bowing about 2 inches along their length (from ridge to eves). The rafters are nominal 2x6s 16″ on center, and span 18 feet, at a 6/12 pitch (picture attached). The sheathing above is 1″ board with 2 layers of asphalt shingles above (the last put on 10 years ago and in good condition). The ridge (a 1″ ridge board) appears generally level across its length. Our contractor recommended jacking the rafters close to straight then either sistering larger framing on or (his recommendation) attaching horizontal members like collar/rafter ties near the mid-points across every second rafter pair. To my surprise, you can lift the deflection out of the roof just by standing under it and pushing up with your shoulder – so it seems like there won’t be any issue removing the deflection. Going forward, the attic will only be used for insulation (yes, that’s vermiculite in the photo – it’s coming out). Once these shingles are ready to be replaced, we’ll rip it down to the sheathing at install metal. So, the question: Is there really a problem with this level of sag? None of the rafters show cracking or other obvious failure. Assuming we get it fixed, do you prefer sistering, horizontal ties, or another method?
 |
 |
 |
2) We’re planning to have an 11 foot section of bearing wall on the first floor removed and replaced with a beam. I’ve seen the FHB articles on this, but have a particular question: One of the new posts to replace the wall would fall about 1-2 feet away from a main beam running across the basement (a 7″x11″ old barn beam). The contractor said that with blocking between the floor joists in that area, it might be close enough that we wouldn’t need a dedicated column in the basement to take the load. Obviously that means the load path is not truly continuous. So, a) is it ever acceptable to call it “close enough” to a beam that you don’t need a column? b) could we extend the wall so the post hits the main beam (where a column is nearby, but not directly under)? or c) do we need to suck it up and install a dedicated column with footing?
Related links:
- Buying a Vermiculite-Insulated House
- Ground Snow Loads for NH – Structural Engineers of New Hampshire
- 502.4 IRC
Question 2: Can I install a water resistive barrier without removing the siding?
Nate from Upstate NY writes: Hey guys, love the podcast! Thanks for taking the time to do what you do!
I’m looking into buying a property that has a 32’x20′ 2 story building on it. It is post and beam construction. The second story has been converted into living space. It has 2 bed rooms, a kitchen, full bath, and a living room. I am thinking about converting the first floor into additional living space. My main question is: is there any way to install a water resistive barrier without removing the siding? From what I can tell, there are 1″x10″s that are attached to the post and beam construction vertically, and then the wooden siding is attached to that. With the thickness of the beams, there is plenty of room for insulation (I am located in upstate NY), but how can I keep it dry (and somewhat airtight) without removing the siding on the outside? There are many more details that I have to figure out, but this one is the one I’ve been pondering the most. Thanks for the help!
Related Links:
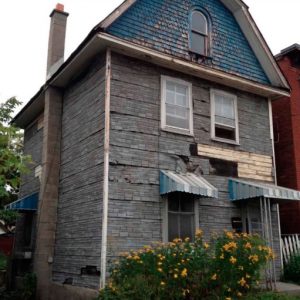
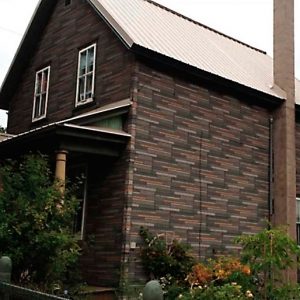
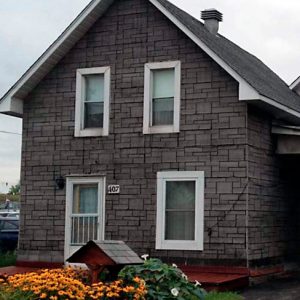
Insulbrick houses:
 |
 |
 |
Question 3: Can I paint my brick exterior?

- Moisture check wood and brick (needs to be below 15%)
- Prime brick with SW Loxon primer brush and roller
- Caulk and putty everything
- spray brick with first coat of SW Emerald paint back rolling
- spray brick with finish coat of SW Emerald paint no back rolling
- Brush siding and trim with two coats of SW Emerald paint
- Remove masking
- Clean all glass
- Collect $
Related links:
Question 4: How do I strengthen my barn floor to create a shop?
Andrew Western NY writes: Hey guys Ive been following your podcast for about a year now and really enjoy the episodes. They’re always entertaining and educational and my wife appreciates that I’ve gone from dangerously incompetent DIYer to passably okay. So thank you from both of us.
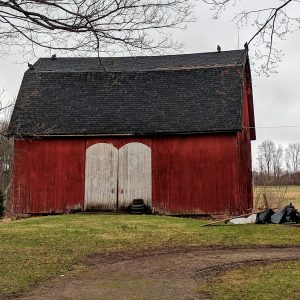
My question concerns turning one of my barns into a functioning workshop. We recently bought an old farm house. The property came with 2 large timber framed barns and my plan is to turn one of them into my workshop. As I said I’m a DIYer so this will be my base for fixing up the farm house and other hobby projects.
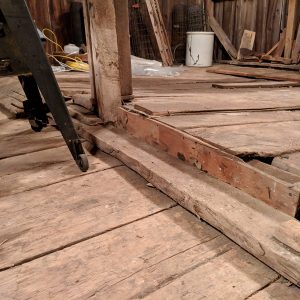
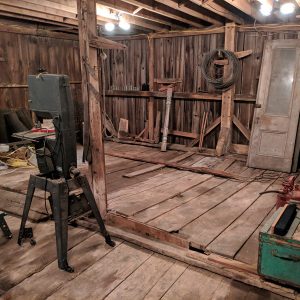
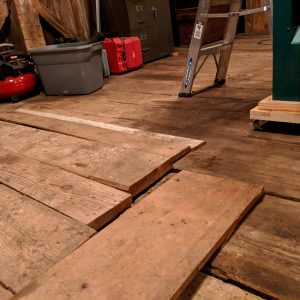
One of the big questions for the barn renovation is what to preserve and what to replace. I love the look of the barn and appreciate that most of it is original but some aspects of that construction are making it less than functional for a workshop. The floor in particular is problematic.
Most of it, as far as I can tell, is original. There is no subfloor and The boards rest on joists which hang on the timbers. It’s a bank barn, the workshop is on the first floor and sits above the barn basement. I love the look and the aging of the wood, but it is has it’s problems. There are large gaps between the boards, there’s a massive height change in the middle with a slope to the back, the boards aren’t remotely smooth. I’d like to have a shop where I can move things around and that’s not going to happen with this floor.
 |
 |
 |
 |
The way I see it there are three options.
- Leave the floor be and have a less than well functioning space.
- Remove the floor, address the issues with the timbers/joists, trim and plane the old lumber and reinstall. If I go this route any recommendations on the process of making the old boards more dimensional? To be honest I don’t have any experience planing lumber but I imagine that doing so with very old very dirty boards would be a nightmare on the planer.
- Remove and replace with modern materials? The last option would solve my functional issues but I think it would look really out of place. If I go this route any recommendations on flooring materials that would look appropriate?
Thanks for the help.
Patrick’s quick calculations: Budget: 1-2k. The space is roughly 27×27.
- 50# loading 2×10 15-5 2x10x16 $22
- 60# loading 2×10 14-1
- 50# loading 2×12 17-10 2x12x16 $30
- 60# loading 2×12 16-3
- 28 16-ft. joists $616 $840
- 23 sheets of floor sheathing
- 3/4 in. plywood $34 ($782)
- 3/4 in. OSB $32 ($736) Advantech $40 ($920)
- 2×12’s with 3/4 plywood $1622
- Doesn’t include hardware, fasteners, glue, under girder
- level mud sill, install girder
#KeepCraftAlive
Support the trades!
Buy a #KeepCraftAlive hat or t-shirt!
We hope you will take advantage of a great offer for our podcast listeners: A special 20% off the discounted rate to subscribe to the Fine Homebuilding print magazine. That link goes to finehomebuilding.com/podoffer.
The show is driven by our listeners, so please subscribe and rate us on iTunes or Google Play, and if you have any questions you would like us to dig into for a future show, shoot an email our way: fhbpodcast@taunton.com. Also, be sure to follow Justin Fink and Fine Homebuilding on Instagram, and “like” the magazine on Facebook. Note that you can watch the show above, or on YouTube at the Fine Homebuilding YouTube Channel.
The Fine Homebuilding Podcast embodies Fine Homebuilding magazine’s commitment to the preservation of craftsmanship and the advancement of home performance in residential construction. The show is an informal but vigorous conversation about the techniques and principles that allow listeners to master their design and building challenges.
Other related links
- All FHB podcast show notes: FineHomebuilding.com/podcast.
- #KeepCraftAlive T-shirts support scholarships for building trades students. So go order some shirts at KeepCraftAlive.org.
- The direct link to the online store is here.








View Comments
Apparently Tesla plans a cheap electric pickup now....
https://www.anonews.co/tesla-announces-electric-pick-up-truck-that-will-cost-under-50000/
Also.... they seem to be trying to bring down the price of their solar roof (I’ll believe it when I see it) https://www.anonews.co/teslas-new-solar-roof/