How to Cut a Straight Edge on a Crooked Board
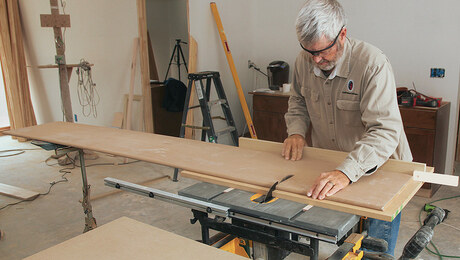
Securing your wavy piece of wood onto a perfectly square guide board is the key to safely ripping it in a straight line.
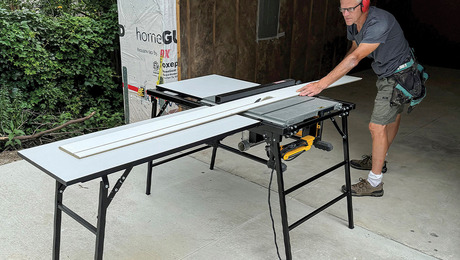
Most woodworking projects require that you start with boards with at least one straight edge on them. It’s not uncommon for wood to warp before it’s time to cut and shape it, plus wood straight from a sawmill will likely have wavy or rough edges that won’t sit flat against the fence on your saw. Fortunately, milling a straight edge on a crooked or rough-sawn board is easy to do on a tablesaw.
Here’s one method:
- Start with a straight piece of guide stock, such as a piece of plywood, cut a few inches longer and a few inches wider than the board to be straightened. Only one edge of this guide needs to be perfectly straight; this edge will serve as a reference surface and will run against the tablesaw’s fence.
- Orient the crooked stock on the guide, with the edge to be straightened slightly overhanging the nonreference edge of the guide, and temporarily screw it in place.
- Locate the narrowest point on the crooked edge by measuring off the straight edge of the guide in several places. Raise the blade to the proper height, then set the fence to the narrow-point measurement.
- Run the assembly through the saw with the straight edge of the guide running against the fence. Then remove the screws, and you’ve got a straight edge to work from.
Helpful tips
You may not want to drive screws through your new board and end up with visible holes in your finished project. There are other ways to hold the board to the plywood guide stock to prevent this. One way would be to use several toggle-style hold-down clamps screwed to the plywood and clamped down onto the board to hold it in place. It’s a good idea to also screw strips of wood to the plywood behind and next to the board you’re ripping in order to ensure that it doesn’t shift on your guide board while you push it through the blade. Alternately, if you don’t have hold-down clamps in your shop, you could make hold-downs out of scraps of wood and screw them to the strips you’ve added to the plywood around the board you’re trying to make straight.
More carpentry tips
How to Make a Zero-Clearance Miter Saw Fence — Quickly make a subfence out of scrapwood and Super Glue for precision cutting of trim and cabinet parts.
How to Frame an Arched Doorway — Plywood and ripped-down studs provide solid backing to create drywall arches.
How to Mortise Hinges With a Chisel — Although a router and jig can be used, mortising hinges with a chisel is a solid, time-tested method.








View Comments
IMO the first thing to do is to surface one side of the board on the jointer before you concern yourself with milling a straight edge on the board. Ideally, thickness the board in the planer as well.
But yes, this is a neat way to create a straight edge on a already thicknessed board.
Great tip!
Thanks for the information!
Thanks for sharing this post!
Very Nice!
Very nice!
Good tips!
Amazing!