Site-Built Steel-Stringer Stairs
A carpenter's approach to simple, modern metal stairs.
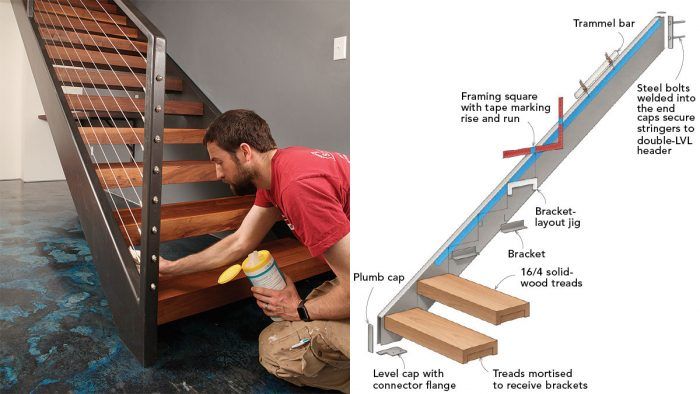
Synopsis: Building steel-stringer stairs begins similarly to wooden stringers by determining rise and run, and calculating lengths and angles. Each wooden tread is mortised to receive metal brackets, which are laid out with a jig. Carpenter Josh Edmonds details the process, using step-by-step photographs and an illustration of the stringer layout. To fabricate the stringers and brackets, he uses a metal-cutting circular saw, and then a welder to attach the brackets. The article includes details on installation of the stringers, handrail, and cable rail.
As builders in a somewhat rural part of central New York, we often find ourselves doing things that are a bit outside our comfort zone. Sometimes we can’t find anyone nearby who has the skills or experience needed for a particular task, or the people who do are booked out well into the future. So we pick up tools and learn how to use them out of necessity. That’s how we—a crew of mostly carpenters—ended up doing our own metalwork.
We started small, welding caps and bases on steel posts so we didn’t have to wait for them to be fabricated and delivered. But as we’ve grown more adept with our welding equipment and techniques, our metalwork has become more ambitious.
The stairs we built for this project are easily within reach of a carpenter who knows how to build a set of simple notched stringers and has the budget and time to invest in some basic cutting and welding tools. The goal here was to create a steel staircase on par with the cost of traditional wooden stairs. The only special tools we used were a metal- cutting circular saw and a welder.
A familiar layout
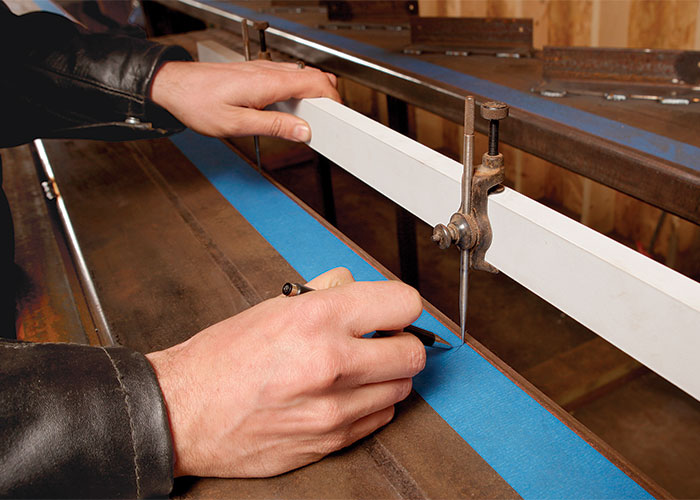
Determine the total rise and run of the stairs just as you would for wooden stringers. I recommend drawing the stringers and railings out on paper or, even better, using a program like SketchUp, which allows you to pull lengths and angles without having to calculate them. Unlike wood, steel tubing has radiused edges, and those don’t play nice with stair gauges or layout lines. to take that radius out of the equation, I keep the layout 1/2 in. down from the top edge of the stringer, marked with a chalkline and a strip of painter’s tape. During layout, factor in the thickness of the steel that will be used to cap the cuts on the ends of the stringers.
Web extra: See how the crew finished the staircase in the online article “How to Paint a Custom Steel Staircase On-Site”
From FineHomebuilding #288
To view the entire article, please click the View PDF button below.
