How to Level an Exterior Doorsill
Leveling the doorsill is important to ensure your door sits correctly. Here's how to do it.
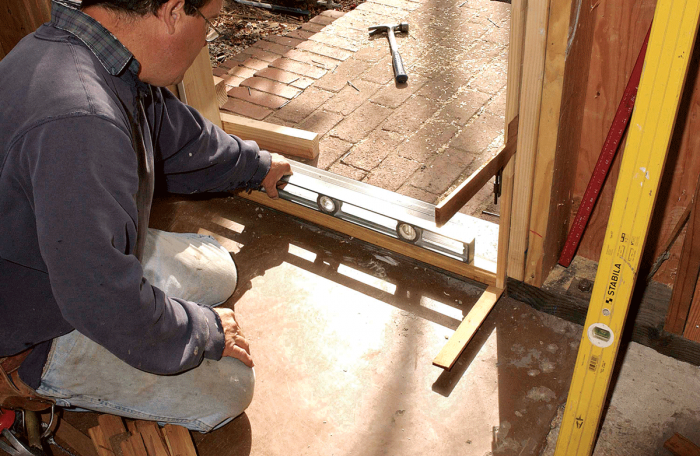
In standard construction, the doorsill sits on the subfloor and the finish floor butts to the sill, but in many older houses, the sill sits directly on top of the joists and the subfloor and finish floor butt to the inside edge of the sill. Now and then, you even see the sill notched into the joists. There are several ways to level an exterior doorsill.
After you’ve installed a sill pan, place a spirit level across the bottom of the rough opening and insert pressure-treated wood shims under the sill until it reads level. Tack shims to plywood subflooring to keep them from drifting, and then install the prehung door unit. If the subfloor is concrete, use construction adhesive to spot-tack the shims. Or you can place the door frame into an out-of-level opening, use a flat bar to raise the low end of the frame sill, and insert shims under the sill until it’s level. To prevent flexing between shims, space shims every 12 in. beneath aluminum/combination or oak sills, or every 6 in. to 8 in. beneath aluminum sliding-door sills.
The problem with any of these solutions is that many sills—especially hollow aluminum ones—are so thin that they may flex between shim points. If there’s 1⁄4 in. to 1⁄2 in. of space under the sill, use a 1⁄4-in. tuck-pointing trowel to push dry-pack mortar into the spaces between the shims, compacting the mortar as best you can. (Dry-pack mortar has a minimal amount of water—just enough to activate the cement. If you squeeze a handful, it will keep its shape but there will be no water glistening on its surface or on your hand.) Or fill under the shimmed-up sill with nonshrinking mortar, such as an epoxy mortar/grout.
The only way to correct an out-of-level opening without shims is to rebuild it, which is rarely simple. For example, you can remove the subfloor and power-plane the joists until they are level, then install pressure-treated plywood. But if nearby floors are out of level, you may need to level them next.
This blog was adapted from Renovation 5th Edition (Taunton, 2019). A hefty 656 pages, R5 is a trove of pro tips and techniques that builders shared with me over four decades, plus roughly 1000 photos taken on job sites across North America. I hope you find it useful. – Mike
RELATED STORIES












View Comments
nice
I started using cut strips of ice and water shield starting with short ones on the low side then longer ones as it was built up until level. Are there any drawbacks to that approach?