2 Ways to Install Post Bases in Concrete Footings
Wet-set or dry-set? Consider the pros and cons of each method before pouring your deck footings.
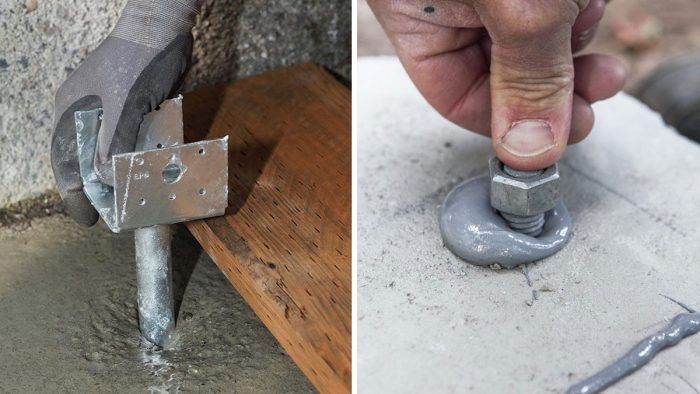
There are generally two ways to install footing hardware: either while the concrete is still wet or once it has set. Wet-setting hardware has the advantage that there is no drilling or application of epoxy. However, there is a limited amount of time to get the placement perfect. Dry-setting hardware in footings is just the opposite. You’ll have all the time you want, but drilling out the hole and setting the bolt with epoxy can be an aggravating process. Also, there are fewer hardware options that are designed for dry setting.
Wet-setting hardware
As mentioned, the main challenge in wet-setting foundation hardware is quickly locating the hardware exactly where it needs to go; depending on the juiciness of the concrete mix, getting the hardware to stay put while the concrete sets can present an additional challenge. A simple alignment technique is to position a board to register the hardware against. Align the board to the edge of the post run and install all the hardware with one edge touching the board. Depending on the weight of the board, you may have to secure it temporarily by tacking the board to the blocks. After about 5 minutes, check the hardware to make sure that is has not shifted or sagged off alignment.
 1. Set the post base’s anchor in the wet concrete aligned with the layout line.
2. Use a straight board aligned with the edge of the run of posts as a positive stop to position the post bases.
3. Check the position after 5 minutes to make sure the post base has not shifted out of position. If necessary, attach it to the alignment board.
Dry-setting hardware
To dry-set hardware, let the concrete cure for at least 24 hours (drilling green concrete runs the risk of cracking it). Most attachment hardware systems have a plate or washer that the bolt slides through. This plate can be used to locate where to drill the bolt hole. When drilling for a 5⁄8-in. bolt, make the hole slightly oversize; otherwise, the dust and debris in the hole will clog the bolt and not allow it to set fully in the hole. Hardware manufacturers will specify the appropriate size bolt and hole for their specific hardware.
1. Locate the bolt’s center mark using the post base’s attachment plate.

2. Check the bolt size and compare it to the manufacturer’s specified bit size.
Using the right equipment to safely drill holes
It was once considered acceptable to drill holes in concrete without collecting or protecting from dust, but concerns about silica-related respiratory diseases have causes OSHA to require special equipment to protect people on the job site. OSHA has a silica-dust-control fact sheet which provides the information you need to safely drill holes. The risks are great enough that you may just opt for wet setting your hardware for this reason alone.
Installing epoxy anchoring systems
If you have decided to drill the holes and you’re ready to install the bolts, there is a fairly detailed protocol for securing a bolt with epoxy. Be sure to follow the instructions provided by the manufacturer to ensure a good bond, but here’s a general description of how most epoxy adhesives work.
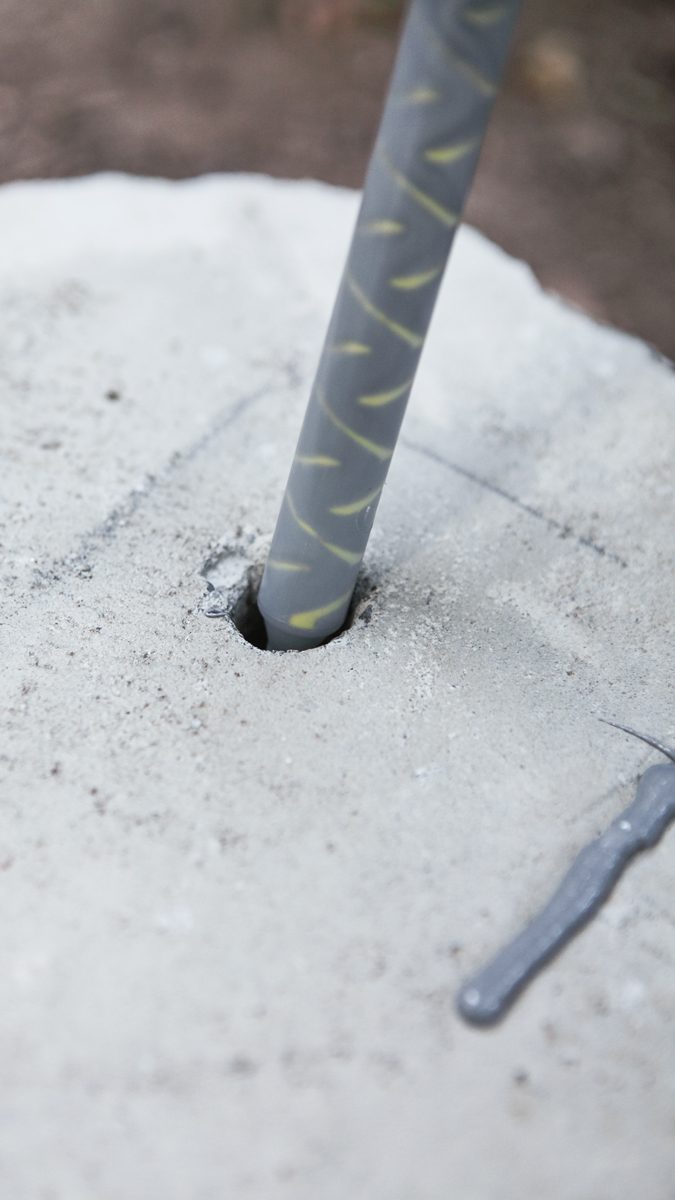
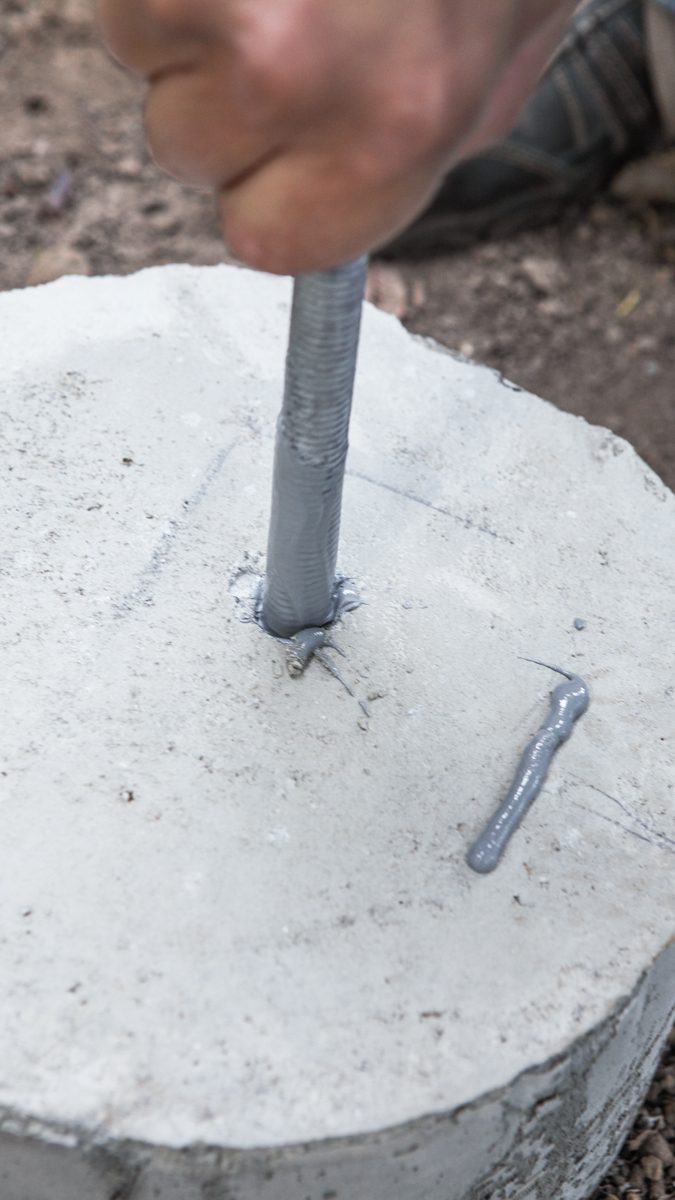
Two-part epoxy enters the mixing tube as separate black and white elements and mixes as it progresses down the tube. It should be an even gray when it exits the end of the tube, which indicates that it’s thoroughly mixed. The applicator tube should be of a small enough diameter to allow you to insert the tube into the bolt hole and apply the epoxy up from the bottom of the hole. The first time you insert the bolt it will want to spring back up because of the epoxy’s elasticity. To avoid this springback, plunge the bolt until the epoxy has worked up the sides of the hole and the bolt shank. Then, if necessary, hold the bolt down until it decides it wants to stay. Note that the nut should be threaded on during this process. The nut provides a handle to work the bolt with and also protects the threads from getting gooped up with excess epoxy. While the epoxy is still pliable, scrape away any excess from around the bolt that might prevent the post base from fully resting on the footing surface.
 7. Mix the two-part epoxy by passing it through a mixing-tube applicator.
 8. Run a small sample line to check that the epoxy is adequately mixed.
9. Apply the epoxy by inserting the nozzle into the hole and filling from the bottom.
10. Insert the bolt and plunge it several times to work the epoxy up the sides.
11. Hold the bolt fully plunged for a few seconds to allow the epoxy to relax.
12. Remove any excess epoxy before it dries.
Fine Homebuilding Recommended Products
Fine Homebuilding receives a commission for items purchased through links on this site, including Amazon Associates and other affiliate advertising programs.
Jigsaw
Drill Driver/Impact Driver
4-Gallon Piston Backpack Sprayer




View Comments
There is also the actually dry technique, which is to use bolts which don't need epoxy, such as wedge anchors or screw anchors, such as the Simpson Titen brand.
I agree on the wedge / expansion anchor. I believe the regular SST Titen anchor screws aren't supposed to be used for permanent exterior installation (they are only mechanically galvanized) but the stainless steel Titen HD is okay. You just have to use stainless hardware so there's no galvanic reaction.
The article is great on “how to” but I found it light on “pros and cons.” Do both methods provide equal results? Are there situations where one is recommended over the other? If you had a choice of either, which is preferred? What are the “Cons” of each option?
Wet-set anchors are always my preferred choice. Using a hammer drill to provide holes for either true 'dry-set' concrete screws or epoxy anchoring of bolts ore threaded rod runs the risk of minute cracks in small diameter concrete piers. I would NEVER use a wedge-bolt style anchor in piers or thin walls - they can easily split the concrete. Using a core drill is preferred but the epoxy manufacturers frown on this because the wall of the hole is too smooth to provide adequate anchorage against uplift.