Salvaging Trees for Lumber
From cutting the logs to milling, drying, and storing the wood, converting trees into lumber is a challenging process.
Synopsis: When Scott McBride decided to salvage the trees in his forested land for lumber, he found it to be a complex process. In this column, he details the ways you can salvage wood, beginning with cutting and transporting logs with the help of a logger, using a portable bandsaw mill or working with a small mill and handling waste, and drying and storing the lumber, all of which requires a sizable upfront investment.
Back in the late 1970s, my wife and I purchased 25 acres of forested mountain land in Virginia with the intention of homesteading. In the ensuing years, careers developed, the kids grew up, and the homestead never happened—but we kept the land anyway. Call me a tree-hugger, but there was something satisfying about keeping that little piece of Creation wild.
Meanwhile, the forest kept on growing. We cut firewood as needed, but had no real desire to harvest timber. The situation changed recently, however, due to a freak storm and an insect blight. The storm knocked down a number of mature hardwoods and the blight, caused by the emerald ash borer, is gradually wiping out an entire species. We had to decide to either salvage the trees or let them rot in the woods.
Our situation is not unique. According to the U.S. Endowment for Forestry & Communities, there are an estimated 10 million family forest ownerships across the United States that collectively control 36%—290 million acres—of the nation’s forestland. That’s a lot of lumber. In an ideal world, these forests would be harvested and replanted on a regular rotation, producing long-term income for their owners while they capture carbon through photosynthesis. But the geo- physical realities of the 21st century throw several monkey wrenches into that happy picture. Some of the impacts are direct consequences of climate change. Storms of greater intensity and frequency mean more trees blowing down, and warmer temperatures have allowed native insect species such as the western pine beetle to survive winters, resulting in massive damage to U.S. pine forests already weakened by drought. Another mass tree killer is the spread of invasive species, such as the ash borer—a wood-boring beetle.
As a builder and woodworker, my instinct was of course to salvage the wood from our doomed trees. That turned out to be more challenging than I realized it would be. There are four distinct issues that need to be addressed in order to convert trees to lumber: logging, milling, drying, and storage.
Logging
Logging (or “timber getting,” as the English call it) involves cut- ting and transporting logs. This is a famously dangerous business; unless you’ve had plenty of experience in the woods, your best option is to hire a logger, at least to fell the trees. That’s what I did. Watching a professional drop a 36-in.-diameter tree in a matter of minutes so it falls where it’s supposed to might lead one to think there’s nothing to it. In fact, that kind of efficiency is only gained by cutting thousands of trees; it’s tougher than it looks.
Cutting up trees into sawlogs (“bucking”) is also dangerous because of the reactions of the fallen trees. Logs can roll and branches can whiplash. At the least it can be devilishly difficult to avoid binding your saw.
Transporting logs to a central location (“skidding”) can also be a major expense. Production loggers do this with a no-nonsense juggernaut called a skidder, but for a landowner who is concerned with minimizing environmental impact, there are more nimble options. In my experience, a skid steer works best, preferably on tracks rather than a rubber-tire model.
A grapple attachment facilitates log handling by capturing the log, but a grapple weighs much more than forks. Thus, forks sometimes work better for a heavy log to keep the machine from tipping forward.
Landowners may be tempted to use the family tractor for skidding, but there are potential dangers, especially on steep ground. A tractor’s high center of gravity makes it susceptible to rollover. chain-dragging logs with a tractor on steep ground is also dicey because a log can roll, pulling the tractor with it.
Milling
Milling is the most enjoyable part of the process, at least for a woodworker. It’s like being a kid in a candy factory. Which type of mill you work with depends on how much physical labor you’re up for and how much control you want over cutting decisions. At the easy- and-simple end of the spectrum is dropping off your logs at a commercial sawmill. But keep in mind that these outfits typically deal in trailer loads of logs, and don’t welcome walk- in business. You may find a smaller operator that will saw for a fee or “on shares,” which means they keep half of the lumber. If you want anything fancy done with your logs, such as quartersawing, you’d better discuss that in advance, because things move very fast in a production mill.
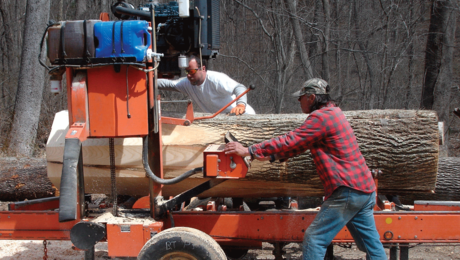
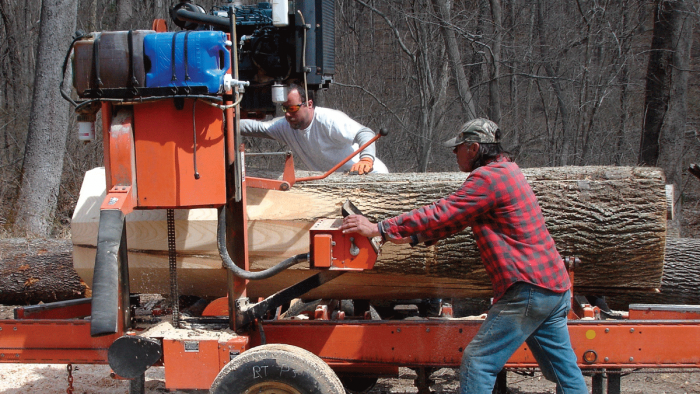
The most popular option nowadays for getting small batches of logs milled to order is the portable bandsaw mill. Because the milling is done on your property, the cost of trucking logs to a mill is avoided and sawn lumber can be moved directly from the mill to the drying stack. Sawing services don’t come cheap, though. In my area, the going rate for bringing in a medium-size mill with hydraulic log loading and turning is $90 to $100 per hour.
Another cost of lumber- making is dealing with waste, even if you burn wood for heat. The unruly shape of sawmill slabs makes them tedious to cut up and handle for firewood.
The alternative is to stack them in a pile for burning, but that’s a project in itself and the pile is an eyesore while it dries.
Drying
Lumber is dried by air-drying, kiln-drying, or a mixture of both. Air-drying is a gentle and free-of-charge way to dry lumber, but there’s still a lot of work in stacking. Green (unseasoned) lumber must be stickered— layered with 3⁄4-in.-thick strips of wood—to allow even airflow around all of the boards. It must also be protected from the weather, either stacked in a well-ventilated barn or covered with sheets of metal roofing.
There’s also a sizable upfront investment of labor in ripping spacer sticks and constructing solid, straight drying platforms. Bringing the cut lumber from wet (“green”) to dry generally requires one year for each inch of board thickness. It’s also worth noting that air-drying won’t kill insects, such as the powderpost beetle, that affect certain woods.
A kiln can deliver 6% Mc (moisture content) lumber in weeks or even days depending on wood species and type of kiln, and it also kills any insects in the lumber. A poorly managed kiln, however, can produce defects such as checks and warpage. If there’s a dry-kiln in your neighborhood, ask around to see how it worked out for other users before committing.
Storage
Storing lumber after it has dried can be an issue that overwhelms a craftsman- turned-lumber maker. A single premium log contains hundreds of board feet, so you may go from squirreling away every little cutoff to suddenly finding yourself awash in wood. An honest assessment of how much lumber you use and how much storage space you have is in order before succumbing to the lure of “free wood.”
If I haven’t discouraged you yet, here’s one final word of caution: Don’t even think about using hardwoods for stick- framing. If you do, you’ll have the strongest and “crookedest” house in the neighborhood.
Photo: courtesy of Scott McBride
From Fine Homebuilding #291
More about building with local timber
21st-Century Timber Framing – A mix of modern and traditional methods of joinery and assembly creates an engineered timber frame that goes up fast.
High-Tech Timber-Frame Joinery Machine – Watch a 90-ft.-long custom CNC machine make all the precise cuts for a timber rafter.
Video: Timber Frame With Basic Tools – See how craftsmen create this true timber-frame look without relying completely on timber-frame joinery.
