FHB Logo Facebook LinkedIn Email Pinterest Twitter X Instagram Tiktok YouTube Plus Icon Close Icon Navigation Search Icon Navigation Search Icon Arrow Down Icon Video Guide Icon Article Guide Icon Modal Close Icon Guide Search Icon Skip to content
Subscribe
Log In
  • How-To
  • Design
  • Tools & Materials
  • Restoration
  • Videos
  • Blogs
  • Forum
  • Magazine
  • Members
  • FHB House
  • Podcast
Log In
How-To

Build a Sturdy Shop Table

A gridded top makes clamping easy and keeps sawdust out of your way.

By Peter Polcyn Issue 292 - July 2020
  • X
  • facebook
  • linkedin
  • pinterest
  • email
  • add to favorites Log in or Sign up to save your favorite articles

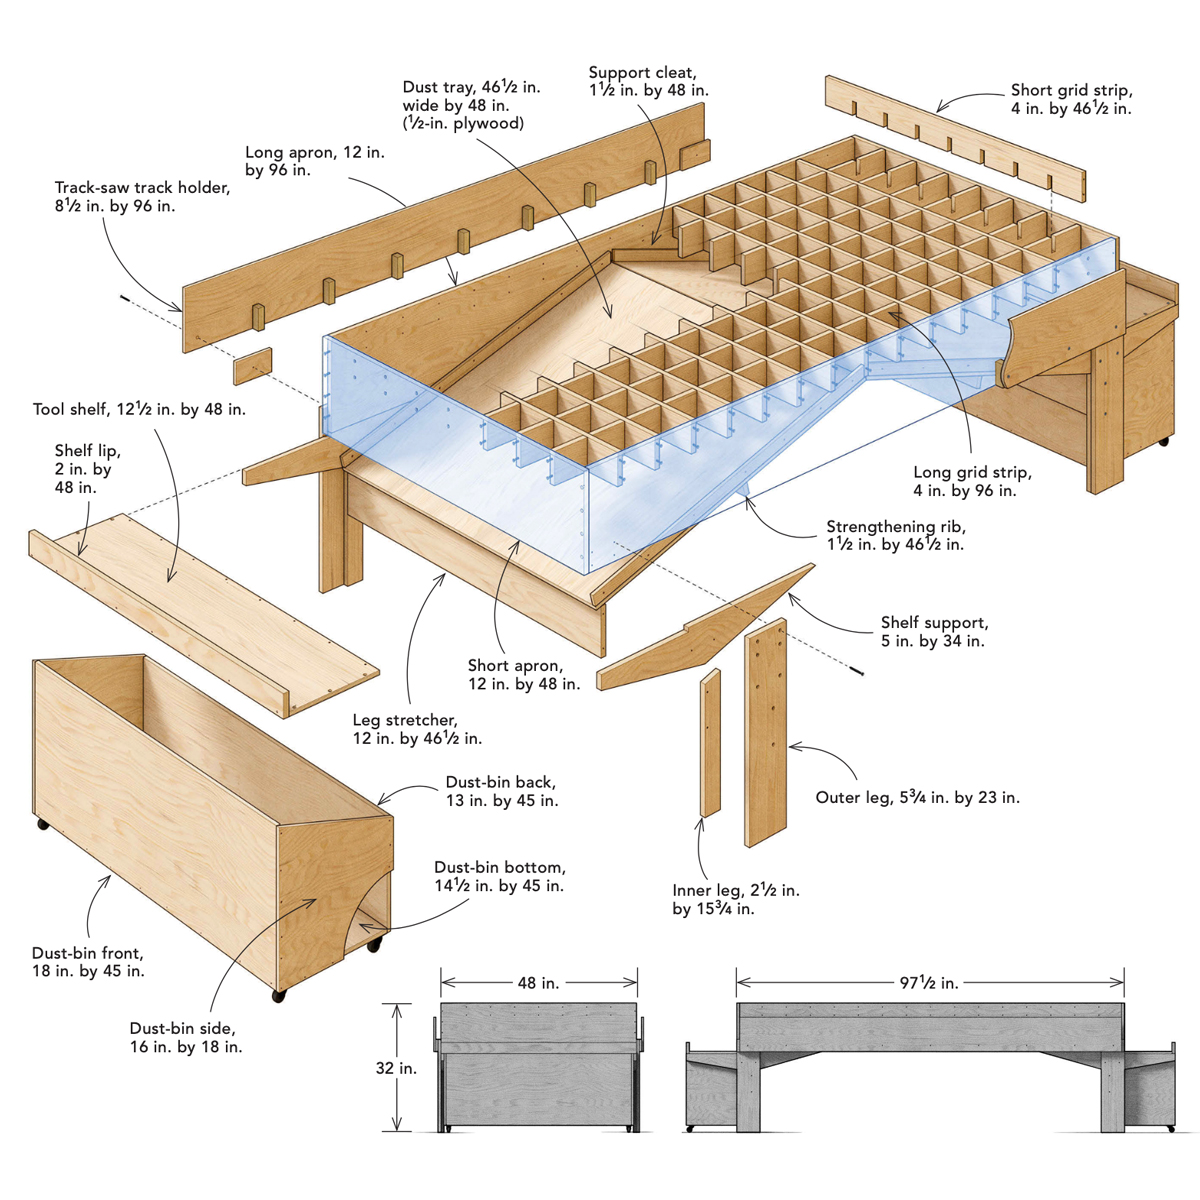
Synopsis: An alternative to sawhorses and workbenches, this shop cut table is made from just four sheets of plywood. Woodworker Peter Polcyn explains how to prep the pieces the most labor-intensive part of the process with a detailed construction drawing (plus a downloadable Sketchup model), and then describes the assembly of the gridded top, apron, dust trays, and legs. The article includes examples of customizable accessories for the table, such as a track-saw guiderail holder and a power strip.


As a full-time cabinet and furniture maker, I work with a lot of plywood. I typically break the sheets down using a track saw, and finding the right surface to do this work has been a challenge. Over the years I tried everything from sawhorses to traditional workbenches, but nothing worked exactly like I wanted. I need a flat, stable, well-supported surface that won’t collect sawdust and allows me to clamp boards and plywood anywhere. And it can’t be too precious to cut into with a track saw.

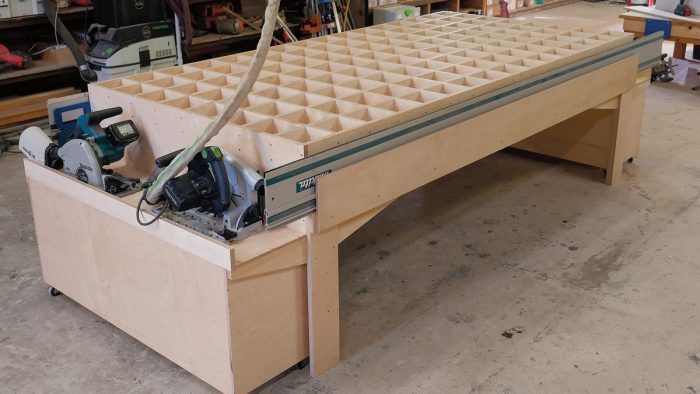
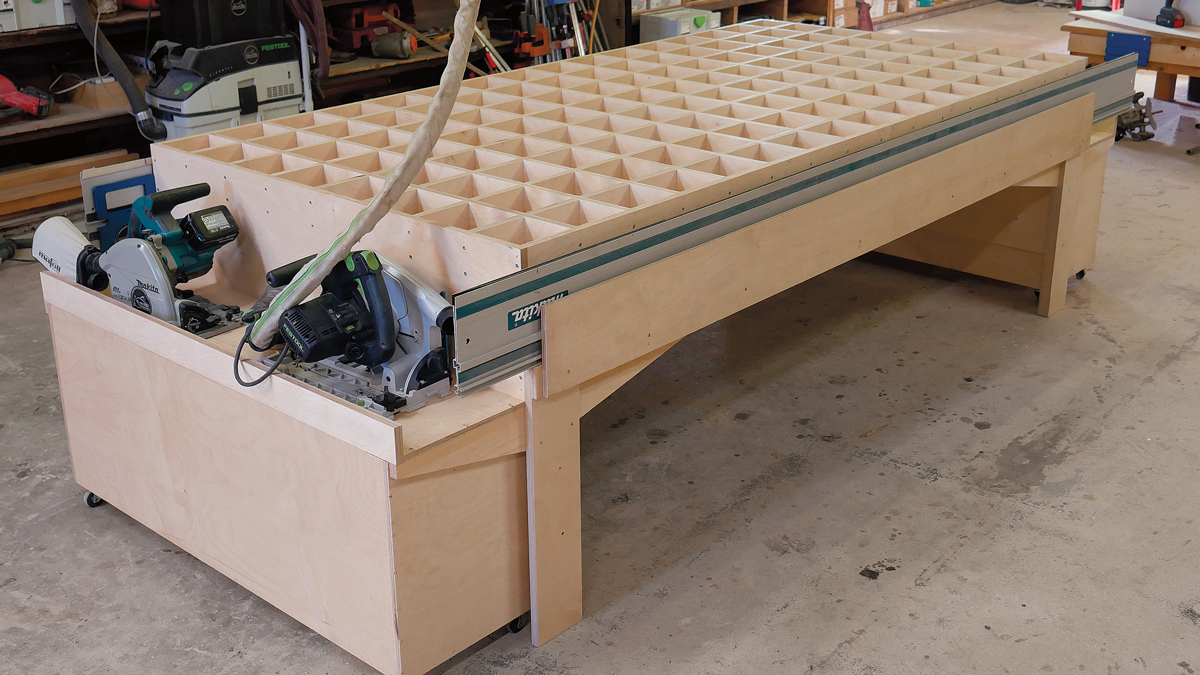
A homemade grid-top shop table, which I call a “cut table,” is my answer. I built my first about a year and a half ago. Because it was made primarily for track-saw use, the design included spots for the saw and tracks. The table worked well, but there were aspects I wanted to improve. This article follows the second iteration of my cut table, which addresses the limitations of the first version.

The biggest problem was that the table sagged a little in the 8-ft. direction, likely because it was only 4 in. thick. The new version has a 12-in.-wide apron to better resist sagging. In the first version, sawdust fell right on the floor. The new version has a sloping bottom that directs saw- dust to collection bins on both ends to keep my work area tidy. Finally, I added enough on-board power to use several corded power tools at once. I’m really happy with the new table and it has greatly improved my shop and my workflow. If you do casework, I strongly recommend this as an option.
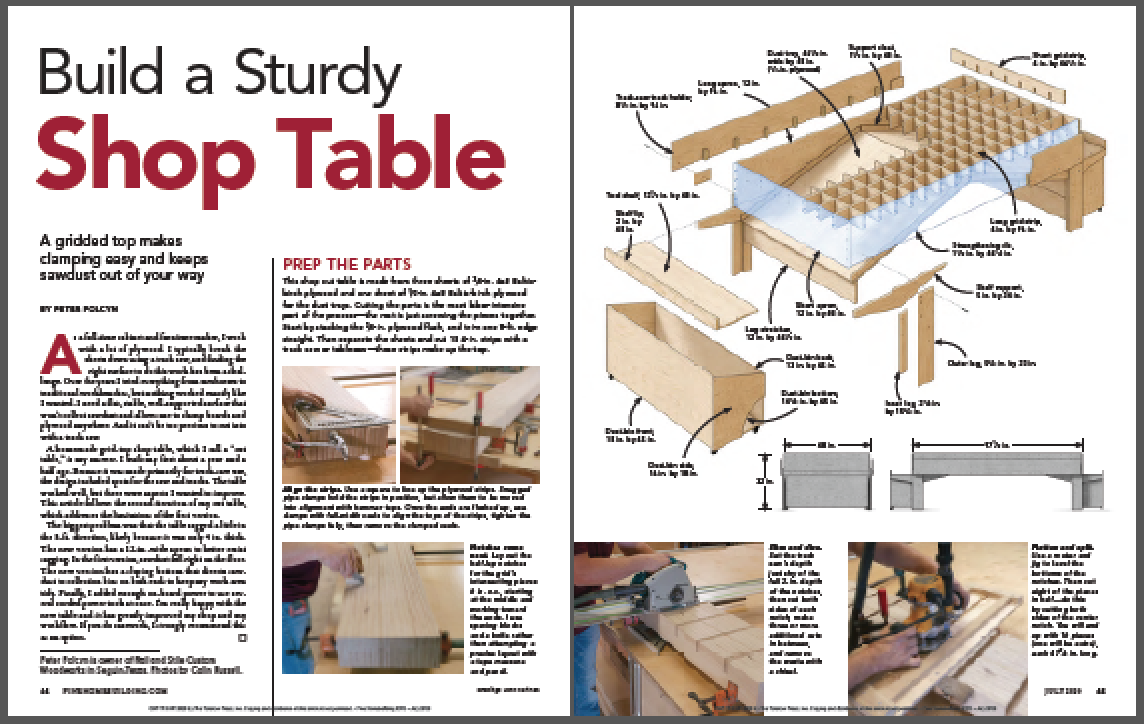
Prep the parts

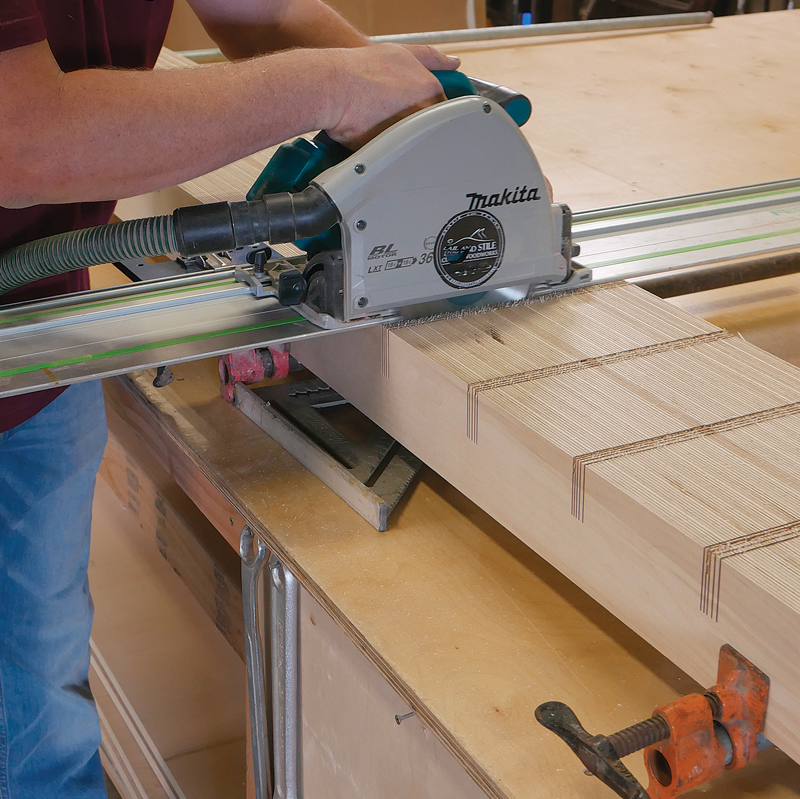
This shop cut table is made from three sheets of 3⁄4-in. 4×8 Baltic- birch plywood and one sheet of 1⁄2-in. 4×8 Baltic-birch plywood for the dust trays. Cutting the parts is the most labor-intensive part of the process—the rest is just screwing the pieces together. start by stacking the 3⁄4-in. plywood flush, and trim one 8-ft. edge straight. then separate the sheets and cut 15 4-in. strips with a track saw or tablesaw—these strips make up the top.

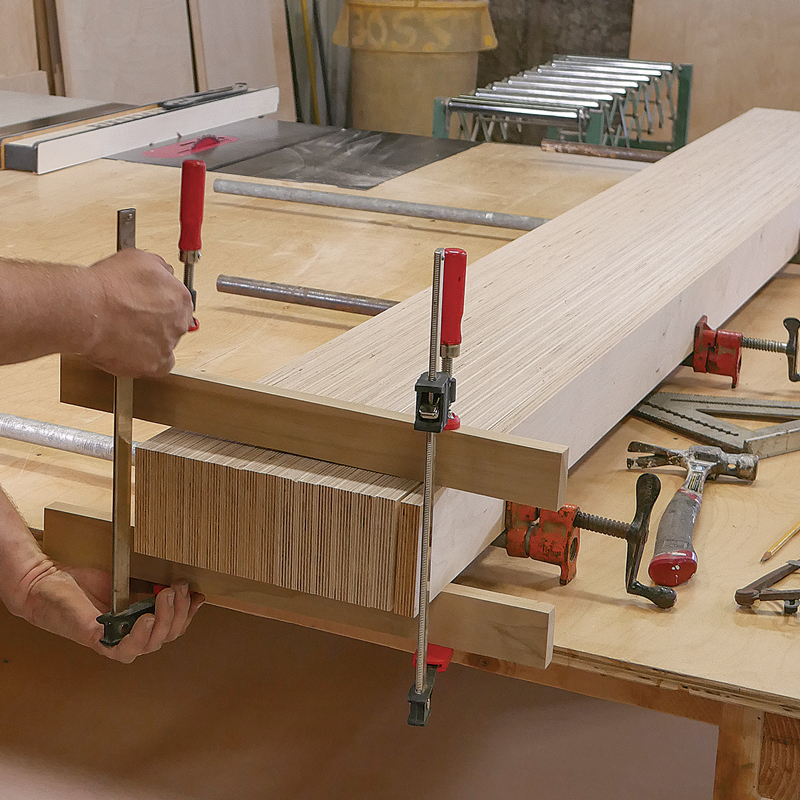
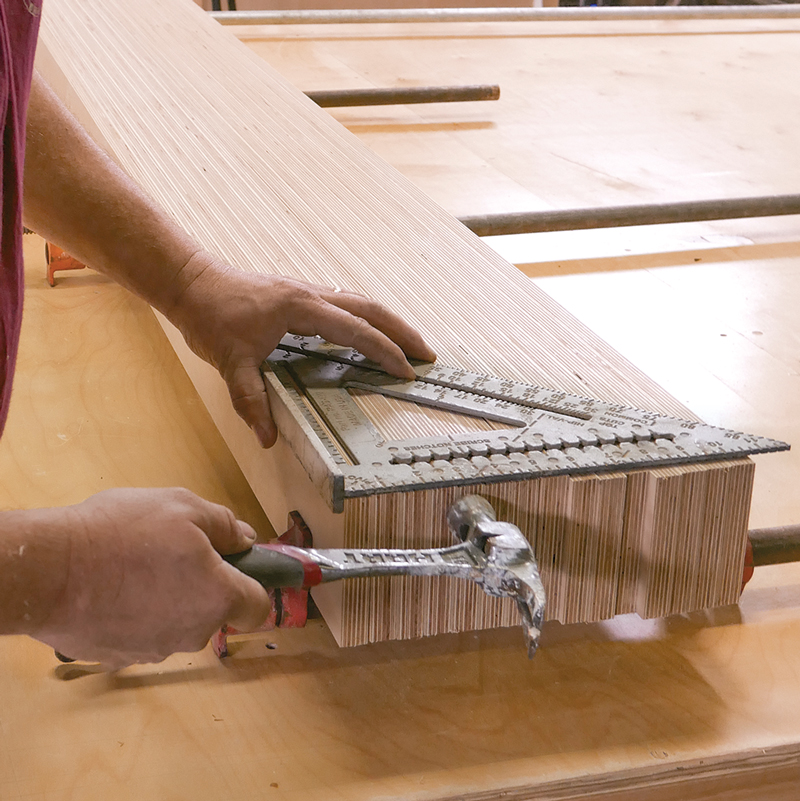
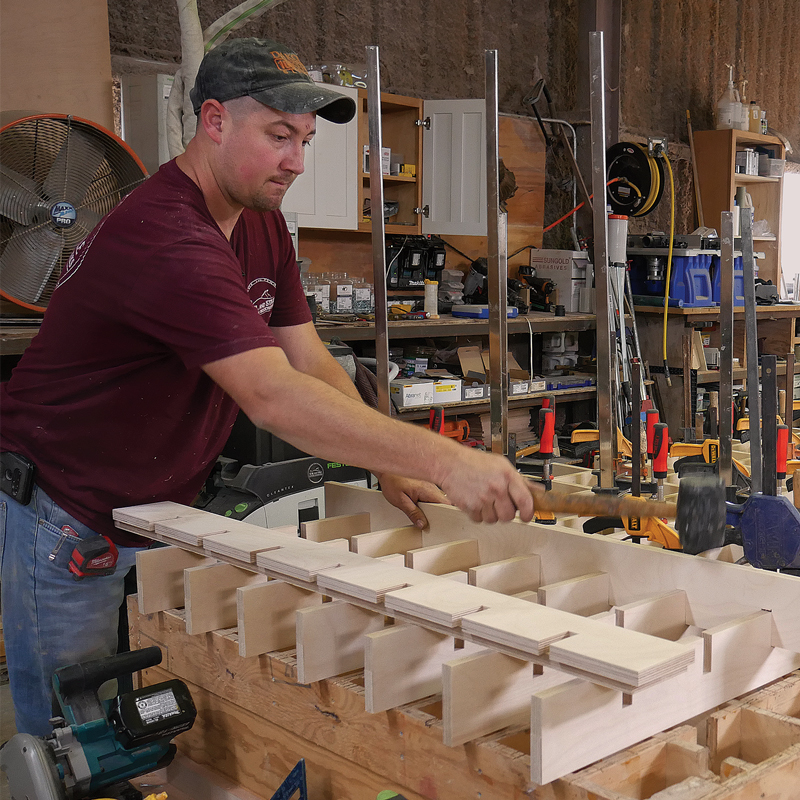
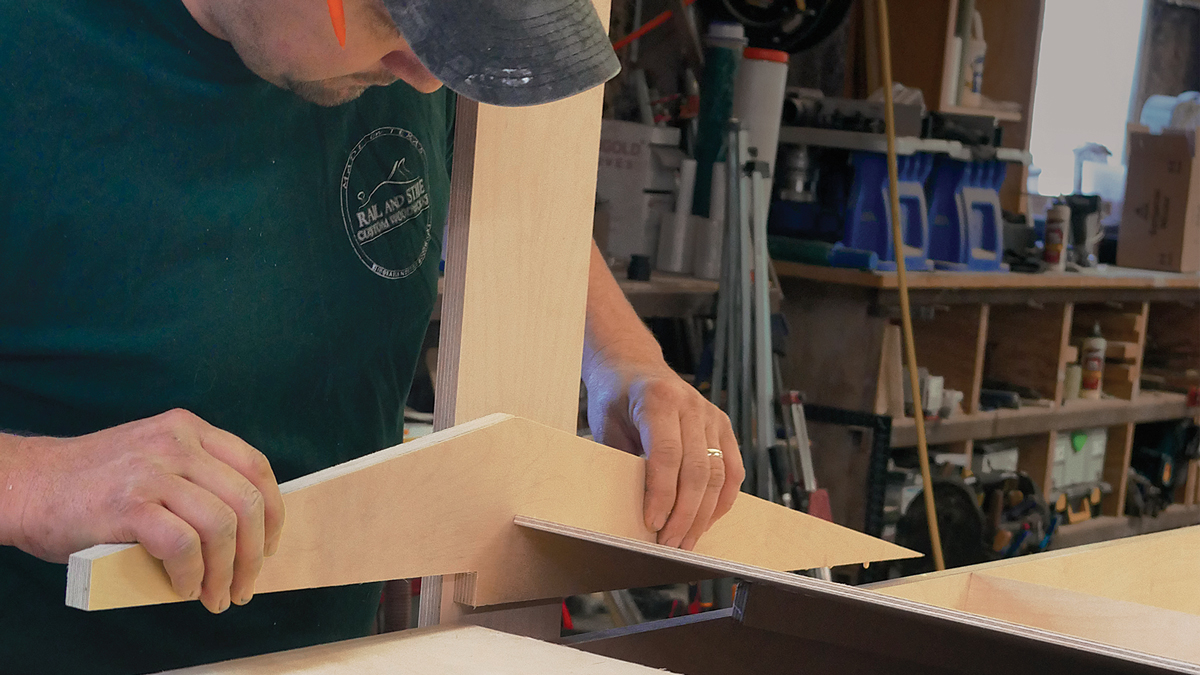
Align the strips. Use a square to line up the plywood strips. Snugged pipe clamps hold the strips in position, but allow them to be moved into alignment with hammer taps. Once the ends are flushed up, use clamps with full-width cauls to align the tops of the strips, tighten the pipe clamps fully, then remove the clamped cauls.
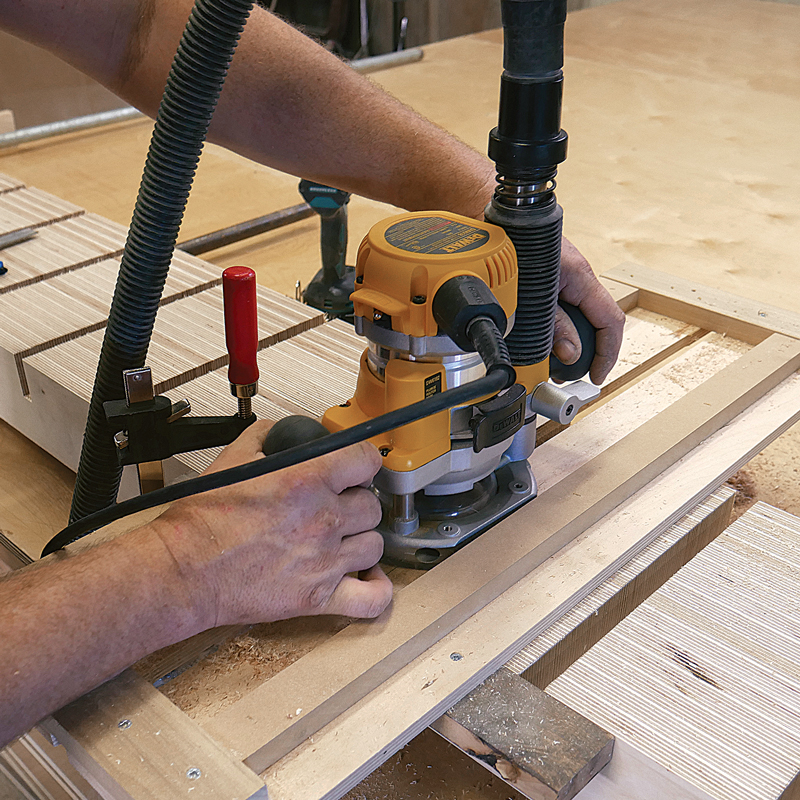
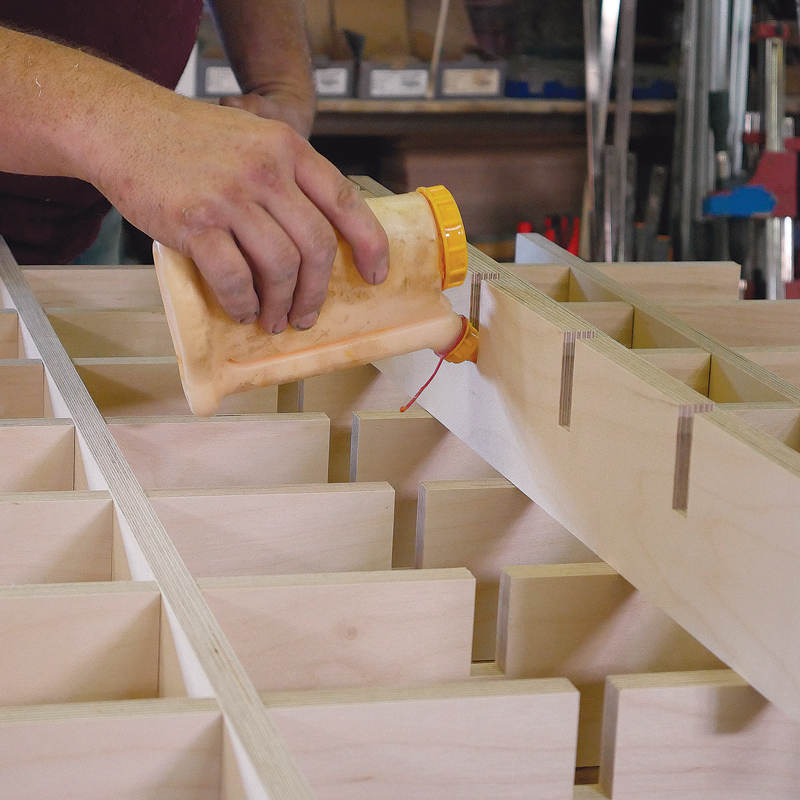
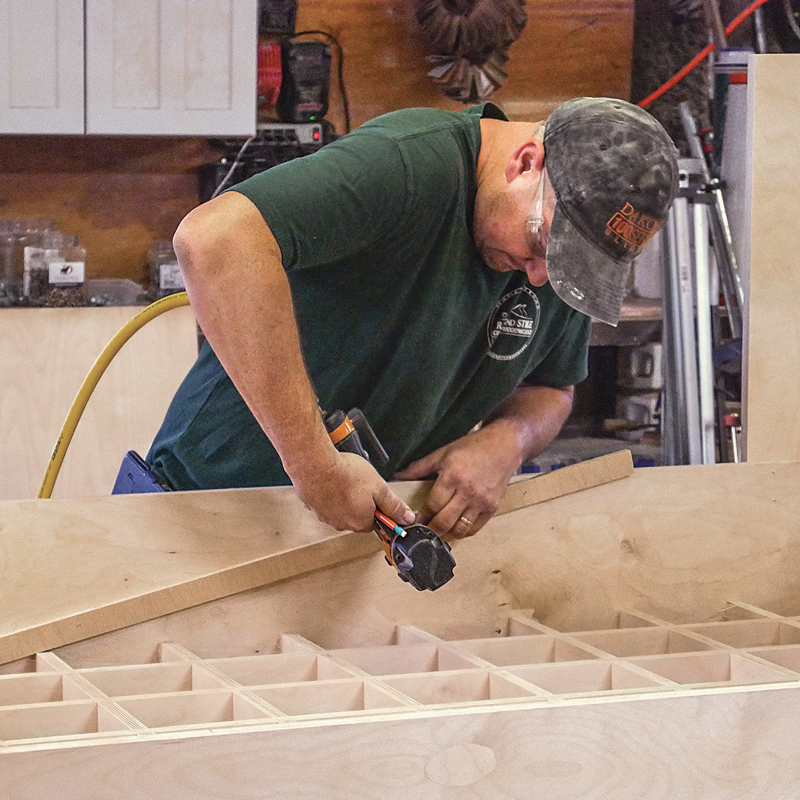
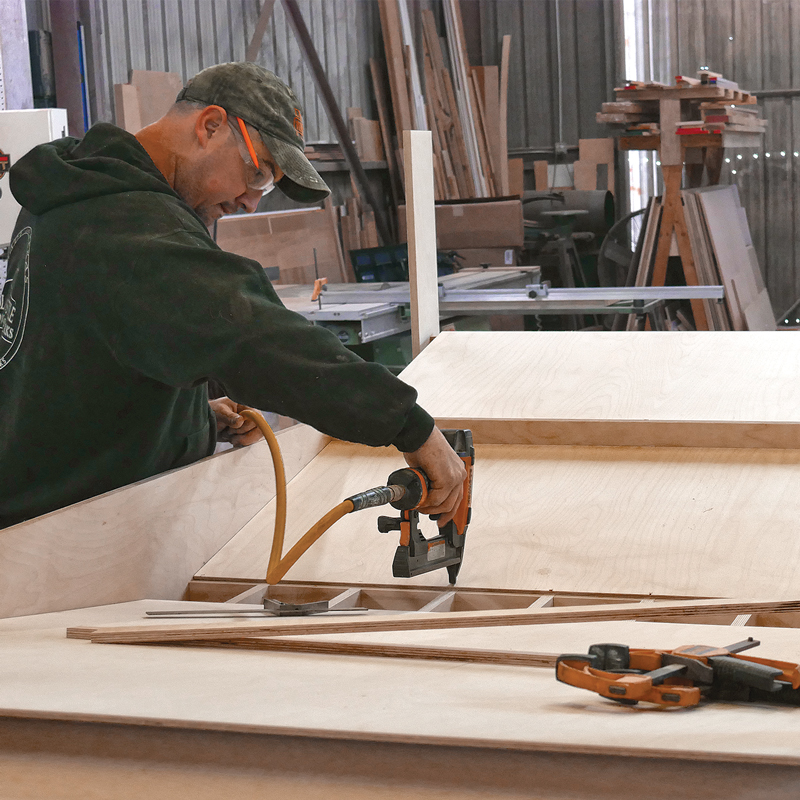
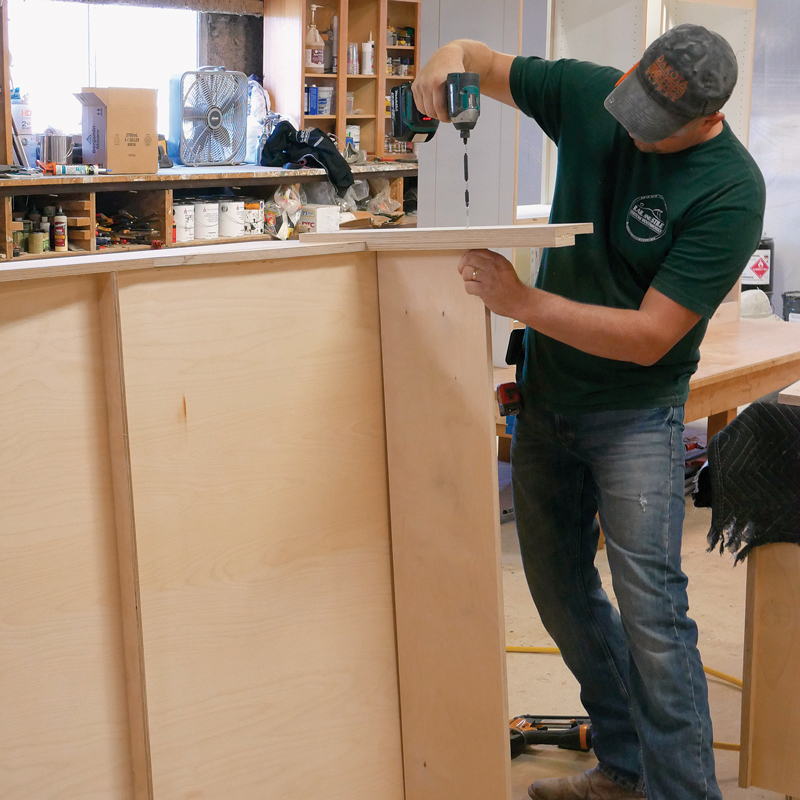
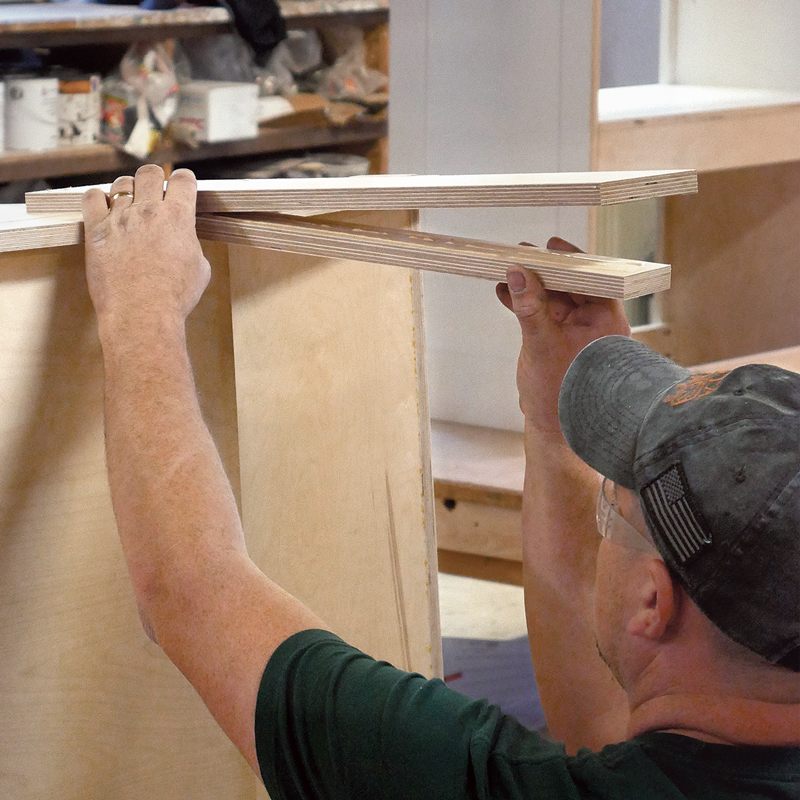
Notches come next. Lay out the half-lap notches for the grid’s intersecting pieces 6 in. o.c., starting at the middle and working toward the ends. I use spacing blocks and a knife rather than attempting a precise layout with a tape measure and pencil.

Slice and dice. Set the track saw’s depth just shy of the full 2-in. depth of the notches, then cut both sides of each notch, make three or more additional cuts in between, and remove the waste with a chisel.

Flatten and split. Use a router and jig to level the bottoms of the notches. Then cut eight of the pieces in half—do this by cutting both sides of the center notch. You will end up with 16 pieces (one will be extra), each 475⁄8 in. long.

Assemble the top

Glue the grid. Dry-fit the parts to check the alignment, then glue them using a squirt of wood glue at each intersection.

Tap it in. Thump the overlapping pieces into place with a rubber mallet. Make sure the pieces are fully seated or the finished top will be uneven.

Clamp the intersections. Each joint should be clamped for about 30 minutes. It’s unlikely you’ll have enough clamps, so move them to subsequent joints after the glue has sufficiently set up.

Trim to width. The apron ends are made from 4-ft. pieces of plywood, so the assembly must be trimmed to that dimension. This can be done before glue-up, but trimming after assembly offers one last chance to ensure the sides are perfectly straight. It takes two passes to get through the 4-in. strips.

Add the apron. Tack the pieces of 12-in.-tall apron in place first, then fasten them with two countersunk 2-in. wood screws into the ends of each grid strip and four into each corner, keeping the screws at least 1 in. down from the top to protect sawblades when the table is in use.

Shelf it. Tack and then screw
a 12-in.-deep by 4-ft.-wide storage shelf onto the bottom of the apron
on each end. Support brackets are added later to prevent sag.

Cleats for dust trays. Plywood trays under the grid slope toward each end to funnel sawdust into collection bins. Dry-fit the trays on blocking first and trace along the bottom edge. Then attach cleats for the dust trays along these lines with narrow-crown staples and glue.

Install the legs and dust trays. Screw the legs to the apron and then attach the dust trays, made of 1⁄2-in. plywood, to the cleats. Finally, add 1⁄2-in.-tall strengthening ribs, made of 3⁄4-in. plywood, centered on the length of each tray and fastened with narrow-crown staples.

Strengthen the legs

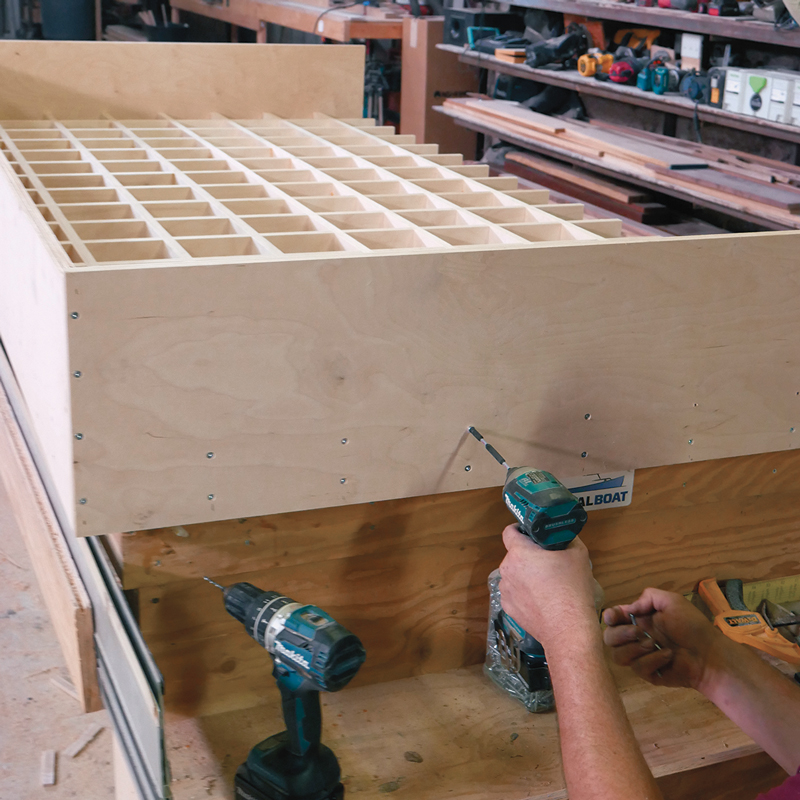
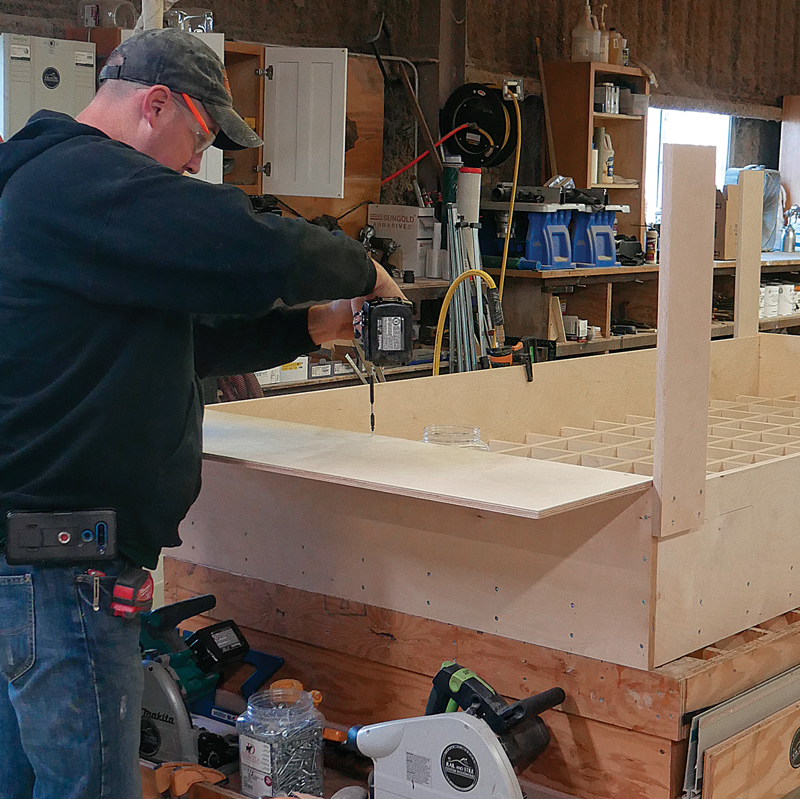
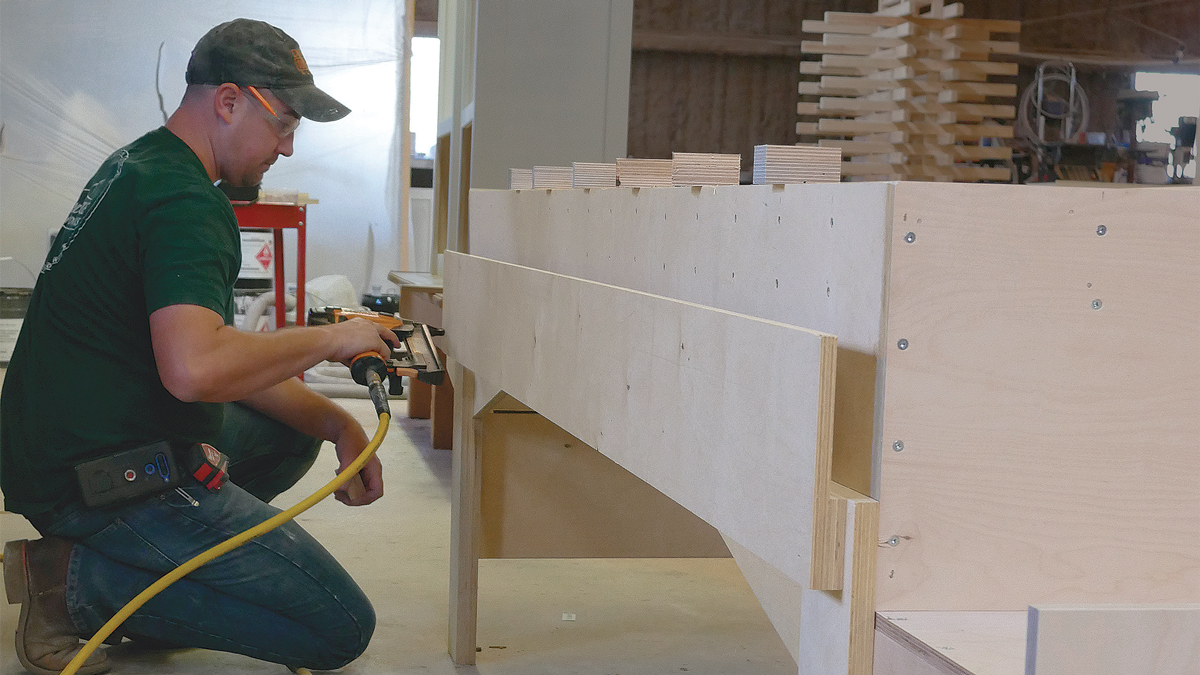
A cut table is only as good as it’s base, which must be sturdy and resist racking in both directions to keep fasteners from loosening over time. I reinforce the legs with another layer of plywood and stretchers, and then use the nearly completed table to help build the dust bins.

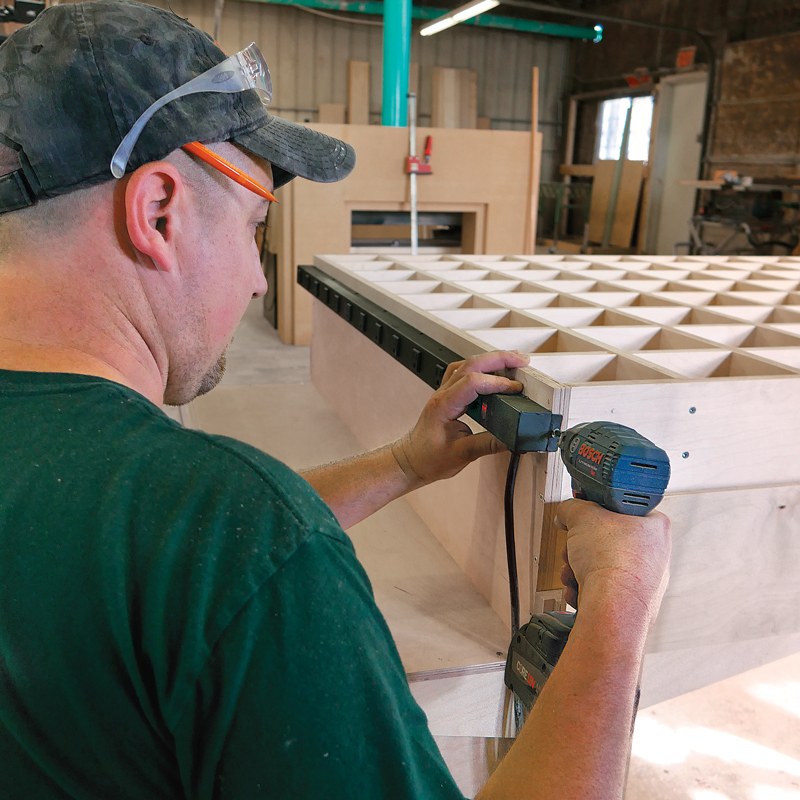
Bolster and close. I attach 3⁄4-in. plywood brackets at the top of each table leg to serve multiple purposes. In addition to providing racking resistance, they also close the sides of the undertable dust trays and reinforce the tool shelves on either end.

Stretchers add sturdiness.To tie each pair of legs together, install 12-in.-wide stretchers at each end with 21⁄2-in. wood screws driven through the legs into predrilled holes.

Beef up the legs.Glue and staple strips of plywood to the inside of the legs to add strength and transfer weight directly from the table to the floor.

Outfit with accessories

How you outfit the table depends on personal preference. Here’s a look at how I customized my version.


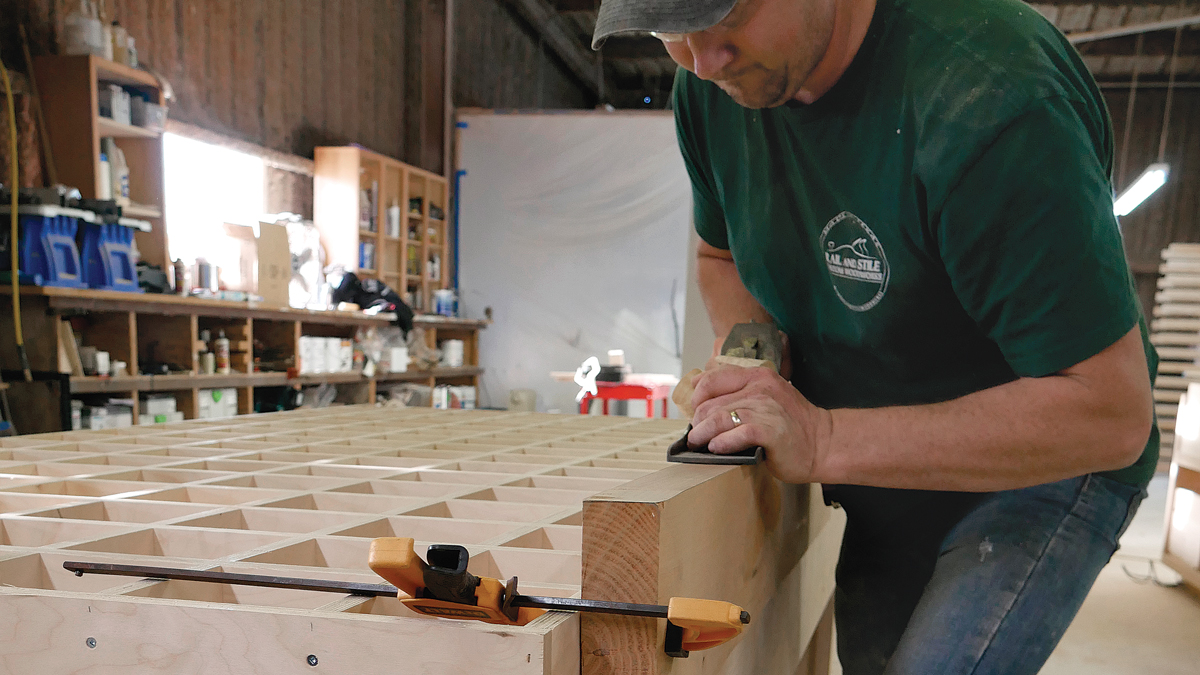
The right track. A holder for my 118-in. track-saw guiderail is mounted on the side of the table, where the track is kept protected and within reach. The holder also acts as a support when I’m planing, sanding, and edge-profiling boards.

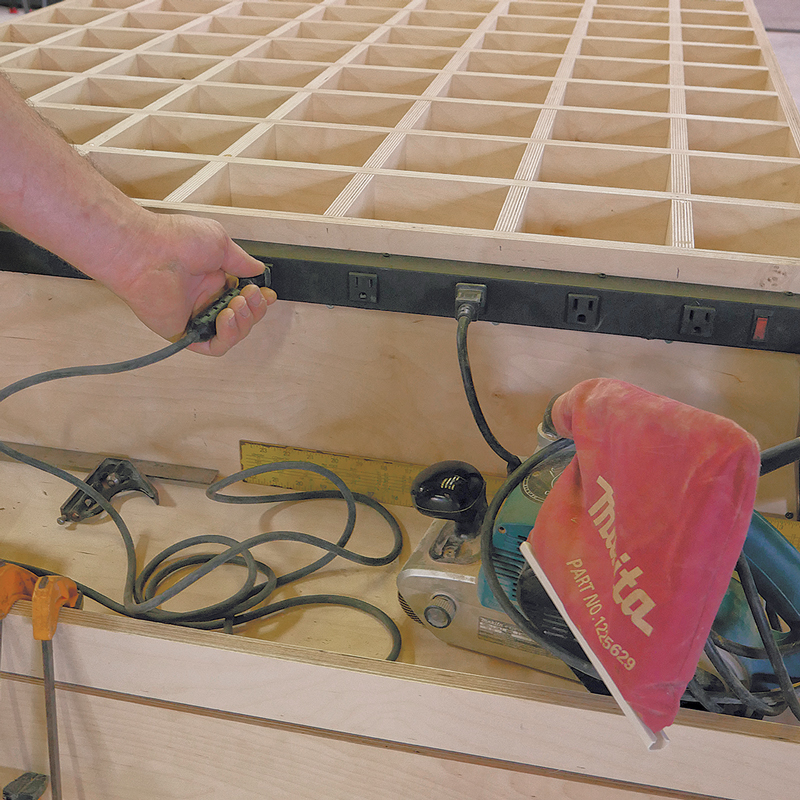
Power up. A 4-ft.-long heavy-duty power strip with 12 outlets allows me to use a project’s worth of corded tools without swapping cords, and means I rarely need an extension cord.

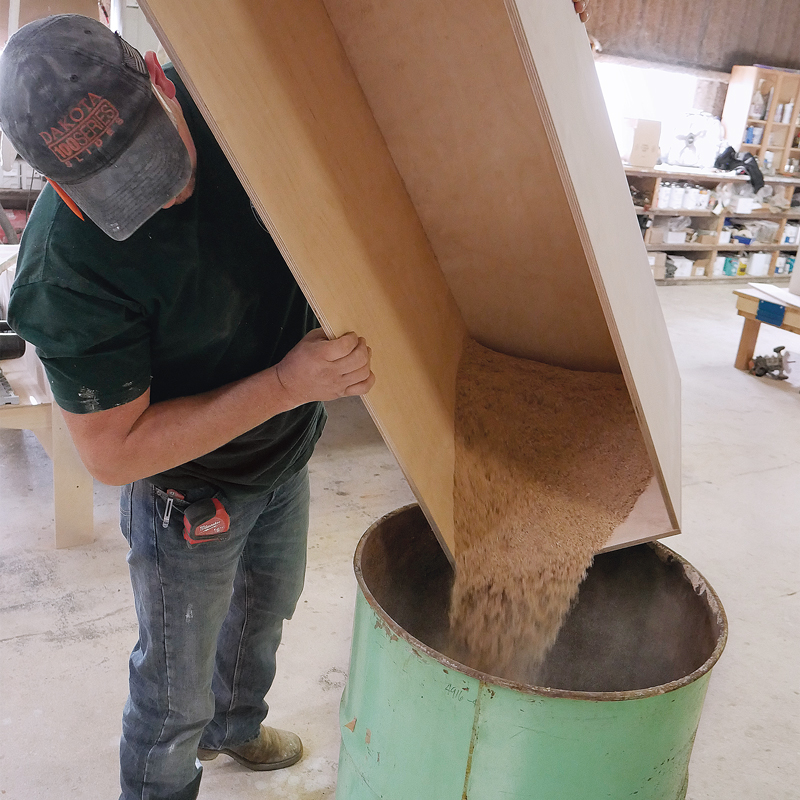
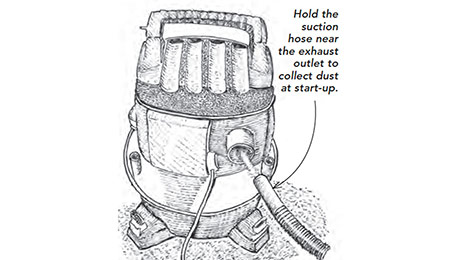
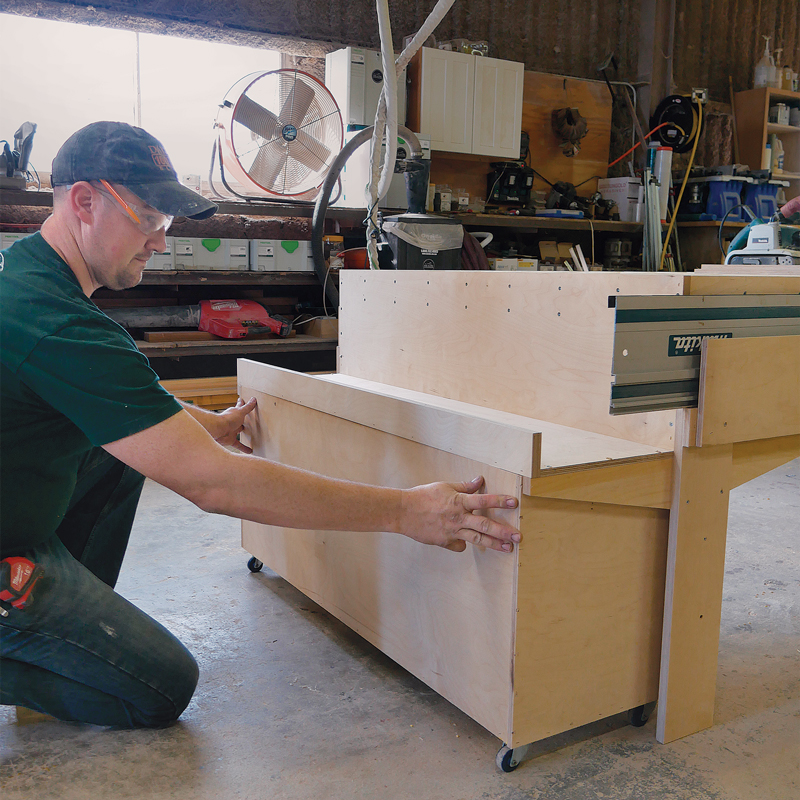
Less mess. The table’s sloping bottom and the dust bins on both ends are game changers when it comes to keeping a neat workspace. In my opinion, effective dust management is the table’s best feature.

Watch the video of the process: How To Build a Sturdy Shop Table

And download a Sketchup model featuring two variations of Peter Polcyn’s custom cutting table

Peter Polcyn is owner of Rail and Stile Custom Woodworks in Seguin,Texas.

Photos by Colin Russell.

Drawings: John Hartman

From FineHomebuilding #292

To view the entire article, please click the View PDF button below.

More helpful workshop stands, and workbenches:

Simple Workbenches – These site-built benches are easy to make and simplify many jobs.

Portable Three-Legged Sawhorses – This versatile knockdown design sets up quickly and stores flat.

The Knock-Down Shop – A precision shop is set up in less than five minutes using collapsible tables and a salvaged panel door.

Sign up for eletters today and get the latest how-to from Fine Homebuilding, plus special offers.

Signing you up...

This site is protected by reCAPTCHA and the Google Privacy Policy and Terms of Service apply.
See all newsletters
See all newsletters
×

Get home building tips, offers, and expert advice in your inbox

Signing you up...

This site is protected by reCAPTCHA and the Google Privacy Policy and Terms of Service apply.
See all newsletters
See all newsletters
View PDF

New Feature

Fine Homebuilding Forums

Ask questions, offer advice, and share your work

  • X
  • facebook
  • linkedin
  • pinterest
  • email
  • add to favorites Log in or Sign up to save your favorite articles

Log in or create an account to post a comment.

Sign up Log in

Become a member and get full access to FineHomebuilding.com

Up Next

Video Shorts

Featured Story

Vintage Sash Windows Get an Energy-Efficient Upgrade

Low-e storm panels improve the energy efficiency of these old sash windows without changing their classic look.

Featured Video

SawStop's Portable Tablesaw is Bigger and Better Than Before

The 10-in. Jobsite Saw PRO has a wider table, a new dust-control port, and a more versatile fence, along with the same reliable safety mechanism included in all SawStop tablesaws.

Related Stories

  • An Easier Method for Mitered Head Casings
  • Putting Drywall Sanders to the Test: Power, Precision, and Dust Control
  • Makeshift Foam Tip for Tight Spots
  • Tool Test: You Need a Drywall Sander

Discussion Forum

Recent Posts and Replies

  • |
  • |
  • |
  • |
  • |
  • |
View More Create Post

Highlights

Fine Homebuilding All Access
Fine Homebuilding Podcast
Tool Tech
Plus, get an extra 20% off with code GIFT20

Video

View All Videos
  • Putting Drywall Sanders to the Test: Power, Precision, and Dust Control
  • Removing Lead Paint: DIY or Hire a Contractor?
  • Garbage-Bag Dust Collector for Tablesaw
  • Podcast Episode 151: Cordless Saws, Glued-Down Floors, and Buried Electrical Boxes
View All

Dust Collection

View All Dust Collection Articles
  • Convenient Dust Collection
  • Minimize Mess from a Wet/Dry Vac
  • Easier Dust Collection
View All Dust Collection Articles

Fine Homebuilding Magazine

  • Issue 332 - July 2025
    • Custom Built-ins With Job-Site Tools
    • Fight House Fires Through Design
    • Making the Move to Multifamily
  • Issue 331 - June 2025
    • A More Resilient Roof
    • Tool Test: You Need a Drywall Sander
    • Ducted vs. Ductless Heat Pumps
  • Issue 330 - April/May 2025
    • Deck Details for Durability
    • FAQs on HPWHs
    • 10 Tips for a Long-Lasting Paint Job
  • Issue 329 - Feb/Mar 2025
    • Smart Foundation for a Small Addition
    • A Kominka Comes West
    • Making Small Kitchens Work
  • Issue 328 - Dec/Jan 2024
    • How a Pro Replaces Columns
    • Passive House 3.0
    • Tool Test: Compact Line Lasers

Fine Home Building

Newsletter Sign-up

  • Fine Homebuilding

    Home building tips, offers, and expert advice in your inbox.

  • Green Building Advisor

    Building science and energy efficiency advice, plus special offers, in your inbox.

  • Old House Journal

    Repair, renovation, and restoration tips, plus special offers, in your inbox.

Signing you up...

This site is protected by reCAPTCHA and the Google Privacy Policy and Terms of Service apply.
See all newsletters

Follow

  • Fine Homebuilding

    Dig into cutting-edge approaches and decades of proven solutions with total access to our experts and tradespeople.

    Start Free Trial Now
    • Facebook
    • Instagram
    • X
    • LinkedIn
  • GBA Prime

    Get instant access to the latest developments in green building, research, and reports from the field.

    Start Free Trial Now
    • Facebook
    • YouTube
  • Old House Journal

    Learn how to restore, repair, update, and decorate your home.

    Subscribe Now
    • Facebook
    • Instagram
    • X

Membership & Magazine

  • Online Archive
  • Start Free Trial
  • Magazine Subscription
  • Magazine Renewal
  • Gift a Subscription
  • Customer Support
  • Privacy Preferences
  • About
  • Contact
  • Advertise
  • Careers
  • Terms of Use
  • Site Map
  • Do not sell or share my information
  • Privacy Policy
  • Accessibility
  • California Privacy Rights

© 2025 Active Interest Media. All rights reserved.

Fine Homebuilding receives a commission for items purchased through links on this site, including Amazon Associates and other affiliate advertising programs.

  • Home Group
  • Antique Trader
  • Arts & Crafts Homes
  • Bank Note Reporter
  • Cabin Life
  • Cuisine at Home
  • Fine Gardening
  • Fine Woodworking
  • Green Building Advisor
  • Garden Gate
  • Horticulture
  • Keep Craft Alive
  • Log Home Living
  • Military Trader/Vehicles
  • Numismatic News
  • Numismaster
  • Old Cars Weekly
  • Old House Journal
  • Period Homes
  • Popular Woodworking
  • Script
  • ShopNotes
  • Sports Collectors Digest
  • Threads
  • Timber Home Living
  • Traditional Building
  • Woodsmith
  • World Coin News
  • Writer's Digest
Active Interest Media logo
X
X
This is a dialog window which overlays the main content of the page. The modal window is a 'site map' of the most critical areas of the site. Pressing the Escape (ESC) button will close the modal and bring you back to where you were on the page.

Main Menu

  • How-To
  • Design
  • Tools & Materials
  • Video
  • Blogs
  • Forum
  • Project Guides
  • Reader Projects
  • Magazine
  • Members
  • FHB House

Podcasts

  • FHB Podcast
  • ProTalk

Webinars

  • Upcoming and On-Demand

Podcasts

  • FHB Podcast
  • ProTalk

Webinars

  • Upcoming and On-Demand

Popular Topics

  • Kitchens
  • Business
  • Bedrooms
  • Roofs
  • Architecture and Design
  • Green Building
  • Decks
  • Framing
  • Safety
  • Remodeling
  • Bathrooms
  • Windows
  • Tilework
  • Ceilings
  • HVAC

Magazine

  • Current Issue
  • Past Issues
  • Magazine Index
  • Subscribe
  • Online Archive
  • Author Guidelines

All Access

  • Member Home
  • Start Free Trial
  • Gift Membership

Online Learning

  • Courses
  • Project Guides
  • Reader Projects
  • Podcast

More

  • FHB Ambassadors
  • FHB House
  • Customer Support

Account

  • Log In
  • Join

Newsletter

Get home building tips, offers, and expert advice in your inbox

Signing you up...

This site is protected by reCAPTCHA and the Google Privacy Policy and Terms of Service apply.
See all newsletters
See all newsletters

Follow

  • X
  • YouTube
  • instagram
  • facebook
  • pinterest
  • Tiktok

Join All Access

Become a member and get instant access to thousands of videos, how-tos, tool reviews, and design features.

Start Your Free Trial

Subscribe

FHB Magazine

Start your subscription today and save up to 70%

Subscribe

We hope you’ve enjoyed your free articles. To keep reading, become a member today.

Get complete site access to expert advice, how-to videos, Code Check, and more, plus the print magazine.

Start your FREE trial

Already a member? Log in

Privacy Policy Update

We use cookies, pixels, script and other tracking technologies to analyze and improve our service, to improve and personalize content, and for advertising to you. We also share information about your use of our site with third-party social media, advertising and analytics partners. You can view our Privacy Policy here and our Terms of Use here.

Cookies

Analytics

These cookies help us track site metrics to improve our sites and provide a better user experience.

Advertising/Social Media

These cookies are used to serve advertisements aligned with your interests.

Essential

These cookies are required to provide basic functions like page navigation and access to secure areas of the website.

Delete My Data

Delete all cookies and associated data