Hanging Drywall: An Overview
Follow these 12 basic guidelines to take the stress and strain out of installing drywall.

Hanging drywall has the reputation of being a difficult, strenuous job; if done improperly, it certainly can be. But with the right attitude and the right techniques, it’s not a job you need to approach with trepidation. A job can be as simple as covering a short partition wall or as difficult as hanging a 24-ft.-high cathedral ceiling. However big the job, hanging drywall is more than just cutting a panel and nailing it in place. Panel seams have to fit properly and be kept to a minimum. Holes for electrical boxes and other openings have to be cut out accurately. Fasteners have to be properly placed and properly set.
A good hanging job provides the foundation for a quality taping job. When I hear someone say that there’s no need to be fussy because the tapers can fix it, I know that the finished job will suffer. A good hanger understands the taping process and has respect for the taper.
General Guidelines for Hanging Drywall
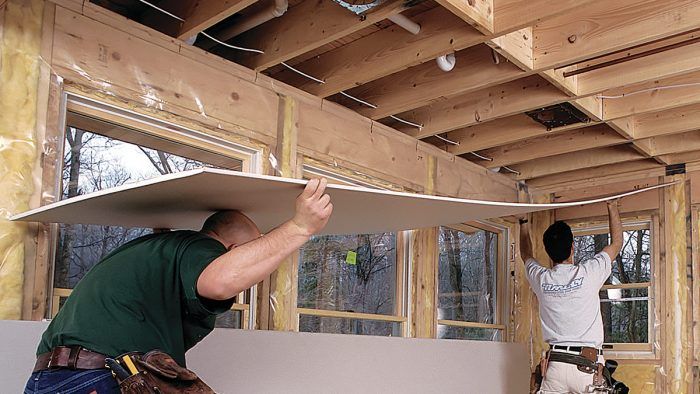
A properly planned drywalling job is a team effort, and within the team each person should have specific responsibilities. When drywalling an entire house, my crew and I start by hanging all the large ceilings first. With a crew of three, two people can measure, cut, and lift the panels into position, and the third can screw the panels down and cut out any electrical boxes. Once the ceilings are attached, we usually follow the same procedure for the walls, hanging all the larger panels as a team first and then splitting up to fit and hang all the smaller pieces individually.
It is difficult for one person working alone to hang anything longer than an 8-ft. piece of drywall on a ceiling or even on the upper part of a wall. Having enough help is important, especially because it’s preferable to hang longer lengths of drywall. Whenever possible, use panels that span the entire length of a wall or ceiling.
If one panel doesn’t cover the length, still use long panels to avoid having too many butted seams. A butted seam is when the ends—not the tapered edges—of two panels are butted together. There are two potential problems here. One is that both ends are attached to the same 1-1/2-in. framing member. If one panel is cut a little long, there won’t be much space to attach the other panel. The result is a toenailed panel that will more than likely be damaged. The other problem is that a butted seam is a weak joint. Any expansion or contraction in the framing or drywall will result in a cracked or ridged seam. So take care when measuring and attaching butted seams, and always stagger butted seams away from each other and away from the center of a wall or ceiling.
Sometimes, however, butted seams are unavoidable. I prefer to place butted seams above or below a window and above a door opening. I use drywall adhesive if possible to avoid screwing into the wide dimension of the framing in the headers for the top seams. I like to backblock the short seams below a window if possible.
12 Tips for Hanging Drywall
|


View Comments
I really love the idea of advanced hanging for butted seams. Using a 1x4 etc. And floating the butted seam halfway between the joist span. For ceilings and walls it heavily reduces the chances for movement cracks, and saves time and effort with having to cut when the joists don't meet a panel edge. I've seen guys do it with a grid pattern which seems crazy for lateral movements but in reality it makes complete sense seeing it in person.
Thanks for this one. A great addition to my Drywall repair site. I have a lot of ceilings to do and this helped me stop from going down the overcomplicating everything path.