Measuring and Cutting Drywall
There's more to it than cutting panels to length; you'll also need to measure and cut openings both large and small.
Once you’re sure that the framing or other backing material is sound, you can begin taking measurements for the first sheet of drywall. When measuring the length of a wall or ceiling, I usually take two measurements—one where each edge of the panel will be. If the measurements are close, I usually go with the smaller measurement. If there’s quite a difference, say 5/8 in. or more, I use both measurements and cut the panel out of square. Check for square by placing a 24-in. framing square in each corner.
Drywall panels should be cut to length so that they fit loosely into place. A good rule is to cut the panels about 1/4 in. short. On ceilings, split the 1/4 in. on each end. On walls, keep the panel edge tight against the panel that is already hung. Avoid cutting panels so long that they have to be forced into place—the ends will break and have to be repaired during taping.
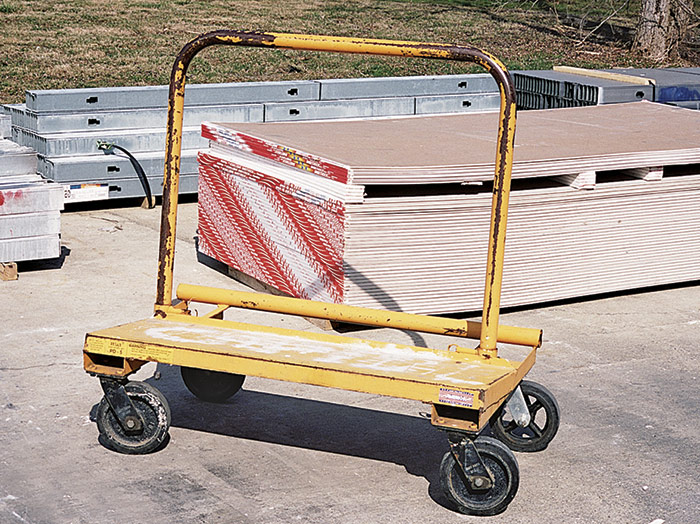
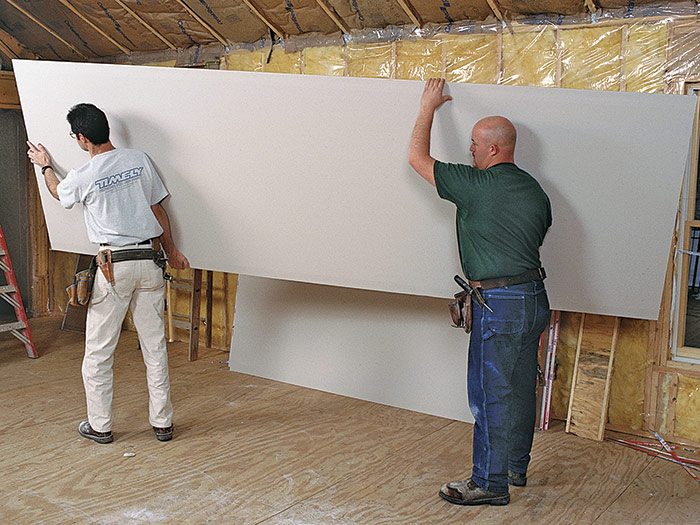
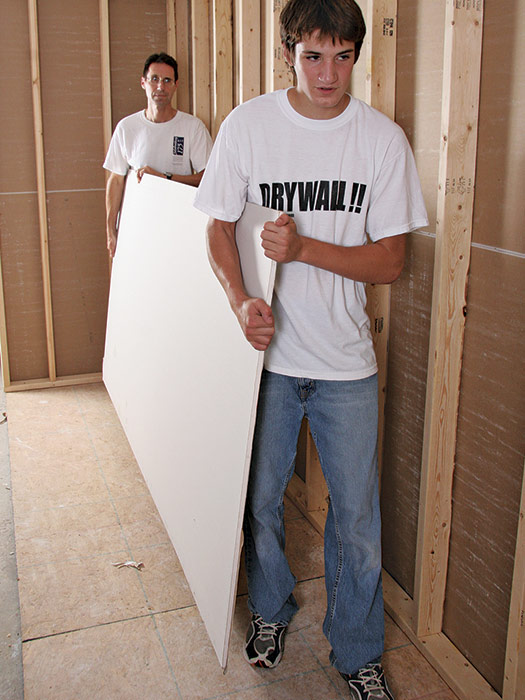
| Carrying Drywall
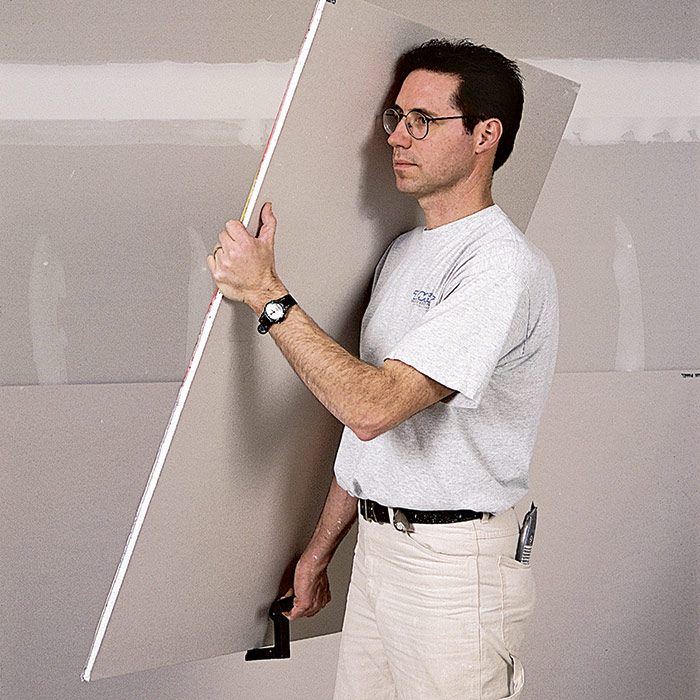
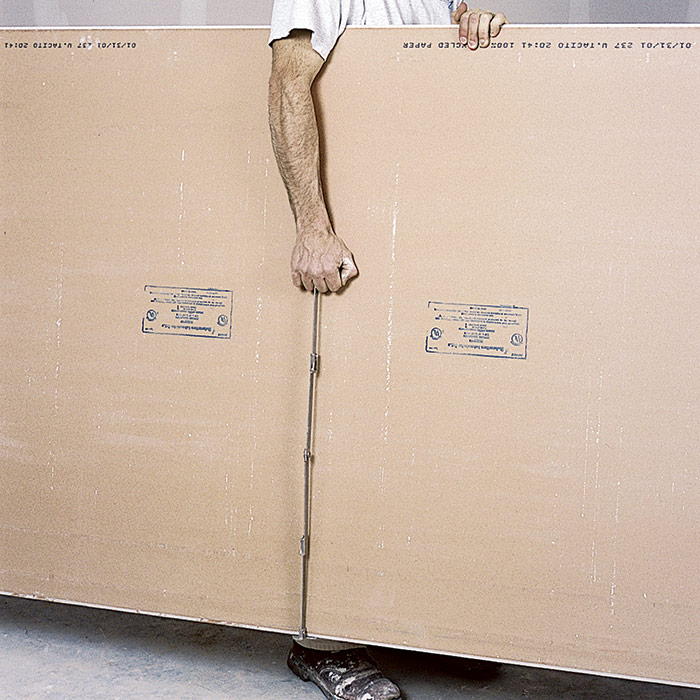
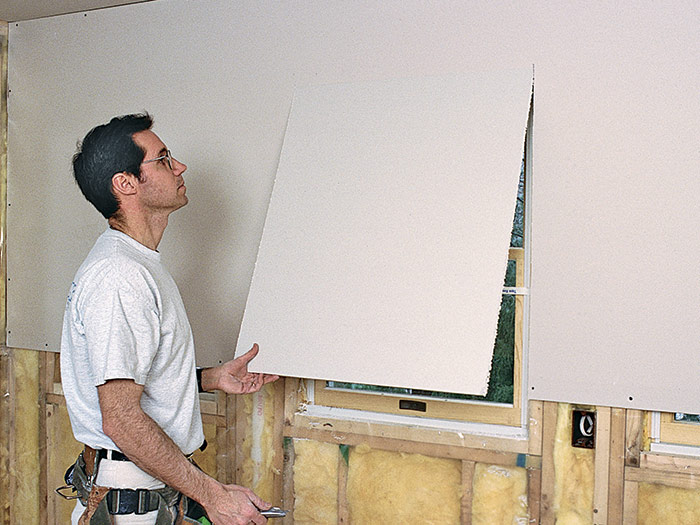
Carrying a drywall panel is a two-person job. Both carriers should be on the same side of the panel, with the same hand under the bottom edge and the other hand steadying the top. They should hold the panel 1 ft. or more in from each end and let the panel lean against their shoulders. Working together like this is the least strenuous way to carry drywall. However, if you are forced to work alone, there are a number of specialized carrying tools available. For more on moving drywall on the job site, see Drywall Delivery Dos and Don’ts.
|
Cutting Panels
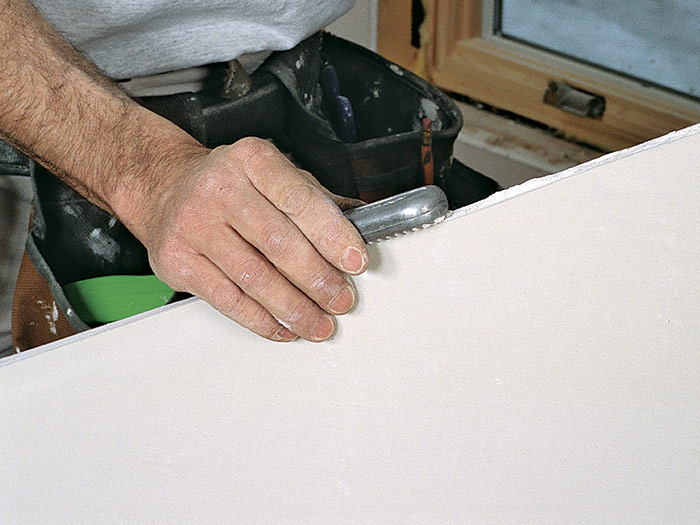
Cutting drywall is probably the easiest part of the whole job. If you’re cutting with a utility knife, use the “score and snap” method (see “Cutting Drywall: The Score and Snap Method” below). When using a utility knife, it doesn’t matter whether you cut the face or the back of the panel first. I prefer to score each panel on the face side first, but because the panels are packaged face to face in pairs, I cut every other panel from the back. If the cut is a little ragged or you’ve cut the panel a little long, use a drywall rasp for smoothing and light shaping.
| Cutting Drywall: The Score and Snap Method
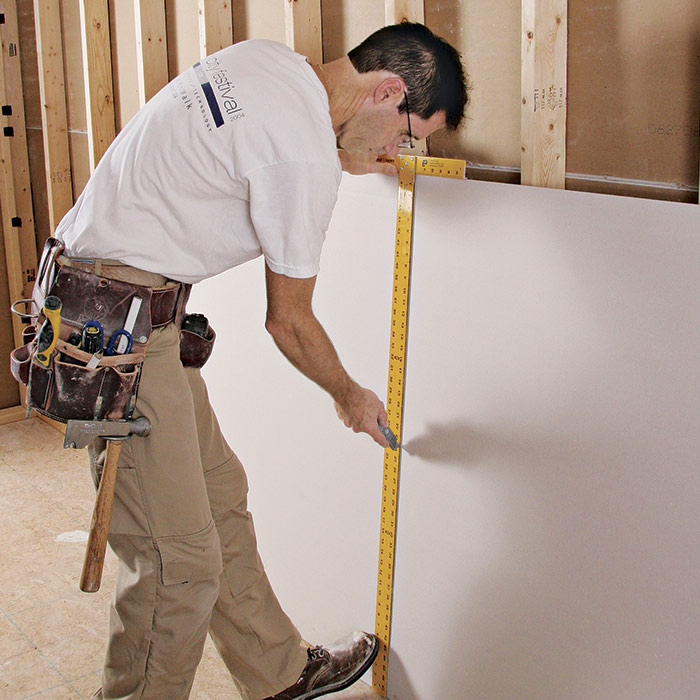
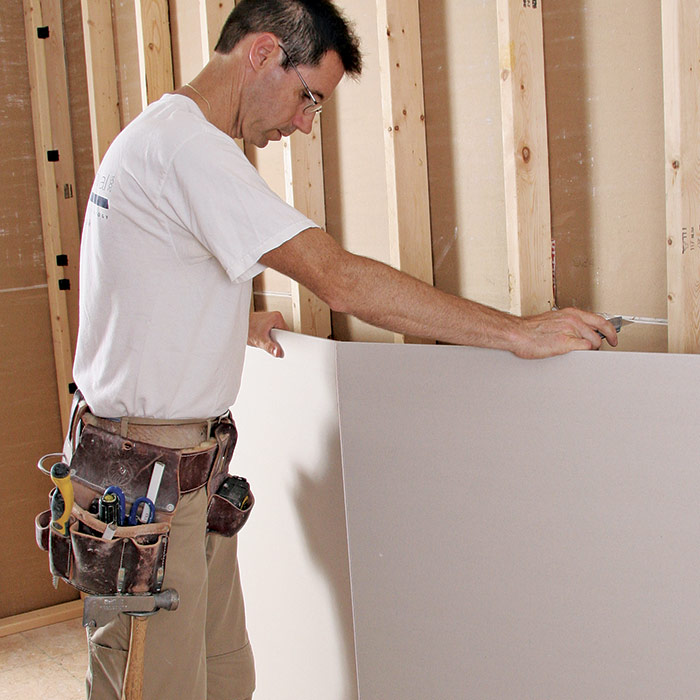
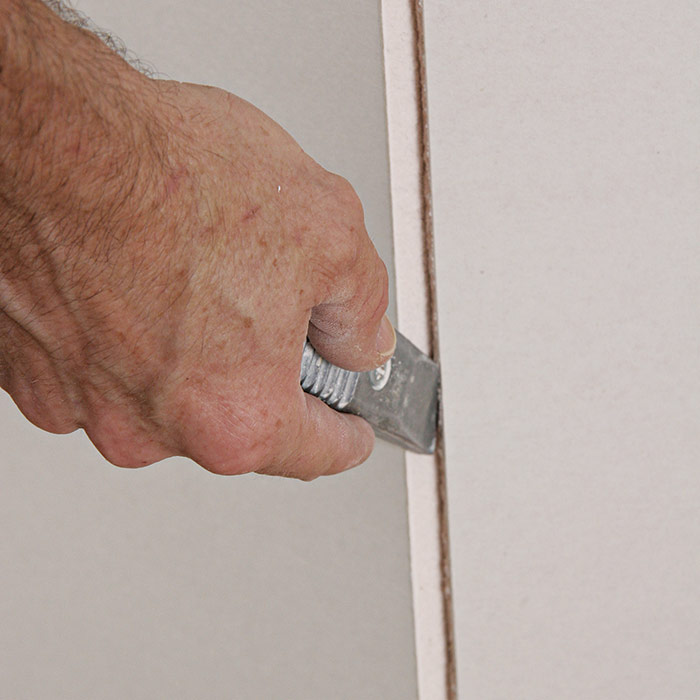
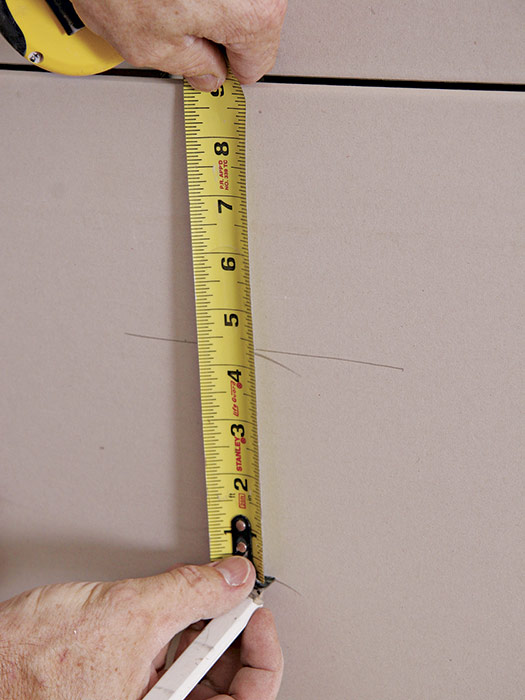
To cut drywall, all you really need is a utility knife and a straightedge, but a drywaller’s T-square makes the work even easier. You simply score one side of the drywall, snap the panel along the cutline, and then cut the panel loose.
|
In some cases, it is easier to cut drywall with a drywall utility saw or a drywall saw. When sawing, always cut from the face side of the panel to avoid damaging the finish paper as you push the blade through. The saw cuts on the forward stroke, but take care not to rip the face paper as you pull the saw back. (The saw teeth will damage the back paper slightly on the forward stroke, but this is not a cause for concern.)
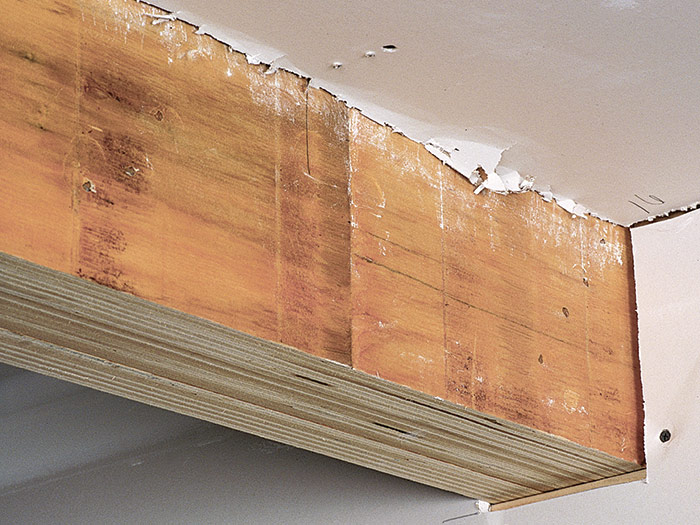
Cutting Holes for Large Openings
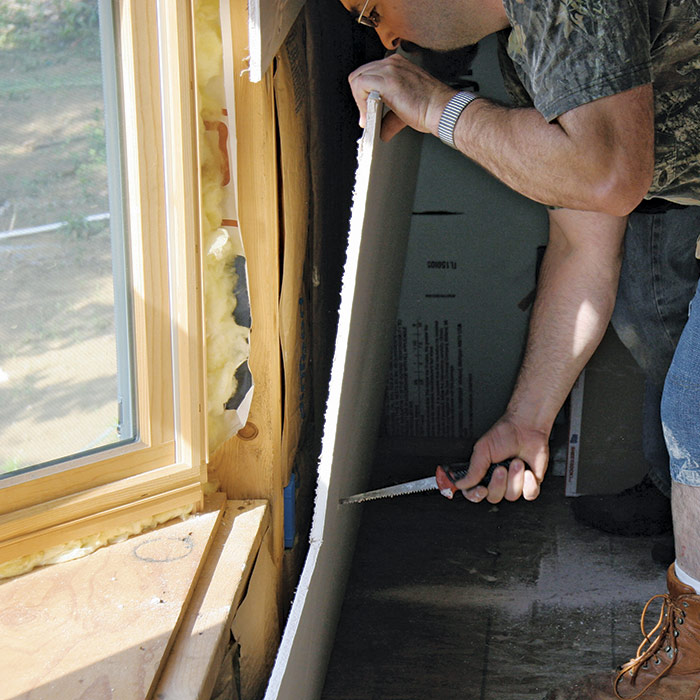
If the door and window jambs are not yet installed (which is best from the drywall contractor’s viewpoint), you can hang the drywall right over the openings before cutting them out. With the panel installed, cut along each side of the opening with a drywall saw. Score along the top of the opening on the back of the panel with a utility knife, snap the panel forward, and cut off the waste with a utility knife.
| THINK AHEAD: For precise and easier cuts around the tops of windows and doors, score the height of the opening on the back of the panel before attaching it. |
If the interior door and window jambs have already been installed, it is safest to measure and cut out the opening before hanging the drywall. Mark the opening on the face side of the panel and cut it out with a drywall saw. The top of the window opening can also be cut with a saw, but it’s easier to use a utility knife to score the height of the window opening on the back of the panel before attaching it. Scoring the back first allows you to snap the waste piece forward and cut along the face side after the panel is hung and the sides are cut.
If you want to do a fast job and don’t mind the dust it generates, use a drywall router to cut the opening. Just attach the panel and run the router in a counterclockwise direction along the inside of the opening. If you’re careful, you can rout out large openings even after the window jambs and interior doors are installed.
| Two Ways to Cut Out Windows
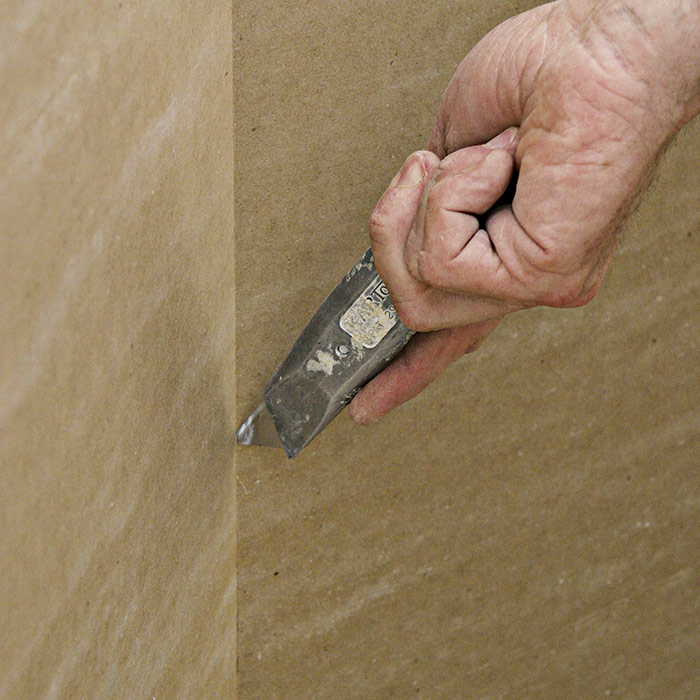
When faced with windows or other large openings, drywall right over them and then cut out the opening. The waste piece can be removed using various tools or combinations of methods, but I usually use a combination of sawing and scoring to remove the waste. And though it’s noisy and creates a great deal of dust, using a router to remove the waste is often the quickest option.
To remove the waste piece, score the front side with a utility knife.
 |

Cutting Holes for Small Openings
Cutting out holes for electrical outlet boxes, switches, and other small openings is trickier than making continuous straight cuts. However, with a little practice and some careful measuring, it’s really not that hard to master. There are a few ways to mark and cut the openings, but the main distinction is whether you make the cuts before or after you hang the panel.
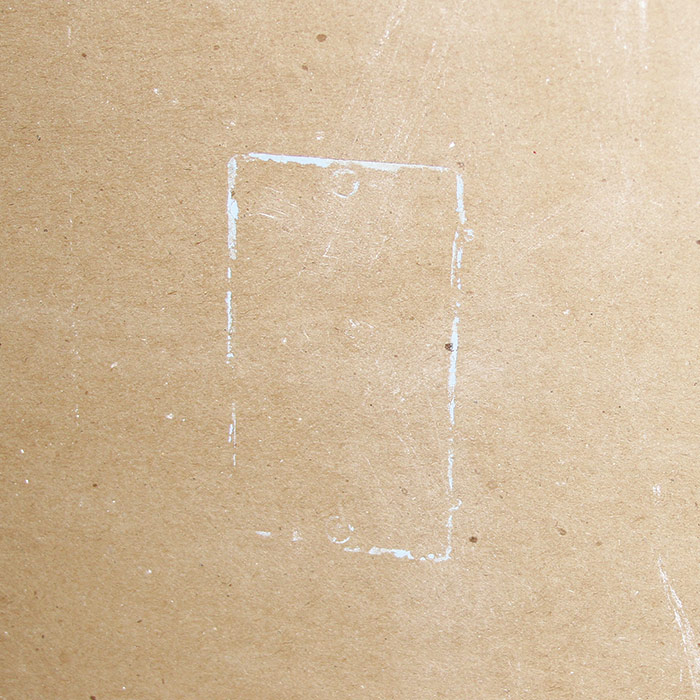
To cut an opening before hanging a panel, measure the box’s coordinates and transfer them to the panel. It sounds simple, but the problem with this method is that the box never seems to line up perfectly with the cut opening. This misalignment is usually because the wall, floor, or attached panel isn’t perfectly square or level or has gaps. But even if every-thing is square, it’s still pretty easy to make a mistake. Some outlet covers and fixtures barely cover a 1/4-in. area around the box, so absolute precision is important or you’ll need to patch later. To improve your chances of the cutout lining up, rub the face of the outlet box with chalk or a marker, and then press the panel against it. The chalk leaves an outline of the box on the back of the panel.

| WORK SAFE: For accurate cuts around electrical outlets and switch boxes, make the cuts with the panel tacked in place. |
Transfer before you hang When cutting out the openings for electrical boxes prior to hanging the panels, begin by transferring the box locations onto the backside of the drywall. It’s fast and easy work to mark the edges of the box with chalk or a marker, and then transfer the markings to the drywall by setting the panel in place temporarily.
|

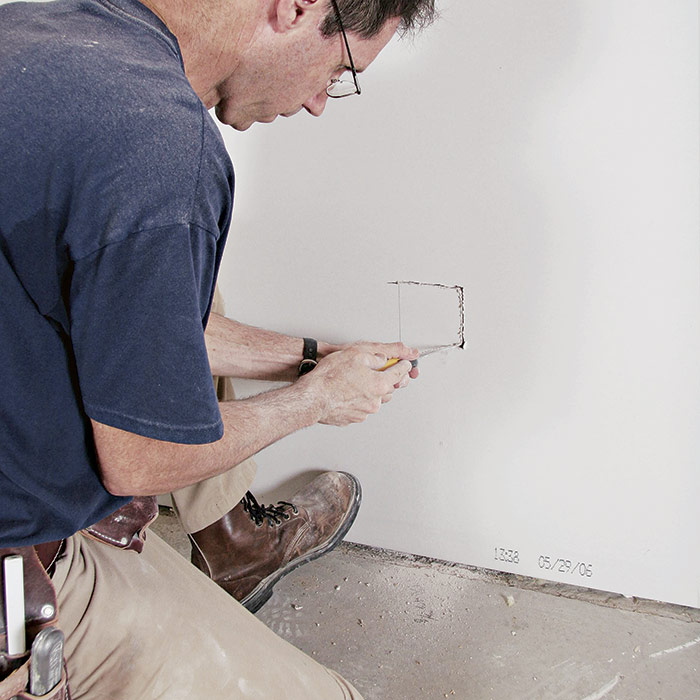
Because of the potential for error with the “cut first” method, I prefer to cut out boxes after the drywall is tacked in place, which is faster and more accurate. Notice that I said “tacked in place.” Use only enough fasteners to keep the panel from falling, and don’t nail or screw to the stud or joist to which the box is attached. Fastening too close to the box will put pressure against it, causing the drywall to break apart as you finish the cut.
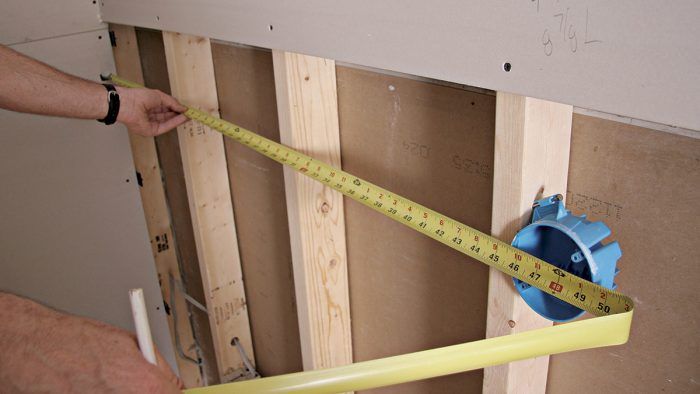
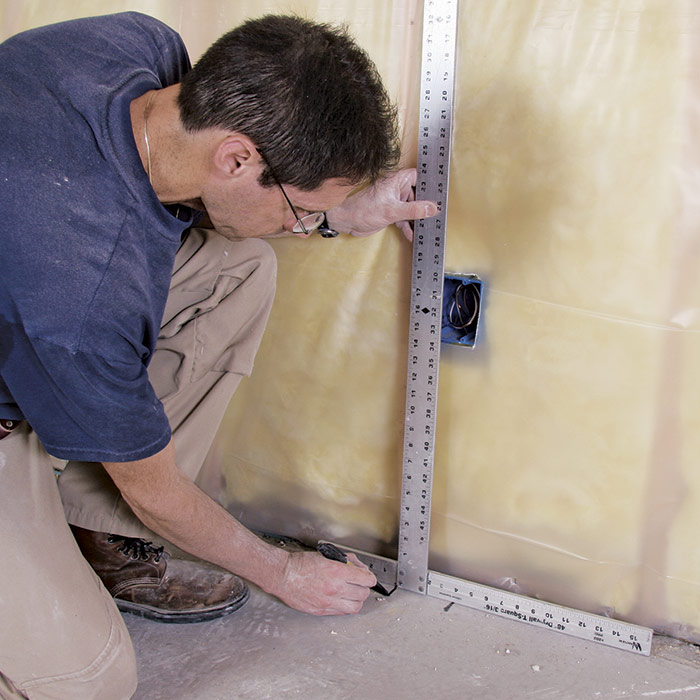
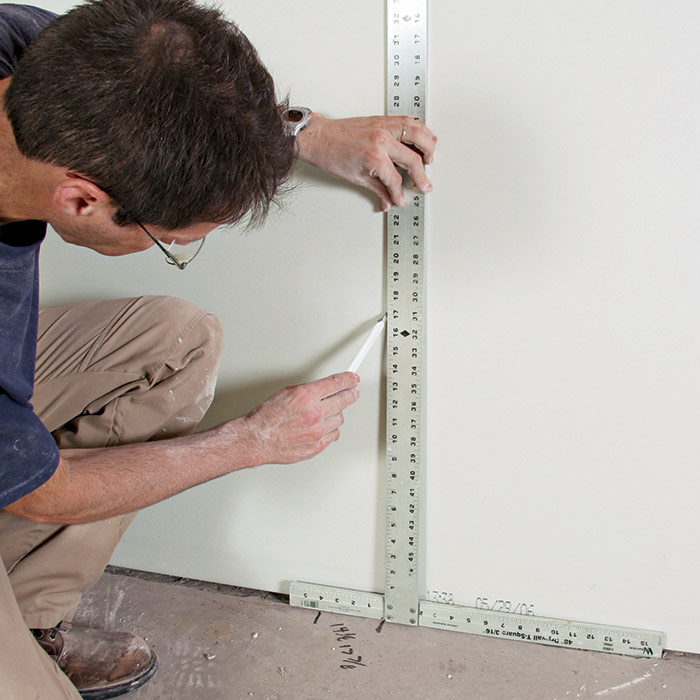
The fastest way to locate the box is to do so before tacking the drywall in place: Simply set it in position and sight down to locate the center of the box with a saw cut. Another method for locating an outlet is to use a framing square or a drywall T-square to locate the box before hanging the drywall. You can transfer the measurements to the drywall once it’s tacked in place. Round boxes on walls and ceilings can be cut out just as easily, though the method of marking the location is a little different (see “Cutting Round Openings” below).
| Mark, Transfer, and Saw
Measure the location of outlets before attaching the drywall. After tacking the panel in place, transfer the measurements to the drywall using the square, and then carefully cut out the opening with a utility saw. Bear in mind that you need to cut around the outside of the box.
|
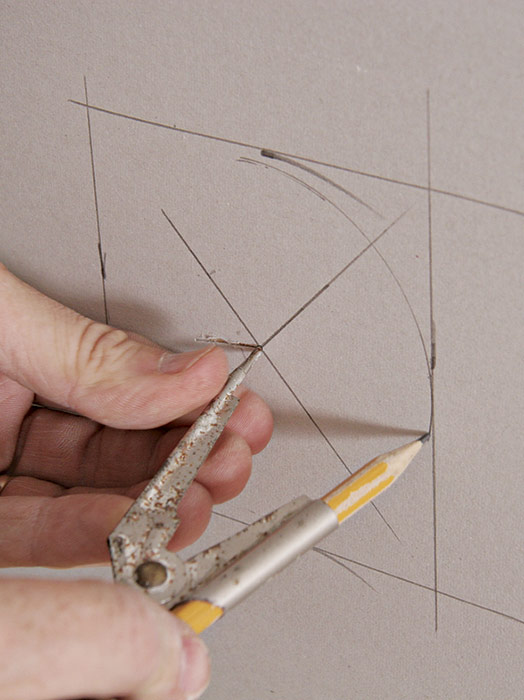
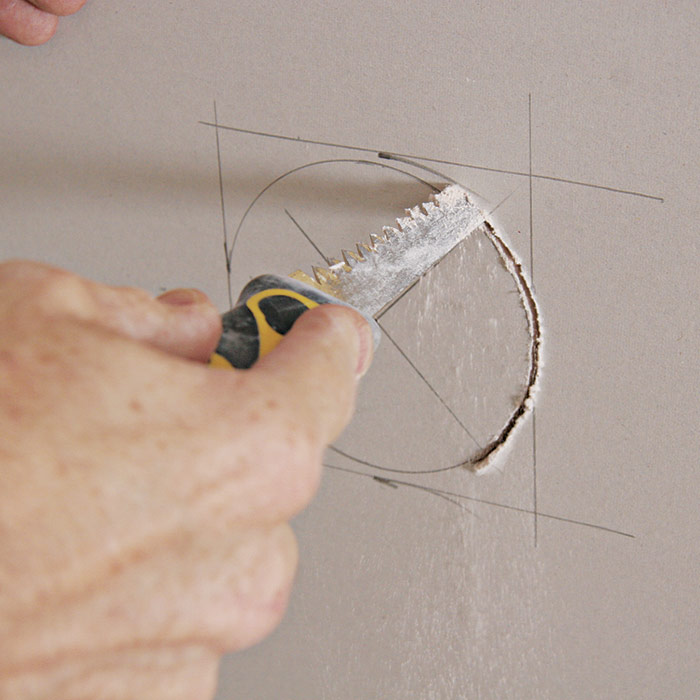
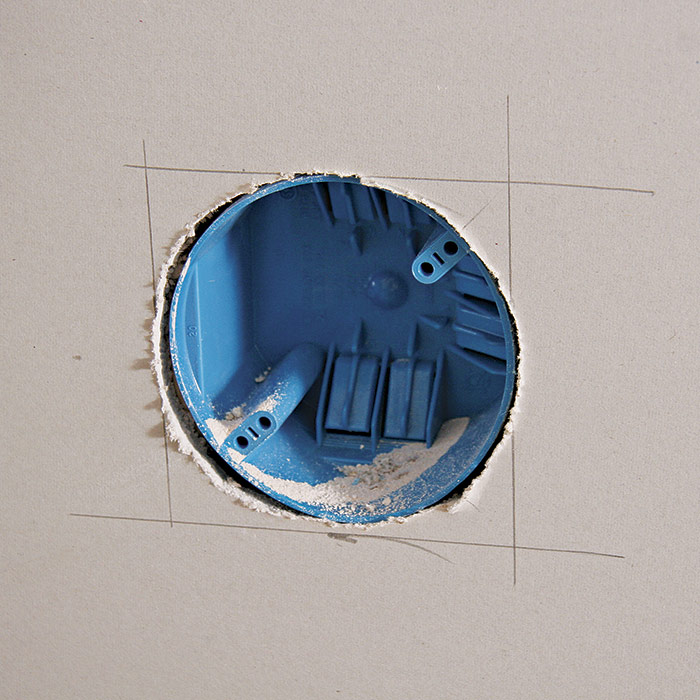
| Cutting Round Openings
An accurate way to cut out an opening for a round fixture box is to measure the box’s coordinates, tack the drywall panel in place, transfer the measurements to the panel, and then make the cut. 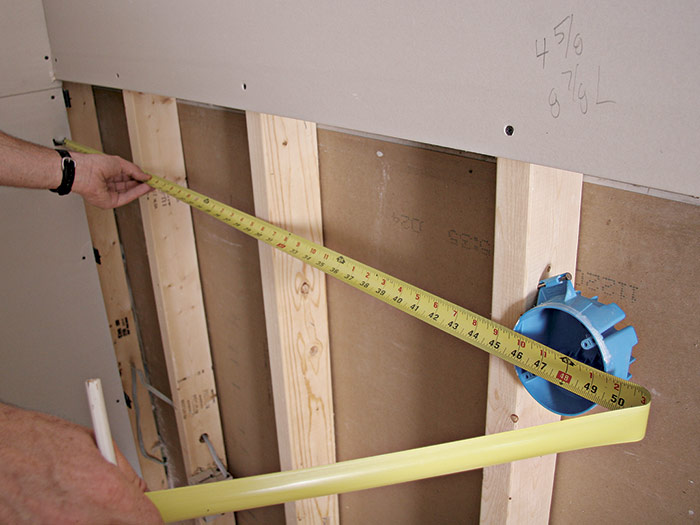
|
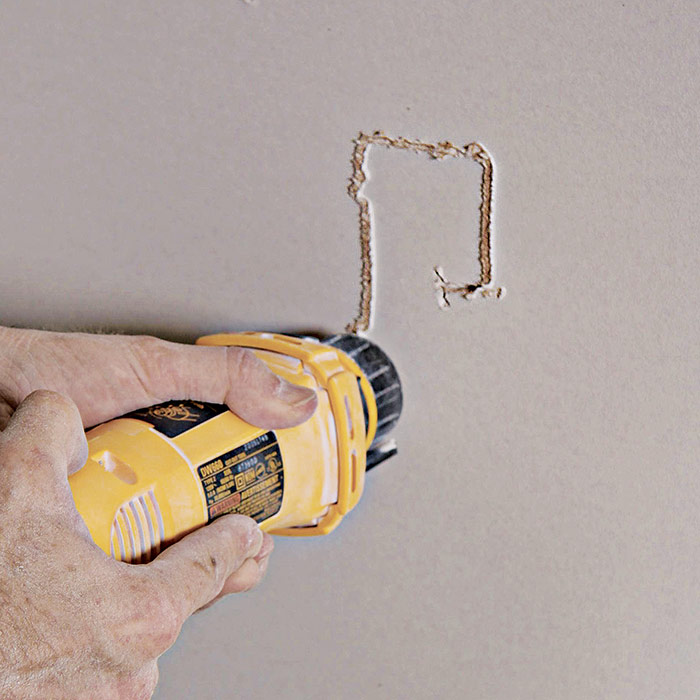
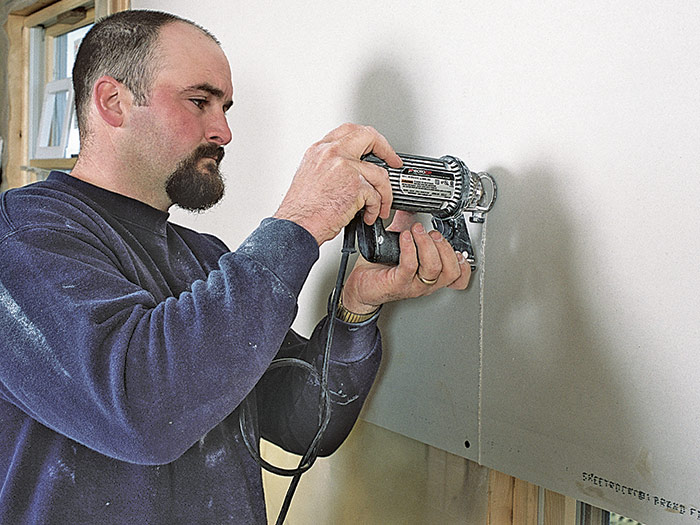
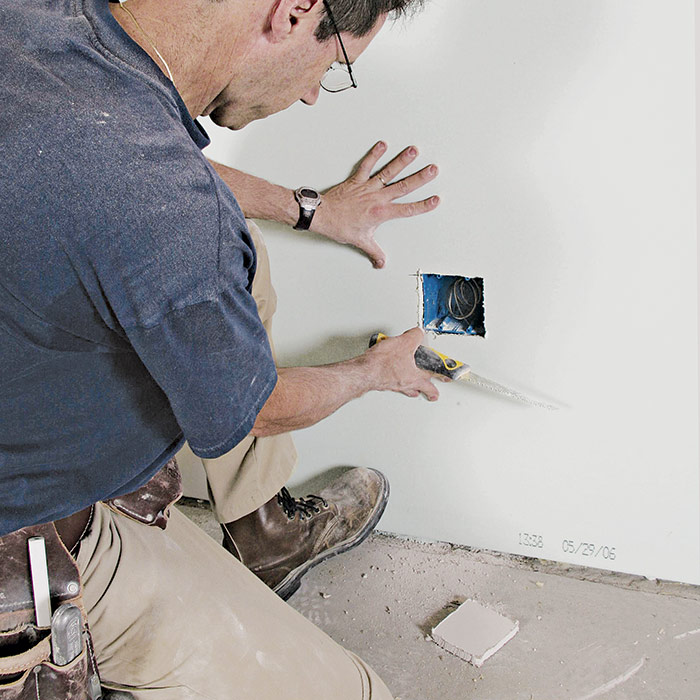
An alternative to cutting out electrical boxes with a utility saw is to use an electric drywall router. Before routing an outlet box, however, first make sure the power is off and the electrical wires are pushed far enough into the box so that the router bit will not reach them. The router bit should stick out of the router only about 1/4 in. more than the thickness of the drywall. To locate the box on the drywall, you can use one of the methods discussed earlier, or use locators that protect the wires and punch out the center of the electrical box on the drywall. Then simply rout around the outlet in a counterclockwise direction. You can also use the router for cutting out larger openings, such as those for heat ducts and vents. The tool takes a little getting used to, but it makes a nice clean cut, and it’s fast.
| WORK SAFE: Before using an electric drywall router to cut a hole for an electrical outlet box, make sure the power is off and the electrical wires are pushed well back into the box. |
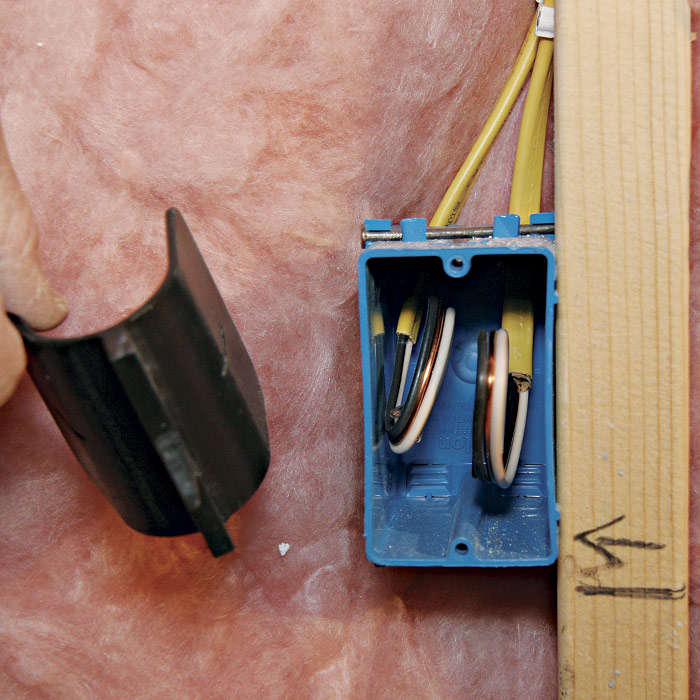
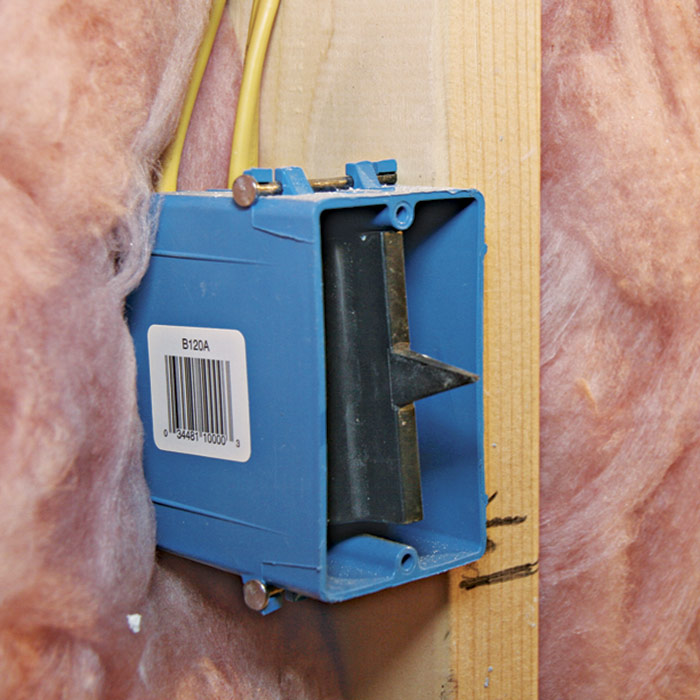
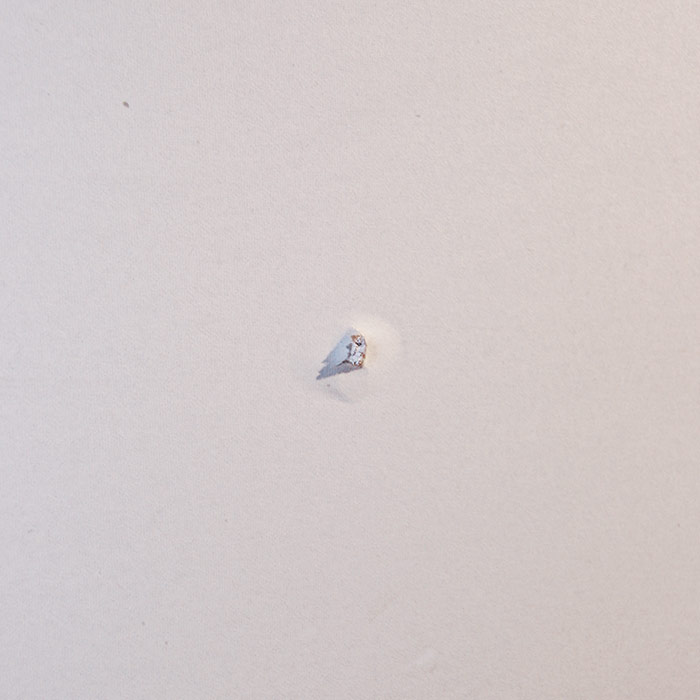
| Use Locators and a Router
If you’re routing out for electrical boxes after tacking the panels in place, using locators is an easy way to find the center of the boxes. They snap into place over the wires in the outlet. Then, once the drywall is tacked in place, they punch through to mark the center of the box.
|