FHB Logo Facebook LinkedIn Email Pinterest Twitter X Instagram Tiktok YouTube Plus Icon Close Icon Navigation Search Icon Navigation Search Icon Arrow Down Icon Video Guide Icon Article Guide Icon Modal Close Icon Guide Search Icon Skip to content
Subscribe
Log In
  • How-To
  • Design
  • Tools & Materials
  • Restoration
  • Videos
  • Blogs
  • Forum
  • Magazine
  • Members
  • FHB House
  • Podcast
Log In

Fine Homebuilding Project Guides

Drywall

Guide Home
  • Drywall Basics
  • Tools and Materials
  • Hanging Drywall
  • Taping and Sanding
  • Special Installations
  • Drywall Repairs
  • Plaster
How-To

Taping Fastener Heads and Seams: Second Coat

This coat is the one when the largest amount of joint compound is applied and the seams are filled and widened.

By Myron R. Ferguson
  • X
  • facebook
  • linkedin
  • pinterest
  • email
  • add to favorites Log in or Sign up to save your favorite articles

Before you begin your second coat, check the surface and knock off any noticeable ridges or chunks of hardened compound with the edge of the taping knife. Smooth areas and blend them together as necessary, but keep in mind that there’s still one more coat of compound to apply, so everything doesn’t have to be perfect. In order for this next coat to be more durable and dry quickly, an all-purpose, topping, or setting-type compound can be used.

Tapered-edge seams

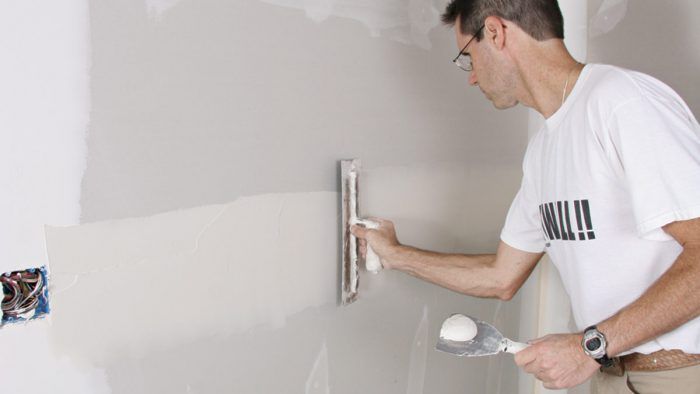
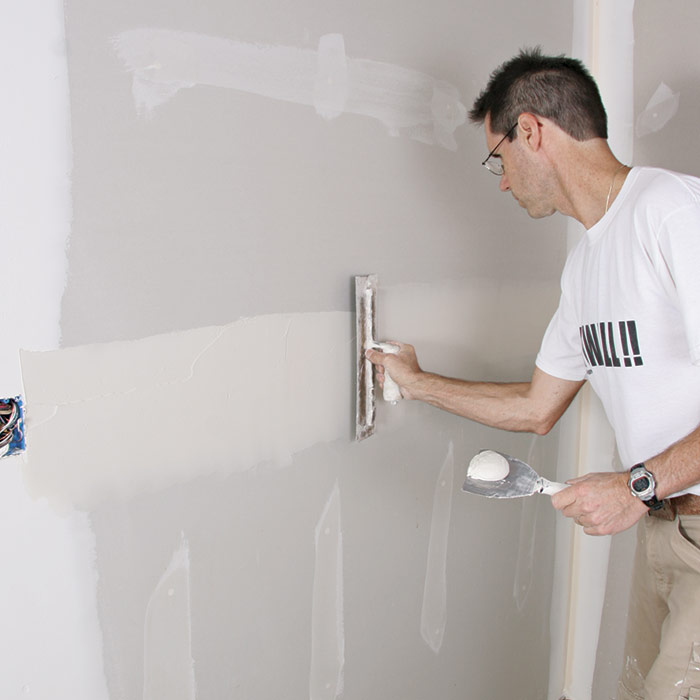
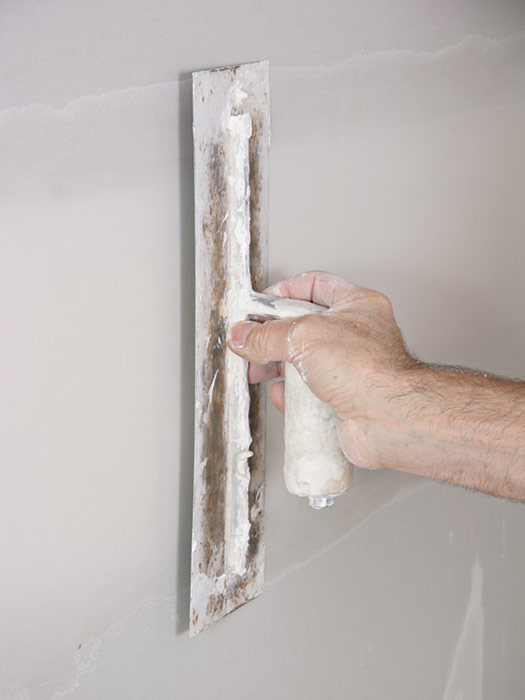
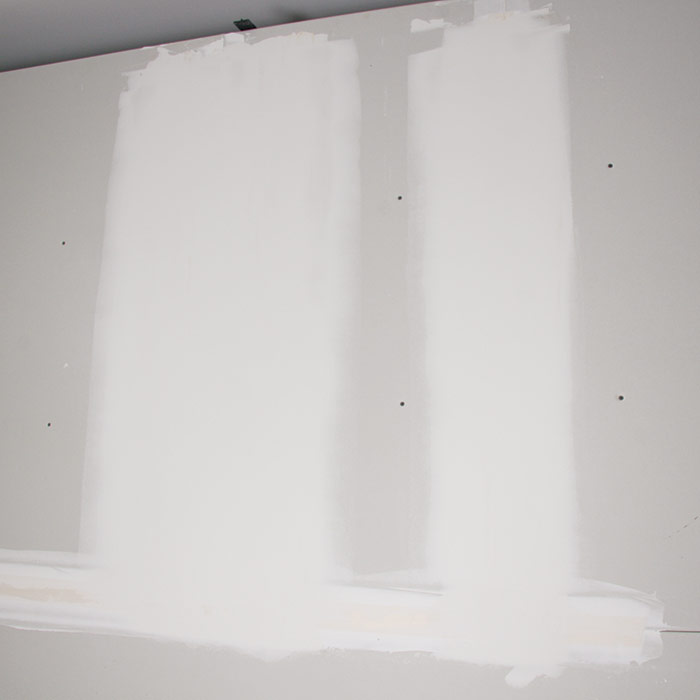
The second coat of joint compound is usually applied to seams after the inside corners are second-coated. Use a 6-in. or wider taping knife to apply the compound about 8 in. wide, with the seam in the center. The coat should be about 3/16 in. thick and fairly even. Whenever possible, apply the compound to the entire length of the seam before you start smoothing it with a 4-1/2-in. by 14-in. beveled trowel. Keep the trowel turned almost flat to the drywall and apply pressure to one edge, feathering the edges of the compound as you pull the trowel. Some compound will be removed as the edge is feathered. Then do the same for the other edge of the compound.


WORK SMART: Try to tape the entire length of a joint with one continuous length of tape—it is faster and won’t leave you with loose ends of tape exposed. For longer runs, say over 16 ft. long, use two pieces of tape to avoid wrinkles and the possibility of leaving too much compound behind the tape.


Next, center the trowel and glide it along the joint, applying constant, even pressure to both edges of the seam. Hold the trowel almost flat against the seam with the back edge doing the work. If all goes well, the edges of the seam will remain feathered and the center will be smoothed to an inconspicuous crown. Repeat this method until most of the air bubbles in the joint compound have been removed. The second-coated seam should be about 10 in. to 12 in. wide, and the tape should not be visible. Try not to remove too much joint compound. If you find that you’re pulling off too much, you’re probably holding the trowel at too steep of an angle. Apply more compound to the seam and try again, this time holding the trowel flatter to the surface.


Apply the second coat

Known as the filler coat, the second application of joint compound goes on wider and covers many of the imperfections left as the tape was embedded. The filler coat should go on smooth, but don’t expect a perfect surface at this stage of finishing.
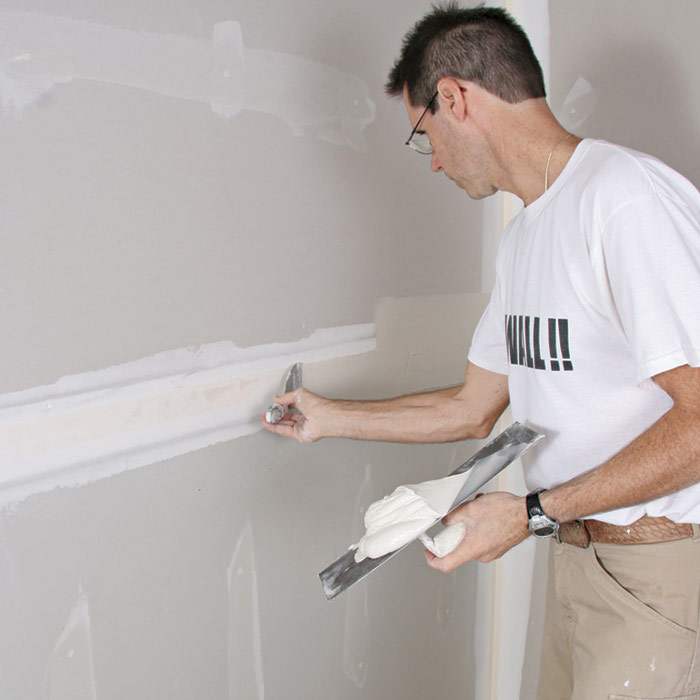
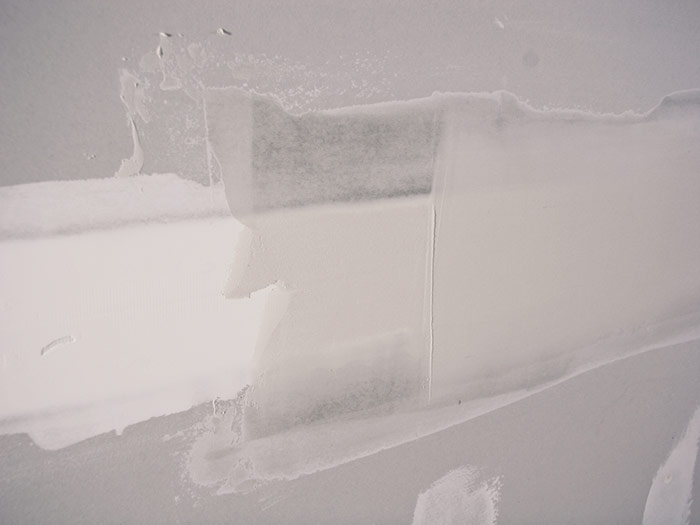
Lay on the compound
Lay on the compound: A 6-in. taping knife is used to apply compound over the taped seams. Before spreading, the second coat should be about 8 in. wide and 3/16 in. thick.

Feather the edges
Feather the edges: Pull a beveled trowel held almost flat against the panels, applying light pressure to one edge at a time.

Smooth the center
Smooth the center: Leave enough compound to conceal the tapered edge of the panels, allowing a little extra for shrinkage and sanding. The finished application should be about 10 in. to 12 in. wide.

What to aim for
What to aim for: In the center of this photo too much compound was removed, which will result in a concave seam. The portion to the right is properly smoothed.


Butted-end seams

Because the butted ends of drywall panels that are attached to studs and ceiling joists are not recessed, as tapered edges are, you create a slight bump at the joint when you apply tape and the first coat of compound. To conceal the bump, you need to apply a wider band of compound than you do with tapered-edge seams (you may also need to apply four coats of compound to blend the bump into the drywall surface).

Taping seams correctly
Taping seams correctly: The seam on the left is attached to the stud, which creates a bump in the drywall. The compound has to be feathered out 30 in. wide, or more, to help conceal the bump. The seam on the right was back blocked and is recessed, so it can be finished 12 in wide.


Before applying the second coat to butted seams, I usually run my hand across the joint or hold a straightedge against it to it to determine how wide I need to spread the compound to blend in the seam. The center is the high area, so you need to cover the tape lightly and build up the joint compound along the sides of the tape. Feather the edges and then smooth the center. Don’t apply too much compound at one time. I usually widen it with a beveled trowel or a 12-in. taping knife to about 10 in. on each side of the tape.


Previous: Taping Fastener Heads and Seams: First Coat Next: Taping Fastener Heads and Seams: Third Coat

Guide

Drywall

Chapter

Taping and Sanding

Sign up for eletters today and get the latest how-to from Fine Homebuilding, plus special offers.

Signing you up...

This site is protected by reCAPTCHA and the Google Privacy Policy and Terms of Service apply.
See all newsletters
See all newsletters

Log in or create an account to post a comment.

Sign up Log in

Become a member and get full access to FineHomebuilding.com

Drywall

Drywall

Trusted, comprehensive guidance for choosing, hanging, taping, sanding, and repairing drywall—the right way

View Project Guide

View All Project Guides »

Become a member and get unlimited site access, including the Drywall Project Guide.

Start Free Trial

Drywall Basics
  • Types and Uses of Drywall
  • Planning the Job
Tools and Materials
  • Hanging Tools
  • Taping Tools and Materials
  • Sanding and Finishing Tools and Materials
Hanging Drywall
  • Prep for Hanging
  • Measuring and Cutting Drywall
  • Guidelines for Hanging and Fastening Drywall
  • Hanging Ceilings
  • Hanging Walls
  • Hanging Airtight Drywall
  • Trim Accessories/Corner Beads
Taping and Sanding
  • Taping Basics
  • Taping Seams
  • Taping Inside and Outside Corners
  • Sanding
Special Installations
  • Tricky Transitions
  • Curved Surfaces
  • Other Special Installations
  • Decorating with Drywall
Drywall Repairs
  • Patching Holes, Cracks, and More
Plaster
  • Working with Lime Plaster
  • Plaster Repair
  • Classic Plaster Techniques

Fine Home Building

Newsletter Sign-up

  • Fine Homebuilding

    Home building tips, offers, and expert advice in your inbox.

  • Green Building Advisor

    Building science and energy efficiency advice, plus special offers, in your inbox.

  • Old House Journal

    Repair, renovation, and restoration tips, plus special offers, in your inbox.

Signing you up...

This site is protected by reCAPTCHA and the Google Privacy Policy and Terms of Service apply.
See all newsletters

Follow

  • Fine Homebuilding

    Dig into cutting-edge approaches and decades of proven solutions with total access to our experts and tradespeople.

    Start Free Trial Now
    • Facebook
    • Instagram
    • X
    • LinkedIn
  • GBA Prime

    Get instant access to the latest developments in green building, research, and reports from the field.

    Start Free Trial Now
    • Facebook
    • YouTube
  • Old House Journal

    Learn how to restore, repair, update, and decorate your home.

    Subscribe Now
    • Facebook
    • Instagram
    • X

Membership & Magazine

  • Online Archive
  • Start Free Trial
  • Magazine Subscription
  • Magazine Renewal
  • Gift a Subscription
  • Customer Support
  • Privacy Preferences
  • About
  • Contact
  • Advertise
  • Careers
  • Terms of Use
  • Site Map
  • Do not sell or share my information
  • Privacy Policy
  • Accessibility
  • California Privacy Rights

© 2025 Active Interest Media. All rights reserved.

Fine Homebuilding receives a commission for items purchased through links on this site, including Amazon Associates and other affiliate advertising programs.

  • Home Group
  • Antique Trader
  • Arts & Crafts Homes
  • Bank Note Reporter
  • Cabin Life
  • Cuisine at Home
  • Fine Gardening
  • Fine Woodworking
  • Green Building Advisor
  • Garden Gate
  • Horticulture
  • Keep Craft Alive
  • Log Home Living
  • Military Trader/Vehicles
  • Numismatic News
  • Numismaster
  • Old Cars Weekly
  • Old House Journal
  • Period Homes
  • Popular Woodworking
  • Script
  • ShopNotes
  • Sports Collectors Digest
  • Threads
  • Timber Home Living
  • Traditional Building
  • Woodsmith
  • World Coin News
  • Writer's Digest
Active Interest Media logo
X
X
This is a dialog window which overlays the main content of the page. The modal window is a 'site map' of the most critical areas of the site. Pressing the Escape (ESC) button will close the modal and bring you back to where you were on the page.

Main Menu

  • How-To
  • Design
  • Tools & Materials
  • Video
  • Blogs
  • Forum
  • Project Guides
  • Reader Projects
  • Magazine
  • Members
  • FHB House

Podcasts

  • FHB Podcast
  • ProTalk

Webinars

  • Upcoming and On-Demand

Podcasts

  • FHB Podcast
  • ProTalk

Webinars

  • Upcoming and On-Demand

Popular Topics

  • Kitchens
  • Business
  • Bedrooms
  • Roofs
  • Architecture and Design
  • Green Building
  • Decks
  • Framing
  • Safety
  • Remodeling
  • Bathrooms
  • Windows
  • Tilework
  • Ceilings
  • HVAC

Magazine

  • Current Issue
  • Past Issues
  • Magazine Index
  • Subscribe
  • Online Archive
  • Author Guidelines

All Access

  • Member Home
  • Start Free Trial
  • Gift Membership

Online Learning

  • Courses
  • Project Guides
  • Reader Projects
  • Podcast

More

  • FHB Ambassadors
  • FHB House
  • Customer Support

Account

  • Log In
  • Join

Newsletter

Get home building tips, offers, and expert advice in your inbox

Signing you up...

This site is protected by reCAPTCHA and the Google Privacy Policy and Terms of Service apply.
See all newsletters
See all newsletters

Follow

  • X
  • YouTube
  • instagram
  • facebook
  • pinterest
  • Tiktok

Join All Access

Become a member and get instant access to thousands of videos, how-tos, tool reviews, and design features.

Start Your Free Trial

Subscribe

FHB Magazine

Start your subscription today and save up to 70%

Subscribe

We hope you’ve enjoyed your free articles. To keep reading, become a member today.

Get complete site access to expert advice, how-to videos, Code Check, and more, plus the print magazine.

Start your FREE trial

Already a member? Log in

Privacy Policy Update

We use cookies, pixels, script and other tracking technologies to analyze and improve our service, to improve and personalize content, and for advertising to you. We also share information about your use of our site with third-party social media, advertising and analytics partners. You can view our Privacy Policy here and our Terms of Use here.

Cookies

Analytics

These cookies help us track site metrics to improve our sites and provide a better user experience.

Advertising/Social Media

These cookies are used to serve advertisements aligned with your interests.

Essential

These cookies are required to provide basic functions like page navigation and access to secure areas of the website.

Delete My Data

Delete all cookies and associated data