FHB Logo Facebook LinkedIn Email Pinterest Twitter X Instagram Tiktok YouTube Plus Icon Close Icon Navigation Search Icon Navigation Search Icon Arrow Down Icon Video Guide Icon Article Guide Icon Modal Close Icon Guide Search Icon Skip to content
Subscribe
Log In
  • How-To
  • Design
  • Tools & Materials
  • Restoration
  • Videos
  • Blogs
  • Forum
  • Magazine
  • Members
  • FHB House
  • Podcast
Log In

Fine Homebuilding Project Guides

Drywall

Guide Home
  • Drywall Basics
  • Tools and Materials
  • Hanging Drywall
  • Taping and Sanding
  • Special Installations
  • Drywall Repairs
  • Plaster
How-To

Taping Fastener Heads and Seams: Third Coat

Apply this finish coat with a taping knife or, if you have a helper, a paint roller.

By Myron R. Ferguson
  • X
  • facebook
  • linkedin
  • pinterest
  • email
  • add to favorites Log in or Sign up to save your favorite articles
Cover previous coats: The third coat on a tapered-edge seam should be just a little wider than the second.

If you have been careful with the first and second coats, the third coat should be the easiest and require the least amount of joint compound. Because the third coat is usually the final coat, it is a good idea to do some light sanding before you begin—just knock off chunks of compound and tool marks. Use light pressure to sand every seam and along the inside corners. Use a pole sander with 100-grit or 120-grit sandpaper or a sanding screen. Be careful not to sand down to the tape. The aim is not to sand out every last defect but only to make it easier to get the finish coat of joint compound as smooth as possible. (It helps to think of this step as a light “brushing” rather than sanding.)
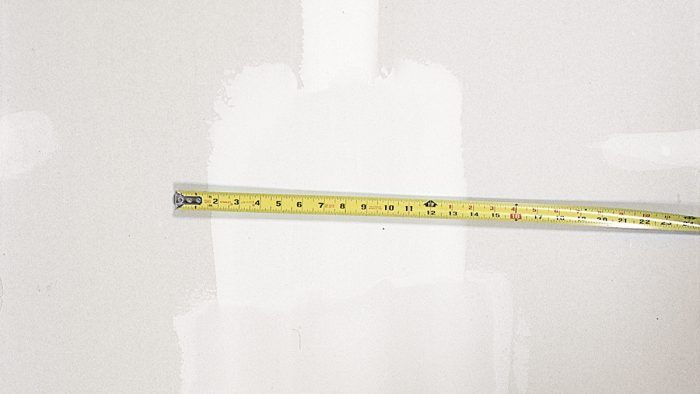
 

Spread the compound wider
Spread the compound wider: To conceal a crowned seam, as seen on this butted joint, compound should be widened out on each side of the tape. Feather the edges flush to the panel and leave only a thin layer of compound over the crowned seam.

Checking for Crowned Seams

Once the second coat is dry, check for potential problem seams with a straightedge or the edge of a long trowel. Hold the straightedge on the center of the seam and check the gap on each side. If it’s greater than 1/16 in., feather the compound farther out on both sides to conceal the seam. Starting at the center, apply joint compound the width of two 6-in. taping knives on each side. Build up each side, but not the center, with joint compound, and feather the edges with a beveled trowel.

When this coat is dry, check the seam again with a straightedge; if it is acceptable, lightly sand the seam and apply the final coat in the same way the other seams and outside corners were third-coated.


There are two ways to apply the finish coat to the seams: with a taping knife (the conventional method) or with a paint roller (the faster method—especially if you’re working with a helper).

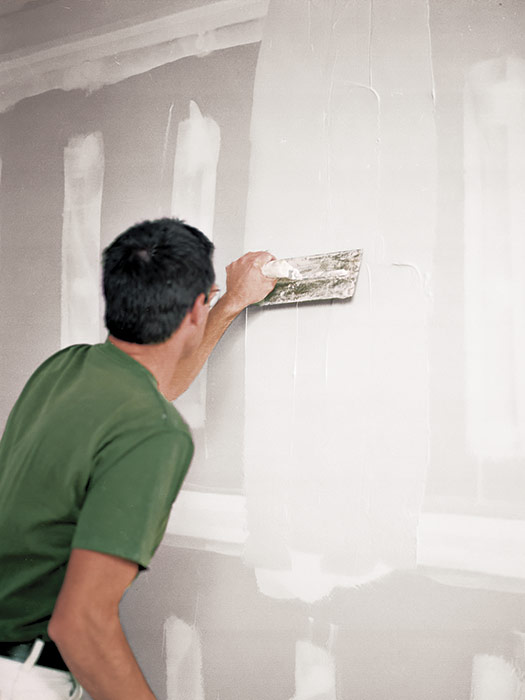
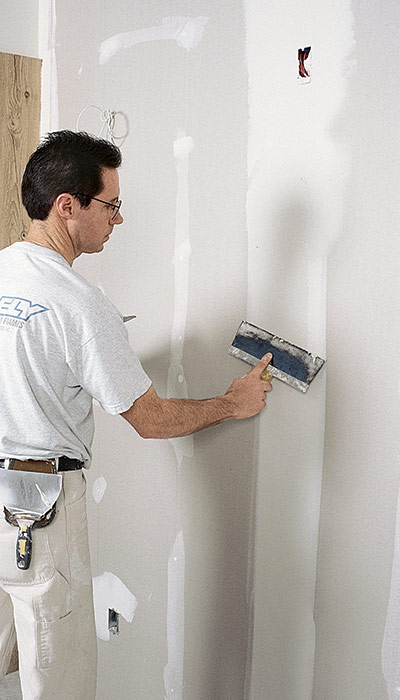
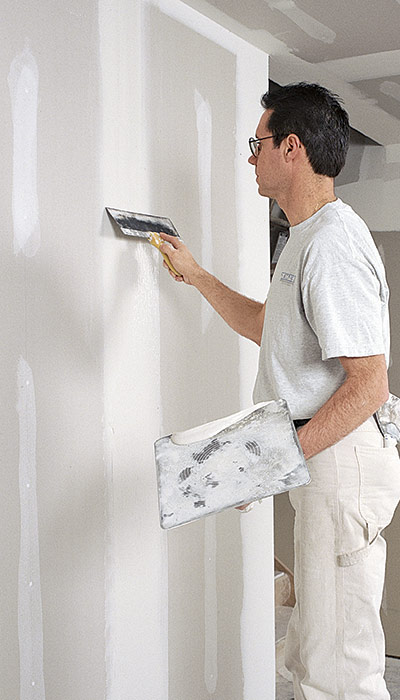
Taping-knife application

Apply the compound over the entire seam using a wide taping knife (I prefer a 12-in.-wide knife), going slightly wider than the second coat. Next, remove most of the joint compound by pulling a 12-in. trowel firmly along the seam. Feather the edges one last time so that there are no thick or rough spots, and then take off any compound left on the center of the seam. The thin layer of compound left fills in all imperfections, scratches, dents, air bubbles, and so on. The compound dries out a little as it is worked, so you can thin it with water as necessary for easier application.

Tools work for you
Tools work for you: The aluminum support strip on wide taping knives can be bowed a little to prevent leaving tool marks in the compound. Most wide knives are designed to bend easily.


Applying the Third Coat

Often referred to as the finish coat, the third coat of compound is laid on a few inches wider than the second coat. This final coat of compound can be applied with either a wide taping knife or a paint roller.

Knife on the third coat
Knife on the third coat: One way to apply the third coat of joint compound to a seam is to use a wide taping knife.

Or roll it on
Or roll it: on A quicker alternative is to use a paint roller. Dilute the compound slightly to ease application.

Level the surface
Level the surface: Use a wide taping knife to remove and smooth the joint compound on the third coat. Feather the edges first and then smooth the center.


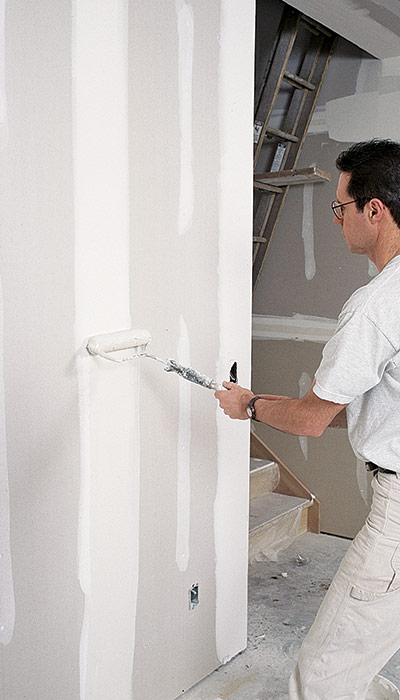
Paint-roller application

Thin the joint compound with a little water and then use a 3/8-in.-nap roller to apply it. Again, lay it on just a little wider than the second coat. Then smooth and remove the compound using a 12-in. trowel in the same manner described for the taping-knife application. I find that rolling works faster than applying the compound by knife, and if you attach a pole to the roller handle, it’s easy to reach high seams. (Working with a long-handled paint roller also places less stress on your wrists and arms than applying the compound with a knife or trowel.) One member of the crew can roll the compound on while another finishes the seam. This works especially well on ceilings.

General Guidelines for Applying the Third Coat

I recommend using a topping or an all-purpose drying-type compound for all third-coat applications. These compounds can be thinned with water and are easy to apply and sand smooth. Taping and setting-type compounds dry out too quickly in such a thin coat, and they are harder to sand.

Start the third coat by applying a thin layer of compound to the fasteners, and then move on to the seams and outside corners. Wherever taped areas intersect, smooth and blend them together, working both seams at the same time. Apply the finish coat to the inside corners after the intersecting joints are finished. When applying the third coat, keep the following points in mind:

  • Make the finish coat just a little wider than the second coat.
  • Keep all the seams smooth and the edges feathered.
  • Fill all scratches and dents to create smooth seams with no trowel marks or air bubbles.


Previous: Taping Fastener Heads and Seams: Second Coat Next: Video Vault: Taping Drywall Seams

Guide

Drywall

Chapter

Taping and Sanding

Sign up for eletters today and get the latest how-to from Fine Homebuilding, plus special offers.

Signing you up...

This site is protected by reCAPTCHA and the Google Privacy Policy and Terms of Service apply.
See all newsletters
See all newsletters

Log in or create an account to post a comment.

Sign up Log in

Become a member and get full access to FineHomebuilding.com

Drywall

Drywall

Trusted, comprehensive guidance for choosing, hanging, taping, sanding, and repairing drywall—the right way

View Project Guide

View All Project Guides »

Become a member and get unlimited site access, including the Drywall Project Guide.

Start Free Trial

Drywall Basics
  • Types and Uses of Drywall
  • Planning the Job
Tools and Materials
  • Hanging Tools
  • Taping Tools and Materials
  • Sanding and Finishing Tools and Materials
Hanging Drywall
  • Prep for Hanging
  • Measuring and Cutting Drywall
  • Guidelines for Hanging and Fastening Drywall
  • Hanging Ceilings
  • Hanging Walls
  • Hanging Airtight Drywall
  • Trim Accessories/Corner Beads
Taping and Sanding
  • Taping Basics
  • Taping Seams
  • Taping Inside and Outside Corners
  • Sanding
Special Installations
  • Tricky Transitions
  • Curved Surfaces
  • Other Special Installations
  • Decorating with Drywall
Drywall Repairs
  • Patching Holes, Cracks, and More
Plaster
  • Working with Lime Plaster
  • Plaster Repair
  • Classic Plaster Techniques

Fine Home Building

Newsletter Sign-up

  • Fine Homebuilding

    Home building tips, offers, and expert advice in your inbox.

  • Green Building Advisor

    Building science and energy efficiency advice, plus special offers, in your inbox.

  • Old House Journal

    Repair, renovation, and restoration tips, plus special offers, in your inbox.

Signing you up...

This site is protected by reCAPTCHA and the Google Privacy Policy and Terms of Service apply.
See all newsletters

Follow

  • Fine Homebuilding

    Dig into cutting-edge approaches and decades of proven solutions with total access to our experts and tradespeople.

    Start Free Trial Now
    • Facebook
    • Instagram
    • X
    • LinkedIn
  • GBA Prime

    Get instant access to the latest developments in green building, research, and reports from the field.

    Start Free Trial Now
    • Facebook
    • YouTube
  • Old House Journal

    Learn how to restore, repair, update, and decorate your home.

    Subscribe Now
    • Facebook
    • Instagram
    • X

Membership & Magazine

  • Online Archive
  • Start Free Trial
  • Magazine Subscription
  • Magazine Renewal
  • Gift a Subscription
  • Customer Support
  • Privacy Preferences
  • About
  • Contact
  • Advertise
  • Careers
  • Terms of Use
  • Site Map
  • Do not sell or share my information
  • Privacy Policy
  • Accessibility
  • California Privacy Rights

© 2025 Active Interest Media. All rights reserved.

Fine Homebuilding receives a commission for items purchased through links on this site, including Amazon Associates and other affiliate advertising programs.

  • Home Group
  • Antique Trader
  • Arts & Crafts Homes
  • Bank Note Reporter
  • Cabin Life
  • Cuisine at Home
  • Fine Gardening
  • Fine Woodworking
  • Green Building Advisor
  • Garden Gate
  • Horticulture
  • Keep Craft Alive
  • Log Home Living
  • Military Trader/Vehicles
  • Numismatic News
  • Numismaster
  • Old Cars Weekly
  • Old House Journal
  • Period Homes
  • Popular Woodworking
  • Script
  • ShopNotes
  • Sports Collectors Digest
  • Threads
  • Timber Home Living
  • Traditional Building
  • Woodsmith
  • World Coin News
  • Writer's Digest
Active Interest Media logo
X
X
This is a dialog window which overlays the main content of the page. The modal window is a 'site map' of the most critical areas of the site. Pressing the Escape (ESC) button will close the modal and bring you back to where you were on the page.

Main Menu

  • How-To
  • Design
  • Tools & Materials
  • Video
  • Blogs
  • Forum
  • Project Guides
  • Reader Projects
  • Magazine
  • Members
  • FHB House

Podcasts

  • FHB Podcast
  • ProTalk

Webinars

  • Upcoming and On-Demand

Podcasts

  • FHB Podcast
  • ProTalk

Webinars

  • Upcoming and On-Demand

Popular Topics

  • Kitchens
  • Business
  • Bedrooms
  • Roofs
  • Architecture and Design
  • Green Building
  • Decks
  • Framing
  • Safety
  • Remodeling
  • Bathrooms
  • Windows
  • Tilework
  • Ceilings
  • HVAC

Magazine

  • Current Issue
  • Past Issues
  • Magazine Index
  • Subscribe
  • Online Archive
  • Author Guidelines

All Access

  • Member Home
  • Start Free Trial
  • Gift Membership

Online Learning

  • Courses
  • Project Guides
  • Reader Projects
  • Podcast

More

  • FHB Ambassadors
  • FHB House
  • Customer Support

Account

  • Log In
  • Join

Newsletter

Get home building tips, offers, and expert advice in your inbox

Signing you up...

This site is protected by reCAPTCHA and the Google Privacy Policy and Terms of Service apply.
See all newsletters
See all newsletters

Follow

  • X
  • YouTube
  • instagram
  • facebook
  • pinterest
  • Tiktok

Join All Access

Become a member and get instant access to thousands of videos, how-tos, tool reviews, and design features.

Start Your Free Trial

Subscribe

FHB Magazine

Start your subscription today and save up to 81%

Subscribe

We hope you’ve enjoyed your free articles. To keep reading, become a member today.

Get complete site access to expert advice, how-to videos, Code Check, and more, plus the print magazine.

Start your FREE trial

Already a member? Log in

Privacy Policy Update

We use cookies, pixels, script and other tracking technologies to analyze and improve our service, to improve and personalize content, and for advertising to you. We also share information about your use of our site with third-party social media, advertising and analytics partners. You can view our Privacy Policy here and our Terms of Use here.

Cookies

Analytics

These cookies help us track site metrics to improve our sites and provide a better user experience.

Advertising/Social Media

These cookies are used to serve advertisements aligned with your interests.

Essential

These cookies are required to provide basic functions like page navigation and access to secure areas of the website.

Delete My Data

Delete all cookies and associated data