Podcast 255: Ridge Vents, Removing Blown Fiberglass, and Matching Textured Drywall
Kiley, Rob and Patrick hear from listeners about saunas and septic systems before taking listener questions on high-flying ridge vents, vacuuming up old insulation, and matching textured drywall.
Follow the Fine Homebuilding Podcast on your favorite app. Subscribe now and don’t miss an episode:
 |
 |
Ken writes in about Russian steam baths outside Boston. Eric and Lonnie weigh in on Kiley’s septic system. William asks why his ridge vent blew off. Scott wants to know if vacuuming an attic’s worth of insulation is a DIY project. John wants to know how to integrate new drywall into an existing textured ceiling. Nick asks how to make a basement in-law suite quieter.
Editor Updates:
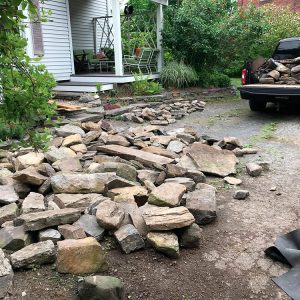
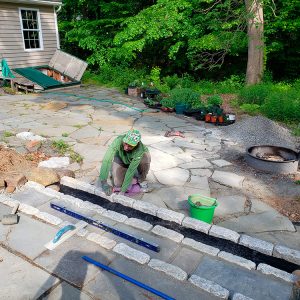
Rob: Pedal-powered tractor, rocks
Kiley: Ryobi mower
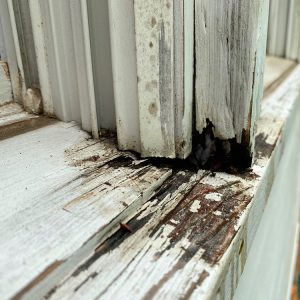
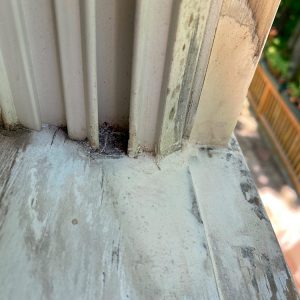
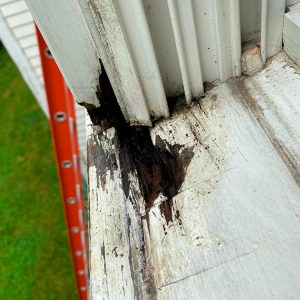
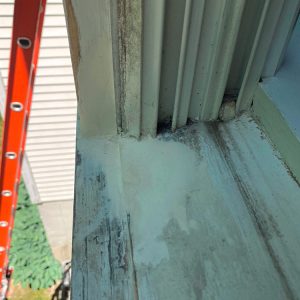
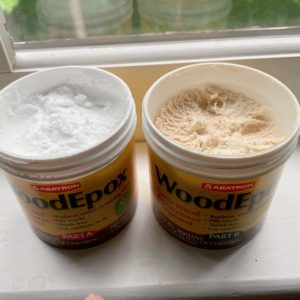
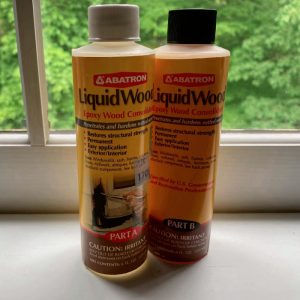
Jeff: Rotted sill
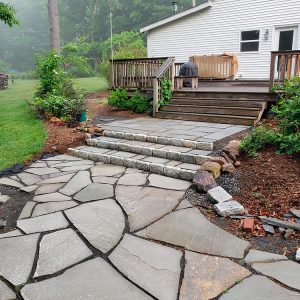
Patrick: Carol’s steps
 |
 |
 |
 |
 |
 |
 |
 |
 |
 |
 |
 |
 |
 |
Listener Feedback 1:
Ken in NH writes: Hi folks, Just finished watching Podcast 251 and while all that siding talk was stimulating, it was the sauna talk that really caught my attention. I agree with Kylie that the health benefits of heat (relaxation, endorphins, improved circulation…) are clear, but I wanted you to know that many of us actually prefer a steam bath instead of the dry heat of sauna.

Do try this if you ever are near Boston. It is men only except for Monday nights which is ladies’ night. It is a real treat! I have become a podcast addict and look forward to every Friday so I hope you guys are enjoying the work – it seems so.
Best wishes, Ken.
Related links:
Listener Feedback 2:
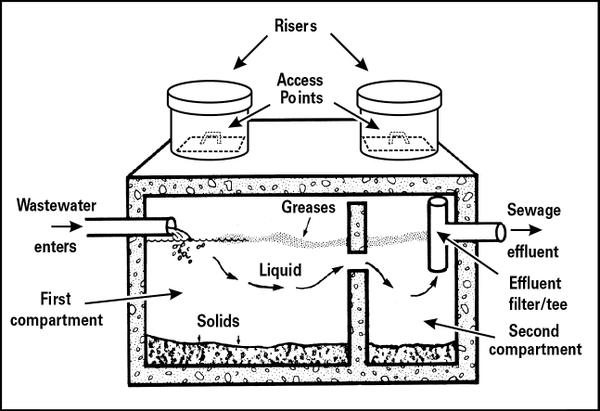
Short version: they aren’t worth the money and they do little to nothing. The risk is they harm your drainfield.
Try talking with soil scientists who research these products… That would make a nice discussion.
They won’t have much good to say about them.
Big State institutions for septic (and soil science) are NCSU, WVU and Purdue; there are others.
Love the show.
Related links:
Question 1: Will closing off old gable vents prevent damage to a ridge vent in a high-wind region?
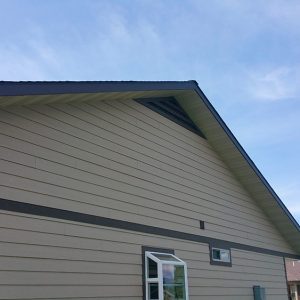
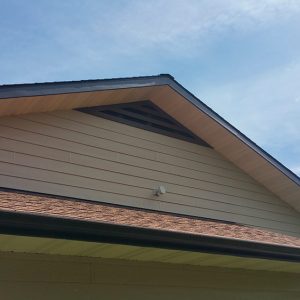
William writes, Our house was built with ridge and gable end vents.
Recently we had an unusually strong wind storm. The wind was coming directly at the north end of the house.
After it subsided I was leaving to go to the store when I noticed an issue with the roof.
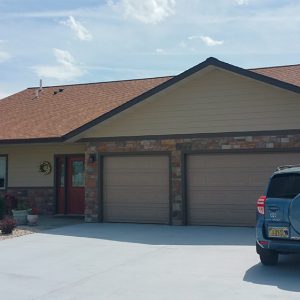
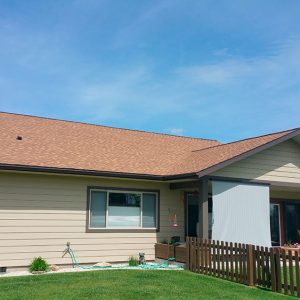
The north, first, section of ridge vent was off the ridge and laying on the roof upside down.
The south end was blown up and almost off.
 |
 |
 |
 |
My thinking was that the wind that blew in the north gable vent didn’t have a good enough exit point and so blew the ridge vent off.
When my neighbor, an ex-roofer, later went up to check on it and fix it he wasn’t very happy. He said there were more than enough nails holding the 3 tab sections to the vent but only a few longer ones holding the vent to the sheathing.
He promptly repaired the issue and even with a heavy wind again it has been fine.
So what we seem to have is poor craftsmanship and a sloppy job.
Now to even go a step farther I think I should close the gable vents.
This is a different reason than what was mentioned in your attic venting articles.
What is your opinion?
Related links:
- Should I Close My Attic Gable Vents?
- 9 Upgrades to Windproof Your Roof
- A Crash Course in Roof Venting
Question 2: Should I remove old blown-in insulation to make it easier to air-seal my attic?
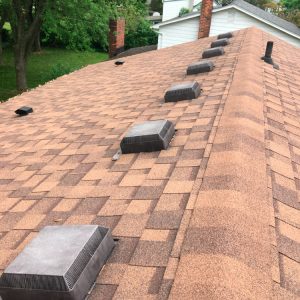
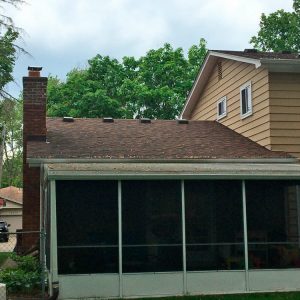
Scott in Ann Arbor, MI writes, As a longtime listener of the Fine Kumiko podcast, I just recently started listening to the Fine Air Sealing podcast and I’m hooked. I know you’ve probably talked about much or all of this before, but I figured I see if my situation would make for compelling podcasting content. I would be doing all the labor myself, and feel confident I can do a quality job (not like we’re talking hand cut dovetails here, amirite? 😉 Address is attached, my bandsaw has a bald spot perfect for a FHB sticker.
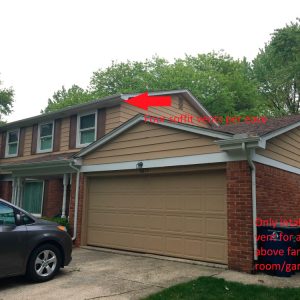
My 2 story colonial house has really poor air sealing and insulation attributes typical of it’s vintage (1967). I’m I’d love to vacuum out the attic insulation, replace whole house fan with retractable stairs, air seal, rafter vents, add some electrical, and blow in an appropriate amount of insulation for my region (R60). Problem is there is already about 12″ of loose fiberglass (1100 sq feet of attic floor), making air sealing difficult. Here’s my questions:
1) Contractor removal of the insulation is about $2,200-$2750 in my area (2-2.5 sqft at R30), and thats a deal breaker, but I can rent a removal vacuum and bags for about $500-$600. Is this a fools errand or something a capable/pig headed DIYer could take on?
2) That’s a lot of insulation to throw away, about $600 worth by my calculations. Can it be re-blown back into the attic once the other work is done?
3) Cellulose seems way cheaper, about 35% less, if I can re-blow the old fiberglass, can i do cellulose first? or vice versa? any problem having two different insulation materials?
4) I’m certain the walls in this house leak like a sieve (2×4, R7, brown fibrous sheathing like masonite, tar paper), are there any practical strategies and low hanging fruit for improving air sealing at the walls? Major retrofitting of the interior walls or exterior sheathing/siding not in the cards right now.
Details of the house:
– Southeast Michigan, climate zone 5
– 1967 2 story colonial , 4×12 pitch, 2×4 framing attic with rim joists that I sealed (fiberglass batts, 2″ ridgis foam, spray foam)
– aluminum siding, tar paper, fibrous masonite like sheathing kraft faced fiberglass R-7ish walls, I’ve seen some sheathing completely missing from uninsulated exterior wall return air chases, I’m sure there are other horrors beneath the siding
-840 sqft main attic space,
-260 sqft above the family room bump out, family room attic is open to garage attic, garage portion is uninsulated and about 400sqft
– Attic is blown fiberglass, about 12″ deep, but no air sealing I can see and poor ventilation
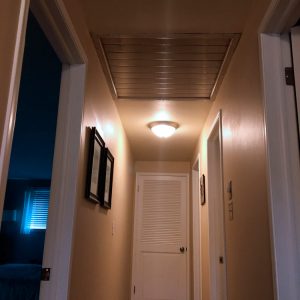
– Whole house fan that is pleasant certain times of the year, but it’s crammed against the truss framing ruling out an effective ridgid insulation box. I shove fiberglass into the fan during winter, but it’s a giant gaping hole otherwise and I’d like to replace it with collapsable stairs (and also eliminate two existing/leaky attic access hatches)
– I will eventual install continuous ridge and soffit vents once the air sealing and insulation work is complete.
Thanks!
 |
 |
 |
 |
Related links:
- Blown Insulation for Attics: Fiberglass vs. Cellulose
- Attic-Insulation Upgrade
- OK to install blown-in cellulose over fiberglas batts in an attic?
- Installing cellulose over fiberglass
- Lstiburek’s Rules for Venting Roofs
- Adequate Roof Venting
Question 3: How can I bridge the gap between new drywall and old textured drywall?
John in Cornelius, OR writes, Hi, I’ve been a subscribing to FHB for many years and only recently found out about the podcast. I’ve now listened to a bunch of them and I really enjoy the information. I’m a DIY person with a fair amount of personal construction history and an electrical/software engineer by trade.
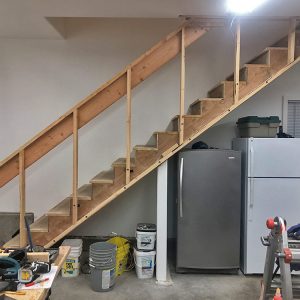
My question is, I’m building a wall to provide a proper handrail on an open staircase in my shop building. The stairs lead into a WFH office built into the trusses.
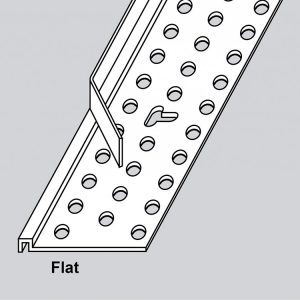
When the shop was built, I hired a contractor to do the sheetrock and texturing. He used rounded corner bead. To build the stairway wall, I had to strip away a bunch of it away, so the wall could be attached to the outside of the stair stringers, which had been covered with sheetrock.
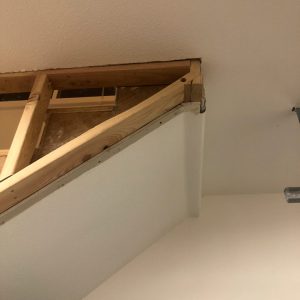
The new sheetrock will need to cover the new wall and wrap under the same, to join the existing sheetrock.
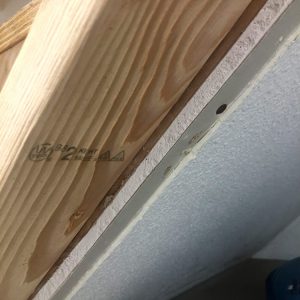
My issue is that the mud was applied really thickly, at least 1/8″ where I pulled the rounded bead off. I’m trying to figure out how to build a nice looking edge profile without adding to the thickness of the mud coat. Dragging the taping knife across the orange peel is going to make a real mess.
To make matters worse, all of the walls are painted. I’d really, really like to avoid pulling the sheetrock back any farther. The idea of grinding/sanding this back crossed my mind, but seemed like a good way to make lots of dust. I’m planning on doing the sheetrock and texturing myself for this little job.
This must happen quite a bit in the field as the rounded edge molding seems to create an 1/8″ ridge at the corner to blend into the radius.
So, any addition to a existing wall would run into the same problem.
Pictures: The overall staircase (10′ ceiling height); the new framing into the existing sheetrock; and the profile of the old sheetrock and the new construction:
 |
 |
 |
 |
Any thoughts on how to approach this? Thanks!
Related links:
Question 4: How can I fix a creaky tongue-and-groove floor that has no subfloor underneath it?
Nick from Portland, OR writes, Dear FHB Podcast, I’m a longtime listener of the show, and have thought of writing many times. I often think of a great question for you, but only when I’m swimming in insulation or tangled in Romex. This time I’ve planned ahead.
I live in a 1908 bungalow in Portland, OR. I’m in the process of converting the basement into living space with the addition of 2 bedrooms, a bathroom, a living area, a kitchen, and a separate entrance. This space will be used as a short-term rental and in-law suite. My question is about soundproofing.
 |
 |
 |
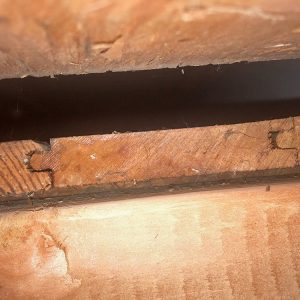 |
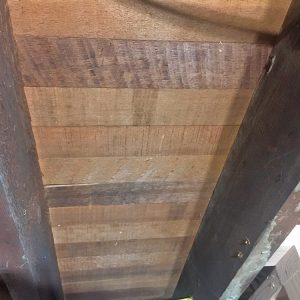
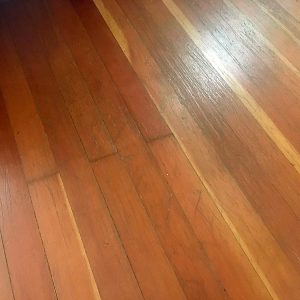
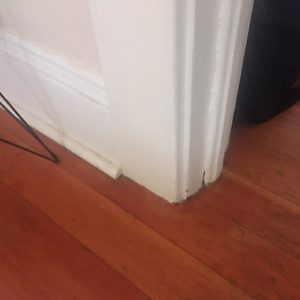
The main floor is framed with 2″x8″s (continuous 28′ boards, which I think is cool) and has original 3/4″ tongue and groove fir flooring attached directly to the joists. There is no subfloor. The bottom plates of the walls on the main floor are framed on top of the fir flooring. The flooring has been refinished a few times, and is pretty thin. There have been various patches over the past 100+ years, there are sections without tongues, and there are some loose or maybe broken tongues. The result is a very creaky floor. I like the look, but am concerned the noise will be bothersome for anyone staying in the basement.
So far I’ve removed the furnace and ducts from the basement and patched the register holes in the flooring. I’ve foamed plumbing and electrical penetrations. I plan to fill the bays with rockwool batts and install a resilient channel to isolate the drywall from the framing. Before I close off those bays, I’d like to do what I can to reduce creakiness. Much of the creeks seem to come from the unsupported sections between the floor joists.
Some of my thoughts are to foam the underside of the floor to add rigidity, put caulk/construction adhesive at connections, try some elaborate system of blocking and shims, or install new hardwood flooring over the top. I’d rather not spend the time and money to cover the floor as I do like the original floor look, and it will be a real pain to rework the original trim on the main floor. The floor is surprisingly level if I did go that route, and I think would take to it well. However, I did grow up in a 1790s house in southern VT, so my reference point for level might be a bit skewed.
I appreciate any ideas or input from the brain trust. Keep at it!
Thank you, Nick
Related links:
- Can You Fix a Squeaky Subfloor With Extra Blocking?
- Squeaky-Floor Fix
- Soundproofing a Floor with a Wood Ceiling Below
- Counter-Snap Pro Floor Repair Kit
END NOTE:
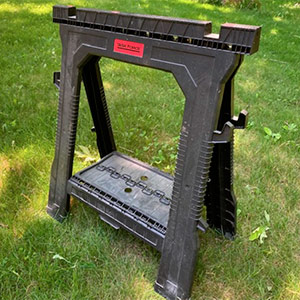
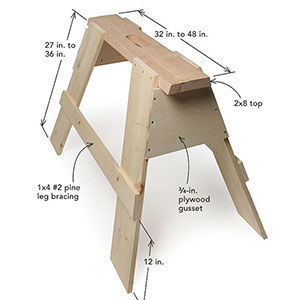
- Please tell us what kind of saw horses you like: [email protected].
 |
 |
 |
If you have any questions you would like us to dig into for a future show, shoot an email our way: [email protected].
If we use your question we’ll send you a FHB Podcast sticker!
FHB Podcast T-shirts!
Represent your favorite podcast! Available in several styles and colors. Made from 100% cotton. Find the Podcast t-shirt and more cool products in the Fine Homebuilding Store.
Fine Homebuilding podcast listeners can now get 20% off anything in the Taunton store, including the The Visual Handbook of Building and Remodeling, 4th Edition.
Use the discount code FHBPODCAST to take advantage of this special offer.
We hope you will take advantage of a great offer for our podcast listeners: A special 20% off the discounted rate to subscribe to the Fine Homebuilding print magazine. That link goes to finehomebuilding.com/podoffer.
The show is driven by our listeners, so please subscribe and rate us on iTunes or Google Play, and if you have any questions you would like us to dig into for a future show, shoot an email our way: [email protected]. Also, be sure to follow Justin Fink and Fine Homebuilding on Instagram, and “like” the magazine on Facebook. Note that you can watch the show above, or on YouTube at the Fine Homebuilding YouTube Channel.
The Fine Homebuilding Podcast embodies Fine Homebuilding magazine’s commitment to the preservation of craftsmanship and the advancement of home performance in residential construction. The show is an informal but vigorous conversation about the techniques and principles that allow listeners to master their design and building challenges.
Other related links
-
- All FHB podcast show notes: FineHomebuilding.com/podcast.
- #KeepCraftAlive T-shirts and hats support scholarships for building trades students. So order some gear at KeepCraftAlive.org.
- The direct link to the online store is here.




View Comments
During the cold intro, I thought the show was about to be cancelled!