Podcast 287: Restoring Windows, Warped Stair Treads, and Not-So-Hot Water
Rob, Brian, and Patrick hear from listeners about Aeroseal, DIY blower doors, and Minnesota’s climate, before taking questions about restoring window sash, lukewarm water, and making a comfortable shop in a block-wall garage.
Follow the Fine Homebuilding Podcast on your favorite app. Subscribe now and don’t miss an episode:
 |
 |
Help us make better episodes and enter for a chance to win an FHB Podcast T-shirt:
www.finehomebuilding.com/podcastsurvey
Zach emails with an Aeroseal success story. Ethan discusses his DIY blower door. Henry explains his experience with portable generators. Brad says Minnesota is not a frozen hellscape. Andrew asks about restoring his divided-lite windows. Greg wants to know why his newly installed stair treads are warping. Bob inquires about his boiler’s lack of hot water during temperature swings. Alex asks for help making a comfortable shop in a block-wall garage.
Editor Updates:
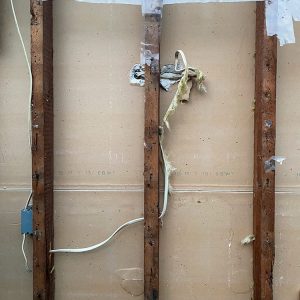
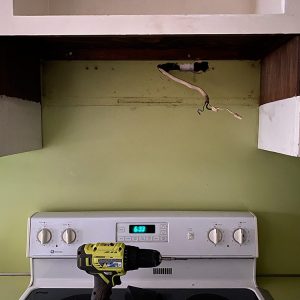
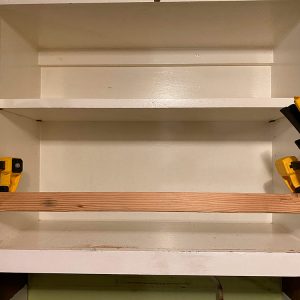
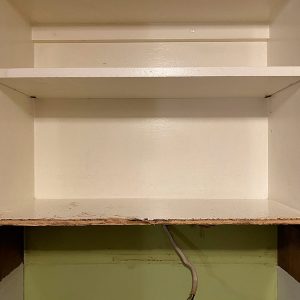
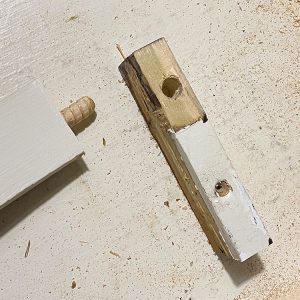
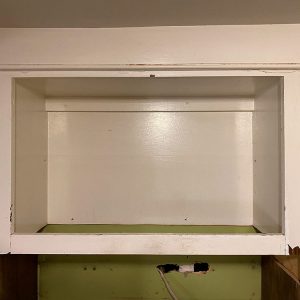
- Rob’s kitchen window/cabinets renovation
- Brian’s life is a beach
- Jeff’s yardwork
- Patrick’s car repairs
 |
 |
 |
 |
 |
 |
 |
 |
 |
 |
Related Links:
Listener Feedback 1:
Zachary from Edgewater, MD writes: In episode 267 you had asked for feedback about the Aeroseal process. Our house has two heat pumps, one for the downstairs and one for the 2nd and 3rd floors. The upstairs unit is sized correctly but has always struggled with maintaining the setpoint. In the winter when it gets below 40 degrees it has to run the electric resistance heat pretty much nonstop just to keep the temperature around 68 degrees. This results in extremely high electric bills. I spent last summer air sealing and blowing in insulation in the finished attic knee walls but it did little in the winter leading me to believe it was a problem with the ducts which are run completely in unfinished spaces. An Aeroseal dealer came out as part of our state’s energy audit program and they first did a blower test on the ductwork to see if it was truly leaky. Well the ducts couldn’t even be pressurized to 20 pascals and only got to 15 which led us to believe there was a break somewhere in the line. I spent the next month crawling through the insulation trying to find the break to no avail but I noticed that even in a full Tyvek suit in an attic in the summer I was nice and cool because our ductwork was so extraordinarily leaky–no breaks, but bad leaks everywhere. We went ahead with the Aeroseal process which took a day and was extremely painless and I noticed immediate results. We went from 210.9 CFM of leakage to just 32.4 CFM. We have an Ecobee thermostat with individual room sensors and have it programmed to keep just our daughters room at 72 degrees at night. The system would run for so long to get to 72 in her room that it kept the rest of the rooms relatively comfortable. On the first night after Aeroseal her room went from 78 degrees to 72 in less than an hour and the rest of the rooms climbed to 80 because the heat pump barely ran. We solved that be reprogramming our thermostat. Now the unit runs for a fraction of the time to keep all rooms comfortable and I’m looking forward to seeing the gains this winter. The total cost for Areoseal was about $2,500 with the state paying $750 through an energy rebate. I’m looking at about a 1 to 1.5 year return on the investment which I’m quite happy with and more importantly our home is now significantly more comfortable. After this experience I’d absolutely say go for it, especially if your state offers any rebates at all. It also helped that they test the ductwork beforehand to see if it would help. If it can’t you pay just a little bit for the testing.
Thanks for the amazing podcast.
Related Links:
Listener Feedback 2:
 Ethan writes: I listened with interest to your recent discussion of DIY blower door fans. For a recent build I constructed an apparatus to host an exhaust fan in a 3×3 window opening. It was instrumental in getting the final blower door result to 0.2 ACH50, which I’ve been told was one of the tightest in the region at the time.
It was nice to have the fan mounted in a fixed location so that I could find holes in the envelope at different phases of the project (before insulation, after insulation, etc). I wasn’t using this to test air tightness, just to find holes.
I used this in conjunction with a Flir heat detecting camera that I hooked up to an old Android phone. I found lots of small leaks through staples and other fasteners. I think the real value came in finding some major holes at membrane corners, transitions, etc. I was also incidentally able to find entire stud bays that had been inadvertently missed by the insulation installers.
I highly recommend the Flir camera and also some type of exhaust fan depressurization that can be used day in and day out to find leaks. It’s a great hobby for homeowners, architects, and contractors who have nothing else to do on cold lonely nights.
The only downside as I now have this clunky fan sitting around. If I could do it again, I would probably build it smaller, maybe using a design that wasn’t fit to the window on this particular project.
Surprisingly, my local building inspector did in the end ask for a blower door test result. I don’t want to be presumptuous, but given our stellar results and his lack of enthusiasm, my guess is he either didn’t look at the results or didn’t know what he was looking at when he did. That being said, I guess the fact that he asked for the results is the sign of some sort of progress.
Related Links:
Listener Feedback 3:
Henry writes: Hello Lady and Gentlemen, I’ve been listening to FHB podcast for quite a while. Thank you and please continue your great work. Congratulations Patrick on your recently purchased generator and transfer switch. I’m no pro at this but this is food for thought.
I’ve been working in commercial buildings now In NYC for over 10 yrs. One thing is for sure is we run our generators once a month. Just to keep things ready for the little one or the big one. We run the generator and put on a fake load ( representing the building needing power ). from the load bank.
I’ve bought a Honda 7000ie and transfer switch. Which was not cheap but very quiet. So I asked the guy who services our generator how can I maintain it and extended its lifespan. He suggested run it once in a while connect a hairdryer or anything to it so that it can put out power. So that the generator can do some type work. Change the oil and just do the normal service to described in the service manual. If you have an electric start, a trickle charger helps to keep battery ready at a moment’s notice.
Just don’t store it away In the shed and expect for it to work when the day comes. It just might lock up on you and that is a hole other situation you will be in.
Good luck and please continue your great work.
Listener Feedback 4:
Brad from Minneapolis, MN writes: Hey pod people, I just listened to the PRO TALK Podcast with fellow Minnesotan, Peter Kulczyk. Great show, but I feel compelled to comment about the weather comments (Discussing weather is a favorite pastime at our igloo parties). I think there is some intrigue in the FHB offices about the weather here in Minnesota, and specifically the Twin Cities. Patrick, I think you should come and visit us a few times to dispel some of the hyperbole I’ve been hearing on the podcast and check out the building scene here.
Yes, as Peter says, it gets cold, but we don’t live in temperatures below zero very often. We have 23 days a year that dip below zero, but it rarely stays there very long–sometimes just a few hours. I also think Steve from Minnetonka got a little carried away about the heat and humidity here in his feedback in episode 269. (I also checked on those Lake Superior surface temps which in late summer reach around 60°, not 36°. Come on guys!) Sure we’ve had some hot ones–sometimes a string of them. But statistically we only exceed 90° eleven days per year. Maybe this will help a little: statistical average low/hi temps in January are 9°/24° rising to 66°/85° in July. Sure there are anomalies, but in reality, we Minnesotans like to lie about our weather (in both directions) just to keep the riff-raff out. As one who grew up in central Florida, I wouldn’t trade our climate, people, and way of life for anywhere else. But forget I said that–y’all stay where you are!
Question 1: What’s the best way to restore all the wood window sashes in my house?
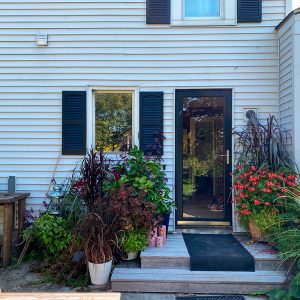
 Andrew writes, Hello Fine Homebuilding Crew, First, I want to say thank you for putting on this awesome podcast. I listen to the podcast religiously on Fridays as soon as I get up. A little back story, my wife and I just bought our first house in St. Paul, MN (see picture). Not sure what the style is but it was built in 1939. It’s got tons of projects I’m excited to address. We talked about replacing the windows but we love the look of the wooden windows. So, our first major project would be replacing a few cracked window panes, and then reglazing almost all of the windows. With winter approaching quickly I’m getting nervous about leaving a giant hole in my house and only using the storm windows to block nature. I’ve been researching the process for refinishing the windows and was wondering if someone with more knowledge could review my process and give me any hints or tips for doing it properly or point out steps that I’m missing. See the steps below:
1. Remove Window Sash
2. Remove Lock hardware and handles.
3. Using a heat gun, remove the old glazing compound that’s breaking up.
4. Remove glass panes, and number each pane for position in the window.
5. Using a heat gun, soften white paint on the outside of the sash to scrape away with paint scraper. (Any suggestions on removing old paint would be greatly appreciated.)
6. Sand inside part in hopes to remove any water stains that exist.
7. Sand the outside part to remove any extra paint that’s left over.
8. Paint on Killz exterior oil based primer.
9. Replace glass panes, and cut new ones for cracked and broken panes.
10. Push in glazing pins.
11. Put on DAP 33 Putty.
12. Shape and smooth compound. Let dry.
13. Paint on Liquid Masking compound.
14. Paint on Premium Behr Enamel Paint for exterior part of window.
15. Let dry and remove the masking compound.
16. Use a wood conditioner on the inside part of the window.
17. Apply Varathane Wood Stain
18. Put Johnson paste wax on the side of the window to allow it to move easier.
19. Replace Sash cord and any missing weights.
Related links:
Question 2: How can I stop the treads from warping on a set of exterior wood stairs?
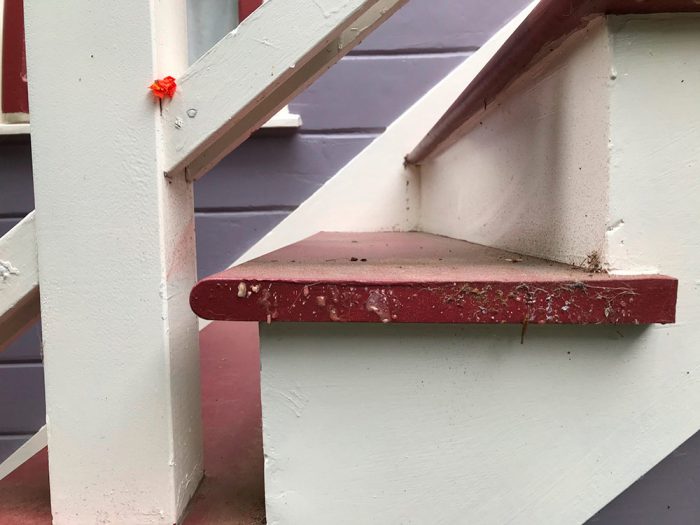
Greg from Corte Madera, California writes, Hi guys – Really enjoying your podcast, and learning so much. Especially about the rigors of tap dancing floors!
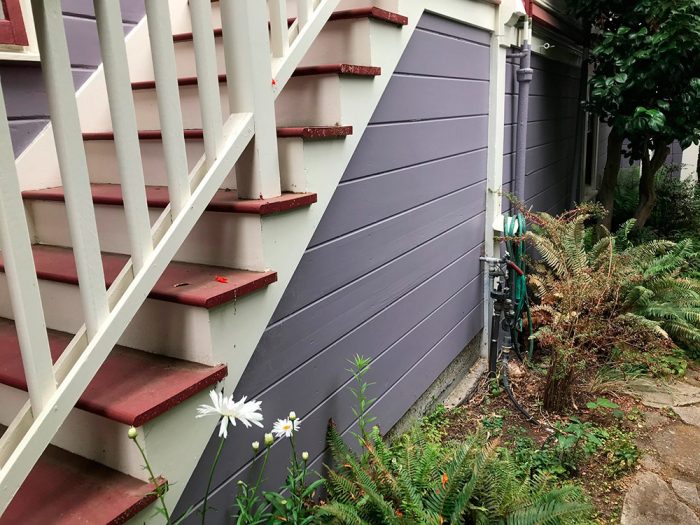
Last August, I repaired the outdoor stairs for some friends in Berkeley. It’s an old Victorian, and the stairs cover an enclosed space below that has a concrete slab floor and wood walls, which are common walls to the laundry/room basement and a small rental unit of a couple hundred square feet.
The previous stair treads were about 20 years old, but had suffered rot from the treads being ever so slightly inclined towards the risers, perhaps a result of just age and shifting stringers and all of the things that old houses face. They also butted into the risers, instead of the risers landing on the treads, so water got into the joint as well.
The stairs come from an elevated, covered walkway in the rear of the house, and lead down to the back garden. The stairs themselves are uncovered from the upper landing to the ground. I removed all the treads and risers; the underlying PT risers were still serviceable. I shored up the connections to the house and added some mid-stringer supports.
I purchased new Kiln dried VG doug fir treads from the local lumber store, and followed their recommendations of two coats of primer pre-installation to all sides of the treads. During installation, I made sure that there was a degree or so of tilt away from the risers to promote proper drainage. All joints between all of the pieces were caulked with Big Stretch prior to the pieces being placed to ensure that the joint would be well sealed. Nail holes were primed, puttied, and then primed again. I thought I was taking every step to make these stairs last.
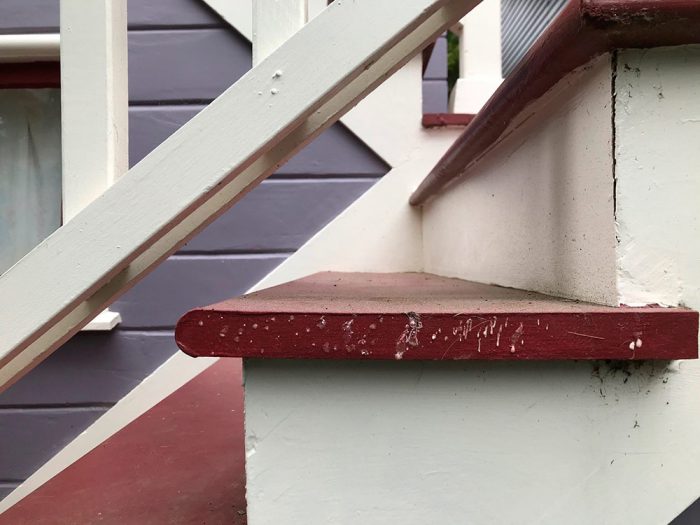
This was all done prior to the whole house getting painted. The stair treads were painted a kind of maroon color that one would expect to see on a victorian.
I got a call from my friends this fall that the treads were holding water. Upon visiting, the treads were cupping and pulling away. I’m stumped at what could be happening. My first thought was that it was a combination of moisture from the space below (it’s not vented other than cracks and holes and a poorly fitting door between it and the laundry room, and the summer sun baking the exposed part of the tread and shrinking that side. I thought I had anticipated and prevented the moisture ingress with two solid coats of primer. The previous treads were painted the same color and had lasted almost 20 years, and were only painted on the upper surface.
So I’m really puzzled. I’m about to go fix them before it starts raining again (hopefully), but don’t want to repeat any mistakes and have to do this again next year.
What are your thoughts? The local lumber store at first thought the same causes as I had, but found it strange that it would warp so much.
Looking forward to some ideas. Replace the treads with marine plywood? But the original treads were solid timber, so I don’t want to go down that route.
 |
 |
 |
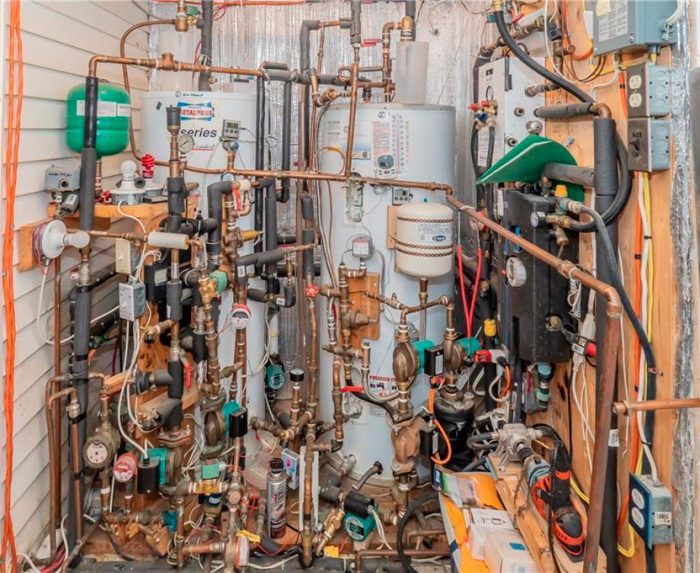
Question 3: Why is my water heater temperature affected by how warm it is outdoors?
Bob from Winchester, Massachusetts writes, Thanks for the show to the whole team. I enjoy each and every podcast.
I’ve meaning to ask this question every time I take a luke warm shower.
I have a gas boiler that heats the water in our 60-gallon superstor tank.
I notice that every time there is a temperature swing outside of 15 degrees our shower water goes cold.
I need to then re-adjust the dial on the thermometer on the storage tank to call for hotter water the next time the boiler fires. Meanwhile I’m stuck with luke warm water for my shower.
Am I doomed to have this happen every change of season?
The confusing part about this happens when we get a 1- or 2-day January thaw and my water gets luke warm for a few days because the boiler won’t heat the water enough.
Is it the outdoor temperature messing with my thermometer or is it the temperature of the street water coming into the house?
Wish I had an app to remotely control and monitor the temperature swings rather than reacting to this after my wife yells “the water is cold!”
Question 4: How should I insulate my concrete block garage?
Alex in Ohio writes, Hi guys, love the show. I’m still making my way through the podcast backlog, but I’m not a builder by trade, so I thought I’d ask you for your thoughts on my situation.
I’m looking to turn my detached 2 car garage into a functional workshop for woodworking. My garage is made of concrete block, with an overhead door, open ceiling, and bare concrete slab. The block has exterior paint, but is bare inside. As a first step, I’m looking to frame in the walls so I can run electric, lights, dust collection, and easily hang stuff on the walls. It seems like a long way off, but I’d like to keep my options open for insulating and heating the shop during the Ohio winter.
I’ve been listening to the show for a while now, but I’m still not sure what I need to do about moisture in the walls. The block is porous and will allow moisture transfer. From what I understand, this should be fine as long as I keep a vapor retarder on the warm side of the framed wall. Any moisture that gets between the vapor retarder and the block would be able to dry out back through the block.
However, the outside of the garage has been painted by the previous owners. I’m not sure what this does to the ability of the block to either to let moisture in or let moisture out.
I found a Building Science Corporation guide which suggests that exterior insulation would be great for this situation. However, due to the garage being immediately on the property line, this isn’t really workable in my situation.
Friends have suggested I double-down on preventing moisture exchange through the block with Dry-Lock or another vapor barrier, but this seems counter to everything I’ve learned from FHB. I don’t want moisture to get trapped within the wall and cause the new wall to rot.
I’m not even planning to insulate immediately, but I don’t want to make any mistake at this stage that requires I rebuild the wall when I do.
Let me know if you need any more details.
Related links:
- Certainteed MemBrain
- Proclima Intello
- Andy Engel’s No-Mold Finished Basement
- Justin Fink’s basement insulating video series
END NOTE:
Due to the complexity of the property and equipment this property is being sold AS IS. Interested Buyers are encouraged to visit the property and do their own due diligence.
Photo courtesy of: Royal LePage Lakes Of Muskoka. This listing content provided by REALTOR.ca has been licensed by REALTOR® members of The Canadian Real Estate Association.
Help us make better episodes and enter for a chance to win an FHB Podcast T-shirt: www.finehomebuilding.com/podcastsurvey
If you have any questions you would like us to dig into for a future show, shoot an email our way: [email protected].
If we use your question we’ll send you a FHB Podcast sticker!
FHB Podcast T-shirts!
Represent your favorite podcast! Available in several styles and colors. Made from 100% cotton. Find the Podcast t-shirt and more cool products in the Fine Homebuilding Store.
Fine Homebuilding podcast listeners can now get 20% off anything in the Taunton store, including the Renovation, 5th Edition.
Use the discount code FHBPODCAST to take advantage of this special offer.
We hope you will take advantage of a great offer for our podcast listeners: A special 20% off the discounted rate to subscribe to the Fine Homebuilding print magazine. That link goes to finehomebuilding.com/podoffer.
The show is driven by our listeners, so please subscribe and rate us on iTunes or Google Play, and if you have any questions you would like us to dig into for a future show, shoot an email our way: [email protected]. Also, be sure to follow Fine Homebuilding on Instagram, and “like” us on Facebook. Note that you can watch the show above, or on YouTube at the Fine Homebuilding YouTube Channel.
The Fine Homebuilding Podcast embodies Fine Homebuilding magazine’s commitment to the preservation of craftsmanship and the advancement of home performance in residential construction. The show is an informal but vigorous conversation about the techniques and principles that allow listeners to master their design and building challenges.
Other related links
-
- All FHB podcast show notes: FineHomebuilding.com/podcast.
- #KeepCraftAlive T-shirts and hats support scholarships for building trades students. So order some gear at KeepCraftAlive.org.
- The direct link to the online store is here.


