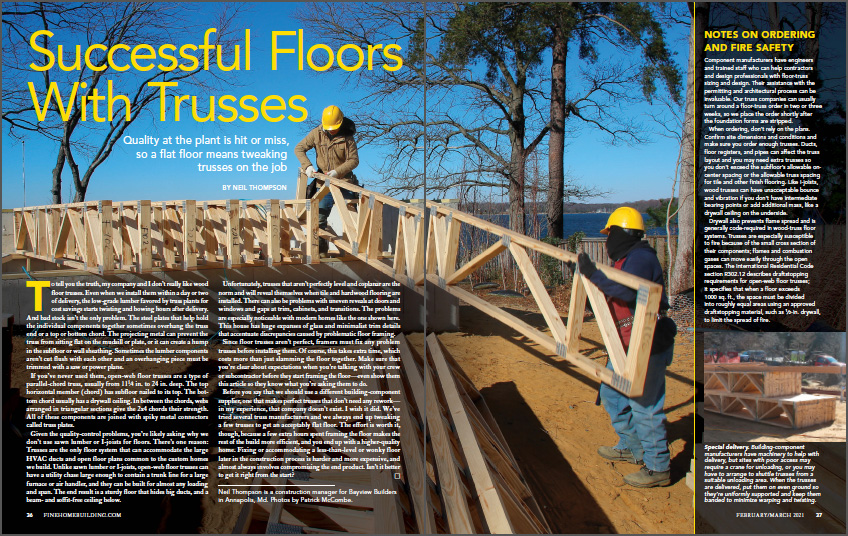
Successful Floors With Trusses
Quality at the plant is hit or miss, so a flat floor means tweaking trusses on the job.
Synopsis: Trusses are the only floor system that can accommodate the large HVAC ducts and open floor plans common to large, custom homes. But bad stock and other quality issues make wood trusses more difficult to work with, requiring some adjustment on the job. A construction manager describes his company’s process of prepping, laying out, placing, and aligning floor trusses, with notes about acceptable modifications for manufacturer errors that don’t require a replacement or engineered fix. Find more information about working with engineered floor joists in the article: Floor-Framing Design
To tell you the truth, my company and I don’t really like wood floor trusses. Even when we install them within a day or two of delivery, the low-grade lumber favored by truss plants for cost savings starts twisting and bowing hours after delivery. And bad stock isn’t the only problem. The steel plates that help hold the individual components together sometimes overhang the truss end or a top or bottom chord. The projecting metal can prevent the truss from sitting flat on the mudsill or plate, or it can create a hump in the subfloor or wall sheathing. Sometimes the lumber components aren’t cut flush with each other and an overhanging piece must be trimmed with a saw or power plane.
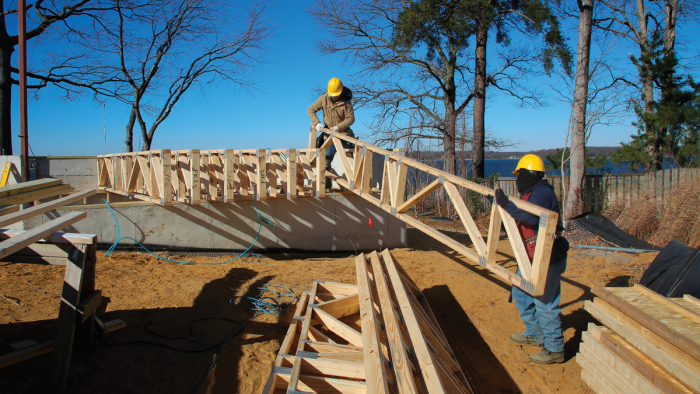
If you’ve never used them, open-web floor trusses are a type of parallel-chord truss, usually from 11-1⁄4 in. to 24 in. deep. The top horizontal member (chord) has subfloor nailed to its top. The bottom chord usually has a drywall ceiling. In between the chords, webs arranged in triangular sections give the 2×4 chords their strength. All of these components are joined with spiky metal connectors called truss plates.
Given the quality-control problems, you’re likely asking why we don’t use sawn lumber or I-joists for floors. There’s one reason: Trusses are the only floor system that can accommodate the large HVAC ducts and open floor plans common to the custom homes we build. Unlike sawn lumber or I-joists, open-web floor trusses can have a utility chase large enough to contain a trunk line for a large furnace or air handler, and they can be built for almost any loading and span. The end result is a sturdy floor that hides big ducts, and a beam- and soffit-free ceiling below.
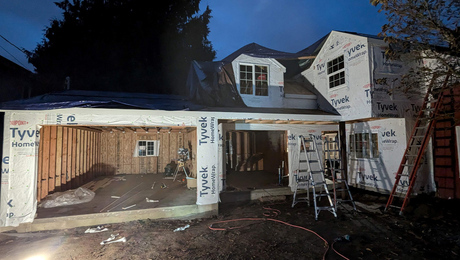
Unfortunately, trusses that aren’t perfectly level and coplanar are the norm and will reveal themselves when tile and hardwood flooring are installed. There can also be problems with uneven reveals at doors and windows and gaps at trim, cabinets, and transitions. The problems are especially noticeable with modern homes like the one shown here. This house has huge expanses of glass and minimalist trim details that accentuate discrepancies caused by problematic floor framing.
Since floor trusses aren’t perfect, framers must fix any problem trusses before installing them. Of course, this takes extra time, which costs more than just slamming the floor together. Make sure that you’re clear about expectations when you’re talking with your crew or subcontractor before they start framing the floor—even show them this article so they know what you’re asking them to do.
Before you say that we should use a different building-component supplier, one that makes perfect trusses that don’t need any rework—in my experience, that company doesn’t exist. I wish it did. We’ve tried several truss manufacturers and we always end up tweaking a few trusses to get an acceptably flat floor. The effort is worth it, though, because a few extra hours spent framing the floor makes the rest of the build more efficient, and you end up with a higher-quality home. Fixing or accommodating a less-than-level or wonky floor later in the construction process is harder and more expensive, and almost always involves compromising the end product. Isn’t it better to get it right from the start?
Notes on ordering and fire safety
Component manufacturers have engineers and trained staff who can help contractors and design professionals with floor-truss sizing and design. Their assistance with the permitting and architectural process can be invaluable. Our truss companies can usually turn around a floor-truss order in two or three weeks, so we place the order shortly after the foundation forms are stripped.
When ordering, don’t rely on the plans. Confirm site dimensions and conditions and make sure you order enough trusses. Ducts, floor registers, and pipes can affect the truss layout and you may need extra trusses so you don’t exceed the subfloor’s allowable on-center spacing or the allowable truss spacing for tile and other finish flooring. Like I-joists, wood trusses can have unacceptable bounce and vibration if you don’t have intermediate bearing points or add additional mass, like a drywall ceiling on the underside.
Drywall also prevents flame spread and is generally code-required in wood-truss floor systems. Trusses are especially susceptible to fire because of the small cross section of their components; flames and combustion gases can move easily through the open spaces. The International Residential Code section R302.12 describes draftstopping requirements for open-web floor trusses; it specifies that when a floor exceeds 1000 sq. ft., the space must be divided into roughly equal areas using an approved draftstopping material, such as 1⁄2-in. drywall, to limit the spread of fire.

Prep and Layout
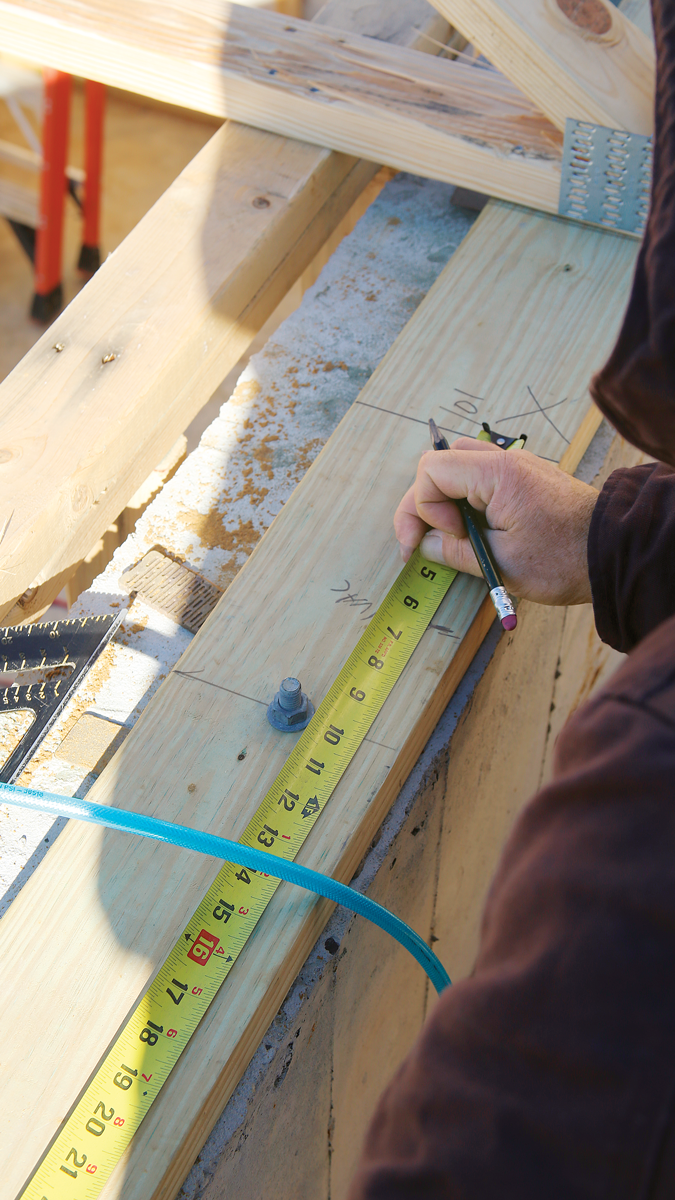
Locate pipes and ducts
You can’t cut a truss to make room for an HVAC register or a closet flange, so the truss layout has to avoid pipes and mechanicals. To prevent problems, plan the exact locations of pipes and ducts before setting trusses and adjust the truss layout to avoid them. In this house, the floor registers are centered on the windows, and the trusses can’t be in the way of register boots, so marking the layout starts with identifying register locations.
 |
 |
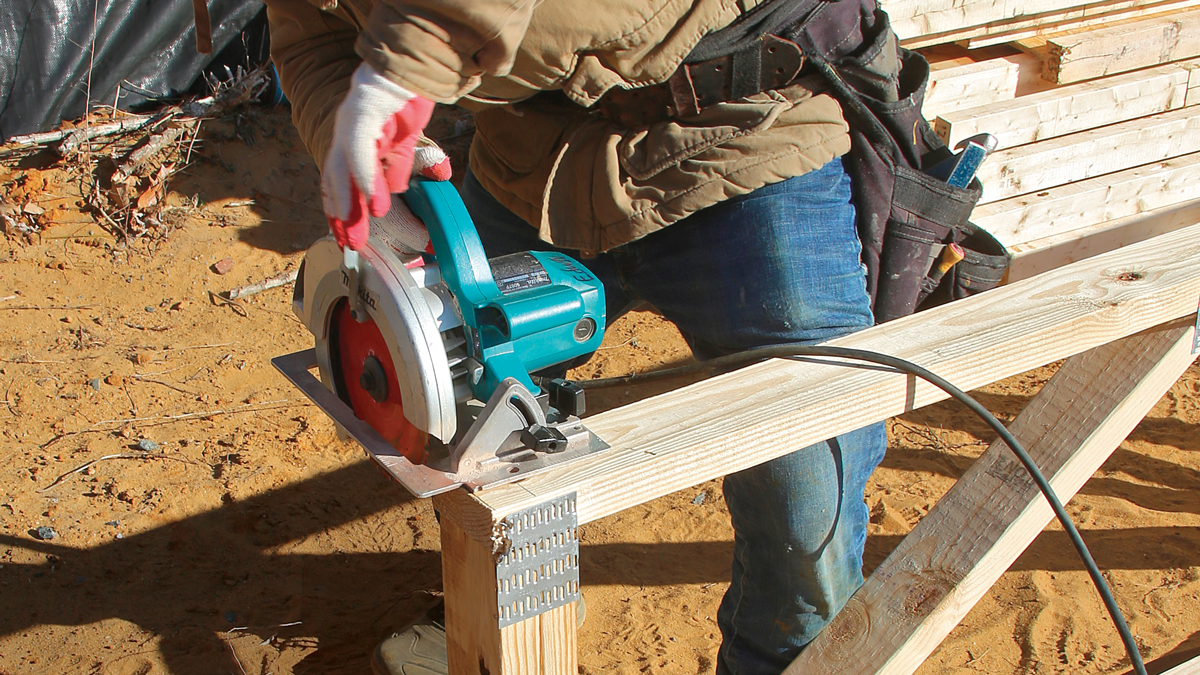
Look for Problems
Some manufacturing inconsistencies in floor trusses can be found right when they’re delivered and still in the pile. The truss ends should be perpendicular to the top and bottom chord, but they aren’t always. We check all the trusses for square before installing them, since repairs and adjustments are easier now than when the trusses are nailed to the mudsill. If one or two trusses are out of square, we usually can fix them; more than a few, and we expect replacements from the manufacturer.

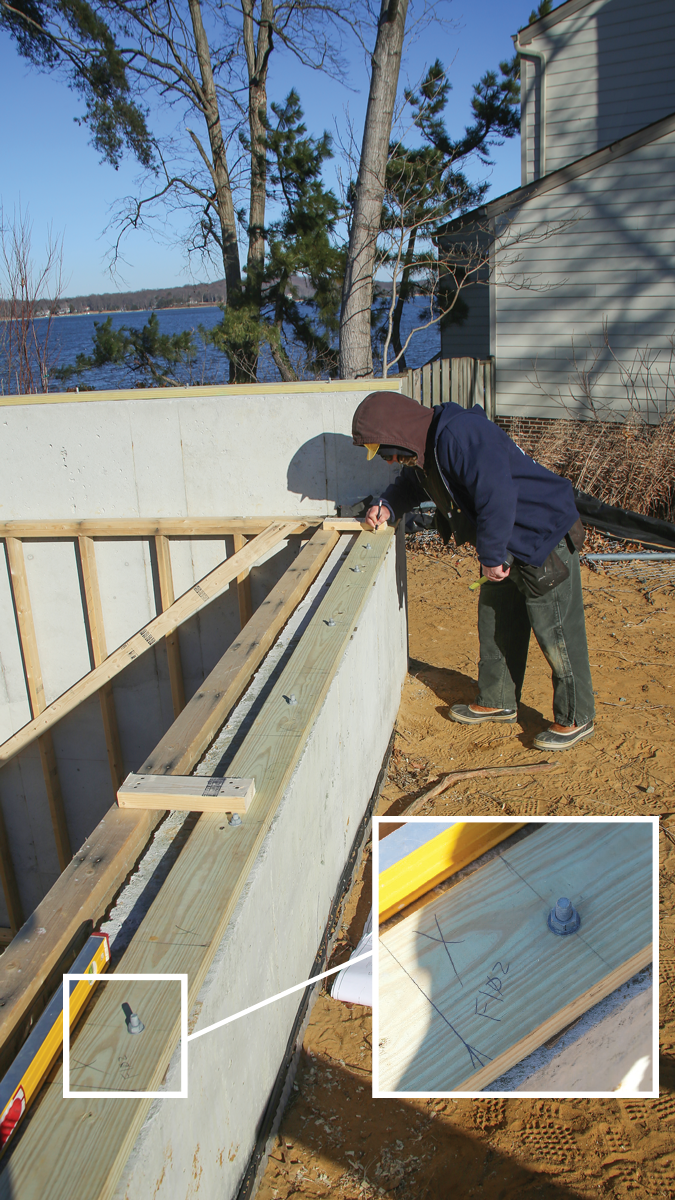
Anchors out of the way
Once the truss layout is done, we tighten the anchor bolts on the mudsill because it is easier to do now than when the floor system is in place. Inevitably one or more of the anchor bolts lands where a truss will sit; these anchors get recessed, and additional anchors get added to beef up the mudsill’s connection to the foundation.


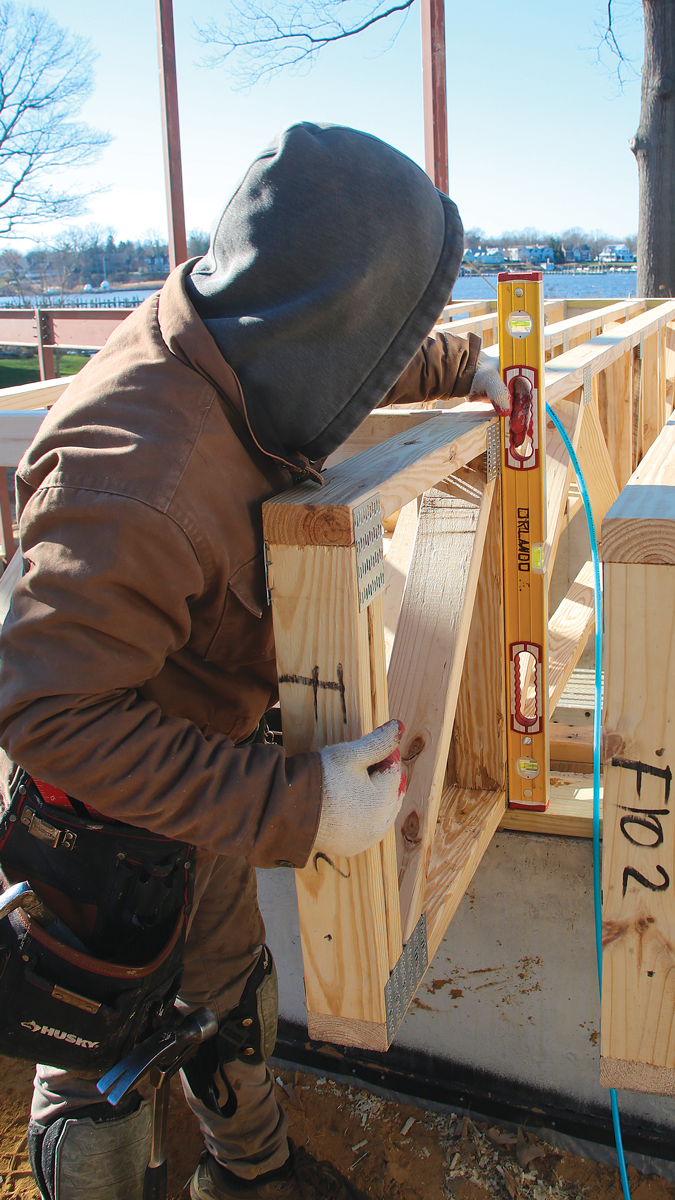
Place and Plumb
Set on layout
Once you start placing trusses on the layout lines, progress can go fast or slow depending on the quality control at the truss plant and the levelness of the foundation. The project managers at my company check the foundation forms and are present when the concrete is placed, which minimizes out-of-level and out-of-square foundation problems, but we generally have to fix a few minor truss defects.
Most of these fixes are done in about 15 minutes, but it’s a different story if a truss breaks or if there’s a serious manufacturing error—those require an engineered fix or replacement. A good truss company should bring a replacement in 24 to 48 hours. Once you have the truss floor framed, use a high-quality subfloor adhesive and install the subfloor panels as soon as possible to prevent the trusses from warping or twisting after they’re in place.

Brace for strength
 |
 |
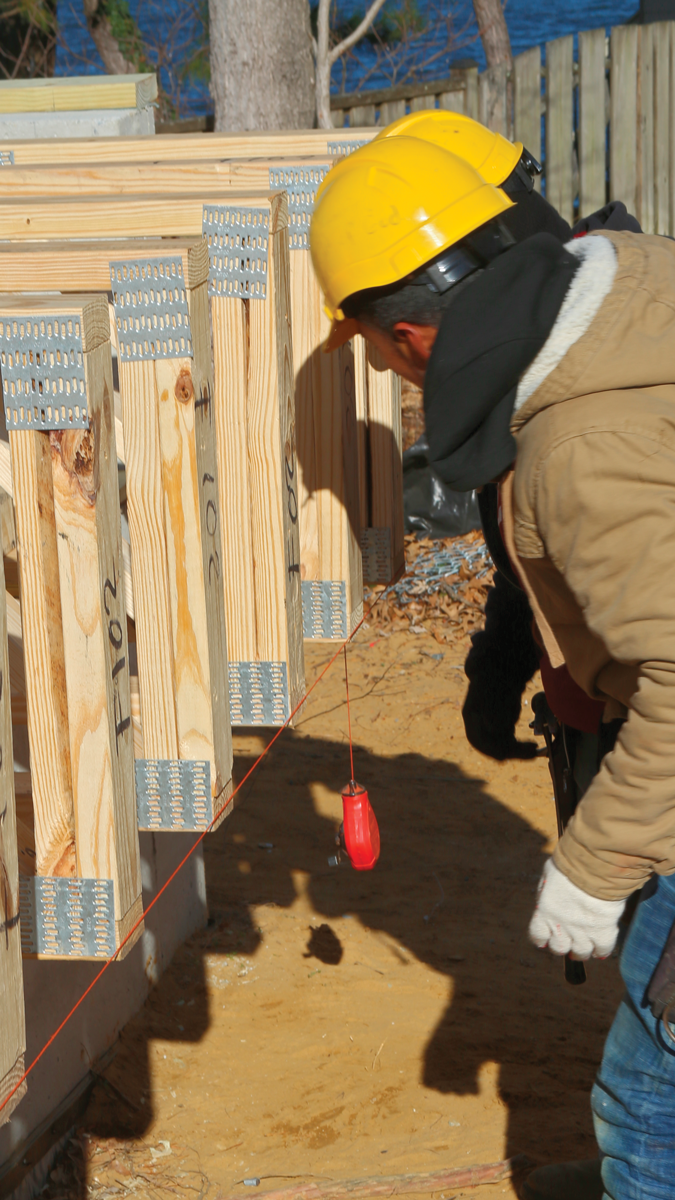
Check alignment
 |
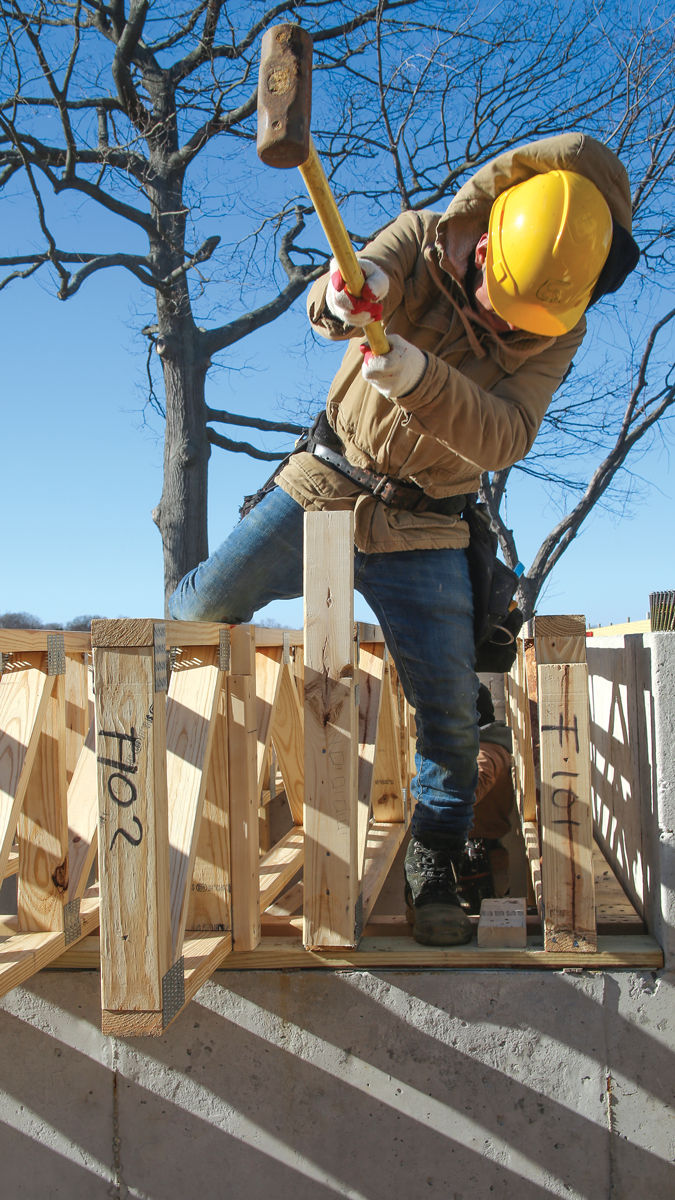 |


Neil Thompson is a construction manager for Bayview Builders in Annapolis, Md. Photos by Patrick McCombe.
To read the entire article, please click the View PDF button below.
Fine Homebuilding Recommended Products
Fine Homebuilding receives a commission for items purchased through links on this site, including Amazon Associates and other affiliate advertising programs.
Portable Wall Jack

QuikDrive PRO300s
Sledge Hammer