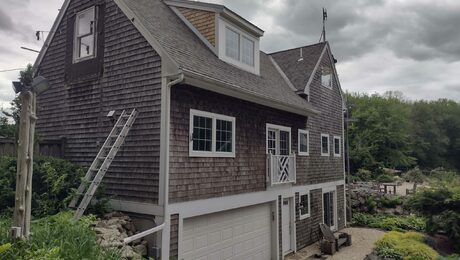
Podcast 319: Building in a Flood Zone, Who Pays for Warranty Work, and Converting Attics to Living Space
Brian, Rob, and Patrick hear form listeners about protecting foundation insulation and building Baltic-birch cabinets before taking listener questions on foundation designs for flood zones, who pays labor costs for warranty work, and attracting clients with COVID-safe work practices.
Follow the Fine Homebuilding Podcast on your favorite app. Subscribe now and don’t miss an episode:
 |
 |
Help us make better episodes and enter for a chance to win an FHB Podcast T-shirt:
www.finehomebuilding.com/podcastsurvey
Mark reminds us that words have power. Mike Guertin explains all the ways he’s tried protecting grade-level foam. Charles offers cabinet-building tips to avoid tearout. Dave describes how COVID-safe work practices have helped attract clients. Nolan shows us the cart he built for hauling concrete into a crawlspace. Wade wants to know who pays the labor costs on a warranty countertop replacement. Dan asks about insulation for his attic-to-living-space conversion.
Editor Updates:
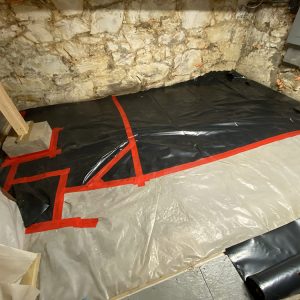
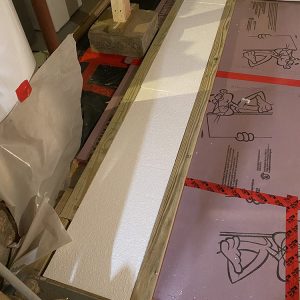
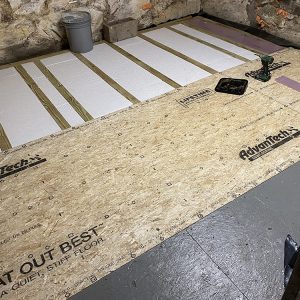
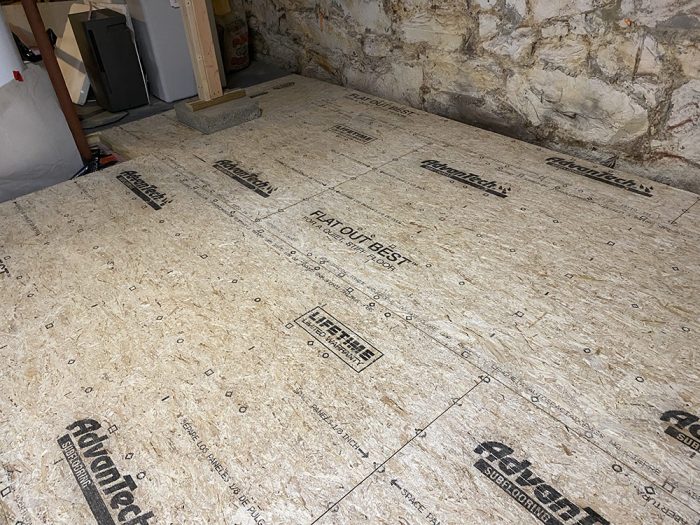
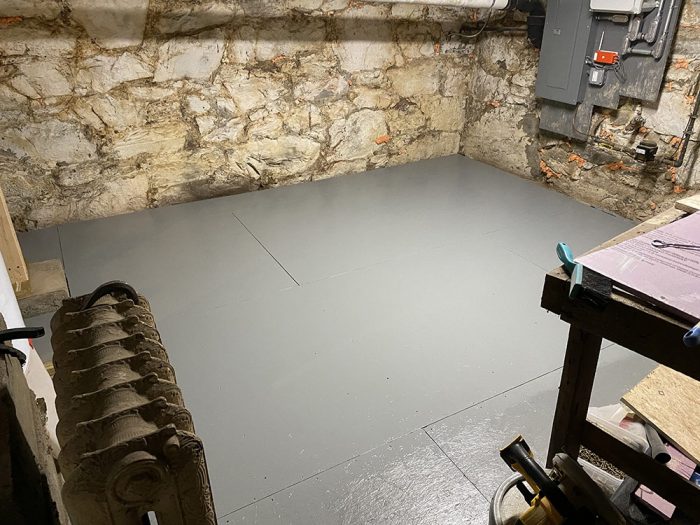
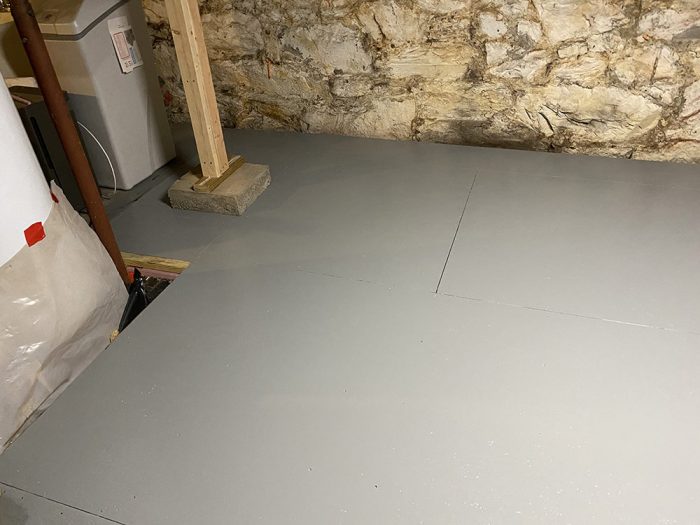
- Rob’s basement floor
- Brian’s handyman jobs at mom’s
- Jeff’s nothing really relevant
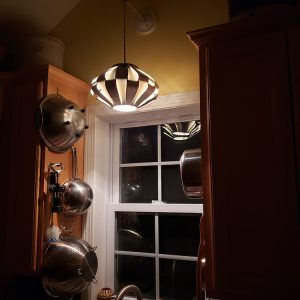
- Patrick’s traveling UFO light fixture
 |
 |
 |
 |
 |
 |
 |
Listener Feedback 1:
Mark writes: Hey Patrick: I tuned in to last week’s regular podcast with great expectation as to what you and the crew would say about the events of the week. I was disappointed although not surprised that nothing was said about the assault of our democracy.
It dawned on me that after having you, Rob, Brian, Matt, Kiley in my head for so long, that I had come to rely on you all for a measure of truth, common sense and even support.
I completely understand why FHB might have decided that discussion of a political insurrection did not belong amidst the discussion of perfect roofs and heated decks, particularly given the diversity of opinions likely in your audience. But if the pandemic is worthy of discussion—you in fact start every ProTalk podcast with a question about it—so does an erosion of faith in government.
As to what one can say about violence and terror, a denial of facts and an assault on our institutions, that’s a more difficult question.
Perhaps just a simple recognition that this is a difficult time for folks. That our strength comes from our diversity of opinion whether it’s cellulose vs. XPS or our trust in democratic institutions.
If most of your audience is angry or sad, shell-shocked or anxious, distrustful of facts or of the new faces of our citizenry, it would seem to be important to recognize that fact.
Like it or not, you all have assumed a leadership role in this building community. Your words have power. And that’s a good thing. Now figuring out to do with that megaphone is the challenge. Stating the obvious seems like a good place to start.
Related Links:
Listener Feedback 2:
Mike writes: Hi Patrick, I’m late listening to last week’s podcast.
As a tangent, you discussed that many contractors install rigid foam on the inside of a basement to avoid having to add protection to the surface when the panels are installed on the exterior. And you noted the lack of protection products.
I build a lot of foundations with ICFs (Insulating Concrete Forms) so we encounter the same problem – and there are solutions I’ve seen and used.
There are several brush-on, trowel-on, spray-on and roll-on coatings like Flexcoat, Tuff II, and others that create a hard shell much like and EIFS coating. They aren’t able to withstand a hammer-blow and an aggressive weed-wacker operator can damage the surface – but they’re decent. The protective product I liked the best was ProtectoWrap ProtectoBond. It was like SBS single-sheet roofing membrane for at-grade foam board. Colored granular surface with peel-and-stick backing. It was easy to install, waterproof and durable. Unfortunately, it was discontinued when ProtectoWrap was no longer able to source the coating. I’ve lobbied them for several years to bring it back. Maybe you and your listeners can help bring it back – just email or call the company – and bug the heck out of them.
PT plywood works fine provided it’s treated to UC4B or UC4C so it can withstand long-term below grade contact.
Some contractors use cellular PVC as a coverboard but most manufacturers don’t support the use. Same with fiber-cement backerboard – it works in warmer climates but manufacturers don’t back it up; and when used in cold climates it will delaminate.
I’ve settled on a couple of options – Boral TruExterior trim is approved for at-grade and below-grade use. So, I run a 1×12 at grade to cover the foam and then siding above that. Another is synthetic brick/stone – Thin manufactured stone adhered to wire mesh that’s secured directly to the foam. But I do break the rules and bring the stone to grade.
Manufacturers require a 2 in. – 4 in. space above grade.
The big issue that many contractors don’t address when installing exterior foam is a proper termite shield at the top of the foam / the top of foundation line. Many foam products don’t have boric acid mixed in the formulation and are prone to insects tunneling through. So, a termite shield is needed to force the insects to the exterior face of the foam so their activity can be monitored. I don’t know of an XPS foam that has boric acid incorporated but some EPS products – both foam panels and ICF blocks – have boric acid added so they aren’t prone to insect infestation.
Related Links:
Listener Feedback 3:
Charles in Queens writes: Hi FHB crew, I’m a cabinetmaker in NYC and longtime listener to the podcast. Though my interests are primarily on the fine woodworking side of things, I always enjoy listening and have learned a lot from you all. I perk up whenever your conversations cross over into the domain of woodworking and thought I’d offer what I can from my experience.
For drawer slide installation, we usually work backwards from our shop drawings. I like to mark the drawer face layout directly on the inside of the cabinet box, including the 3/16” reveals between (tick marks suffice, no need to draw a line to the back of the cabinet). Once the faces are laid out, it’s a simple matter to measure up from the bottom of each drawer front to mark the location for the drawer boxes and slides. To simplify installation, a scrap piece of plywood about the width of your case side will be cut to length to match the distance between the bottom of the case and the bottom of the topmost drawer slide. Set the spacer into the case and set the slide on the spacer, screw and repeat for each slide location, cutting the spacer down as you go. If you have multiple boxes with the same layout you’re off to the races, no need to do any additional marking out. The most essential skill I’ve learned in making furniture is to lay things out at full scale whenever I start thinking too much.
Having recently done a kitchen in Baltic birch, I can offer a few comments. A freshly sharpened blade is essential, as the material splinters easily. Scoring the bottom side of every cut, even rip cuts, with the blade set for about 1/16”, is great insurance against blow-out. When making the full cut, raising the blade higher than normal will allow the teeth to enter the work at a steeper angle, preventing chip-out on the top side. Because layers alternate grain direction, you are always making a cross grain cut and therefore will always risk blowout at the end of every cut. A crosscut sled with a zero-clearance sub fence (I use 1/8” mdf) helps avoid this issue. Otherwise a piece of scrap material can be clamped or held tightly against the edge of concern. All of this is incredibly tedious for those of us without large sliding table saws with scoring blades, and additional time should be allowed in estimating the work.
Finishing the edges is vigorous work. A block of hardwood with sandpaper wrapped around it and having the work set up near a low raking light will help you track your progress. This is the time to kick it into low gear and be attentive and methodical. Blowout is still a risk when sanding so it’s important to keep the block flat against the edge. I use the block to soften the sharp corners as well (a router with a small round over bit works most of the time but I find it’s not worth risking the inevitable blowout). It’s worth paying attention to grain direction here, as Baltic birch is notorious for splintering. The sandpaper can easily catch and dive under the grain if you’re not careful and it is an unwelcome distraction to have to remove these spears from your hand.
Despite its price and glowing reputation, a truly flat piece of Baltic Birch is a rare thing and can cause problems when used for doors, especially larger doors in inset cabinetry. The best solution is to use birch veneered mdf, and then band the edges in Baltic birch edge banding. This can be ripped from your scrap pieces or purchased in rolls. An alternative would be laminating two layers of 3/8” Baltic in a vacuum press, which produces a flatter panel, but many of us will not have access to that equipment.
Some would regard a lot of the tedium described as overly fussy, but in the end, it adds only a marginal amount of extra time and care and will deliver really stunning results.
Apologies for the long-winded notes, I just wanted to take the opportunity to share in case any of you can benefit in your own projects! Thank you all for the work you do, I’ve been a listener since the podcast began and though I have no idea what you’re talking about most of the time, I enjoy it anyway.
Related Links:
- Video: Tips for Installing Drawer Slides and Cabinet Hinges
- Fine Woodworking: Jig for Side-Hung Drawers (with wooden slides)
Listener Feedback 4:
Dave writes: Hey Podcast and magazine crew! I hope this finds you all well!
I love the podcast and know a lot of building professionals listen to it. I also love the magazine and know that a lot of building pro’s and DIYer’s read it. I thought I would take a little time to relay my experience about being COVID-conscious from a business standpoint. There’s also a moral imperative here, but I can leave that to another discussion. I created a page on my website detailing my companies COVID-safe practices and I enforce the policy with my crew – which is easy since they want us to behave as safely as possible anyway. I put it forward in my contracts and make no bones about the expectations of my employees and clients: masks must be worn, distancing as much as possible is expected, hygiene and disinfection regularly must be performed, etc.
The reaction I have received to this has been instructive. A number of folks have contracted with me as a result of us being COVID-safe and many have had prior, otherwise happy relationships with other builders; builders who have explicitly refused to wear a mask. I live in a very small town (pop 1200) and relationships matter. My business plan prioritizes client retention, so I fully intend to keep these new clients by doing good work and caring about their health. If I end up putting another builder out of business who doesn’t care, or even refuses to care about our community’s health, while that’s not my goal as a builder, I am fine with that.
So, just to say, being COVID-safe makes good business sense!
Thanks!
Keep up the great work and Keep Craft Alive!
Question 1: Is it a good idea to build on piers in a flood zone?
Keefer from Chicago writes: Hey FHB Podcast, Got a question for y’all. I’m a sole-practitioner architect in Chicago, and I’ve recently been commissioned to design a small cabin near a river a couple hours south of the city in climate zone 5. The site is in an AE flood zone (1% chance of flooding a year), although with climate change it seems likely that the flood chance will rise in the future. I’m planning on using a pier and beam foundation to elevate the building 42” above grade to get above the floodline.
First question, I don’t like the idea of enclosing the bottom of the building as a conditioned crawlspace (which I would normally do on a more typical project) because I’m worried about mold and drying potential between enclosure layers around the crawlspace in the event of a flood. Am I crazy?
Follow up, if I leave the foundations open or design a very simple unconditioned crawlspace enclosure that can dry easy or be replaced on the cheap, what can I do to prevent supply and waste plumbing mains from freezing as they come up into the conditioned space? I’d like to stay away from active systems like heat tapes and lines to mitigate fire risk and ensure reliability.
Hope that isn’t too long, feel free to shorten! Love the show!
Related Links:
Question 2: Do you think this is the best way to pour concrete footings for posts in a shallow crawlspace?
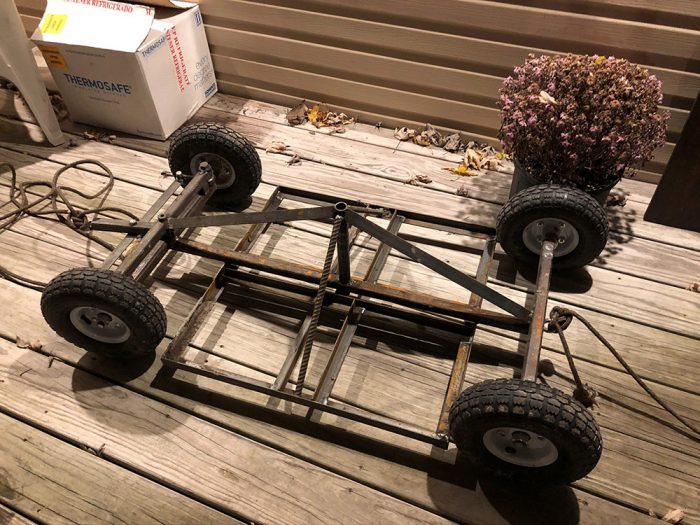
This part of the job consisted of 2 guys up top mixing concrete. 2 more hauling concrete from outside to the crawl space opening and me in the crawl space hauling the concrete to the forms. Completed the job from start to finish in about 4 hours. And couldn’t have done it without the help of this creation. I attached a photo. Let me know if you have any issues seeing it, love the podcast!
Related Links:
Question 3: Who pays for labor to install a damaged product if it’s replaced under warranty?
A listener from Sioux Falls, SD writes, Hello FHB crew! I currently run a handyman/light remodeling company here in Sioux Falls, SD. I recently did a bath renovation which required a new vanity top. Two days after finishing the project, the client called and said the top had cracked! While the supplier did provide a replacement under warranty, my question is, who pays for the labor to replace it? This is the first time I’ve run into this situation and would love your time-honored wisdom on the subject. Thanks for the great content and keep up the good work!
Related Links:
- FTC Guide To Home Warranties
- Managing Customer Expectations
- Expert Session: Three Documents to Better Your Business
Question 4: Can I insulate my existing truss-roof attic with rigid foam?
Dan writes, I regrettably write to you with what has become a taboo topic: roof ventilation.
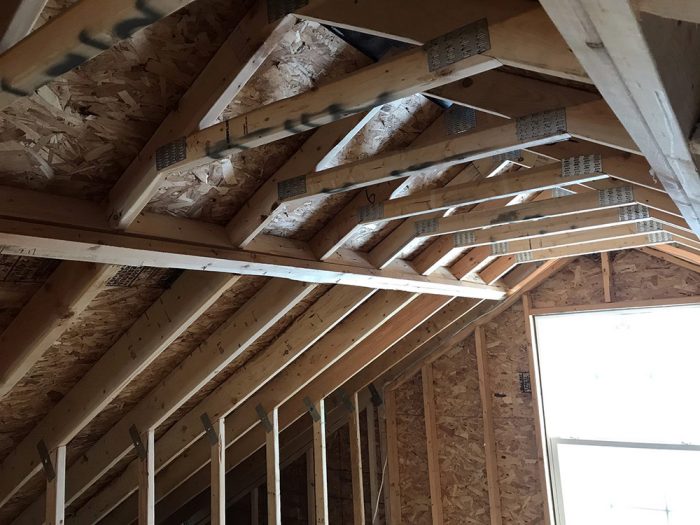
> My partner and I recently purchased a modular home. She wants to turn the 5:12 pitched roof attic into usable space. To do this we will need to install EPS foam in between the rafters as well as a layer over them to get an R-40 ceiling.
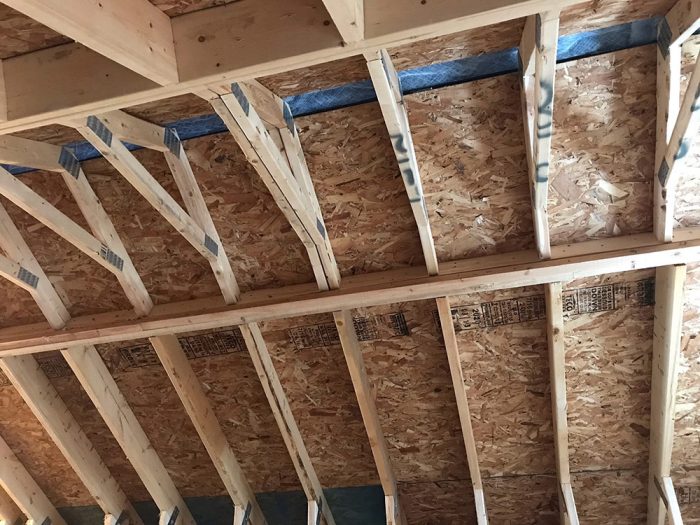
> The catch here is that the roof system was assembled with a crane. Where the roof peak assembly connects to the roof section extending from the soffits, there is framing material foiling the flow of air.
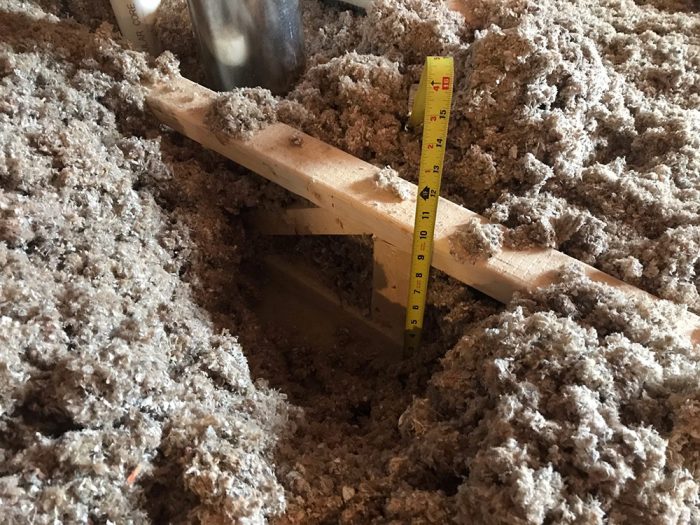
> Included is an image of a proposed method to allow air through the framing blockage. Would drilled holes close to the roof deck provide enough airflow? I would hate to invest time and money into finishing this space, only to learn that the snow is melting and water is wreaking havoc. We live in the southern tier of western New York, zone 5 climate.
> Hoping your advice will set our minds at ease! Thanks for all you do. Keep up the strong work.
 |
 |
 |
Related Links:
END NOTES:
Also: Check out our Webinars:


Visit the Taunton Store • Magazine Index • Online Archive • Our First Issues • All Access
Help us make better episodes and enter for a chance to win an FHB Podcast T-shirt: www.finehomebuilding.com/podcastsurvey
If you have any questions you would like us to dig into for a future show, shoot an email our way: [email protected].
If we use your question we’ll send you a FHB Podcast sticker!
FHB Podcast T-shirts!
Represent your favorite podcast! Available in several styles and colors. Made from 100% cotton. Find the Podcast t-shirt and more cool products in the Fine Homebuilding Store.
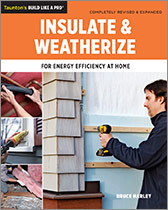
Fine Homebuilding podcast listeners can now get 20% off anything in the Taunton store, including Insulate & Weatherize.
Use the discount code FHBPODCAST to take advantage of this special offer.
We hope you will take advantage of a great offer for our podcast listeners: A special 20% off the discounted rate to subscribe to the Fine Homebuilding print magazine. That link goes to finehomebuilding.com/podoffer.
The show is driven by our listeners, so please subscribe and rate us on iTunes or Google Play, and if you have any questions you would like us to dig into for a future show, shoot an email our way: [email protected]. Also, be sure to follow Fine Homebuilding on Instagram, and “like” us on Facebook. Note that you can watch the show above, or on YouTube at the Fine Homebuilding YouTube Channel.
The Fine Homebuilding Podcast embodies Fine Homebuilding magazine’s commitment to the preservation of craftsmanship and the advancement of home performance in residential construction. The show is an informal but vigorous conversation about the techniques and principles that allow listeners to master their design and building challenges.
Other related links
-
- All FHB podcast show notes: FineHomebuilding.com/podcast.
- #KeepCraftAlive T-shirts and hats support scholarships for building trades students. So order some gear at KeepCraftAlive.org.
- The direct link to the online store is here.


