
Planning an Electrical Remodel
Renovation expert Mike Litchfield explains how to inspect and assess your existing electrical system so you can make the appropriate changes when moving or adding circuits during a remodel.
Being detail oriented is as important to planning as it is to installation. When you plan a wiring project, be methodical: Assess the existing system, calculate electrical loads, check local codes, and draw a wiring floor plan.
If you are only replacing existing devices—changing a light fixture, replacing a faulty switch, or upgrading a receptacle, for example—you seldom need a permit from the local building department. However, if you extend or add any circuit, you must pull (or file) a permit.
Most local electrical codes are based on the NEC. When it’s necessary to pull a permit, local code authorities will want to approve your plans and later inspect the wiring to be sure it’s correct. Don’t short-cut this process: Codes and inspections protect you and your home.
Whatever the scope of your project, if you work on existing circuits, first turn off the power, test to be sure it’s off, and tag or lock the panel.
Inspecting the Fuse Box or Breaker Panel
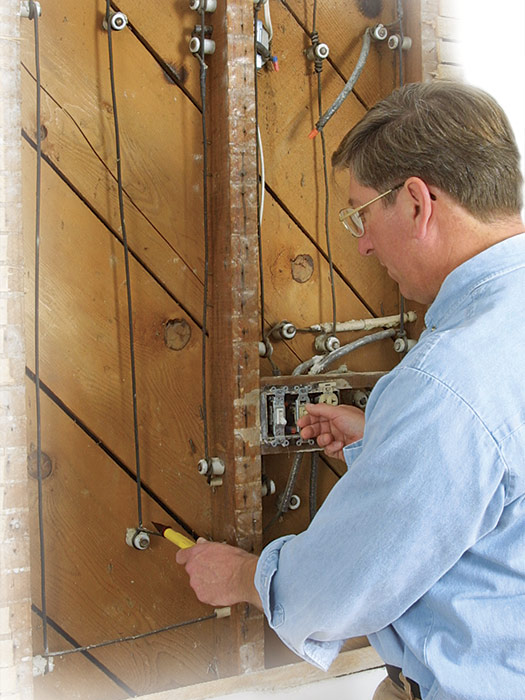
By looking at the outside of the service panel and wiring that’s exposed in the basement and attic, you can get a basic overview of the system’s condition. If the panel has unused breaker spaces and the wiring insulation is in decent shape, you can probably continue using it and safely add an outlet or two if there is sufficient capacity. However, if the system seems unsafe or inadequate, hire a licensed electrician to open the panel and do a more thorough examination.
Here’s what to look for:
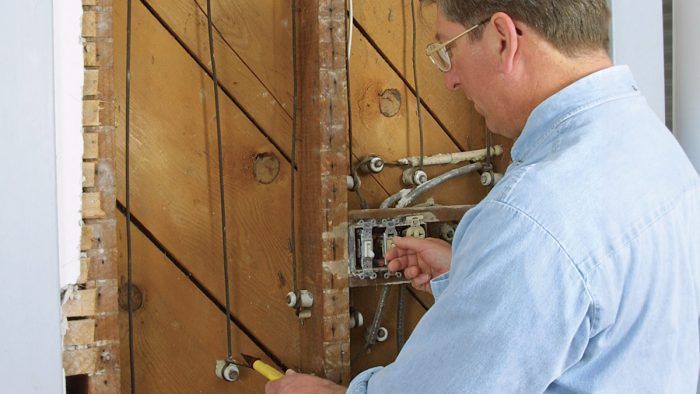
Start your investigation at the fuse box or breaker panel. You can learn a lot about the condition of the system by examining the outside of the service box. Examining the inside of a panel or fuse box is best left to a licensed electrician, however.
Rust and corrosion on the outside of a service box or on the armored cable or conduit feeding it can indicate corroded connections inside. Faulty connections can lead to arcing (sparks leaping gaps between wires) and house fires, so have a licensed electrician replace the fuse box or panel. Likewise, if you see scorch marks on breakers or a panel, have a pro examine it.
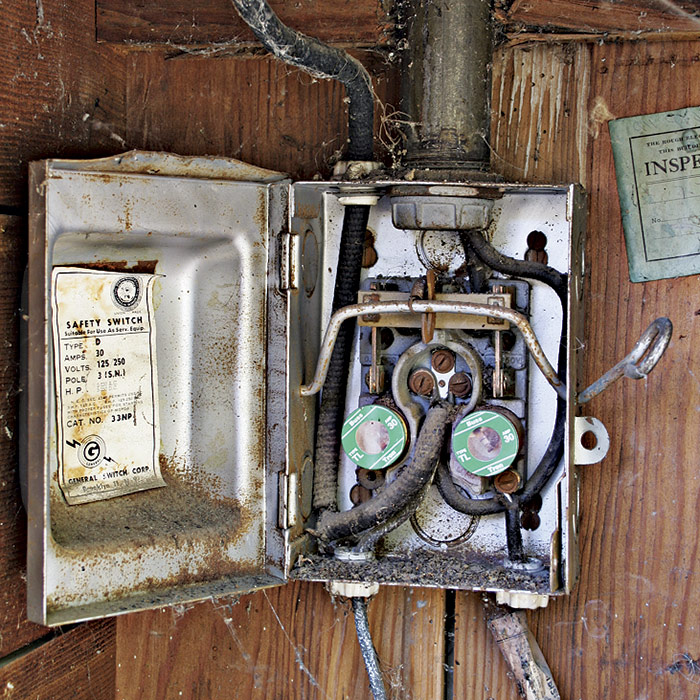
Melted wire insulation is a sign either of an overheated circuit—usually caused by too many appliances in use at the same time—or of a poor wire connection in which arcing has occurred. In the first case, a homeowner typically installs an oversize fuse or breaker to keep an overloaded circuit from blowing so often, but this “remedy” exceeds the current-carrying capacity of the wire. The wire overheats and melts the insulation, which can lead to arcing, house fires, or—if someone touches that bare copper wire—electrocution.
An oversize fuse may not melt wires where you can see them, but it may have damaged wire insulation in a place you can’t see. Have an electrician inspect the electrical system. Installing type-S fuse socket inserts can prevent overfusing.
“Pennying” a fuse is another unsafe way to deal with an overloaded circuit that keeps blowing fuses. In this case, someone unscrews a fuse, inserts a penny or a blank metal slug into the bottom of the socket—a dangerous act in itself—and then reinstalls the fuse. The penny allows current to bypass the fuse and the protection it offers. Here, again, have an electrician examine the circuits for damage to the wire insulation.
Panel covers that don’t fit, have gaps, or are missing are unsafe. So, if you see covers that have been cut to fit a breaker, housing knockouts that are missing, bus bars that are visible when the panel cover is on, or mismatched components, hire a licensed electrician to assess and correct those problems. Some older brands of panels and breakers, such as Federal Pacific and Zinsco, have a host of well-documented failures and so should be carefully checked and, where necessary, replaced.
Missing cable connectors or unfilled knockouts enable mice and vermin to enter the panel and nest in it, which can be a fire hazard. Missing connectors also allow cables to be yanked, stressing electrical connections inside the panel. A missing cable clamp may also allow the sharp edge of the panel to slice through thermoplastic cable sheathing, which could energize the panel (if the grounding of the system is not correct) and electrocute anyone who touches it.
A properly grounded panel will have a large grounding wire running from the panel to a grounding electrode (which could be a metal underground water pipe, a ground rod driven into the earth, or a Ufer electrode). For the entire electrical system to be grounded, there must be a continuous ground wire or other effective grounding path running from each device or fixture to the service panel and, by extension, to the grounding electrode. Cold-water and gas pipes must also be connected (bonded) to the grounding bus in the panel.
A 30-Year Pro’s Take on RewiringIf the wiring in an older home appears to be sound and in good repair (see the warning signs below) it’s probably OK to continue using it, even though it may not meet code requirements for a new installation. If you are planning to gut the house completely, it makes sense to rip out all the old wiring and completely rewire the house. If you’re remodeling only part of the house, leave most of the old wiring in place if it is sound and spend your money rewiring the kitchen, baths, and laundry circuits. That will give you more bang for your buck. However, you should replace old wiring that’s unsafe. If you observe any of these conditions, the wiring should be replaced:
|
Assessing the Condition of Wiring
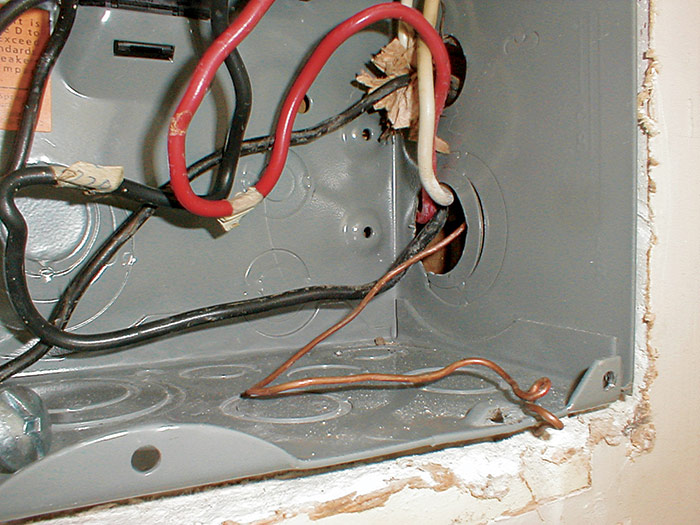
Cables may be visible as they near the service panel and as they run through attics and basements. If there are covered junction boxes, carefully remove the covers and examine the wire splices inside—without touching them. You can also turn off power and pull a few receptacles out to better examine the wires.
Deteriorated sheathing is a potential shock hazard, so note brittle fiber insulation and bare wire, but avoid touching it. If cable sheathing has been chewed on by mice, rats, or squirrels the cable should be replaced.
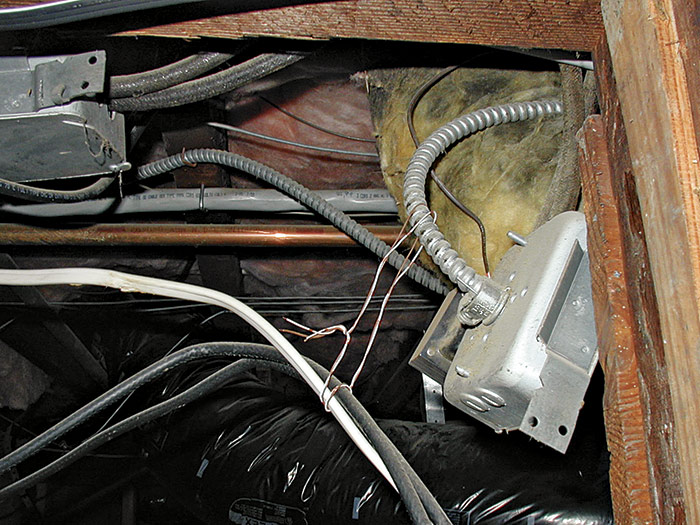
NM cable (cable protected by nonmetallic sheathing) must be stapled within 8 in. of single-gang boxes that don’t have cable clamps, and within 12 in. of other boxes, and supported by stapling or another method at least every 4 1⁄2 ft. (54 in.). A cable running through a drilled hole is considered supported. Sagging wire is hazardous because it can get inadvertently strained, jeopardizing electrical connections. Likewise, all boxes must be securely mounted. All NM cable entering metal boxes must be gripped by cable clamps. Single-gang plastic boxes do not require the strain relief of cable clamps, but double-gang (and larger) plastic boxes have integral plastic tension clips that afford some strain relief on cable.
Small-gauge aluminum wiring (10 or 12 gauge) is a fire hazard unless it is correctly spliced to a copper wire with a COPALUM connector or terminated to CO/ALR-rated outlets and switches. If it is incorrectly terminated in a copper-rated only device, the two metals will expand and contract at different rates each time the circuit is under load. This can lead to loose connections, arcing, overheating, and house fires. Aluminum-to-aluminum splices require special splicing techniques, either COPALUM connectors or another listed and approved method.
Wire splices (whether copper to copper, copper to aluminum, or aluminum to aluminum) must be housed within a covered junction box or outlet box. Wires that are spliced outside a box or inside an uncovered box can be a fire hazard because of the dangers of arcing. Loose connections not contained in a cover box can easily ignite combustibles nearby because arcs can reach several thousand degrees centigrade.
Knob-and-tube wiring, although outdated, is usually safe unless individual wire insulation is deteriorated, splices are incorrectly made, or the wiring is overloaded or buried in thermal insulation. Typically, splices that were part of the original installation will not be in a junction box but must be wrapped with electrical (friction) tape and supported by porcelain knobs on both sides of each splice. Nonoriginal splices must be housed in covered boxes. Have knob-and-tube wiring assessed or modified by an electrician familiar with it; it’s quirky stuff. The NEC does not allow knob-and-tube wiring to be buried in insulation.
Knob-and-tube wiring lacks an equipment ground (a separate grounding wire), so it offers no protection should a faulty appliance get plugged into a receptacle. On the other hand, a knob-and-tube system is run completely on insulators, a plus. The conductors of knob-and-tube wiring were copper, coated with a thin layer of tin (to protect the copper from sulfur in the rubber wire insulation). Uninformed inspectors often mistake the tinned copper wire for aluminum wire.
Ungrounded OutletsYou can continue using two-slot, ungrounded receptacles on general-use circuits as long as the wires are in good condition and the connections are correctly made. Most new lamp and appliance plugs are double-insulated and are suitable for use with ungrounded receptacles. However, if you want to use appliances or tools with three-pronged plugs or a surge protector at the location, you must upgrade to a grounded circuit. Putting a two-pronged adapter on a three-pronged plug is unsafe. |
Assessing a Circuit’s CapacityTo recap briefly, electricity, impelled by voltage, flows from the power source. (Amperes are the rate of electron flow.) Along the way (at outlets), it encounters resistance and does work. (Watts are a measure of power consumed.) It then returns to the power source, its voltage reduced or spent. Or, expressed as mathematical formulas: To determine the capacity of a circuit you want to extend, identify the circuit breaker controlling the circuit and note the rating of the breaker. If it’s a general-purpose circuit, the breaker will probably be 15 amp or 20 amp. A circuit controlled by a 15-amp breaker has a capacity of 1,800w (15 amp x 120v); one controlled by a 20-amp breaker has 2,400w. The total wattage of all loads on the circuit (including the extension) must not exceed these capacities; otherwise, you risk overheating wires. To avoid overloading, it’s a good idea to reduce the capacity by 20%. For example, 80% of 1,800w is 1,440w for a 15-amp circuit; 80% of 2,400w equals 1,920w for a 20-amp circuit.
* Safe capacity = 80% of total capacity. |
Is the system adequately sized?
If receptacles in your house teem with multiplugs and extension cords, you probably need to add outlets. But there are more subtle clues: If you blow fuses or trip breakers regularly, or if the lights brown out when you plug in a toaster or an electric hair dryer, you may need to add new circuits to relieve the overload on existing circuits. This section will help you figure out whether your system has the capacity to do so.
These days, three-wire service feeding a 100-amp service panel is the minimum required by the NEC, and many electricians install 150-amp or 200-amp panels if the homeowners plan to enlarge the house at some point or acquire a lot of heavy energy-using appliances, such as electric ranges and hot tubs. If there are only two large wires running from the utility pole to the house, they deliver only 120v service. A house with two-wire service probably has a 30-amp or 60-amp main fuse or breaker, which is inadequate for modern usage.
Rules of thumb. The only sure way to know if you’ve got enough capacity to add an outlet or a circuit is to calculate electrical loads, as shown in the chart. But for the benefit of those who wish that an electrician would just offer an offhand opinion of what works most of the time, here are a few rules of thumb.
 USING THIS TABLE
|
- Fuse box service. If you’ve got a fuse box with a 30-amp or 60-amp main fuse, the best advice we can give is to upgrade your service. Don’t add outlets or circuits until you replace the fuse box with a breaker panel. Fused mains are often abused by people trying to bypass its protection, so insurance companies often charge higher premiums on houses with fuse boxes.
- Adding outlets. If you have a breaker panel with space to add an additional breaker, you can most likely add a circuit to feed a new outlet or two or more lights. If, for example, you have three-wire service and a 100-amp main, you may have excess capacity.
Safety alertDon’t add outlets to circuits that have ungrounded cable; wires with frayed, discolored, or melted insulation; blackened metal boxes or other signs of arcing; or aluminum wire (a soft, dull silver) rather than copper. Don’t confuse old knob-and-tube wire, which is usually tinned copper, with aluminum wire; the tinned copper has a shiny silver coating on the outside, but at the cut end, you can see the copper color of the wire. |
- Adding a circuit for general use. If there is an unused space in the panel, have an electrician determine whether the panel can handle another circuit.
- Adding a kitchen or bath circuit. If you want to add a bath fan or some new light fixtures, and there’s space in the panel, have an electrician see if you can add a circuit. Adding a 20-amp, small-appliance circuit to reduce the load on an existing circuit is smart.
- Remodeling a kitchen. Kitchens are complicated and often full of big energy users. Use the chart to help you add up the loads. If there aren’t many open spaces for breakers, you may need to upgrade to a larger panel.
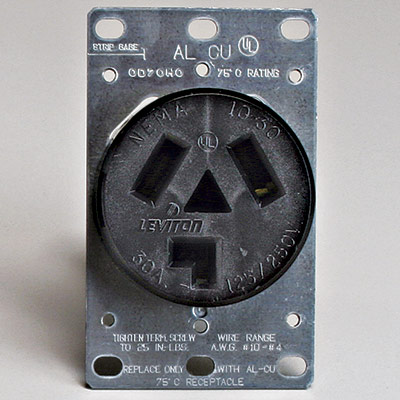
- Adding dedicated circuits. If you need to add dedicated circuits for heavy-use items such as an electric range (50 amps) or a hot tub (60 amps), get out the calculator and do the math. general wiring guidelines
 Excerpted from Wiring Complete, 3rd Edition (The Taunton Press, 2017) by Michael Litchfield and Michael McAlister.
Available in the Taunton Store and at Amazon.com.
