Podcast 323: Addition Airtightness, Beam Rescue, and Air-Sealing Around a Chimney
Matt, Kiley, and Patrick hear from listeners about hiding foam insulation and homemade light fixtures before taking listener questions on the appropriate airtightness for an addition, fixing a badly hacked beam, and the right way to air-seal around a chimney.
Follow the Fine Homebuilding Podcast on your favorite app. Subscribe now and don’t miss an episode:
 |
 |
Help us make better episodes and enter for a chance to win an FHB Podcast T-shirt:
www.finehomebuilding.com/podcastsurvey
Andrew offers his low-buck solution for hiding foam foundation insulation. Carson shows off his good-looking homemade light fixtures. Steve doesn’t mind doing home repairs for friends and family. Dwight explains his experience with outdoor tile in Nova Scotia. James asks how tight he should make his addition. Zak wonders if the improvements to his home have hurt it historically. Ben asks about the right way to air-seal around a brick chimney.
Editor Updates:
- Matt’s “interesting” wall assemblies
- Kiley’s other wall assemblies
Listener Feedback 1:
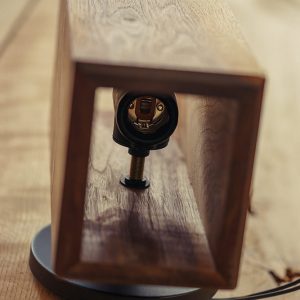
Carson writes: Hi FHB crew, here are my DIY light fixtures presented for public ridicule:
 |
 |
 |
 |
 |
I was shocked to find so little information out there on how to make these things when I started them, but since I didn’t like a single fixture in the local lighting supply shop and I blew my budget on an unhealthy timberframe obsession, DIY it was. Youtube is full of craft projects painting shades funky colors or inserting existing wired fixtures through steel piping, but next to nothing on assembling and wiring a quality fixture from scratch. There may be good reasons for this as there is some danger involved, some designs may require some minimal soldering, and for new construction you will run into the same endless fights with builders, subcontractors, inspectors, and banks that you run into with any attempt to DIY portions of your build. Notably, even if the socket is UL listed, the fixture itself needs to be ETL listed and I’ve been told this is even true if you change out the shade. So… be creative in ways to get around that. The hurdles might not be such a bad thing for many, as you will find that the standard lamp wires with 2 strands for some unfathomable reason lack a grounding wire – a recommended addition if you don’t like getting electrocuted by touching your nice copper shade. Note that mine is missing it currently… so don’t follow that:)
The fixtures are ridiculously easy to put together. The analogy to an erector set was a good one, it really is that simple as the pieces screw together for the most part. It’s fun. Finding the parts and which ones to put together, however, is a big challenge. Even the suppliers of these don’t seem to give out any sort of guide. I just googled images of light fixtures and found what roughly followed each part from one end to the other. If you manage to put in a single order that has everything you need on one go, then you are a lot better at that game than I. The parts are fairly cheap. Shipping is not. For my copper fixtures, they averaged 72$ each in parts and shipping, and those are all solid copper and brass (no paint jobs here!). Good luck finding that in a store. For my walnut midcentury-esque (and really easy to build) wall sconces, the cost was only about $20 per fixture since I got the sockets for $1 a piece from habitat. The big walnut piece is to go over the dining room table and has a fairly complicated electronics board that fits in under the rails, and a sanded glass plate covers the bottom to hide the electronics. My current project is a swing arm lamp; I feel I have gone up a level. I am also building walnut veneer pendant lights to go over the kitchen island. I was pretty lazy there and bought cheap drum fixtures off of amazon that I’m going to cover. One trick that may be helpful— I really wanted the veneer to be translucent but all of the veneers available have opaque paper backings for adhering to stock. Separating the wood and paper layers was problematic, but a *very* careful sanding of the paper back will let glorious golden light glow through the shade. Now I need to finish the house to install them in.
Happy building,
Related Links:
Listener Feedback 2:
Andrew writes: Hi FHB Podcast, Just finished episode 313 and wanted to pass along a strategy I have successfully used to cover exterior applied foundation foam.
Elastomeric paint with a few scoops of play sand. I’ve applied it with a large nap roller in small coverage and with a texture gun for larger coverage.
I can’t take credit for the idea. Was given to me by a former co-worker.
It gives the general aesthetic of a light stucco, you can tint it, acts as a moisture barrier, and I’ve even applied it over foundation membrane with success so far.
My former co-workers house is going on 20 years with minimal chipping.
Hope it’s something that can alleviate some headaches for some people.
Related Links:
Listener Feedback 3:
Steve writes: I smiled when you guys talked about being asked to do projects at other people’s houses. Any time I go to my in-laws or friends there is a list of projects waiting. Stuck drawers, pilot lights, drippy faucets, faulty light switches, loose knobs, leaking kitchen sink, burned out appliance lights, ineffective bathroom fans, ineffective door locks, jammed disposals, and even a few new toilets. Three thoughts:
First, it seems these repairs fall to me because they are afraid they would just do more harm. My “handiness” mostly comes from me being willing to pry off a cover or look under a cabinet and poke around a bit. Second, I’m surprised how often people assume replacement rather than repair is the way to go. I don’t know why this makes me sad, but it does. Finally, I love doing these projects because I get thanked profusely and it is the only time I don’t have to clean up after myself. I’m made to feel like an elite surgeon, being handed tools and walking away to the next project as soon as something is done.
Keep up the good discussions!
Listener Feedback 4:
Dwight from Nova Scotia writes: Hello Patrick and Gang, I have been listening to the podcast for a year or so and you are doing a great job. The Pro Talks are an invaluable insight into other professional’s journey in the building sector and it is interesting to see that we all have very similar experiences. Confirmation helps.
On to the Heated Decks from podcast #315. I have been doing tile work of every description in Nova Scotia for 20 years (climate zone 6). We avoid doing exterior tile like the plague! We have done it with success and we have had jobs fail even when taking every precaution available. The thing your caller needs to be aware of is that when water freezes it expands. Water is everywhere and it doesn’t take much of a gap for it to get under your tile and destroy the cement bond. In part of your discussion you mentioned not grouting…guaranteed loose tile in the first season!
Also, electric heat under tile has its own issues. The consensus from the electricians I deal with is that they replace resistance wires in 20 years. I looked up Schluter’s warranty after hearing that from a number of electricians, and their warranty is 15 years…. hmm. I have used so many brands of infloor heat wire in my career it is staggering. They often go out of business after a bunch of failures. At this point we will only use the ditra heat system from Schluter, inside or out. It is more robust than others and the system of pushing wires into the Ditra membrane is infinitely better than pouring self-leveler over some moderately attached wires. There are are always a few that float up and cause a problem. Also, Schluter actually honours its warranty in my experience.
There is so much to say on this subject, I could write a book! Even though tile works seems simple to do, humans have been doing it for centuries, this is not a job for an amateur. I should say this is not the place to be setting tile for the first time. Experience is key. In an effort to relay information in a readable format, I will do point form. These are non-negotiable things he must do for a moderate chance of success:
1. Non absorbitive tile: most porcelains, some ceramic, if stone gotta seal it religiously for evermore
2. Thinset rated for exterior, more expensive for a reason.
3. Must be grouted! We use Power grout from TEC, it is rated for outside
4. When setting tile 100% bond from tile to substrate is necessary. The cement manufacturer will demand it.
5. If going electric, understand it is has a lifespan, and to make your tile job last may want to leave it on all winter.
6. Pouring a slab and doing hydronic heat with glycol is better.
7. Don’t do it where you have winters!
Although yesterday I drove by a house we did 10 years ago with a 2” thick limestone exterior stone deck and stairs and it is still fine with no heat. It is partially covered by a roof and faces south east which I suspect help.
Keep up the good work, I thank you for all the information I have gleaned from the podcast and magazine over the years. If you folks make it to Nova Scotia look me up. Also have a lot to say on stairs.
Related Links:
Question 1: Is it worth it to air-seal an addition better than the original house it’s attached to?
James from Ottawa writes: Hi FHB team! I love the podcast; it’s a real breath of (heat recovered) fresh air!
My wife and I are planning a 400 square ft addition on our 800 square foot single story home in Ottawa, Ontario Canada (climate zone 6). The home was built in the 40’s, and the exterior walls are: brick veneer, air gap, asphalt coated fibreboard, study cavity (which is empty) and drywall. I am always surprised that our heating bills are lower than other new houses here given there is NO real insulation! I think the small footprint is a larger factor not often considered, as well as our windows being smaller than what is standard for new construction.
For the rear addition, I plan to have better than code insulation in the walls and roof, but I was wondering if there is any benefit to having better than code airtightness given that two-thirds of the remaining walls have presumably very low airtightness? Does airtightness only matter holistically, or can it help even if I cannot upgrade the rest of the house?
Related Links:
Question 2: Should I jack up this damaged, sagging beam—and if so, how?
Franny from Durham, NC writes, Hello Fine Homebuilding Magazine, My parents subscribed to your magazine while I was growing up, which was while they were restoring their 1925 Spanish-style triplex in Melbourne, Florida. After 25 years of projects (as well as two hurricane-shelter accessory structures), they announced they had no more projects, and I bought a house. My parents started resubscribing, and I will be a subscriber once I get my feet back under me. For now, I listen to your wonderful podcast!
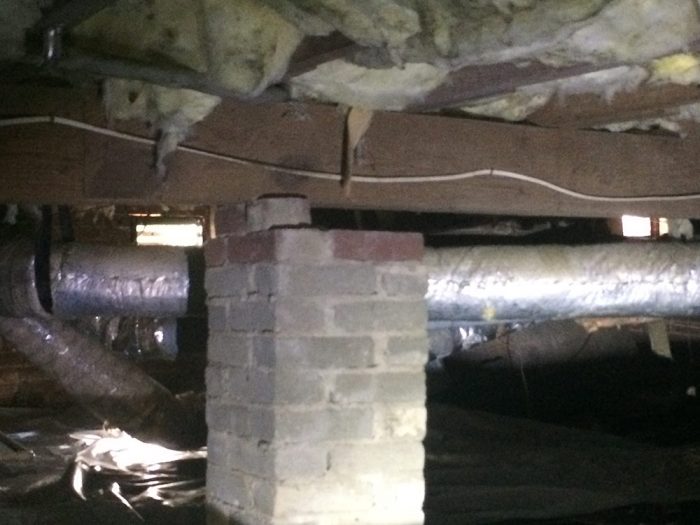
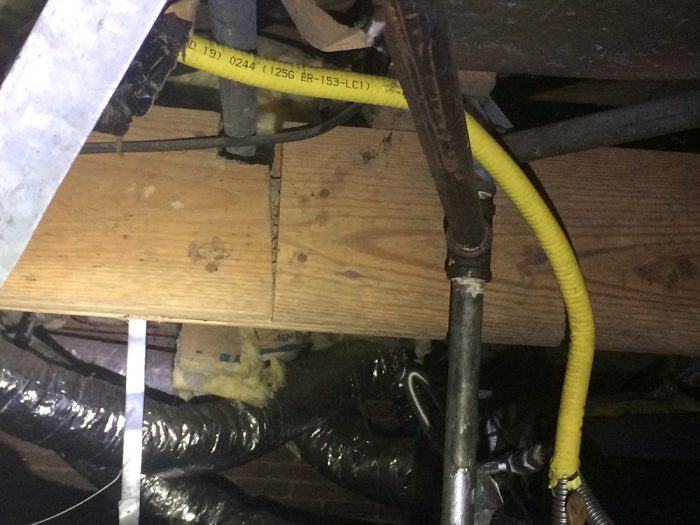
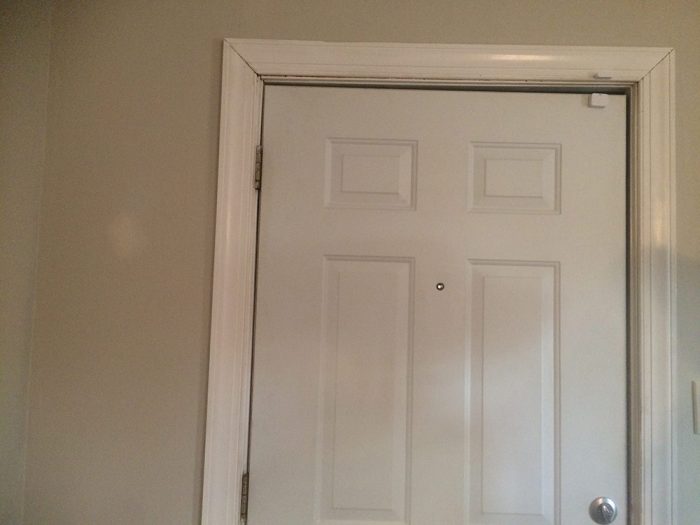
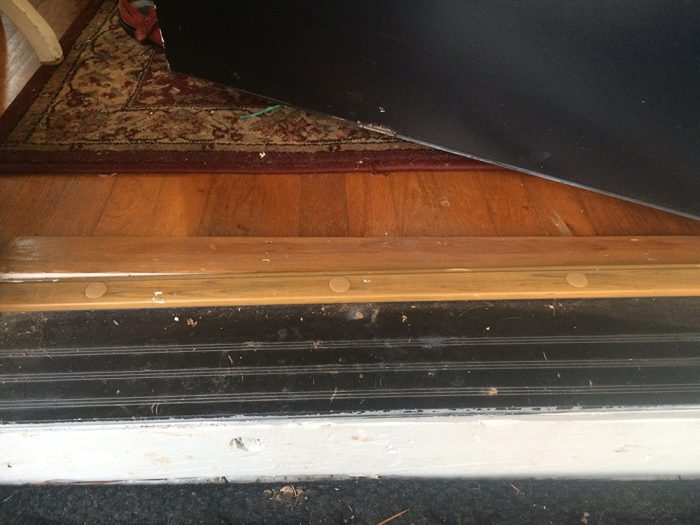
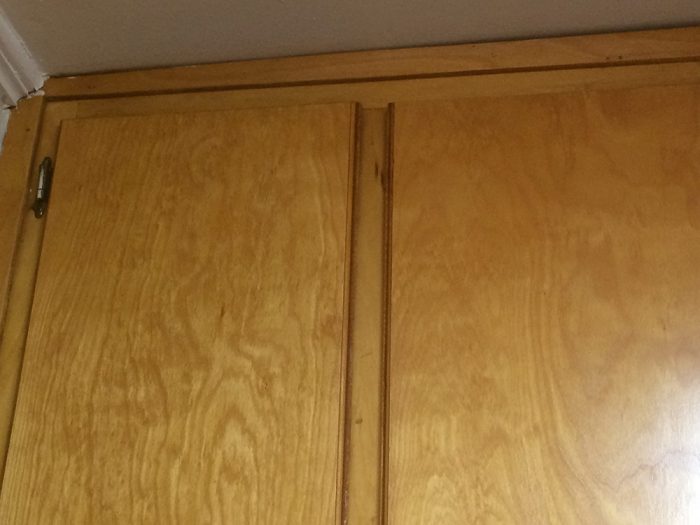
Here is my problem: I bought a post-war, simple ranch-style house in Durham, North Carolina. The house is one-story, 1100 square feet. A central beam supports the house. Probably for the 1970 addition (which I am turning into a studio apartment), a gap was carved through the top of the beam to route wiring. The beam is three 2x’s, and the cut goes through all three. The cut also happens to take place where one of the 2x’s buts up against another one.The house sags considerably where the beam was weakened. Right above the gap in the central beam isn’t the only place where the house sags (see picture of parallelogram front door). The beam is light enough to raise with a screw jack, but will leveling it cause more problems than I already have (see cabinet detail)? Should I put a support under the beam where the gap was cut to arrest the possibility of further sagging? And while we are at it, in one place, the central beam rests on a single brick on top of a pier. The inspector marked this as a cause for concern. Is this actually something I should fix?
Any advice would be much appreciated.
 |
 |
 |
 |
 |
Question 3: How do you avoid taking away all of the character when renovating or remodeling an old house?
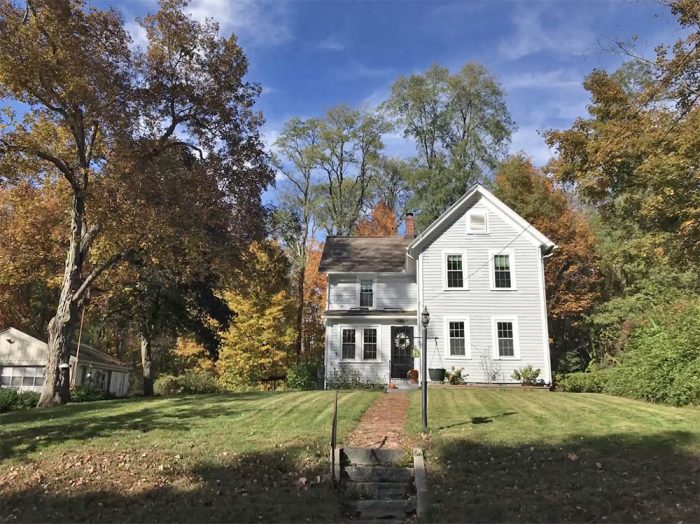
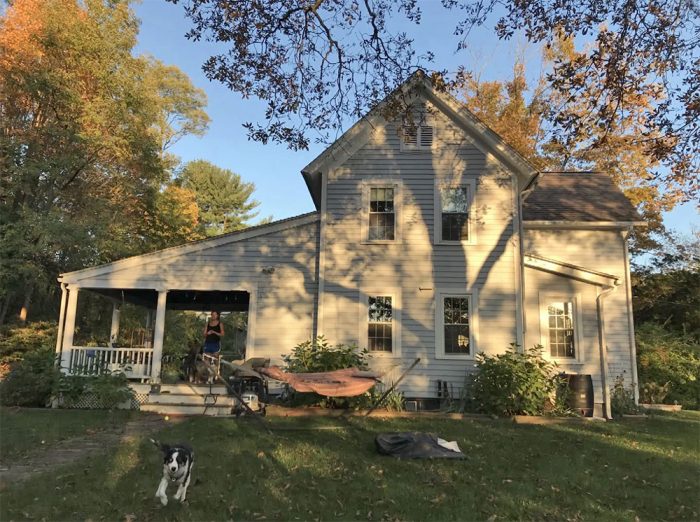
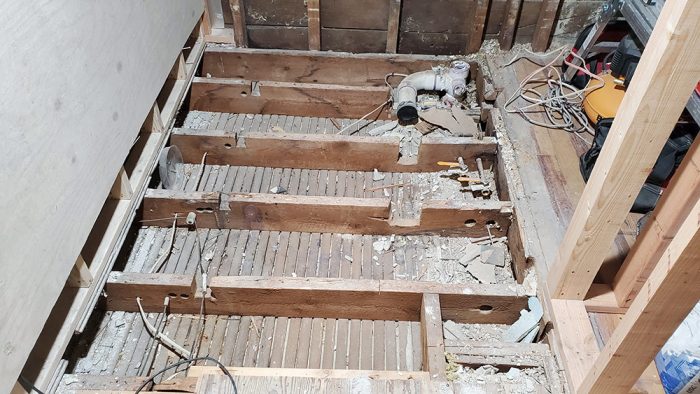
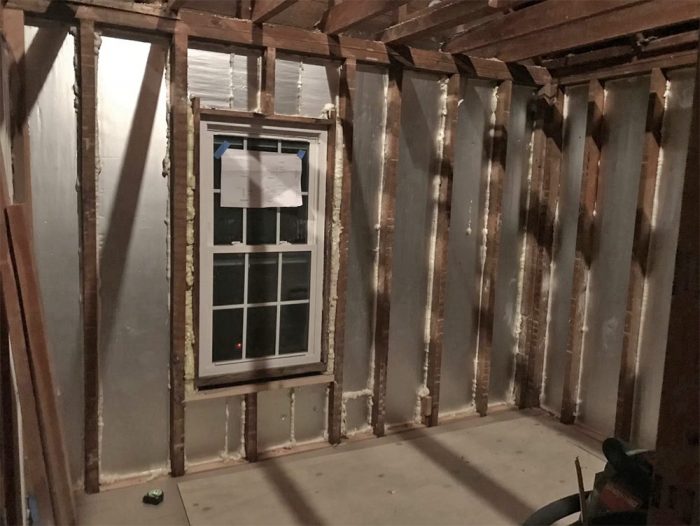
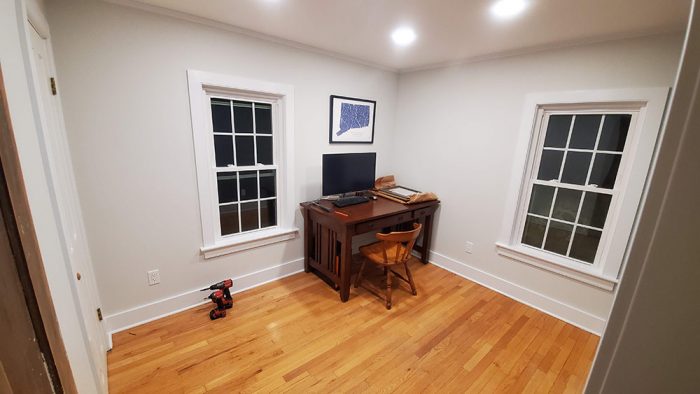
Zak from Collinsville, CT writes, A few years ago my girlfriend and I purchased a home. Like many, we are drawn to the architecture and character of old homes and ended up purchasing a home built around 1900. As we make the home our own, we are tackling the needed updates and repairs. We gutted and renovated bathrooms, tore out old plaster that was cracked and falling away from the lath and replaced with drywall and better insulation. It is evident that we are clearly not the first to renovate certain parts of the home, but with every project we do there are some old components of the home that have to be removed or replaced, whether it be the plaster and lath or partition walls made of rough sawn lumber. Now that we are done with a few projects, I feel like the home is in better shape, but I can’t help to feel that we have taken away some of the character of the home that we loved when we bought it. We try to work traditional details into the renovations as much as possible but do you ever get the feeling you are doing an old home a disservice by renovating it? I’d be interested to hear your perspective.
 |
 |
 |
 |
 |
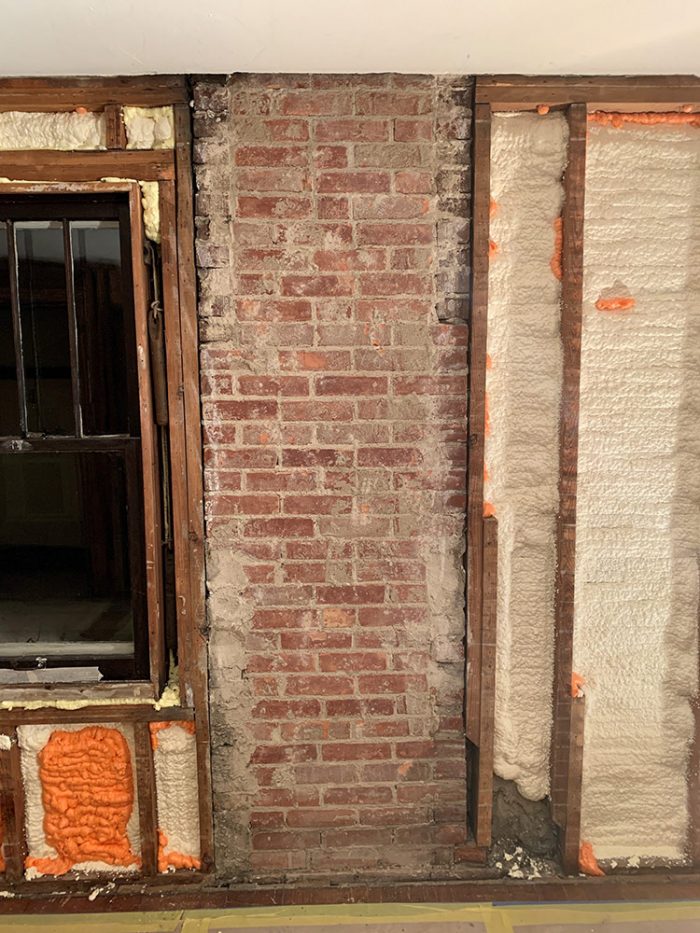
Question 4: What materials can you use to safely air-seal around a brick chimney?
Ben writes, Hello pod cast crew! My 100+ year old house has no insulation in the 2nd floor walls. Being that I live in Michigan, I’ve decided to systematically go room by room and remove the old lathe and plaster from the walls, then insulate using the Bonfig wall system with a flash and batt approach to both air seal and insulate.
The house was built with 2×4 studs. With ‘Bonfigified’ exterior walls, I should have enough room in the stud bays for 1-2” of foam insulation, then fill the rest with 4” batts of mineral wool.
The issue I am faced with is how to air seal around my chimney. I know foam against the chimney brick is not safe. How would you guys air seal this area?
Thanks in advance!
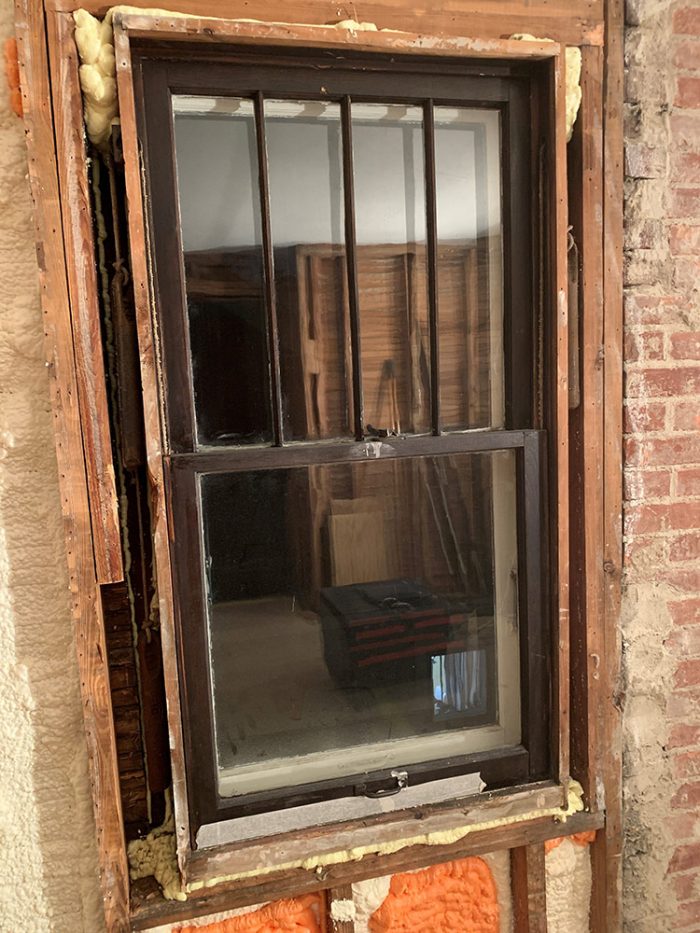
PS. I know my original windows are going to be the source of my biggest air leaks. We’ve decided most to replace them. If you have any recommendations how to best air seal and insulate these, I’m
 |
 |
Related Links:
END NOTES:
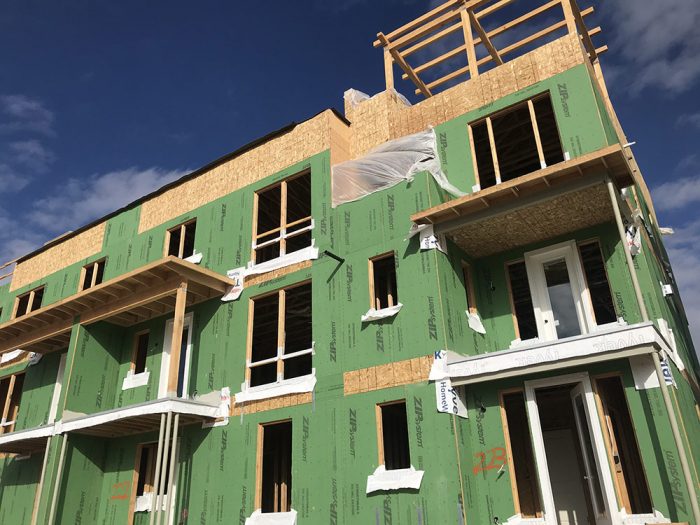
I was surprised when they started prepping their openings and ledgers with Tyvek, so I asked a building inspector what was going on. He told me that he’s seen several builders doing this. Apparently when the recent lumber price increases first hit, some of the lumber yards had Zip System in stock and cheaper than good ole OSB. They’ll just use whatever WRB they normally do and treat the ZIP as they would any other OSB.
I was more amused by this than anything and thought I’d share. Have you ever heard of builders doing this? Attached is a picture of one of these buildings.
Love the podcast,
Alan from Utah
BS* + BEER Podcasts!
Also: Check out our Webinars:


Visit the Taunton Store • Magazine Index • Online Archive • Our First Issues • All Access
Help us make better episodes and enter for a chance to win an FHB Podcast T-shirt: www.finehomebuilding.com/podcastsurvey
If you have any questions you would like us to dig into for a future show, shoot an email our way: fhbpodcast@taunton.com.
If we use your question we’ll send you a FHB Podcast sticker!
FHB Podcast T-shirts!
Represent your favorite podcast! Available in several styles and colors. Made from 100% cotton. Find the Podcast t-shirt and more cool products in the Fine Homebuilding Store.
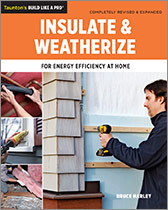
Fine Homebuilding podcast listeners can now get 20% off anything in the Taunton store, including Insulate & Weatherize.
Use the discount code FHBPODCAST to take advantage of this special offer.
We hope you will take advantage of a great offer for our podcast listeners: A special 20% off the discounted rate to subscribe to the Fine Homebuilding print magazine. That link goes to finehomebuilding.com/podoffer.
The show is driven by our listeners, so please subscribe and rate us on iTunes or Google Play, and if you have any questions you would like us to dig into for a future show, shoot an email our way: fhbpodcast@taunton.com. Also, be sure to follow Fine Homebuilding on Instagram, and “like” us on Facebook. Note that you can watch the show above, or on YouTube at the Fine Homebuilding YouTube Channel.
The Fine Homebuilding Podcast embodies Fine Homebuilding magazine’s commitment to the preservation of craftsmanship and the advancement of home performance in residential construction. The show is an informal but vigorous conversation about the techniques and principles that allow listeners to master their design and building challenges.
Other related links
-
- All FHB podcast show notes: FineHomebuilding.com/podcast.
- #KeepCraftAlive T-shirts and hats support scholarships for building trades students. So order some gear at KeepCraftAlive.org.
- The direct link to the online store is here.


