FHB Logo Facebook LinkedIn Email Pinterest Twitter X Instagram Tiktok YouTube Plus Icon Close Icon Navigation Search Icon Navigation Search Icon Arrow Down Icon Video Guide Icon Article Guide Icon Modal Close Icon Guide Search Icon Skip to content
Subscribe
Log In
  • How-To
  • Design
  • Tools & Materials
  • Restoration
  • Videos
  • Blogs
  • Forum
  • Magazine
  • Members
  • FHB House
  • Podcast
Log In
How-To

Built-ins for Odd Spaces

A simple, foolproof method for off-angle cabinets.

By Gary Striegler Issue 298 - April/May 2021
  • X
  • facebook
  • linkedin
  • pinterest
  • email
  • add to favorites Log in or Sign up to save your favorite articles

Synopsis: Odd-shaped cabinets are often found tucked under a stairway or next to a sloping ceiling. Trim carpenter Gary Striegler explains his construction method for these off-angle cabinets, beginning with a back panel that becomes a template for the cabinet box. He walks through the steps of building the box and installing shelves before aligning the cabinet and installing the face frames and trim.


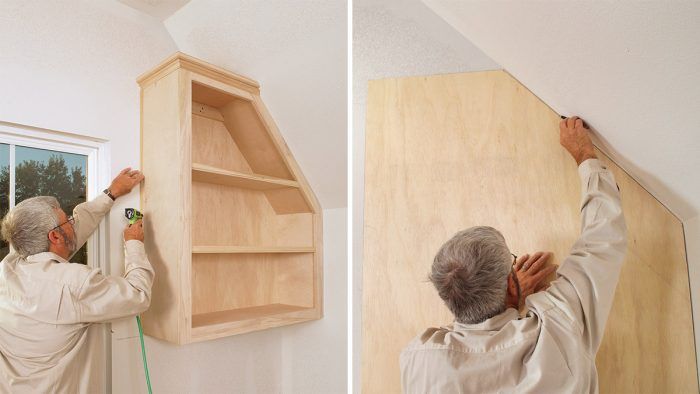
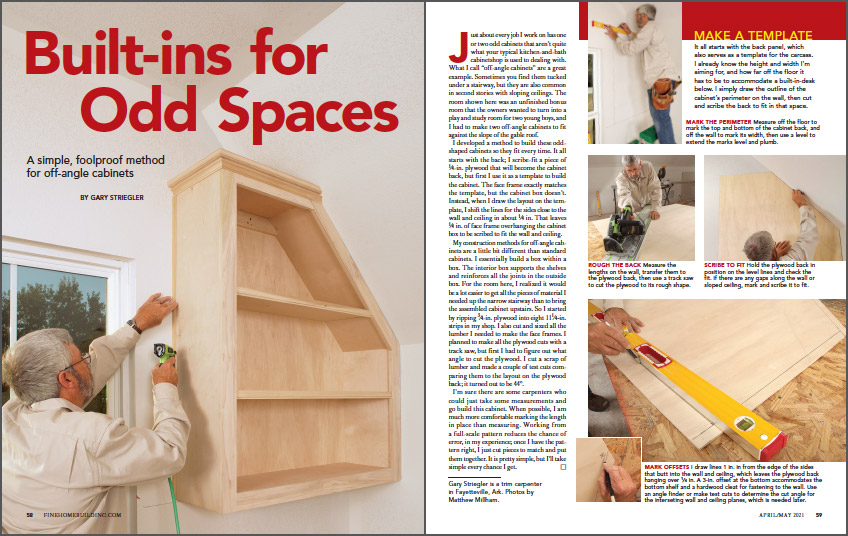
Just about every job I work on has one or two odd cabinets that aren’t quite what your typical kitchen-and-bath cabinetshop is used to dealing with. What I call “off-angle cabinets” are a great example. Sometimes you find them tucked under a stairway, but they are also common in second stories with sloping ceilings. The room shown here was an unfinished bonus room that the owners wanted to turn into a play and study room for two young boys, and I had to make two off-angle cabinets to fit against the slope of the gable roof.

I developed a method to build these odd-shaped cabinets so they fit every time. It all starts with the back; I scribe-fit a piece of 1/4-in. plywood that will become the cabinet back, but first I use it as a template to build the cabinet. The face frame exactly matches the template, but the cabinet box doesn’t. Instead, when I draw the layout on the template, I shift the lines for the sides close to the wall and ceiling in about 1/4 in. That leaves 1/4 in. of face frame overhanging the cabinet box to be scribed to fit the wall and ceiling.

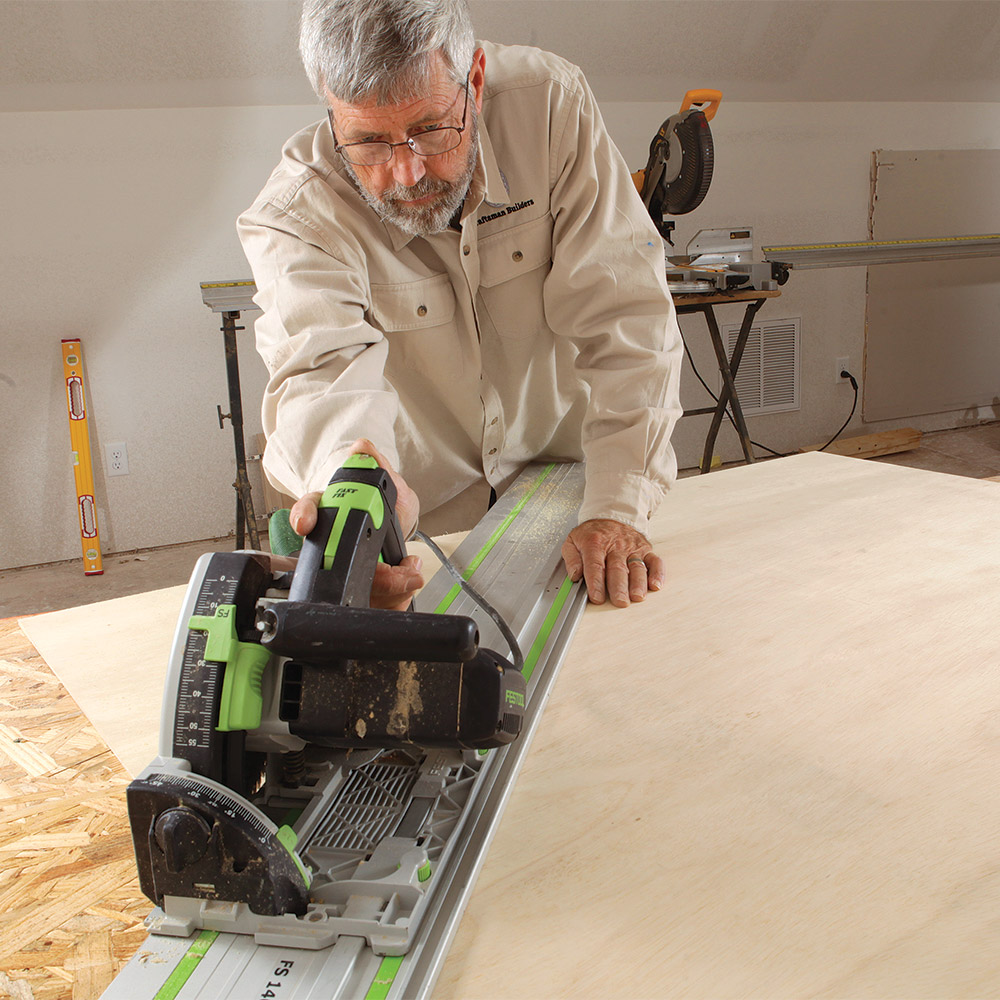
My construction methods for off-angle cabinets are a little bit different than standard cabinets. I essentially build a box within a box. The interior box supports the shelves and reinforces all the joints in the outside box. For the room here, I realized it would be a lot easier to get all the pieces of material I needed up the narrow stairway than to bring the assembled cabinet upstairs. So I started by ripping 3/4-in. plywood into eight 111/4-in. strips in my shop. I also cut and sized all the lumber I needed to make the face frames. I planned to make all the plywood cuts with a track saw, but first I had to figure out what angle to cut the plywood. I cut a scrap of lumber and made a couple of test cuts comparing them to the layout on the plywood back; it turned out to be 44°.

I’m sure there are some carpenters who could just take some measurements and go build this cabinet. When possible, I am much more comfortable marking the length in place than measuring. Working from a full-scale pattern reduces the chance of error, in my experience; once I have the pattern right, I just cut pieces to match and put them together. It is pretty simple, but I’ll take simple every chance I get.

Make a template

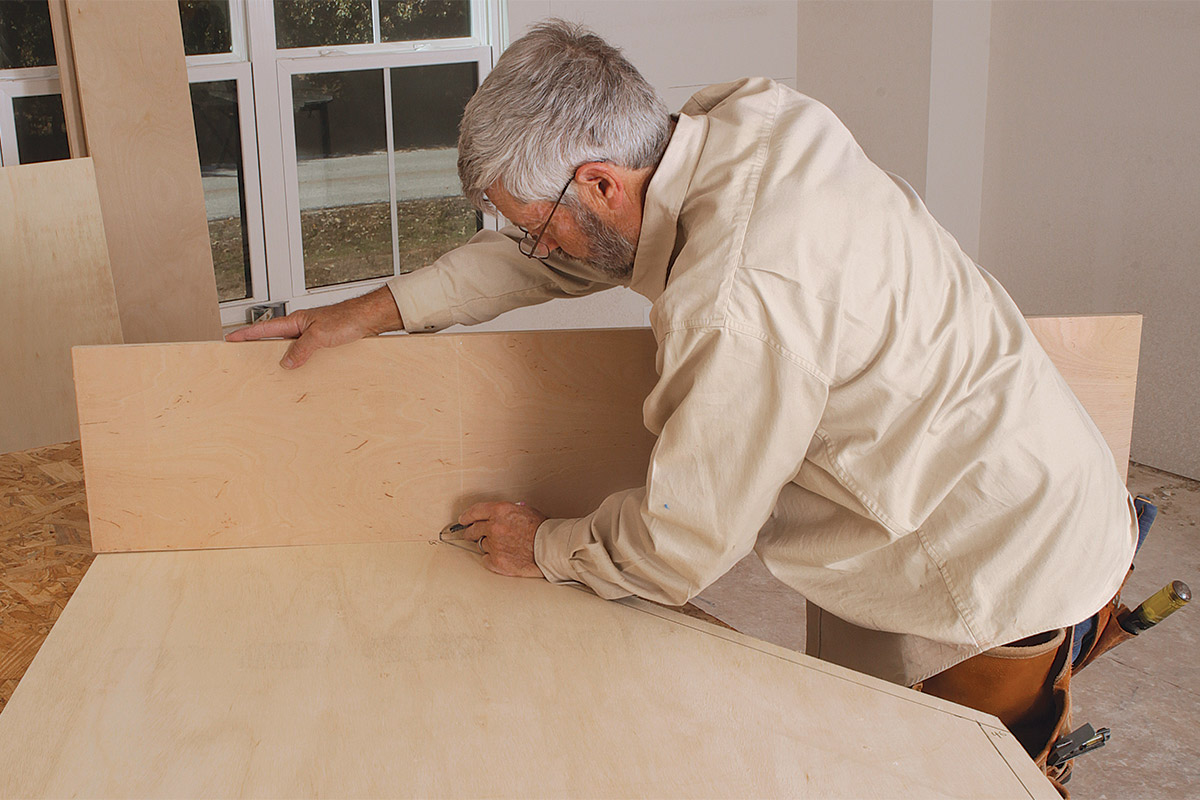
It all starts with the back panel, which also serves as a template for the carcass. I already know the height and width I’m aiming for, and how far off the floor it has to be to accommodate a built-in-desk below. I simply draw the outline of the cabinet’s perimeter on the wall, then cut and scribe the back to fit in that space.

Mark the perimeter
Mark the perimeter. Measure off the floor to mark the top and bottom of the cabinet back, and off the wall to mark its width, then use a level to extend the marks level and plumb.

Measure the lengths on the wall, transfer them to the plywood back
Rough the back. Measure the lengths on the wall, transfer them to the plywood back, then use a track saw to cut the plywood to its rough shape.

check the fit of the plywood
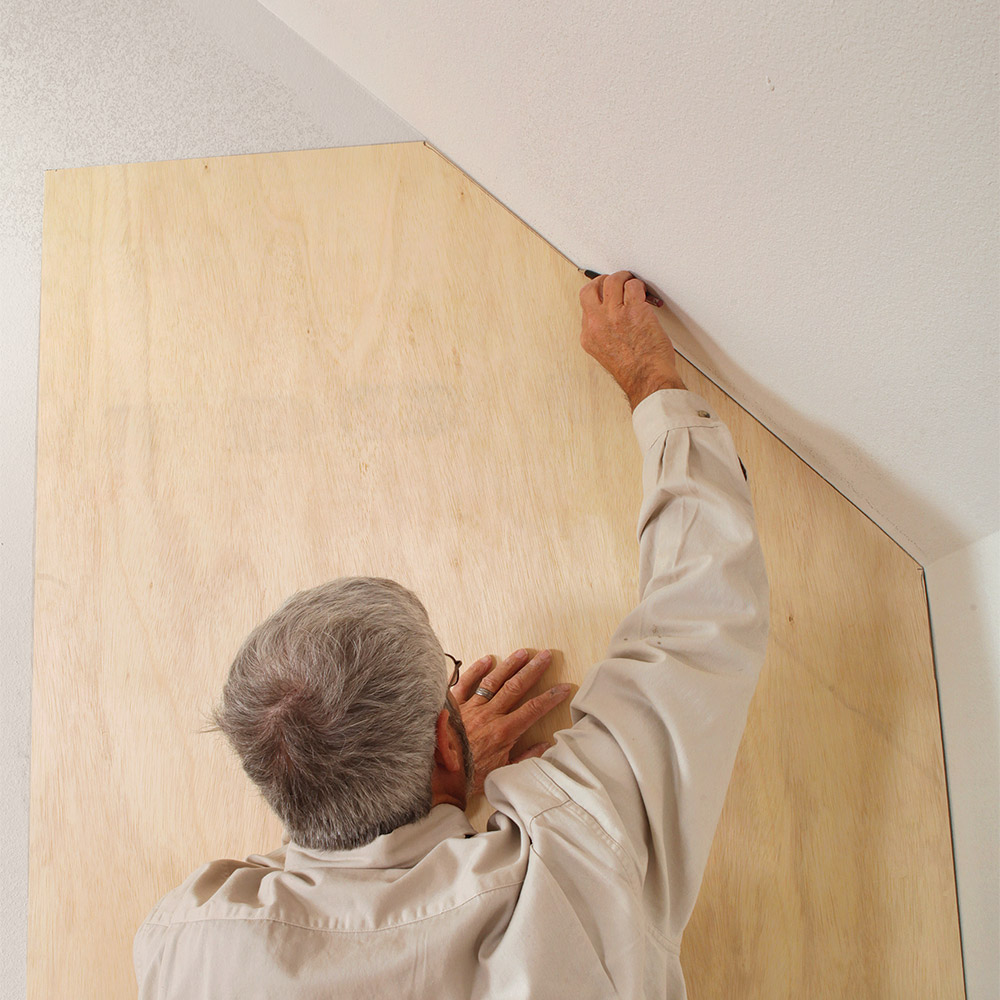
Scribe to fit. Hold the plywood back in position on the level lines and check the fit. If there are any gaps along the wall or sloped ceiling, mark and scribe it to fit.
Mark offsets
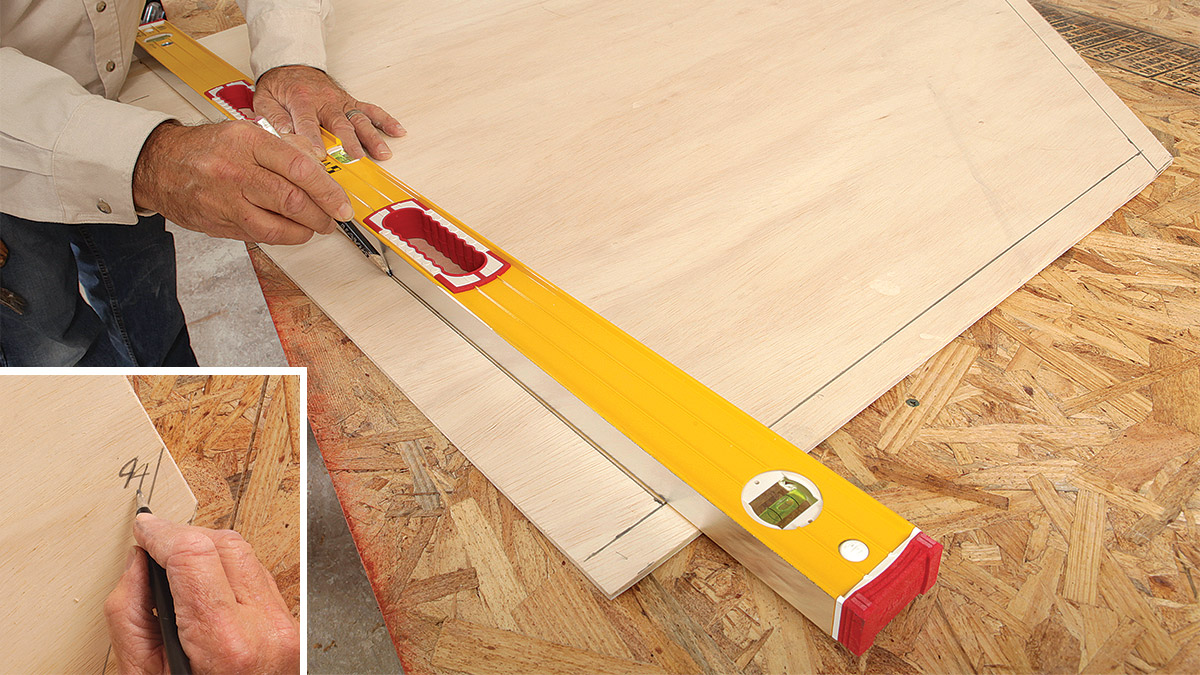
Mark offsets. I draw lines 1 in. in from the edge of the sides that butt into the wall and ceiling, which leaves the plywood back hanging over 1⁄4 in. A 3-in. offset at the bottom accommodates the bottom shelf and a hardwood cleat for fastening to the wall. Use an angle finder or make test cuts to determine the cut angle for the interseting wall and ceiling planes, which is needed later.

Build the box

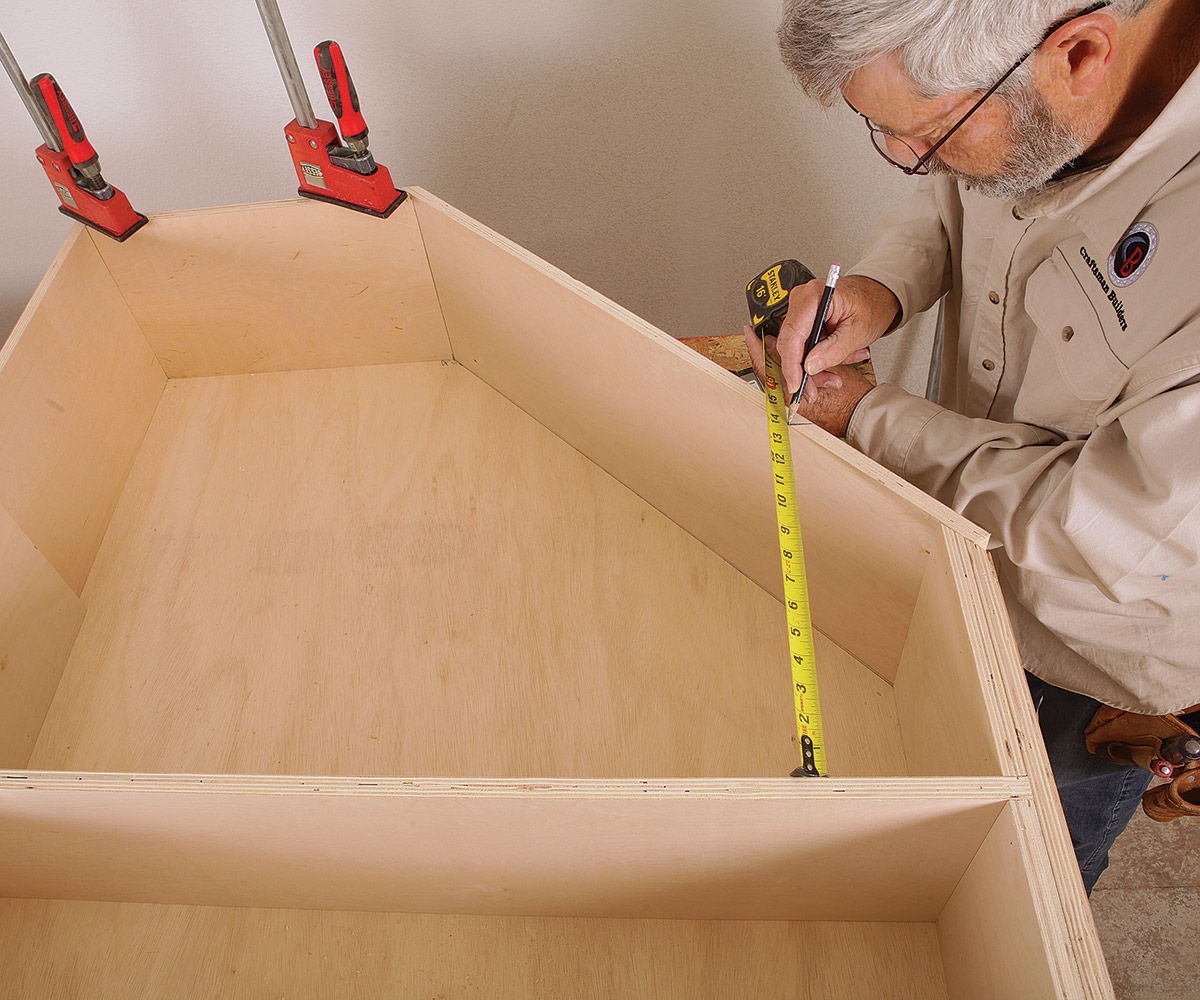
I prefer to mark trim lengths in place rather than use a tape, and I use that same method for the parts of these cabinets. The layout lines and the edge of the plywood back are my starting points. I precut all of the plywood to width on a tablesaw at my shop, and cut all the parts to length on-site with a track saw.

use the layout lines as a guide to mark where to cut pieces
Mark in place. When possible, use the layout lines as a guide to mark where to cut pieces to length.

Fasten parts as they’re cut
Fasten as you go. Fasten parts as they’re cut for a tight fit, for accurate marks, and to ensure nothing gets mixed up.
drilling pocket holes
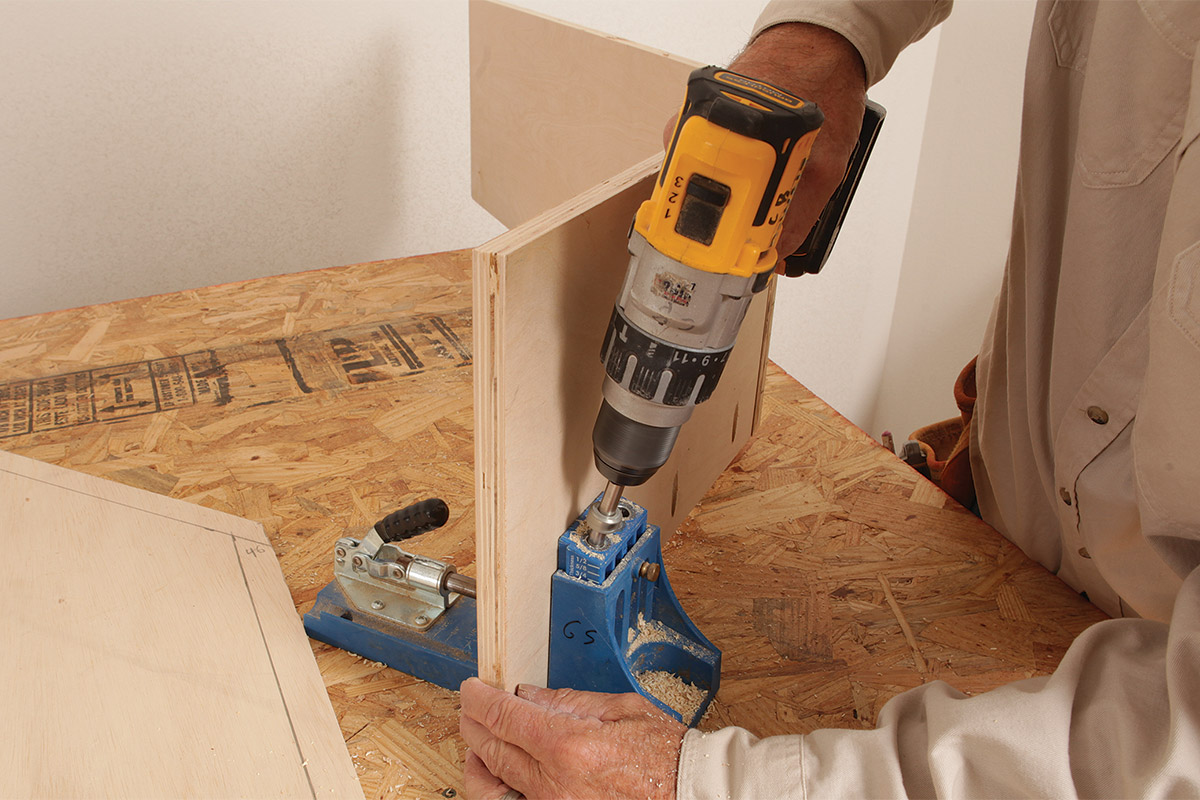
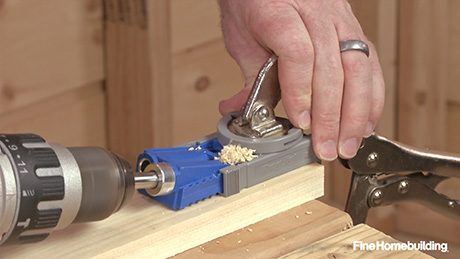
Prep the pockets. Pocket-hole screws secure the face frame along the sides that butt into the wall and ceiling. Drill the pocket holes before the entire perimeter of the cabinet is fastened to make things easier.
spacing shelves with plywood
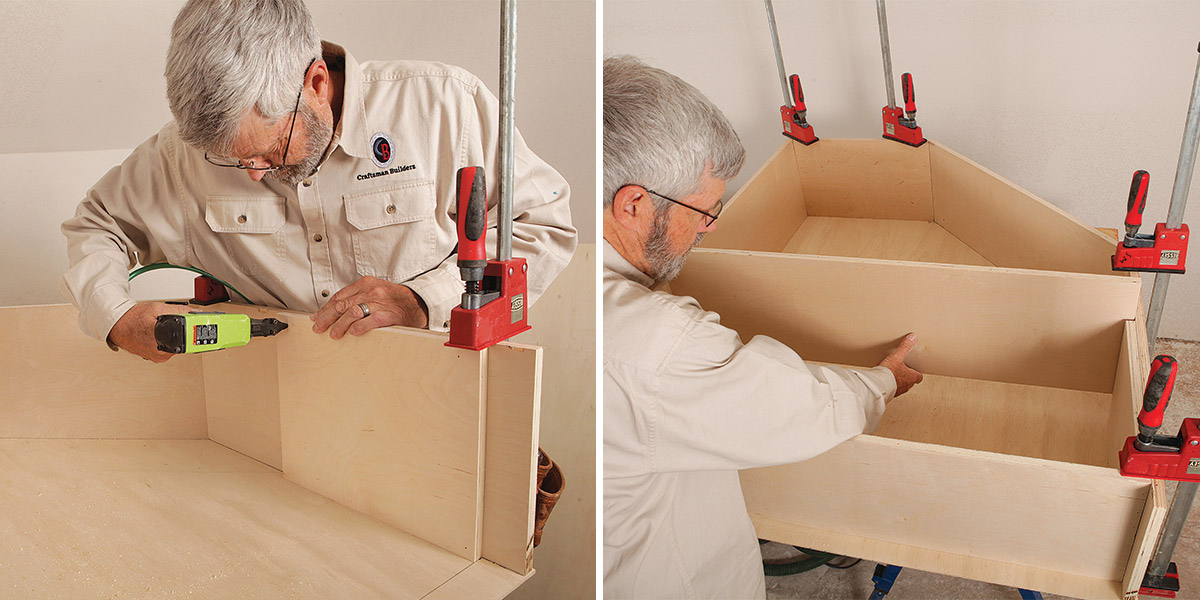
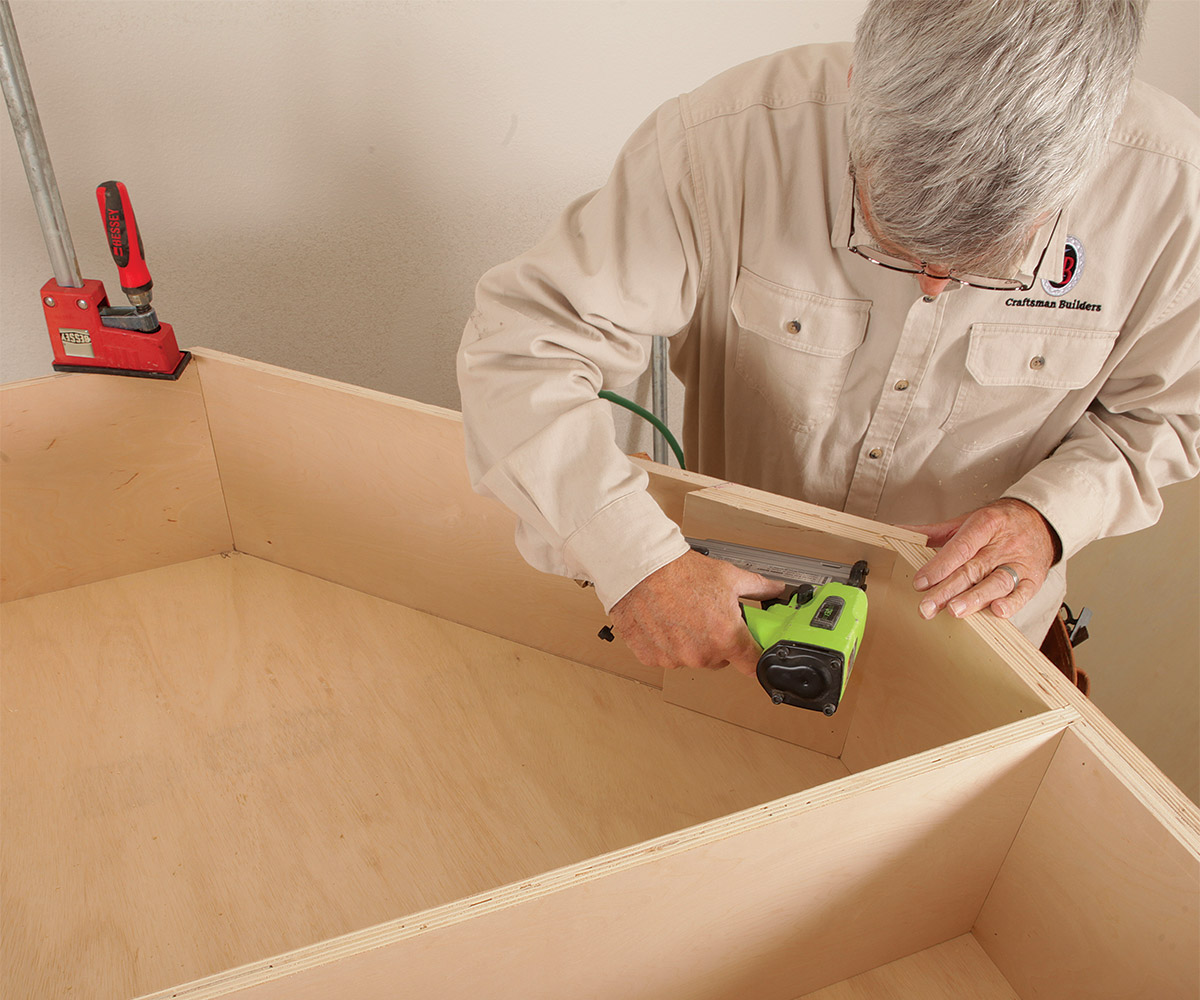
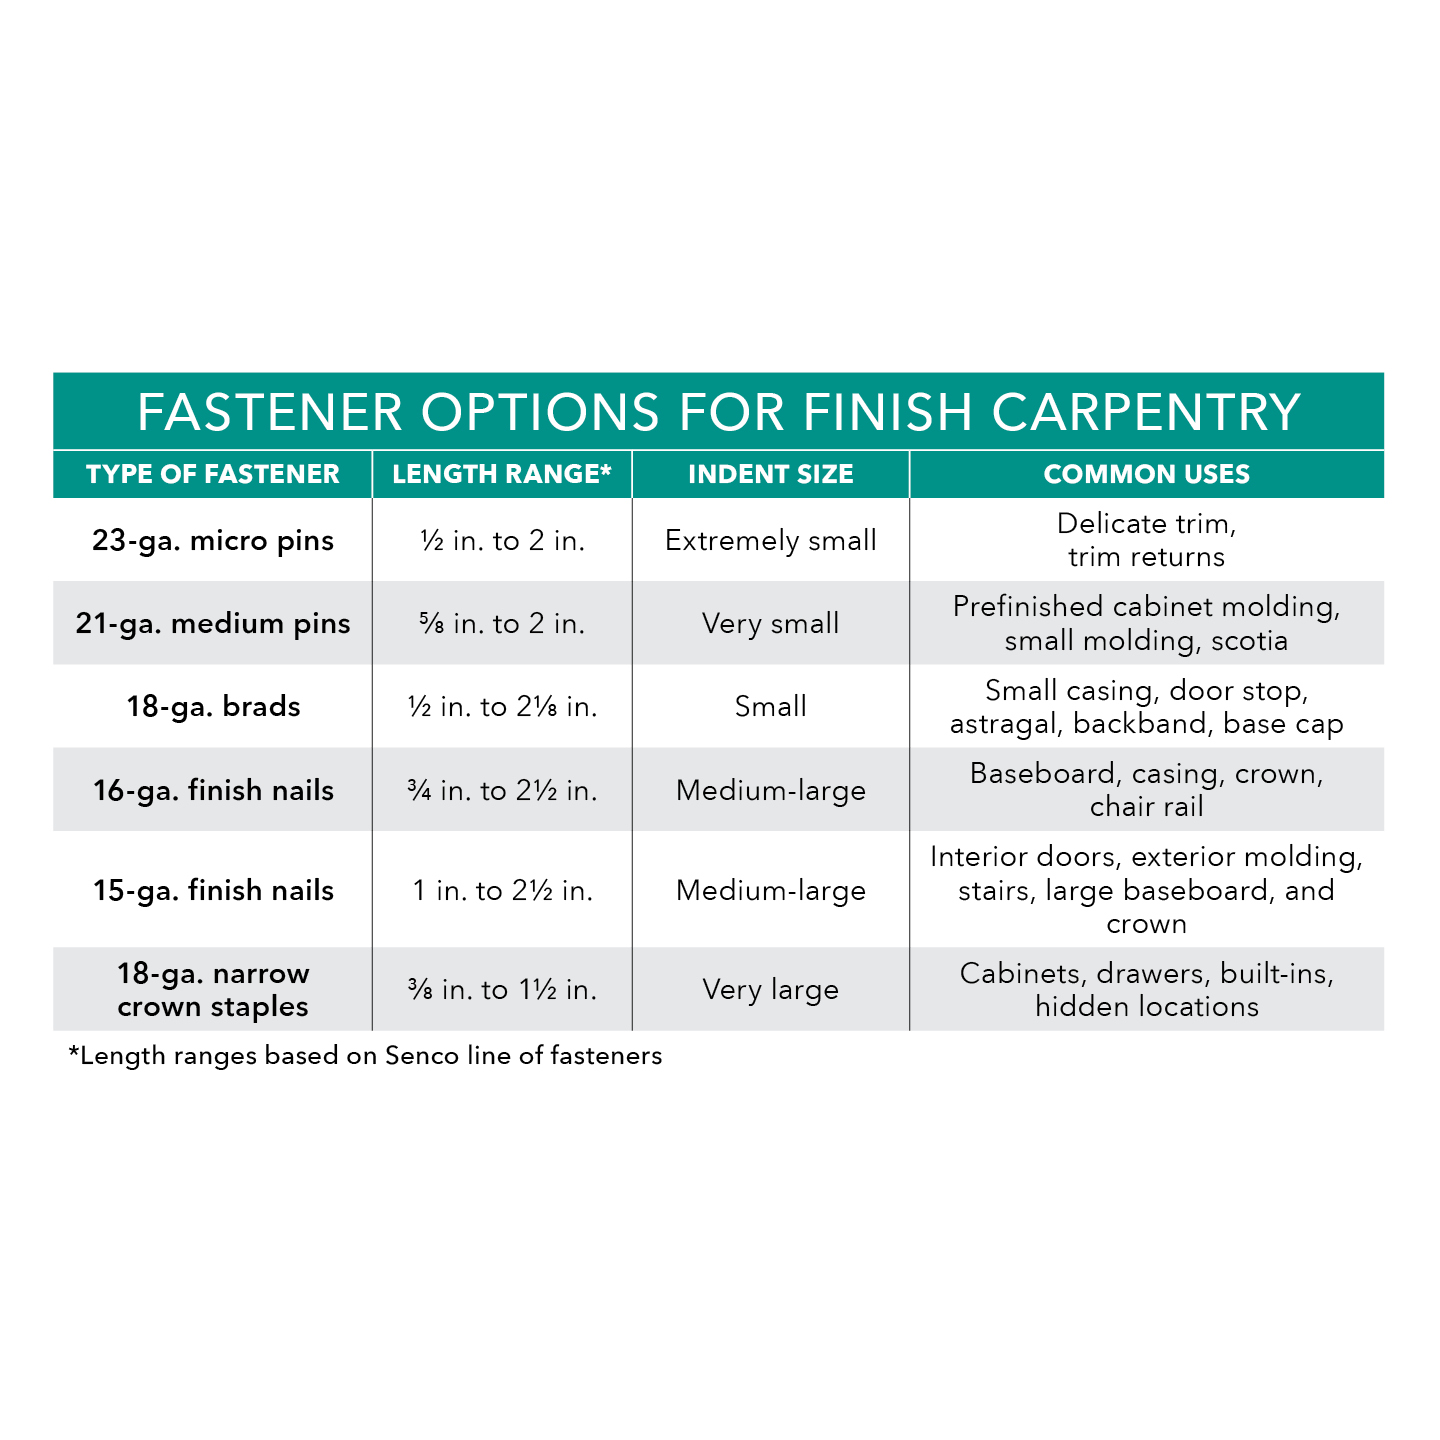
Space it out. Adjustable shelves don’t work with this cabinet, so I space them evenly with pieces of plywood cut to the height between shelves, and nail them to the sides of the box with 11/4-in. brads.
Fasten the shelves through their tops down into their supporting spacers
Hide the fasteners. Fasten the shelves through their tops down into their supporting spacers using 2-in. brads. The next layer of spacers will conceal these nails—just one less thing to fill before finishing.

Find the intersection
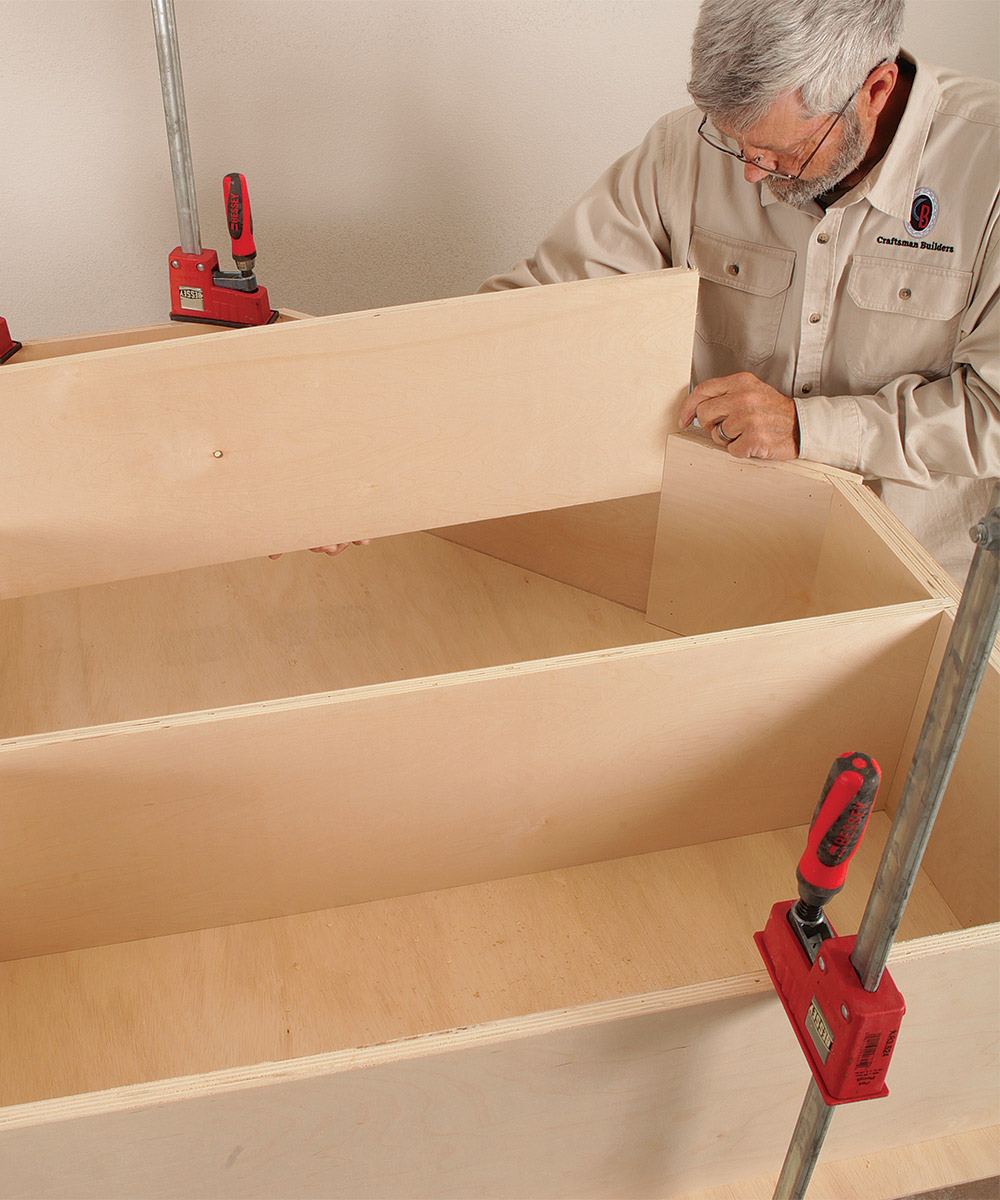
Find the intersection. To determine where the spacer goes on the angled side, I simply pull a tape square off the previous shelf and mark where the shelf’s height intersects the slope.

Two-part spacer
Two-part spacer. Depending on your shelf layout, the spacer on the sloped side may require two pieces. The cut angle identified earlier (in this case, 44°) comes into play here.
Go slow when adding shelves
Slide carefully. Go slow when adding shelves in the upper sloped portion to avoid damaging the sharp edges created by the angled cut.

Stiffen and trim

The plywood back and 1-in. (nominal) face frame give the cabinet rigidity, and cleats provide the needed strength to hold it on the wall. Trim is optional, but I never miss an opportunity to add a little flourish.

Align the back flush
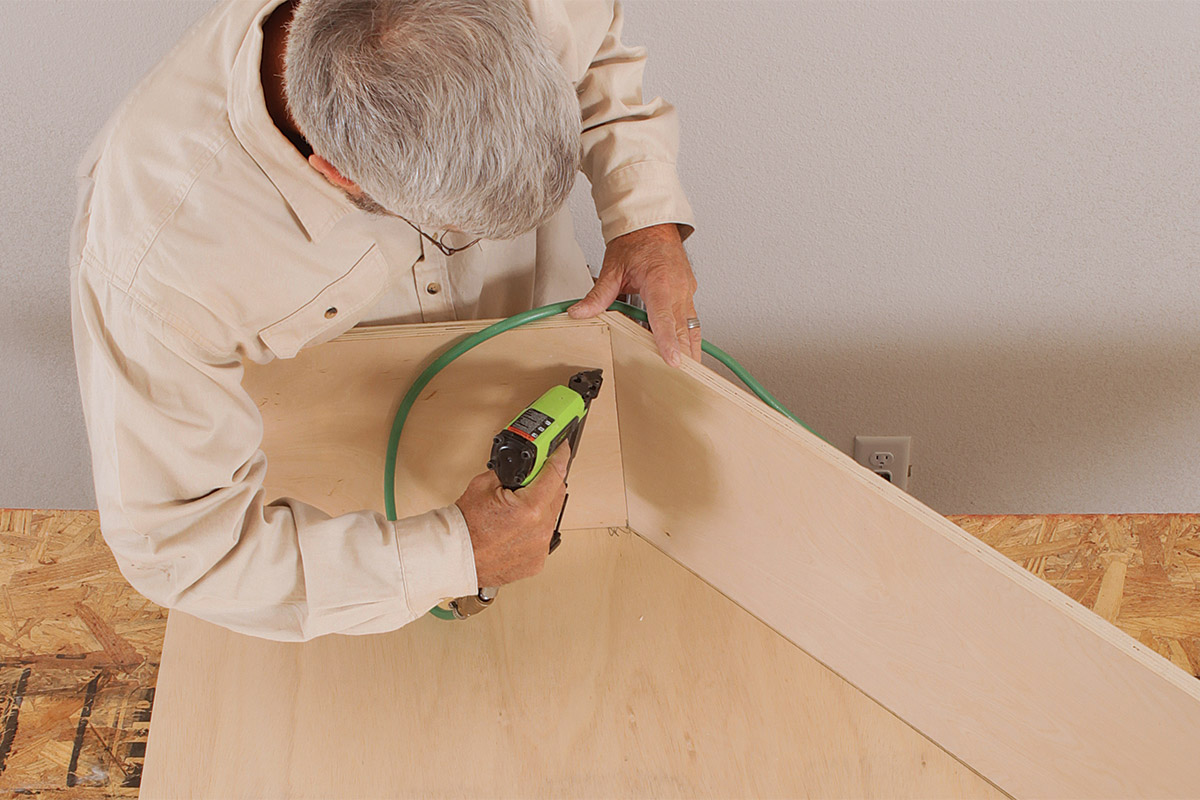
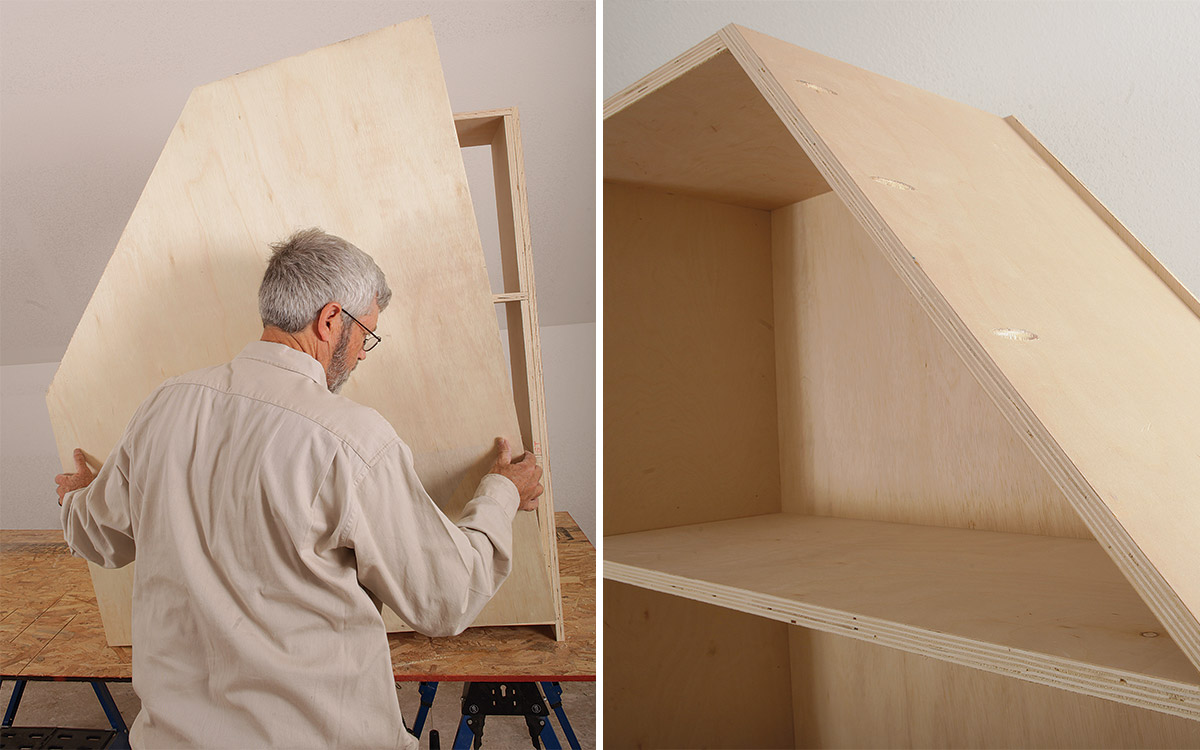
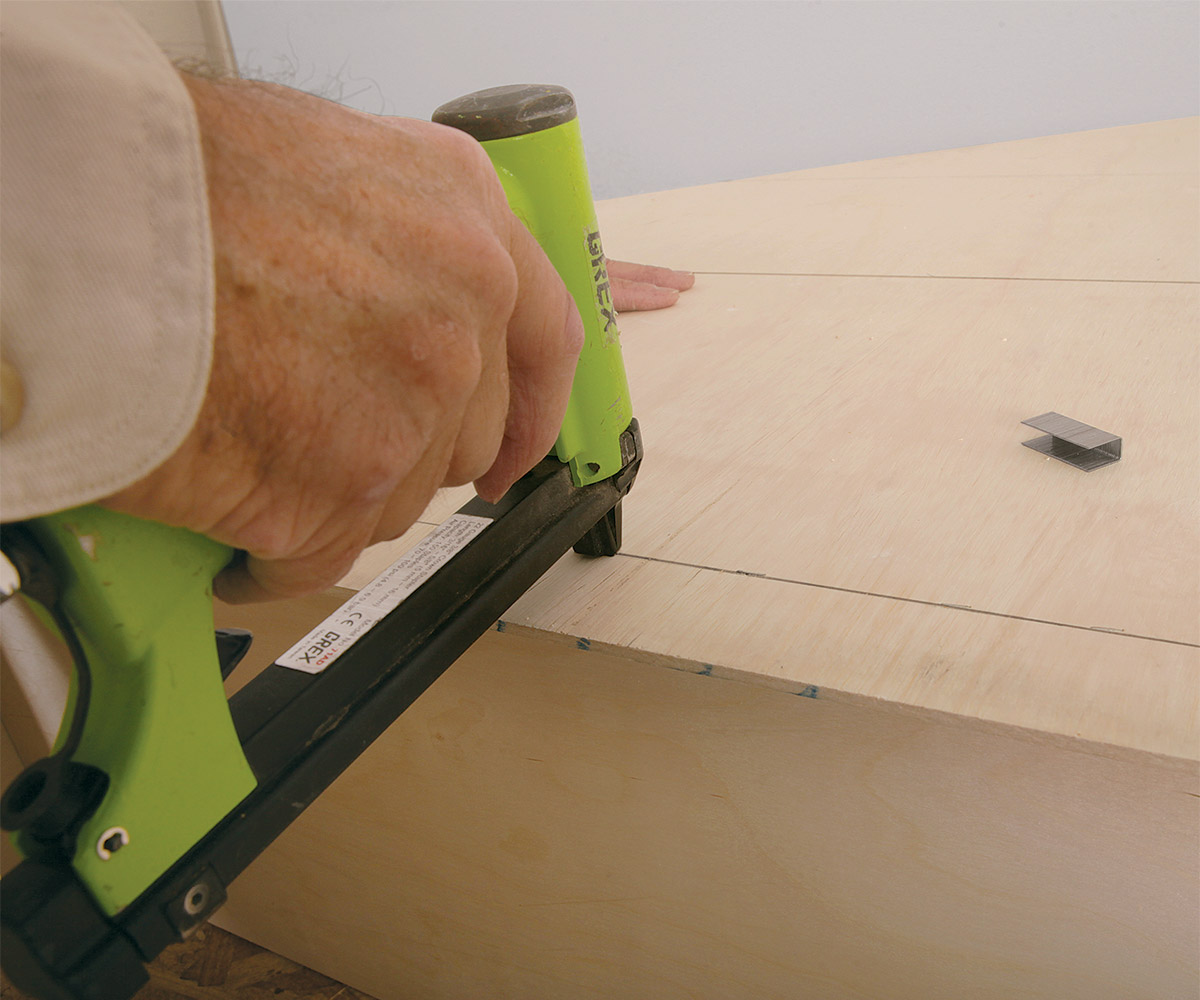
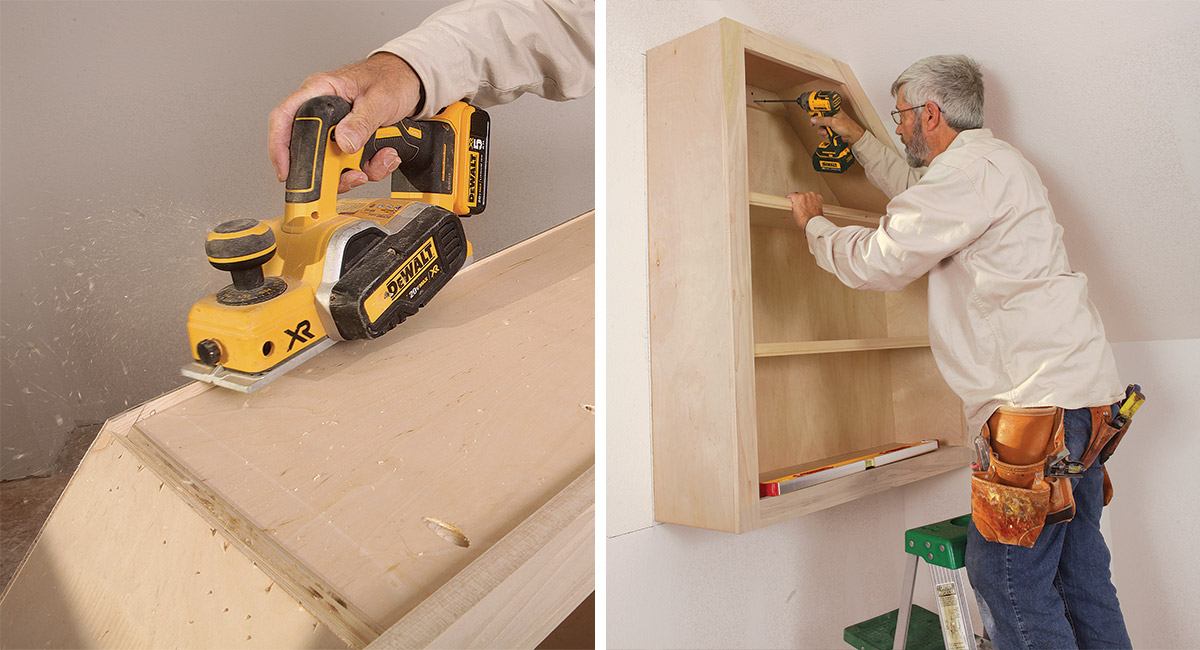
Back it up. Align the back flush with the side that will be visible in the room, leaving the edge against the wall running long. This excess gets trimmed later.
Staple liberally
Staple liberally. Because this construction method is a little unorthodox, I fasten the back with 5/8-in.-long 3/8-in.-dia. crown staples around the entire perimeter and into the shelves roughly 3 in. on center to add rigidity and holding power.

Assemble face frames
Assemble the face frames. I build the face frames using the back template as a guide. Because the back is slightly larger than the cabinet box, the face frame will overhang slightly, to be scribed to the wall and ceiling if necessary.

Fasten the face
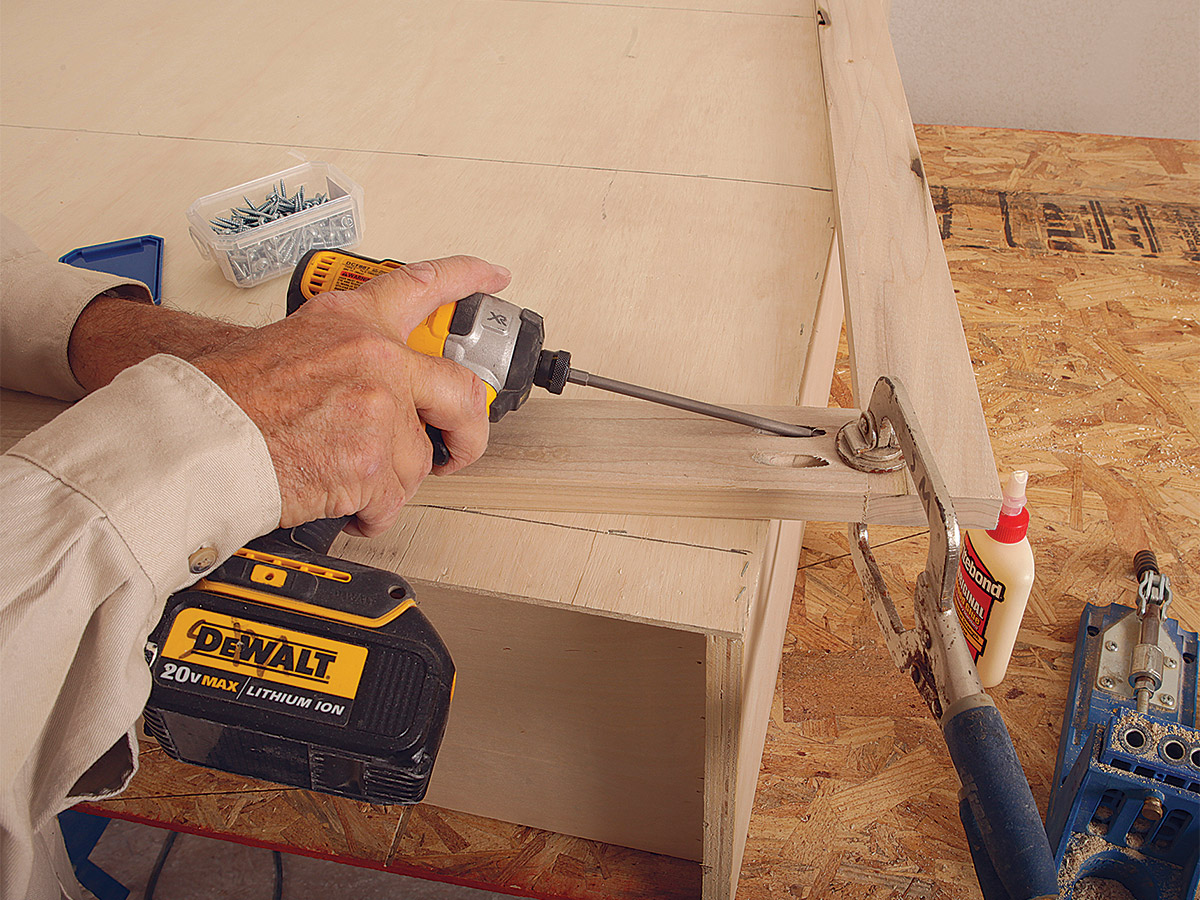
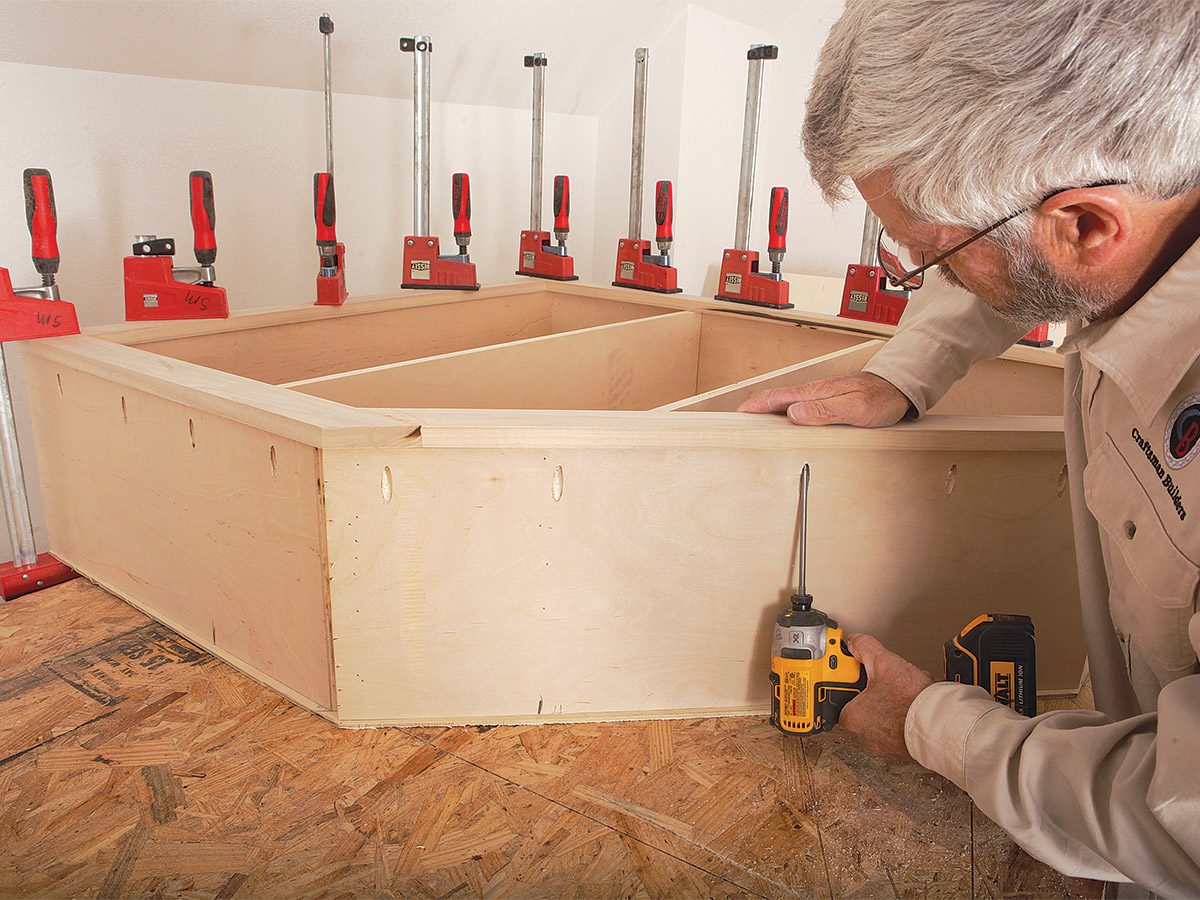
Fasten the face. Glue around the entire front edge of the box, then clamp the face frame to the box along the bottom and side that faces into the room, and fasten the hidden sides, which overhang the box, with pocket screws. Allow the glue to set before removing the clamps and sanding.
Add cleats to the bottom
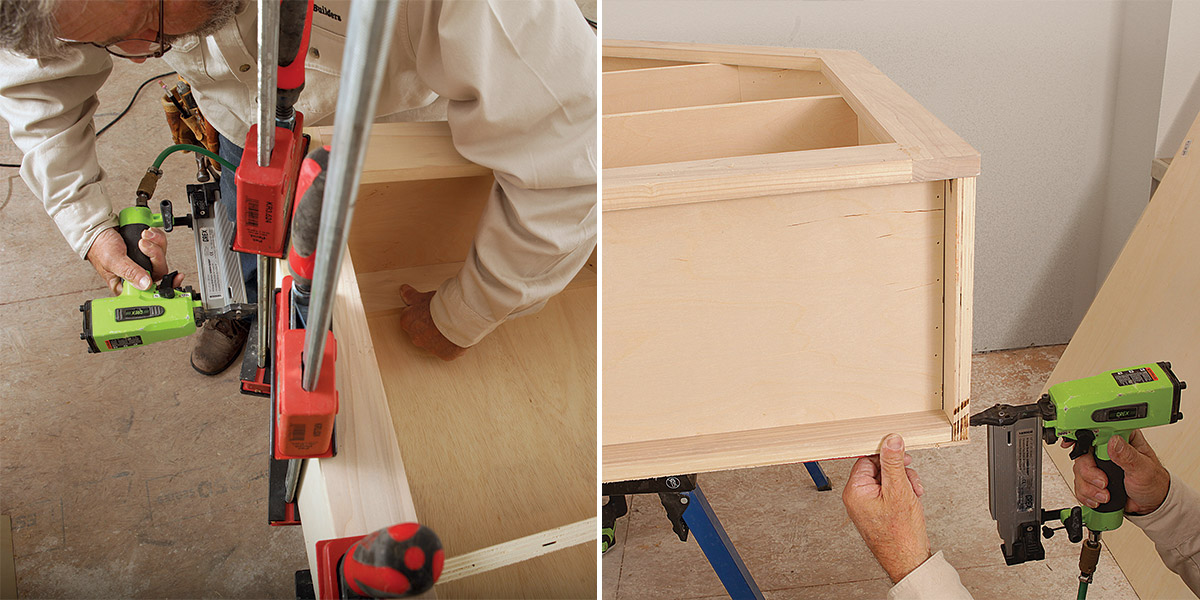
Cleat it. Add 2 1/4-in. cleats to the bottom and upper interior of the box for attachment. Cut the pieces for a tight fit, then fasten with 2-in. brads through the sides and crown staples through the back.
Add the nosing
Add the nosing. To hide the edges of the plywood shelves, cut and fasten molding with glue and 2-in. brads.
planning and installing
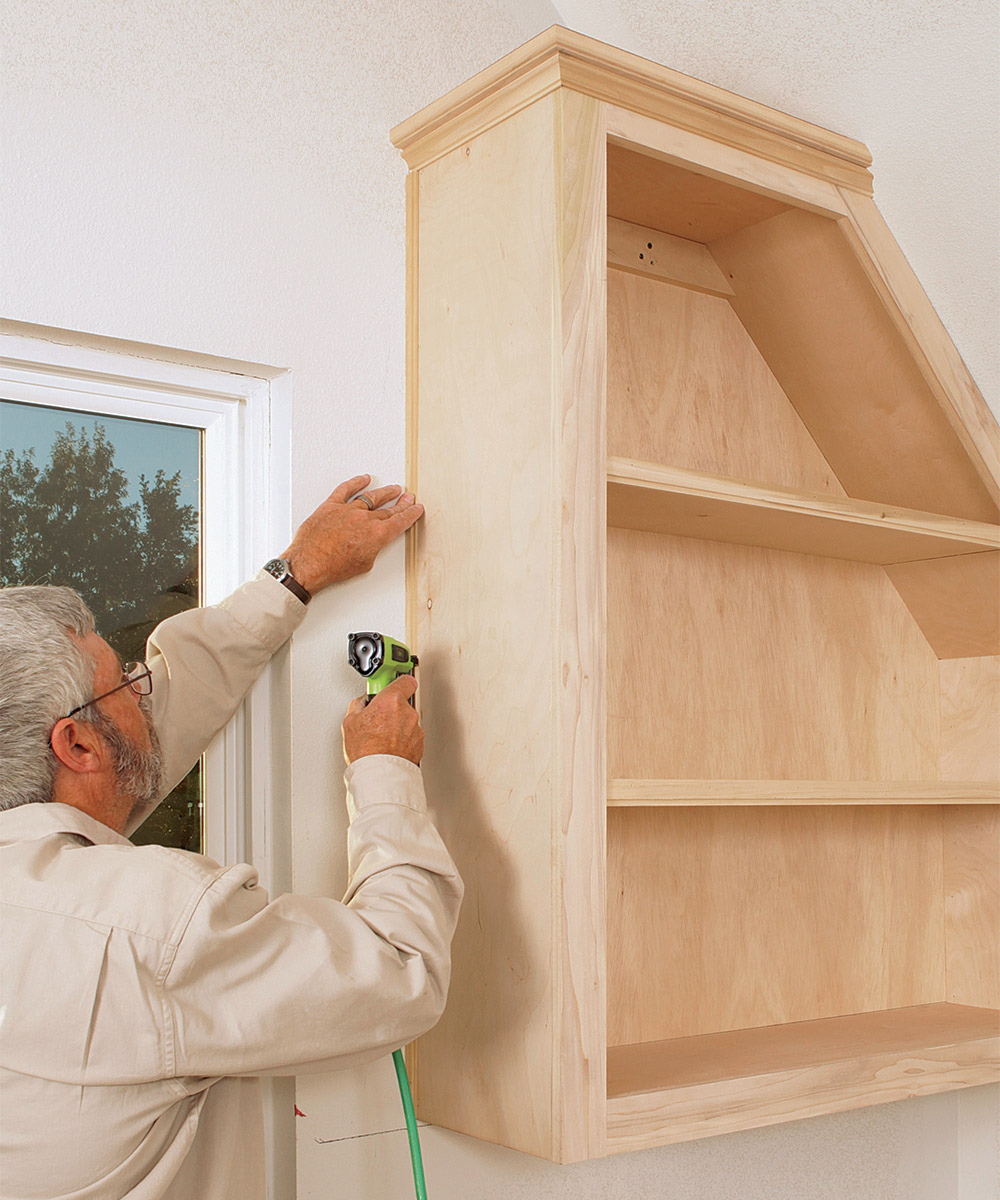
Plane it flush. Trim the bit of the back that overhangs the cabinet before testing its fit against the wall and ceiling. Scribe the face frame as necessary for a tight fit, then fasten the cabinet to the studs with long screws through the top and bottom cleats.
adding trim to odd cabinets
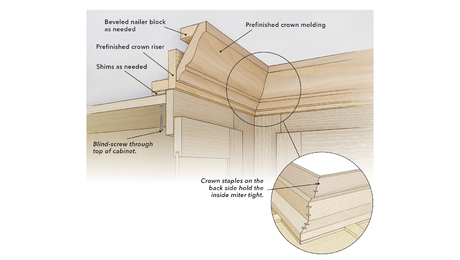
Trim it out. Though not entirely necessary, I like to add a little trim to these odd cabinets. The top has a routed-edge top cap over a piece of panel mold. A narrow scribe mold covers the plywood back.

Built-ins for Odd Spaces spread

From Fine Homebuilding #298

To view the entire article, please click the View PDF button below.

Related Links:

  • Installing Frameless Cabinets
  • A Houseful of Cabinets and Built-ins

Sign up for eletters today and get the latest how-to from Fine Homebuilding, plus special offers.

Signing you up...

This site is protected by reCAPTCHA and the Google Privacy Policy and Terms of Service apply.
See all newsletters
See all newsletters
×

Get home building tips, offers, and expert advice in your inbox

Signing you up...

This site is protected by reCAPTCHA and the Google Privacy Policy and Terms of Service apply.
See all newsletters
See all newsletters
View PDF

New Feature

Fine Homebuilding Forums

Ask questions, offer advice, and share your work

  • X
  • facebook
  • linkedin
  • pinterest
  • email
  • add to favorites Log in or Sign up to save your favorite articles

Log in or create an account to post a comment.

Sign up Log in

Become a member and get full access to FineHomebuilding.com

Up Next

Video Shorts

Featured Story

Custom Built-ins With Job-Site Tools

From building boxes and fitting face frames to installing doors and drawers, these techniques could be used for lots of cabinet projects.

Featured Video

SawStop's Portable Tablesaw is Bigger and Better Than Before

The 10-in. Jobsite Saw PRO has a wider table, a new dust-control port, and a more versatile fence, along with the same reliable safety mechanism included in all SawStop tablesaws.

Related Stories

  • What Size Nails?
  • Custom Built-ins With Job-Site Tools
  • An Easier Method for Mitered Head Casings
  • Making and Installing Wood Wall Paneling

Discussion Forum

Recent Posts and Replies

  • |
  • |
  • |
  • |
  • |
  • |
View More Create Post

Highlights

Fine Homebuilding All Access
Fine Homebuilding Podcast
Tool Tech
Plus, get an extra 20% off with code GIFT20

"I have learned so much thanks to the searchable articles on the FHB website. I can confidently say that I expect to be a life-long subscriber." - M.K.

Get home building tips, offers, and expert advice in your inbox

Signing you up...

This site is protected by reCAPTCHA and the Google Privacy Policy and Terms of Service apply.
See all newsletters
See all newsletters

Video

View All Videos
  • Building Custom Kitchen Cabinets
  • Podcast 331: PRO TALK With Cabinetmaker Ben Scott
  • How to Use a Pocket-Hole Jig
  • Podcast 128: Worst. Photo. Shoot. Ever.
View All

Cabinets and Built-ins

View All Cabinets and Built-ins Articles
  • Custom Built-ins With Job-Site Tools
  • Custom Cabinet Pullout Drawer
  • Installing Prefinished Cabinet Molding
  • A New Approach for Millwork Finishes
View All Cabinets and Built-ins Articles

Fine Homebuilding Magazine

  • Issue 332 - July 2025
    • Custom Built-ins With Job-Site Tools
    • Fight House Fires Through Design
    • Making the Move to Multifamily
  • Issue 331 - June 2025
    • A More Resilient Roof
    • Tool Test: You Need a Drywall Sander
    • Ducted vs. Ductless Heat Pumps
  • Issue 330 - April/May 2025
    • Deck Details for Durability
    • FAQs on HPWHs
    • 10 Tips for a Long-Lasting Paint Job
  • Issue 329 - Feb/Mar 2025
    • Smart Foundation for a Small Addition
    • A Kominka Comes West
    • Making Small Kitchens Work
  • Issue 328 - Dec/Jan 2024
    • How a Pro Replaces Columns
    • Passive House 3.0
    • Tool Test: Compact Line Lasers

Fine Home Building

Newsletter Sign-up

  • Fine Homebuilding

    Home building tips, offers, and expert advice in your inbox.

  • Green Building Advisor

    Building science and energy efficiency advice, plus special offers, in your inbox.

  • Old House Journal

    Repair, renovation, and restoration tips, plus special offers, in your inbox.

Signing you up...

This site is protected by reCAPTCHA and the Google Privacy Policy and Terms of Service apply.
See all newsletters

Follow

  • Fine Homebuilding

    Dig into cutting-edge approaches and decades of proven solutions with total access to our experts and tradespeople.

    Start Free Trial Now
    • Facebook
    • Instagram
    • X
    • LinkedIn
  • GBA Prime

    Get instant access to the latest developments in green building, research, and reports from the field.

    Start Free Trial Now
    • Facebook
    • YouTube
  • Old House Journal

    Learn how to restore, repair, update, and decorate your home.

    Subscribe Now
    • Facebook
    • Instagram
    • X

Membership & Magazine

  • Online Archive
  • Start Free Trial
  • Magazine Subscription
  • Magazine Renewal
  • Gift a Subscription
  • Customer Support
  • Privacy Preferences
  • About
  • Contact
  • Advertise
  • Careers
  • Terms of Use
  • Site Map
  • Do not sell or share my information
  • Privacy Policy
  • Accessibility
  • California Privacy Rights

© 2025 Active Interest Media. All rights reserved.

Fine Homebuilding receives a commission for items purchased through links on this site, including Amazon Associates and other affiliate advertising programs.

  • Home Group
  • Antique Trader
  • Arts & Crafts Homes
  • Bank Note Reporter
  • Cabin Life
  • Cuisine at Home
  • Fine Gardening
  • Fine Woodworking
  • Green Building Advisor
  • Garden Gate
  • Horticulture
  • Keep Craft Alive
  • Log Home Living
  • Military Trader/Vehicles
  • Numismatic News
  • Numismaster
  • Old Cars Weekly
  • Old House Journal
  • Period Homes
  • Popular Woodworking
  • Script
  • ShopNotes
  • Sports Collectors Digest
  • Threads
  • Timber Home Living
  • Traditional Building
  • Woodsmith
  • World Coin News
  • Writer's Digest
Active Interest Media logo
X
X
This is a dialog window which overlays the main content of the page. The modal window is a 'site map' of the most critical areas of the site. Pressing the Escape (ESC) button will close the modal and bring you back to where you were on the page.

Main Menu

  • How-To
  • Design
  • Tools & Materials
  • Video
  • Blogs
  • Forum
  • Project Guides
  • Reader Projects
  • Magazine
  • Members
  • FHB House

Podcasts

  • FHB Podcast
  • ProTalk

Webinars

  • Upcoming and On-Demand

Podcasts

  • FHB Podcast
  • ProTalk

Webinars

  • Upcoming and On-Demand

Popular Topics

  • Kitchens
  • Business
  • Bedrooms
  • Roofs
  • Architecture and Design
  • Green Building
  • Decks
  • Framing
  • Safety
  • Remodeling
  • Bathrooms
  • Windows
  • Tilework
  • Ceilings
  • HVAC

Magazine

  • Current Issue
  • Past Issues
  • Magazine Index
  • Subscribe
  • Online Archive
  • Author Guidelines

All Access

  • Member Home
  • Start Free Trial
  • Gift Membership

Online Learning

  • Courses
  • Project Guides
  • Reader Projects
  • Podcast

More

  • FHB Ambassadors
  • FHB House
  • Customer Support

Account

  • Log In
  • Join

Newsletter

Get home building tips, offers, and expert advice in your inbox

Signing you up...

This site is protected by reCAPTCHA and the Google Privacy Policy and Terms of Service apply.
See all newsletters
See all newsletters

Follow

  • X
  • YouTube
  • instagram
  • facebook
  • pinterest
  • Tiktok

Join All Access

Become a member and get instant access to thousands of videos, how-tos, tool reviews, and design features.

Start Your Free Trial

Subscribe

FHB Magazine

Start your subscription today and save up to 70%

Subscribe

This is your last free article.

Don't miss another expert tip or technique from building pros. Start your free trial today.

Start your FREE trial

Already a member? Log in

We hope you’ve enjoyed your free articles. To keep reading, become a member today.

Get complete site access to expert advice, how-to videos, Code Check, and more, plus the print magazine.

Start your FREE trial

Already a member? Log in

Privacy Policy Update

We use cookies, pixels, script and other tracking technologies to analyze and improve our service, to improve and personalize content, and for advertising to you. We also share information about your use of our site with third-party social media, advertising and analytics partners. You can view our Privacy Policy here and our Terms of Use here.

Cookies

Analytics

These cookies help us track site metrics to improve our sites and provide a better user experience.

Advertising/Social Media

These cookies are used to serve advertisements aligned with your interests.

Essential

These cookies are required to provide basic functions like page navigation and access to secure areas of the website.

Delete My Data

Delete all cookies and associated data