Podcast 348: Building Porches, Reworking Flush Doors, and Swapping a Basement Beam
Rob, Brian, and Patrick hear from listeners about sturdy fences and clean energy before talking questions about long-lasting porches, upgrading flush doors, and increasing the span of a basement beam.
Follow the Fine Homebuilding Podcast on your favorite app. Subscribe now and don’t miss an episode:
 |
 |
Help us make better episodes and enter for a chance to win an FHB Podcast T-shirt:
www.finehomebuilding.com/podcastsurvey
Kevin has a suggestion for finding good contractors. David shares his method for installing fence posts. Matt offers his take on clean power. Alex asks for help building his two-story porch. Wayne wants to convert his flush doors to flat panel. MacoBuilds is trying to eliminate posts in his basement. Chris asks how to paint his chimney and concrete foundation.
Editor Updates:
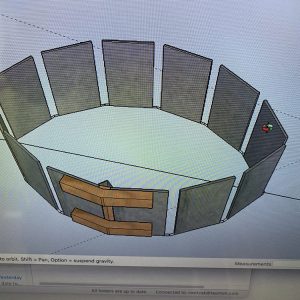
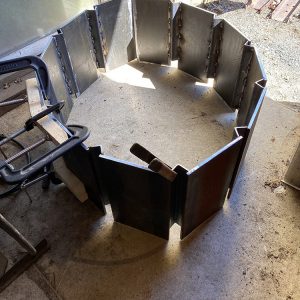
- Rob’s fire ring
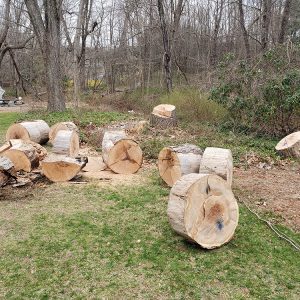
- Patrick’s tree felling
- Brian talks about the new FHB Insulation Project Guide
 |
 |
 |
 |
 |
 |
 |
Listener Feedback 1:
Kevin writes: About finding Good Contractors in episode 344:
Hi FHB, I’m not a contractor, I’m an automotive technician for the last 18years. Our industry has the same issues that every other trade has, anyone can pick up a wrench and think they can fix a car. I would say if you’re looking for a trades person, try going through Instagram or YouTube. I feel like the people that take the time to be involved in posting content and posting how-to content have nothing to hide. Just look at the modern craftsman podcast and the people they have on. I know it sounds so millennial to say but it’s worth a shot. Love the show!
Related Links:
Listener Feedback 2:
David writes: Hello Fine Fence Building Podcast crew, I have been listing to the podcast for a few years now. Enjoy it very much. Over the last few weeks there has been a lot of conversation about fences and fence post. Living in tornado alley I’ve seen my share of fence panels and post destroyed by wind, including metal post. Several years ago, I was putting up a new metal post fence and pouring a new curb under the fence at the same time. I was thinking how much trouble it would be to bust up the curb to replace a damaged post in the future. So, I went to the big box store on a mission and discovered that the ID of a 2 1/2“ electrical conduit was 1/8” bigger than the OD of a standard fence post. So, I bought a few 10’ sticks of conduit, took them home and cut them into 30” pieces. Then about 3” from one end I drilled a ½” or so hole all the way through and put an old bolt or short piece of rebar, whatever I had laying around, through so it stuck out about an inch on each side. This was to keep the post from sliding through to the ground and sinking in over time causing the fence to sag. It also kept the conduit from sliding in the concrete. Then I dug the holes as normal, added a little gravel in the bottom, slid the pole into the conduit, put it in the hole, filled with concrete, aligned, leveled, etc. Once the concrete was set, I slid the poles back out and took a saw and cut the conduit off level with the top of the new curb and slid the poles back in. So now if a pole ever gets damaged, or I just want to remove a section of fence for some reason, no problem. After this, I’ve started using this method for all my metal poles even if they were just a stand-alone post (no curb).
Listener Feedback 3:
George writes: Dear FHB Podcasters, I listened to engineer Matt’s feedback on EVs and natural gas appliances in episode 344. As an electrical engineer also in the power sector I feel the need to respond succinctly. That sounds like an engineering callout to me.
1. EV’s have less CO2 emissions when being charged off the grid in every state in the great ol’ US of A, even in coal heavy states like Wyoming, West Virginia, and Ohio. There may be some granularity by zip code, but I don’t have that data right off the bat.
My source is the Alternative Fuels Database run by the Department of Energy, link here.
2. EV’s with Vehicle-to-Grid technology will change the way people interact with their electric company in ways that are completely bonkers. Imagine your vehicle’s battery buffering the load from your hair dryer or AC unit to avoid peak demand charges. Or selling battery power to the grid to avoid a grid blackout. Or soaking up cheap noon-day sun or late night gusty wind. Or even providing emergency power during the event of an outage (examples already seen during the Texas deepfreeze this year). And this is just the stuff we can see now.
3. The whole argument of “energy use efficiency” misses the point. Even if fossil fuels were 100% efficient, they still produce greenhouse gases, SOx and NOx, particulate matter and air quality pollutants to surrounding communities, and leave huge brownfields where the power facilities are located to be cleaned up by taxpayers. They also come with lovely supply chain and geopolitical concerns all throughout their extraction, refinement, and transportation as well.
In summary, why in heaven do we power our vehicles and homes from dirty crap that comes from Venezuela, Russia, Saudi Arabia, and pollutes our soil and countryside when we can do it from the wind in Nebraska and sunshine in Arizona? The grid is getting cleaner every day and the building sector needs to get wise about carbon. I can’t see why any new residential building in America should get a new gas line installed. After all, 2050 is only 29 years away.
Thanks so much and love the show.
Question 1: How can I make sure the balcony of my porch is solid and protected from rot?
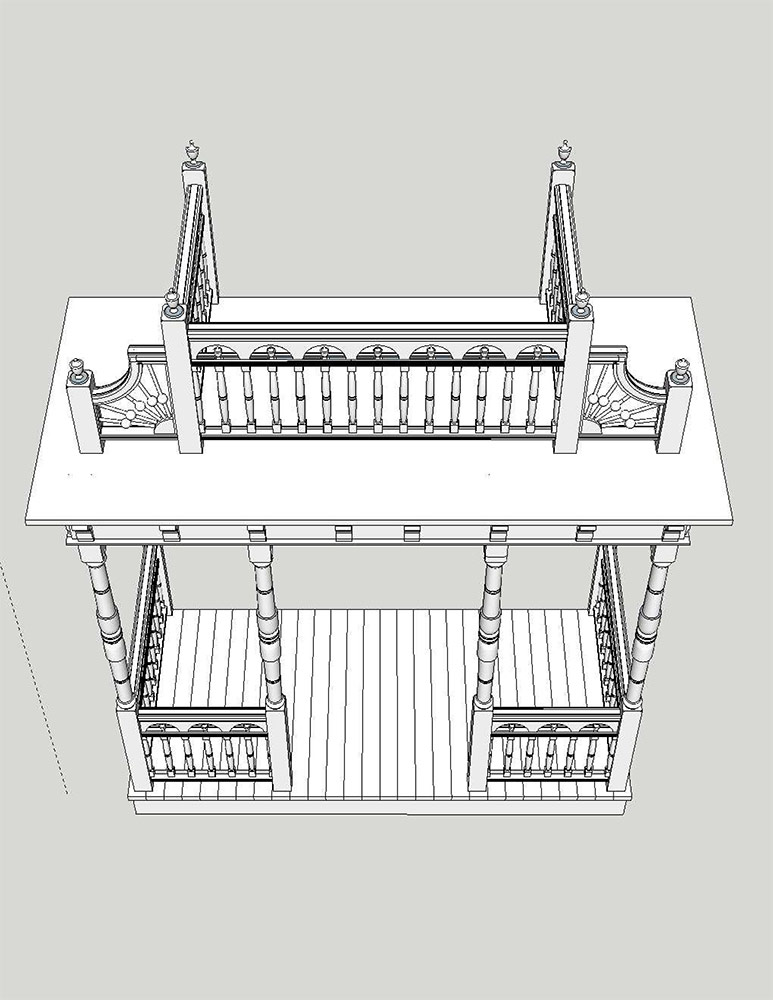
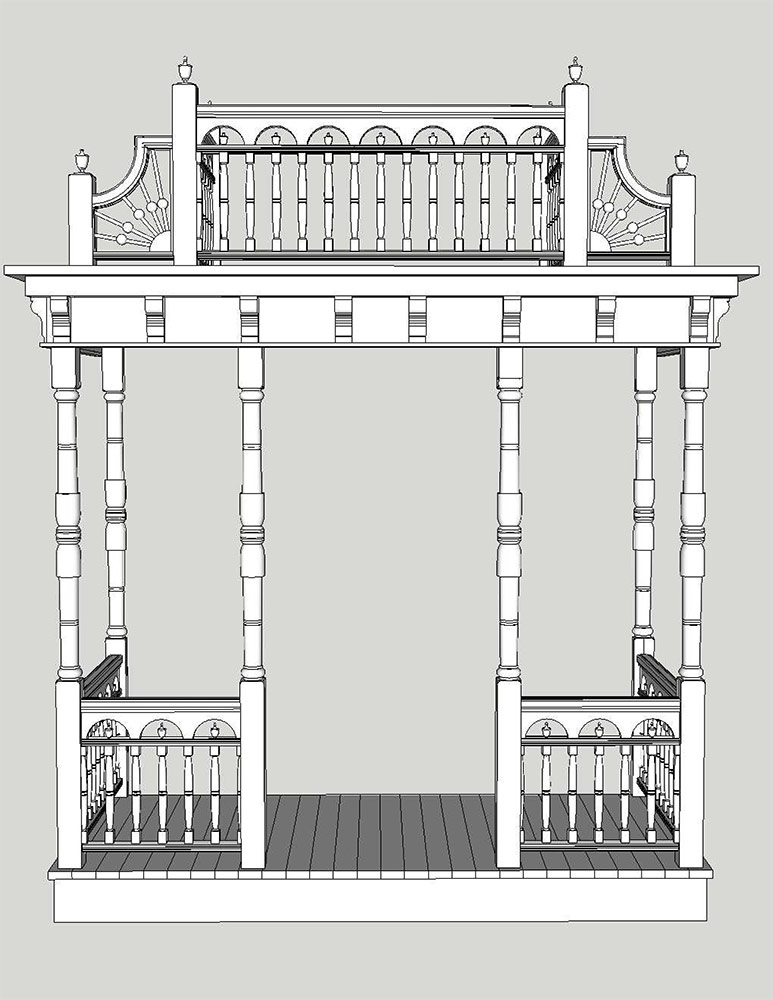
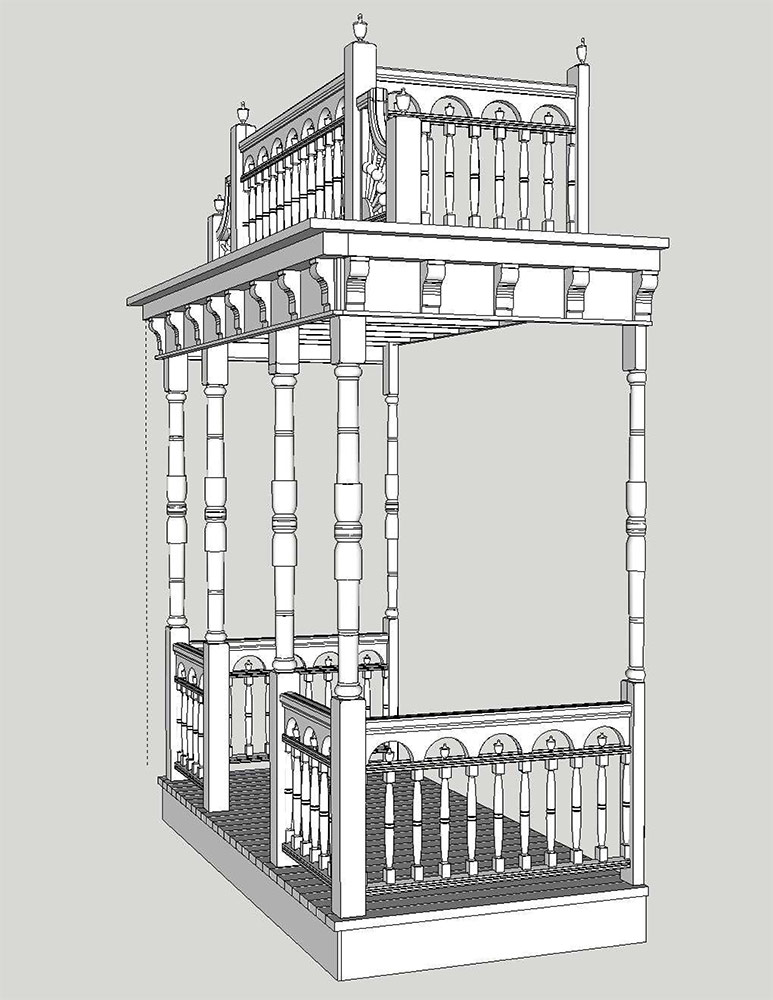
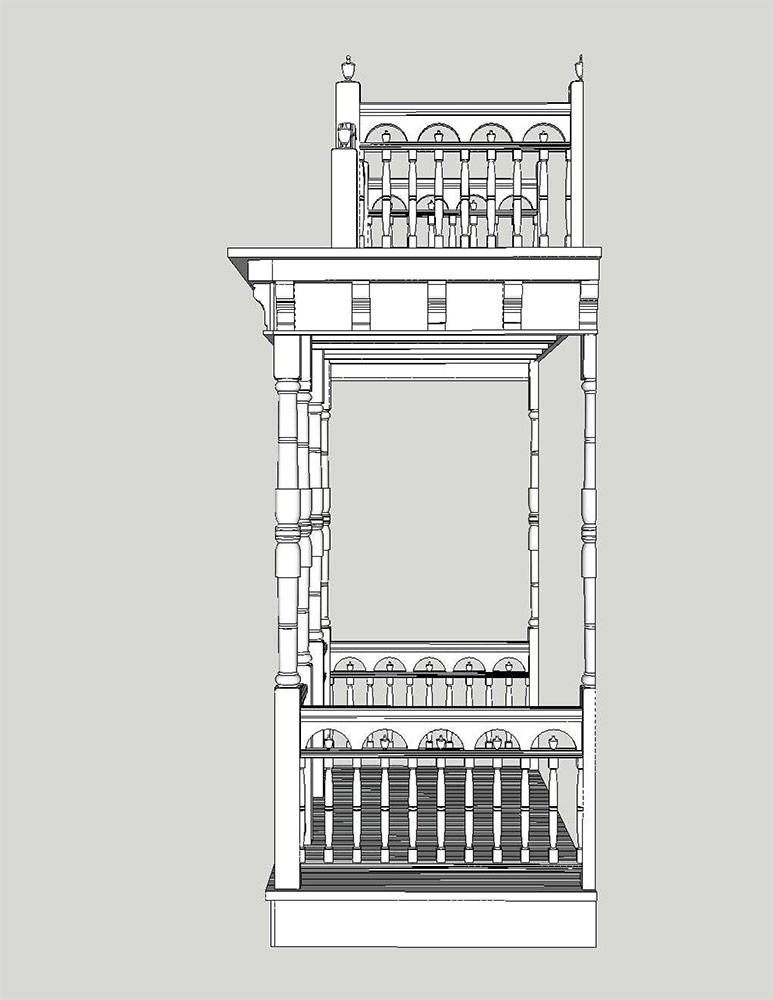
Alex from La Prairie (QC) writes: Hello! I listened to many FHB podcasts, but unfortunately not all of them. Sorry if my question is redundant. The question relates to my project of rebuilding the front porch of the house as it was a century ago, but with today’s best techniques. As you can see on the attached drawings, the lower deck (gallery) will have a tongue and groove pine or cedar floor and the upper deck (balcony) will have a fiberglass floor. Otherwise, everything will be built out of white pine.
My concern is about anchoring the post on the balcony floor. I really want it to be solid and protected from rot. I am not a fan of toe nailing so I thought maybe using a lag bolt from under the fiberglass slab. When I install wood columns on a deck, I usually insert a one-inch piece of white cedar between the base of the column and the floor to prevent rot. I may do the same for the posts. But maybe there are better solutions. What do you suggest? Thank you and keep the good work!
 |
 |
 |
 |
 |
Yes, this is our old house that I slowly try to restore. Thanks to my girlfriend’s patience and understanding J
All pieces will be white pine, except the upper deck floor (probably fiberglass) and maybe the lower deck floor (probably white cedar). The post and columns will be laminated. When you say waterproof, is this a liquid sealant or a membrane?
Thank you for your interest!
Related Links:
Question 2: How can I modify my hollow-core doors to match my 2-panel Shaker style doors?
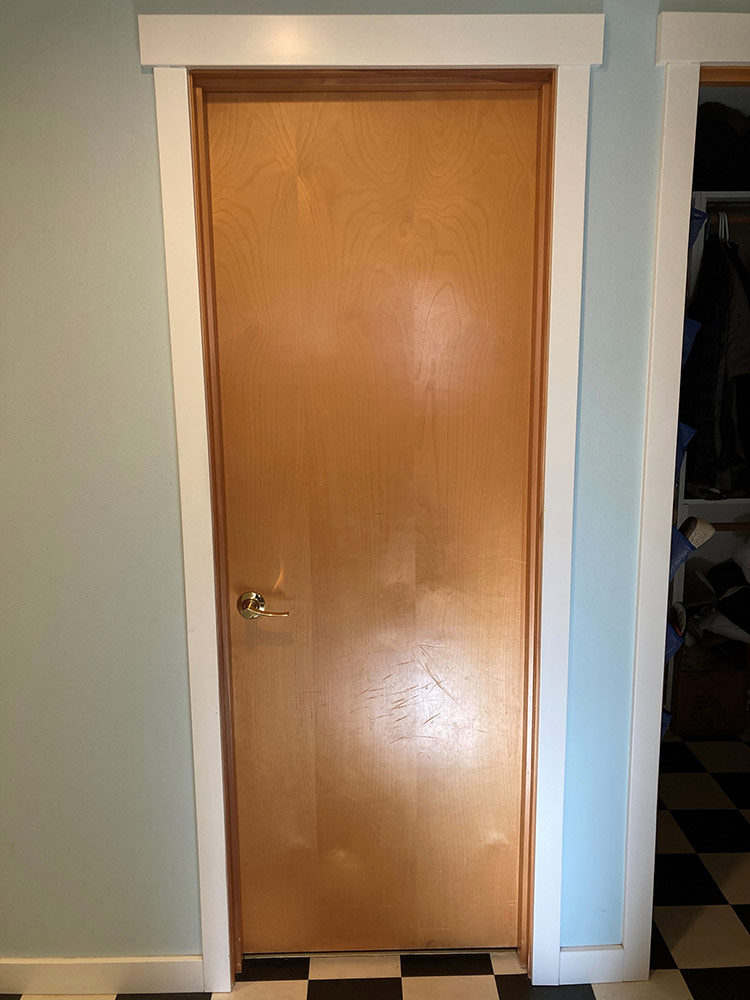
Wayne writes: First, great job on the podcasts. I am a novice woodworker. However I have built fences,/gates, decks, build-in open bookcases, inset cabinet doors/drawers, overlay cabinet doors/drawers, mantels, interior/exterior door and window trims. I have a 1997 bungalow style house with clear finished hollow core doors. Sizes range from 1’-6” linen closet door to 2’-6” bedroom doors. In 2012 I added a 2 story addition using pre-primed 2 panel shaker style doors. I want to modify each existing door to match 2-panel style and rails doors in the addition.
I have seen online how to cut the doors faces with a track saw to create the 4-sided openings for the top and bottom panels.
I am stumped as how to finish the perimeter of the recesses on 4 sides of the new stiles and rails. I don’t want the modifications to be visible. Finished doors will be prepared and painted white to match the addition doors. Thank you, Wayne
 |
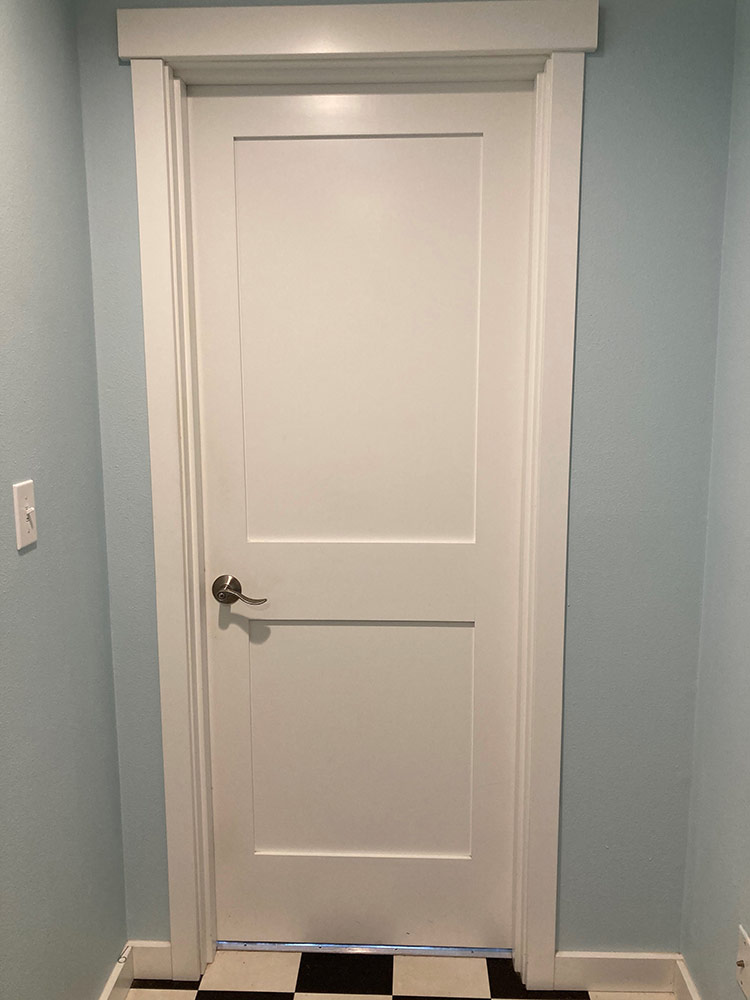 |
Good morning from the SUNNY PNW, Yes, my original intention to modify both faces to stile and rail. The existing doors are hollow core with a honeycomb cardboard core. That is my assumption. I have also thought about faux painting each face to give the look and feel of stile and rail. Creating a shadow impression.
My shopping list is :
Five 2’-4” x 6’-8”
Two 2’-0” x 6’-8”
Two 2’-6” x 6’8”
One 2’-8 x 6’-8”
One 1’-6” x 6’-8”
Modifying the existing doors deleted the need to perp the doors for 1 pair of hinges and latch/privacy sets.
I still need to paint the existing frames to match doors.
Related Links:
Question 3: What is the best way to to make changes to load-stiffening beams and posts in my basement ceiling without losing the existing support?
MacoBuilds from FHB Forum writes: I’m planning to renovate the basement of my attached, 3-story townhouse. My goal is to create an open layout room in the back third of the basement. The building was built 100 years ago and is 20×60 ft. The first floor (basement ceiling) is supported by 2×8” joists (rough sawn, true dimensional) that run perpendicular to the length of the building, spaced 16” oc. These rest on thick sidewalls made of rubble stone. They also rest on a 6×8” beam (rough sawn, true dimensional) that runs down the center of the building. The beam is pocketed into the front & back walls of the building and is supported by steel posts. Starting from the front of the building, the posts are spaced about 5.5 ft apart. But the last post is about 15 feet away from the back wall. The back section of the beam is supported by a cinder block wall which is part of the existing boiler room.
I aim to relocate the boiler room, and remove the beam, posts, and cinderblock walls in the back 20 feet of the house. An architect I spoke with told me the beam and posts are load stiffening, not load bearing. But the support lost by removing them will need to be replaced. After 100 years, I see no defection in the basement ceiling and I would like to keep it that way. I’d also like to preserve as much headroom as possible down there.
It seems like there are a few ways to approach this and I am wondering if anyone here has any experience or advice with any of these methods. Because of the thickness of the sidewalls, the joist span (width of the room) I am trying to support is 18 feet. The length of the room (part of beam I am removing) Is 20 ft.
Method 1: (Architect recommendation) Sister the existing joists with 1 3/4 x 9 1/4 LVLs (i.e. Boise Cascade Versa-LAMs). This seems like a relatively clean solution, but I do wonder how well this would hold up compared to the existing beam, posts, and cinder block wall.
Method 2. Replace the section of wood beam with a 20 ft steel beam. I’m not sure the exact size of the beam that would be needed yet, but it would definitely cut into the head room.
Method 3. Replace the section of wood beam with a recessed LVL beam. This would entail making temporary walls, cutting out the middle sections of the existing joists, fitting the new LVL beam between them, and then attaching the cut ends of the joists to the side of the new beam with joist hangers. If I’m reading the tables correctly, this LVL beam would have to be at least 7 x 18” to span 20 ft. I’m guessing that is larger than the steel beam that would be needed, but it would also be recessed 8” so likely would cut into headroom less. It would also be a lot easier to work with than a steel beam. But doesn’t this put a lot of weight on the joist hangers?
Maybe there are other methods I haven’t thought of. Any advice would be appreciated.
Related Links:
- Steel with Wood Framing?
- When Wood Falls Short, Steel I-Beams Do the Trick
- How to Build a Temporary Brace Wall
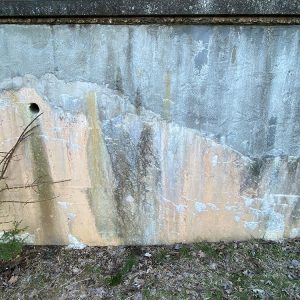
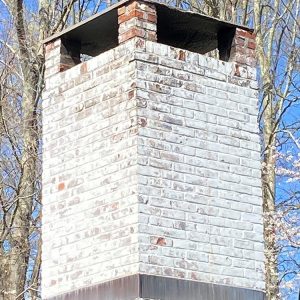
Question 4: What paint can I use to improve the aesthetics of my unsightly concrete foundation and brick chimney that won’t create moisture problems?
Chris in Connecticut writes: I’d like to make my unsightly concrete foundation wall and brick chimney more attractive. What kind of paint would you recommend? Would painting or sealing them trap water or create other problems? Thanks in advance for your advice.
 |
 |
End Note:
Check out our Webinars!
Visit the Taunton Store • Magazine Index • Online Archive • Our First Issues • All Access
Help us make better episodes and enter for a chance to win an FHB Podcast T-shirt: www.finehomebuilding.com/podcastsurvey

If you have any questions you would like us to dig into for a future show, shoot an email our way: [email protected].
If we use your question we’ll send you a FHB Podcast sticker!
FHB Podcast T-shirts!
Represent your favorite podcast! Available in several styles and colors. Made from 100% cotton. Find the Podcast t-shirt and more cool products in the Fine Homebuilding Store.
This episode of the Fine Homebuilding podcast is brought to you by Benjamin Obdyke.
The future is here. Benjamin Obdyke has launched the first self-adhered water-resistant-barrier that also incorporates a true gap for drainage. HydroGap SA is the ideal product to create an air-control layer in the wall assembly, while also providing a path to remove pesky water infiltration. Backed by an unmatched 20 year system warranty, Benjamin Obdyke’s Air Barrier Drainable Housewrap System incorporates HydroGap SA WRB, HydroFlash high-performance flashing options, and more. Request a sample today at benjaminobdyke.com.
Also brought to you by BILCO.
Finishing your basement is the fastest and least expensive way to add living space and value to your home. BILCO basement doors and window wells add light, ventilation, and code compliant emergency egress to lower level living areas, making them as warm, safe, and comfortable as any room in the home. Basement doors are available with a factory-applied powder coat paint finish in a number of standard colors to compliment any home. To learn how to get more out of your basement with BILCO products, visit BILCO.com.
And by BUILDBOOK.
A lot of construction pros have a common problem; your construction management software is either non-existent, or it is too slow and too complex. It shouldn’t be bogged down with complicated features that you have to attend an academy to learn how to use. You need software you can start using DAY ONE without training… That is faster and more reliable than your notepad. That allows you, your team and your clients to always know what’s getting done and when. And your software should reduce stress, not increase it. The solution? BuildBook.
BuildBook is built for today’s modern builder with everything you need, nothing you don’t. Whether you’re a one man operation or a business with a large crew, BuildBook has plans to fit your budget. No nagging sales calls, tricky upsells or hidden fees. Head over to BuildBook.co and sign up for a free 10-day trial — and don’t forget to mention that you heard about them on the Fine Homebuilding podcast.
Fine Homebuilding podcast listeners can now get 20% off anything in the Taunton store, including Insulate & Weatherize.
Use the discount code FHBPODCAST to take advantage of this special offer.
We hope you will take advantage of a great offer for our podcast listeners: A special 20% off the discounted rate to subscribe to the Fine Homebuilding print magazine. That link goes to finehomebuilding.com/podoffer.
The show is driven by our listeners, so please subscribe and rate us on iTunes or Google Play, and if you have any questions you would like us to dig into for a future show, shoot an email our way: [email protected]. Also, be sure to follow Fine Homebuilding on Instagram, and “like” us on Facebook. Note that you can watch the show above, or on YouTube at the Fine Homebuilding YouTube Channel.
The Fine Homebuilding Podcast embodies Fine Homebuilding magazine’s commitment to the preservation of craftsmanship and the advancement of home performance in residential construction. The show is an informal but vigorous conversation about the techniques and principles that allow listeners to master their design and building challenges.
Other related links
-
- All FHB podcast show notes: FineHomebuilding.com/podcast.
- #KeepCraftAlive T-shirts and hats support scholarships for building trades students. So order some gear at KeepCraftAlive.org.
- The direct link to the online store is here.


