Podcast 352: Rotten Basement Walls, Conditioned Shops, and Air-Sealing a ’60s Ranch
Patrick, Rob, and Brian hear from listeners about cool roofs and acoustics before taking questions on wall assemblies for basements, conditioning a woodshop, and air-sealing with liquid WRB.
Follow the Fine Homebuilding Podcast on your favorite app. Subscribe now and don’t miss an episode:
 |
 |
Help us make better episodes and enter for a chance to win an FHB Podcast T-shirt:
www.finehomebuilding.com/podcastsurvey
Kathryn writes in about the utility grid, the emissivity of roofing, and finding good contractors. Brian talks about material costs in California. Anna describes her bathroom renovation. Scott explains the two types of sound control. Jay needs a fix for his wet basement wall. Daniel asks about partially conditioning his new shop space. Grant wants to air-seal with a spray-applied WRB on the inside.
Editor Updates:
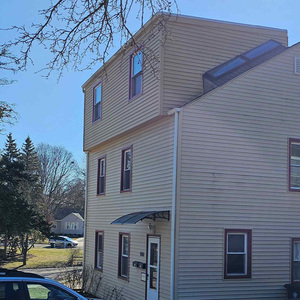
- Brian’s condo
- Rob’s pool
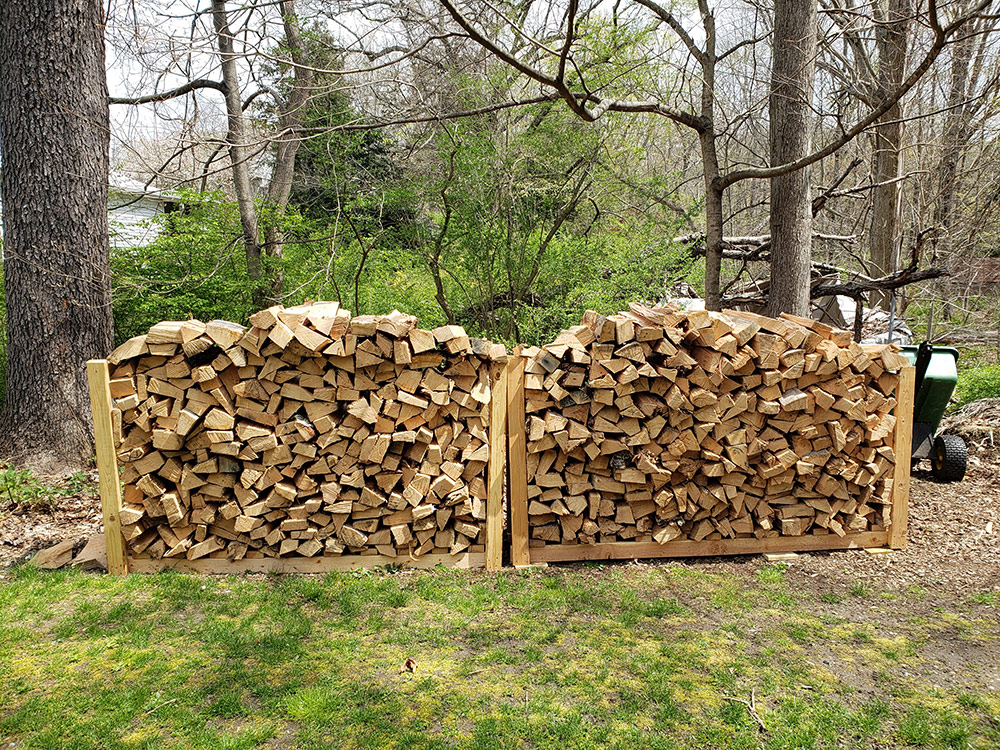
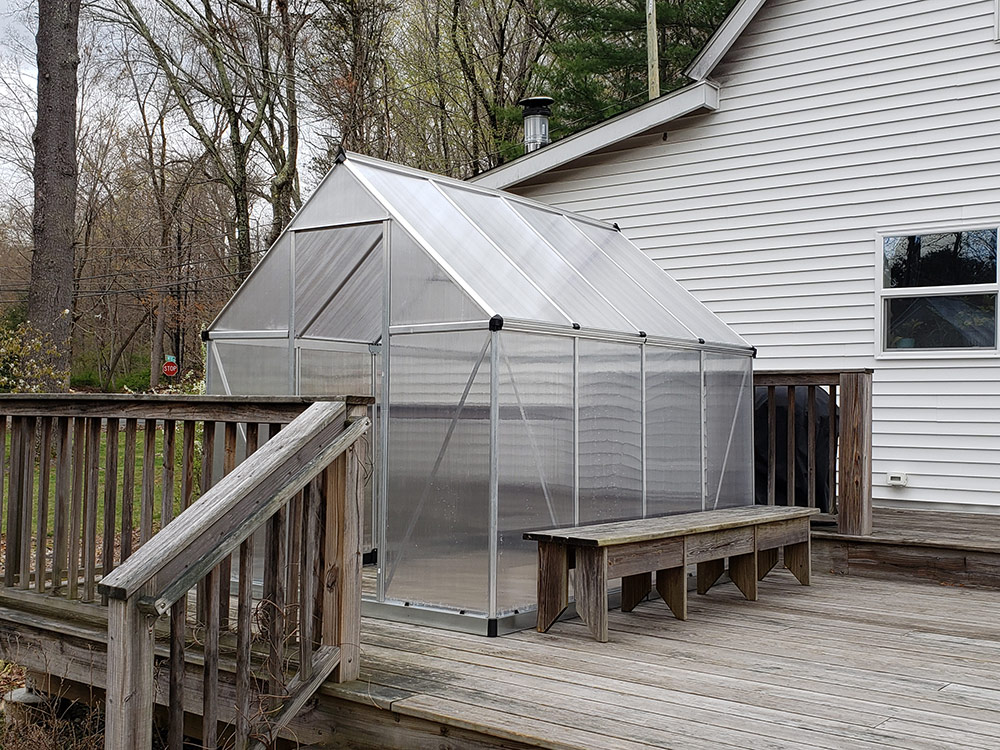
- Patrick’s log splitting and greenhouse
 |
 |
Listener Feedback 1:
Kathryn writes: Dear FHB Podcast, I was listening to episode 344 and kept wanting to chime in over and over. I hope you will permit me my commentary. I apologize for any lack of editing as I’m pressed for time.
I agree with the letter writer who commented that energy efficiency isn’t a great reason to switch your oven and range. He’s correct that grid electricity has to consume fossil fuels to create electricity, which is then used in an oven, so there’s an additional energy conversion step in electrical ovens that natural gas ovens and ranges don’t have.
However, when it comes to the cooktop, induction is actually more efficient than you might think because it heats the pan directly, rather than heating a gas only some of which heats the pan. That being said, cooking is such a tiny percentage of overall energy consumption in a home (about 1/10 of that for space heating or water heating) that it’s not a good reason to avoid electrifying everything else nor is it a good reason to keep your natural gas line.
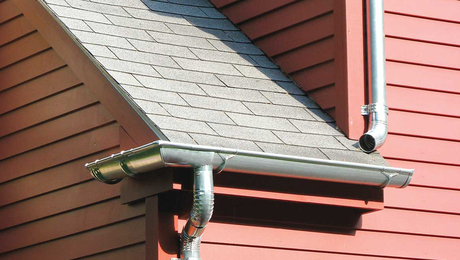
Another letter writer commented on the high temperatures of roofs due to solar heat gain. He’s totally correct that the roof temperature can get extremely hot (up to 150F, 65C), which makes insulating the roof more important than it would seem just by looking at the outdoor temperatures. This is why there’s an entire cool roof program which uses light colored paints to reduce roof temperatures. The science of this always blew my mind. There’s a reason that roofs (and LNG tanks) are light colors instead of shiny metal. Shiny metal has lower absorption of solar energy, but it has a lower emissivity of thermal energy. This means that white paint absorbs more energy than shiny aluminum, but it re-emits even more energy, which is why it remains cooler and why metal slides are so damned hot. (Solar energy is predominantly at a different wavelength than thermal infra-red, which is why this happens).
Finally, how can you find a good contractor without word of mouth? Try consumer’s checkbook (Checkbook.org) where subscribers rate contractors (and other service providers) and no one is paid for higher rankings. This is a service you have to pay for, but that’s what makes it hard to game.
Not a building performance expert,
Kathryn
PS. Let me know if you do find a way to get contractors who want to put lots of out-sulation on a roof. Also, I loved your article in the magazine about the code requirements for fire setbacks for solar panels.
Related Link
Listener Feedback 2:
Brian writes: Hi Podcast- I’ve been enjoying both of your podcasts, and in the Pro Talk, it has been especially interesting to hear from people, such as Sue Wadden, who so clearly really enjoy doing what they are doing. Keep up the good job!
A few weeks ago, you asked for listeners to report to you about the prices of construction materials. Yesterday I purchased some pressure treated lumber for a small deck I’m building. I don’t want to start-up the patio vs ground level deck discussion again, but it is a ground level deck and hence why I needed a bunch of PT.
I almost dropped the phone when the salesperson at the lumber yard said that I was over the $1000 price limit for phone orders! The deck is only 6′ x 20′, and I had already purchased the framing lumber separately. A single 20′ PT 2×4 is now $30.14 (plus 9.75% sales tax and 1% “lumber tax”, whatever that is). I also needed a couple of sheets of 1/2″ PT plywood- $88.37 each before the taxes! I’m located in El Cerrito, California, just outside of San Francisco, so I’m used to higher prices for most things, but this is getting quite ridiculous.
Listener Feedback 3:
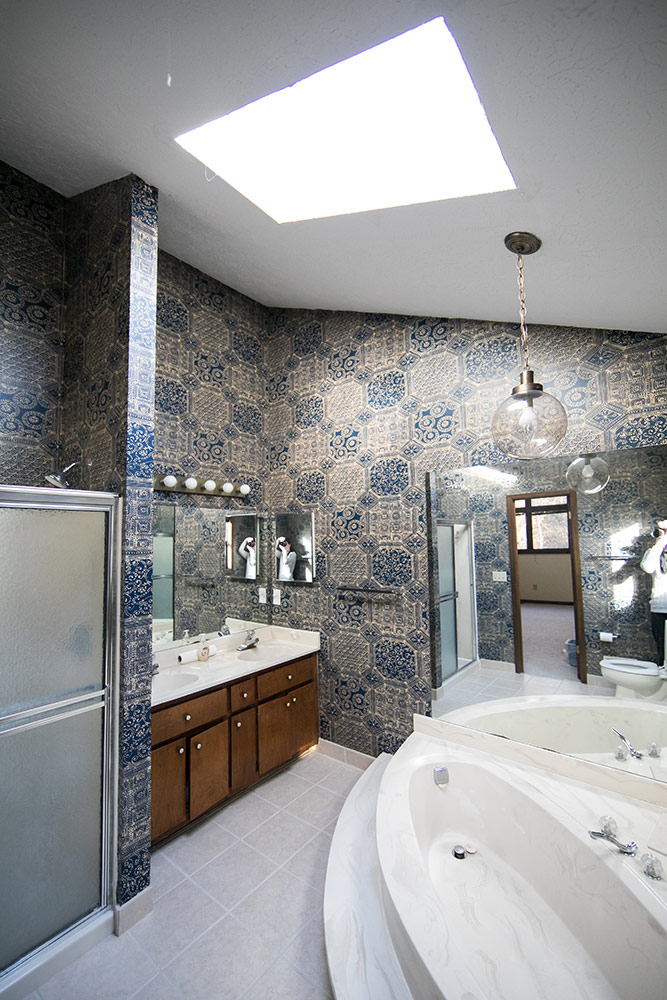
Anna writes: Hi everyone! FHB is my favorite podcast and I thought I’d share one of our 2020 projects! My husband and I renovated our master bath ourselves (DIY). I’m attaching before and after photo sas well as a link to a more in-depth gallery of images.
I heard you discussing on a past episode about curbless showers and wanted to give some insight into how our curbless shower install has performed. It has a linear tile-over drain and no door (just one 29” pane of glass to protect the vanity.)
The linear drain is against the back wall. Our situation was such that installing the drain at the entry was not an option as the shower is not in an alcove. We finished the project in November 2020, so we’ve had a bit of time to test the drain. We have not had any issues with it clogging (my husband and I both have long hair) and it is not very difficult to remove the drain for cleaning.
 |
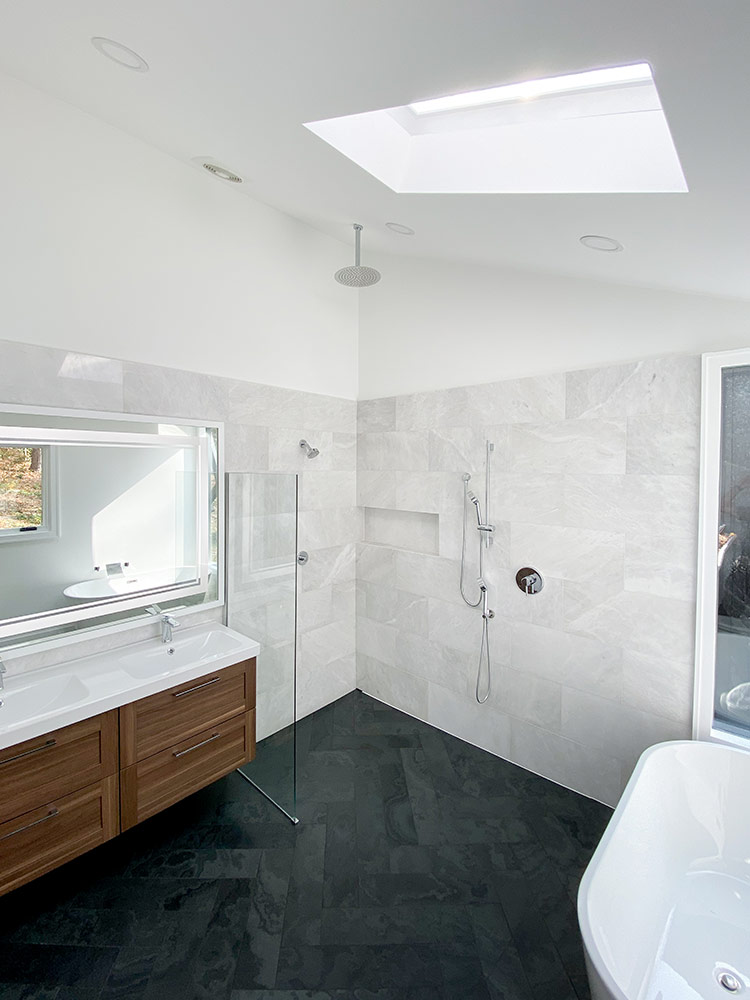 |
Though, you do need to be careful when taking out the cover as you could scratch surrounding surfaces if careless. I believe you had a listener have issues with a drain at the shower entry (I can’t recall the episode, my apologies) but ours, located against the wall, is functioning just fine without any problems. We clean the drain about once every 2-4 weeks, which only takes a few minutes.
We also have a freestanding tub next to (not inside) the shower (see concerns highlighted in FHB podcast episode 285). Like the podcast mentioned, I was also concerned about water possibly making its way down between the tub drain and the floor, where it shouldn’t be – so we just made sure the shower pan was pretty sizable (48”x60”) so water had the best chance to flow into the drain rather than the flat tub area. We utilized wall-mounted faucets, caulked under the tub (just the side facing the shower), and haphazardly caulked/waterproofed around the tub drain pipe as best as possible. As it is – water rarely even splashes near the tub and I honestly can’t see any bulk water getting under there with normal use.
We do not have a door to the shower – just one pane of glass to protect the vanity. In planning for this situation, we waterproofed the entire room (shower walls and entire floor including 4” up the adjacent walls behind the baseboards – which is probably excessive). In use, surprisingly, we don’t have much splash outside the shower area around the glass, even with a typically angled shower head. Though, we do have a rain head as well – which is usually recommended to reduce splashing in this type of situation. I was also worried that the lack of door/ open concept shower would mean that showering would be cold – it turns out, this is not the case, even with the high ceilings in the room.
We also installed an electric heated floor to aid in drying. I have tested how quickly the floor dries with and without the floor heat and it does make a difference in the dry time – going anywhere from 10-15 hours down to 2-3 hours to completely dry. The floor warming system is also a very nice addition for comfort … and our cat is also a fan! If you’d like us to share more about our experiences with lowering the floor or anything else about this project – we’d be happy to! 🙂
Related Links:
Listener Feedback 4:
Scott writes: In response to podcast number #346 I wanted to give my 2 cents on the “soundproofing discussion. I’m an Audio Visual Engineer and have some background in Acoustical design. First the term “soundproofing” is a misnomer often used by those who confuse two very different aspects of acoustics: Acoustical Isolation vs Acoustical Treatment. In the podcast it seemed Kiley was referring to the later and Patrick the former.
Acoustical Isolation is concerned with the prevention of sound from leaving or entering a space. As this building is out in the country, sound leaving the space maybe isn’t a concern, unless they are actually recording and then they might be concerned without outside noise being captured, such as a truck driving by, dogs barking etc. Mechanical decoupling, mass loading and extreme air sealing are all involved. Some basic results can be achieved with careful air sealing, mineral wool insulation, and double layered drywall with green glue in between. After that things get difficult and costly, especially with low frequencies like the rumble of a truck driving by.
Acoustical Treatment deals with how sound propagates within a space, i.e. how does the room sound? Is there low frequency build up or harsh slap back echo? Treatment is a bit easier to deal with and very DIY-able. A easy approach is to use 2″ rigid fiberglass panels like Owen Corning 703. Attach drywall corner beads to the edges and wrap in a breathable fabric like muslin and hang them on the walls with a 2″ air-gap behind them. The air-gap increases low frequency absorption and makes them behave more like 4″ panels. If low frequency build up is problem, block off the corner of the rooms with additional panels and pack some mineral wool insulation behind them. If you’re framing in the interior of the space, making the walls not parallel is a huge bonus. Think of standing directly perpendicular to a wall and throwing a ping pong ball at it, it comes right back at you. If the wall is splayed the ball will deflect in a different direction and thus loss a lot of energy by the time it gets back to you. Acoustical theory and treatment can be a rabbit hole, but basic efforts can get some pretty good results. Also, that egg crate foam, even the “Acoustical” stuff is really only useful for high frequencies, the rigid fiberglass is a far superior solution.
An important note: sound treatment typically does next to nothing for isolation. You can treat the inside of a room to a great degree, but it will not prevent sound from leaving or entering that space. Another important note: Still waiting on my FHB sticker from previously aired questions, my bandsaw is filled up but there’s plenty of space left on my jointer. 🙂
Related Links:
Question 1: How Should I waterproof this exposed stone foundation?
Jay from Atlanta writes: Hi FHB Podcast, Really appreciate what all of you do. Have listened to all 300+ hours of the show and don’t think I have heard my situation brought up on any of the “fine air-sealing” podcast episodes. House is located in Atlanta, GA and was built in 1979 with the (then) popular concept of a vented crawlspace. The house has had a number of renovations over the years…the one I am writing about today was completed in 1991.
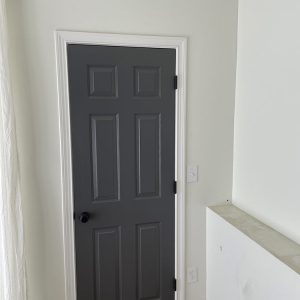
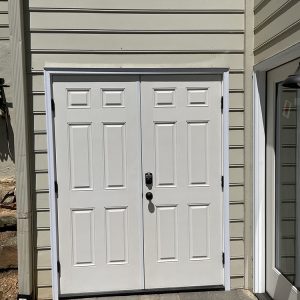
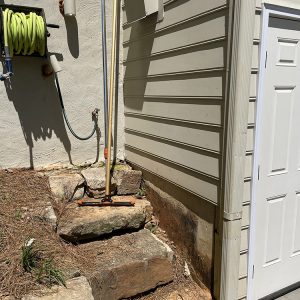
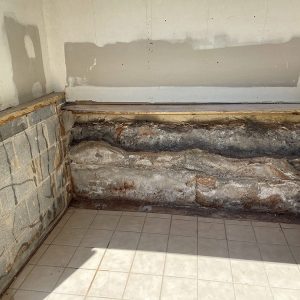
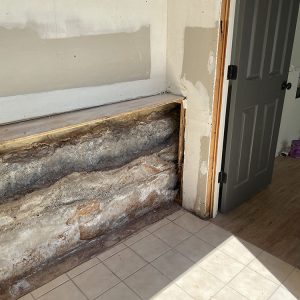
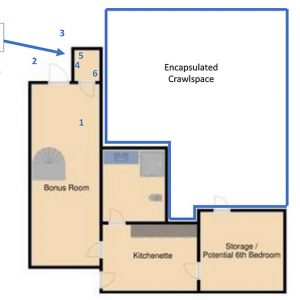
We have lived in this house for 3 years and last year decided to encapsulate the crawlspace with 20 mil plastic, 2 inches of closed cell, and added a dedicated dehumidifier. This significantly changed the comfort of the home. The 1991 addition finished out space in a walk out basement to a pool in the backyard. There was a “cedar” closet (i.e. 90’s Cedar Flake Board) in the basement that had two outside walls. Recently we decided to turn this indoor closet into an outdoor closet for all the kid/pool stuff by adding double doors to the outside and we are planning to close up the existing door into the house. (pictures attached to help)
 |
 |
 |
 |
 |
 |
 |
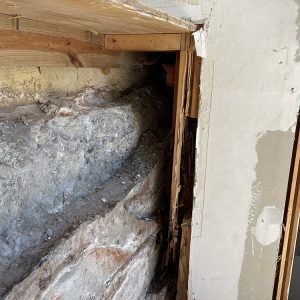
I had seen some water damage in the back corner of the “cedar” closet but hadn’t ever experienced water/wet conditions over last 3 years so figured we’d see what was behind it when I updated the closet. While ripping out the “cedar” I was delighted to find drywall behind it in great condition…. I was cruising for a quick project. Then I opened up the bottom section of the closet which had a slight bump out for foundation and found significant mold, rot and bugs. Fiberglass bats were used and the 2×4 framing was crumbling from rot. This bump out continues into the finished part of the basement and is one large cavity that I now know is full of mold/rot.
Since this basement addition was on the original exterior side of the foundation, there were few areas for HVAC contractors to punch through cinder blocks for supply vents, but they found a spot in this closet to add a supply. Thinking that between the original vented (humid) crawl space, conditioned air in the closet and the large temperature swings here in GA…. there was a fair amount of vapor drive over the last 30 years that led to the mold/rot situation.
I have attached numbered pictures and a floorplan layout…. need some help/guidance thinking through what to do now that I have encapsulated on the other side of this wall.
Two questions:
1) How do I treat this foundation before putting up new sheet rock? Can I do closed cell foam on this section of foundation in the closet and then box it in as it was previously done? If not, what do you recommend?
2) How should I address ventilation in this soon to be outdoor closet…. should I keep some supply air flowing to this closet? I was planning to move the HVAC Supply pointing into the “bonus room” but could split between closet and bonus room.
Appreciate any thoughts and keep up the good work.
Related Links:
Question 2: How should I air-seal and heat my detached garage in climate zone 6?
Daniel in Montana writes: First off, I wanted to say how much I appreciate the podcast. I’m a desk jockey in my twenties that jumps for any excuse to build something myself, and I’ve learned so much from listening to all your podcasts. I especially enjoy hearing about your own projects and how I’m not the only one that takes forever to finish a project!
I am building a 16×30 detached garage with a 10 foot ceiling this summer in Montana, climate zone 6. My plan has been to frame out the back 8-10 feet, to heat and insulate that as my woodshop to keep my tools from rusting. I’ve been losing sleep over a couple details, and I was wondering if you could help me out.
I was looking at using ZIP sheathing to get a quality air-seal around the exterior. However, because I’m not insulating (or drywalling) the ceiling above the non-work shop section, any method of roof venting will negate any air sealing I do on the exterior. Would this be a good candidate for an insulated, unvented, hot roof (asphalt or metal)? Or should I just plywood + Tyvek the sides and not worry about air-sealing. I’m hoping my wife decides she wants her car to be in a heated garage after the first winter, so we can drywall and insulate the whole building, but she isn’t going for it at this point.
I also haven’t settled on a heating system. I am fairly enamored with in floor radiant via electric on demand water heater, but am wondering if I should just keep it simple and do electric infrared radiant panel or tube heaters (natural gas comes to the house, but I would prefer not to have it plumbed to the garage). We live a ways out of town and the only inspection they do is for plumbing and electrical, but I still want to follow best practice.
Details, if it’s helpful:
Foundation will be contracted out, mono-slab pour 16-24 inches at the edges, with 2 inches of foam underneath. I’ve been mulling a frost protected shallow foundation, but all of the contractors in the area that I’ve spoken to say not to worry about it.
I’ll have two foot overhangs at the eves and gables (outriggers for the gables) from pre-fab trusses, 4/12 roof. I may forgo exterior insulation, though I haven’t ruled it out, especially if I do zip. Siding will likely be hardie plank or horizontal steel (our house is being resided with seamless steel this summer, so whatever I use I would like to try to match the 8 inch profile of that).
I would like to try my hand at a ventilated rainscreen, either venting through the soffit and up or through the frieze board. This may be overkill, and I might just settle on a drainable house wrap. I’ll be doing mineral wool batts in the 2×6 walls of the workshop, drywalled and blown in cellulose on top. I apologize for the length of this essay, but I appreciate your consideration for my questions, and look forward to some sage wisdom!
Related Links:
Question 3: What’s the best way to deal with moisture management when renovating an old brick-clad house?
Grant writes: Dear FHB team, We have bought our first stand-alone home (leaving the condo) a 1960’s brick ranch in PA zone 4/5, and we are going to be renovating. Even though Mom always said a little knowledge is dangerous I have gone down the building science rabbit hole. It all started with some harmless “Build show” videos, to Lunsdrum, to Lstiburek (have you heard the one about the Quebecois?), and now to FHB.
My goal is to improve this home’s air-sealing (not so much improve, as introduce it to the concept), followed by insulation.
Just to paint a picture of the current state of things…
– attached living space and garage are directly connected via an open attic
– insulation in the attic are batts laying on top of the ceiling’s drywall.
– dampness in the basement from an attached underground room, which is out beyond the foundation and therefore roof.
– the exterior is in good condition. brick, with an air gap and sheeting, all look good.
The basement dampness issue will hopefully be dealt with via bitumen wraps and/or dehumidifiers. Regarding the air-sealing. I am leaning towards a liquid WRB (e.g. polywall). Go down to the studs and sheeting, and use the polywall on everything on the interior: bottom plates, top plates, sheathing, etc. The interior will look like a blue box. Add insulation, drywall and done. Forget the open attic, close it. Air sealing the drywall ceiling is a Sisyphean task. If venting the roof decking is needed… put furring strips on the underside of the roof decking, followed with rigid poly, polywall again, and do this down to the knee wall. If venting is needed, add an exhaust fan to the gable vent, or hrv/erv. The liquid WRB seems to solve vapor permeability, air sealing, etc for retrofits. I have not seen this approach mentioned or poo-poo’ed anywhere. Is this a bad idea, good idea, too wacky? Thanks for any feedback.
Related Links:
- How to Use a Spray-Applied Water-Resistive Barrier
- Air-Sealing 101
- When Sunshine Drives Moisture Into Walls
End Notes:
Check out our new 2021 FHB Houses:
Visit the Taunton Store • Magazine Index • Online Archive • Our First Issues • All Access
Help us make better episodes and enter for a chance to win an FHB Podcast T-shirt: www.finehomebuilding.com/podcastsurvey

If you have any questions you would like us to dig into for a future show, shoot an email our way: fhbpodcast@taunton.com.
If we use your question we’ll send you a FHB Podcast sticker!
FHB Podcast T-shirts!
Represent your favorite podcast! Available in several styles and colors. Made from 100% cotton. Find the Podcast t-shirt and more cool products in the Fine Homebuilding Store.
This episode of the Fine Homebuilding podcast is brought to you by Benjamin Obdyke.
The future is here. Benjamin Obdyke has launched the first self-adhered water-resistant-barrier that also incorporates a true gap for drainage. HydroGap SA is the ideal product to create an air-control layer in the wall assembly, while also providing a path to remove pesky water infiltration. Backed by an unmatched 20 year system warranty, Benjamin Obdyke’s Air Barrier Drainable Housewrap System incorporates HydroGap SA WRB, HydroFlash high-performance flashing options, and more. Request a sample today at benjaminobdyke.com.
Also brought to you by BILCO.
Finishing your basement is the fastest and least expensive way to add living space and value to your home. BILCO basement doors and window wells add light, ventilation, and code compliant emergency egress to lower level living areas, making them as warm, safe, and comfortable as any room in the home. Basement doors are available with a factory-applied powder coat paint finish in a number of standard colors to compliment any home. To learn how to get more out of your basement with BILCO products, visit BILCO.com.
And by BUILDBOOK.
A lot of construction pros have a common problem; your construction management software is either non-existent, or it is too slow and too complex. It shouldn’t be bogged down with complicated features that you have to attend an academy to learn how to use. You need software you can start using DAY ONE without training… That is faster and more reliable than your notepad. That allows you, your team and your clients to always know what’s getting done and when. And your software should reduce stress, not increase it. The solution? BuildBook.
BuildBook is built for today’s modern builder with everything you need, nothing you don’t. Whether you’re a one man operation or a business with a large crew, BuildBook has plans to fit your budget. No nagging sales calls, tricky upsells or hidden fees. Head over to BuildBook.co and sign up for a free 10-day trial — and don’t forget to mention that you heard about them on the Fine Homebuilding podcast.
Fine Homebuilding podcast listeners can now get 20% off anything in the Taunton store, including Insulate & Weatherize.
Use the discount code FHBPODCAST to take advantage of this special offer.
We hope you will take advantage of a great offer for our podcast listeners: A special 20% off the discounted rate to subscribe to the Fine Homebuilding print magazine. That link goes to finehomebuilding.com/podoffer.
The show is driven by our listeners, so please subscribe and rate us on iTunes or Google Play, and if you have any questions you would like us to dig into for a future show, shoot an email our way: fhbpodcast@taunton.com. Also, be sure to follow Fine Homebuilding on Instagram, and “like” us on Facebook. Note that you can watch the show above, or on YouTube at the Fine Homebuilding YouTube Channel.
The Fine Homebuilding Podcast embodies Fine Homebuilding magazine’s commitment to the preservation of craftsmanship and the advancement of home performance in residential construction. The show is an informal but vigorous conversation about the techniques and principles that allow listeners to master their design and building challenges.
Other related links
-
- All FHB podcast show notes: FineHomebuilding.com/podcast.
- #KeepCraftAlive T-shirts and hats support scholarships for building trades students. So order some gear at KeepCraftAlive.org.
- The direct link to the online store is here.


