FHB Logo Facebook LinkedIn Email Pinterest Twitter X Instagram Tiktok YouTube Plus Icon Close Icon Navigation Search Icon Navigation Search Icon Arrow Down Icon Video Guide Icon Article Guide Icon Modal Close Icon Guide Search Icon Skip to content
Subscribe
Log In
  • How-To
  • Design
  • Tools & Materials
  • Restoration
  • Videos
  • Blogs
  • Forum
  • Magazine
  • Members
  • FHB House
  • Podcast
Log In
Q&A Spotlight

Tracking Down the Cause of a Flooring Installation Gone Wrong

Why does the solid wood floor downstairs squeak everywhere while the flooring upstairs does not?

By Scott Gibson
  • X
  • facebook
  • linkedin
  • pinterest
  • email
  • add to favorites Log in or Sign up to save your favorite articles
A squeaky wood floor can be annoying. Readers offer their suggestions for the root cause of squeaks in one part of the house while flooring in another part of the house is trouble-free. Photo courtesy Fine Homebuilding.

Mopsy has been doing some work for a Vancouver, British Columbia, family with a pesky wood-flooring problem that he’d like to help them solve.

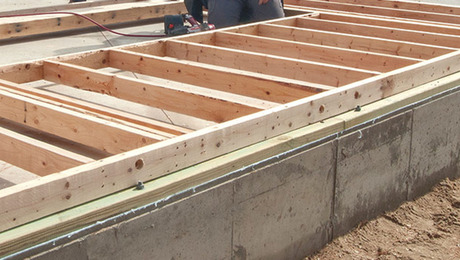
As Mopsy explains in this post in FHB’s Discussion Forum, the 3000-sq.-ft. house has two levels built over a 3-ft. crawlspace. As part of a whole-house renovation, Mopsy’s clients installed a new hardwood floor in the upper part of the house. The prefinished, 7-in.-wide hickory sat for two weeks before it was glued and nailed down.

“The end result was an installation that to this day has not peeped a sound,” Mopsy says.

But when it came time to install new flooring on the first floor, the results were not nearly as good. Once again, the installers used both glue (Titebond) and nails, dividing the floor into two phases a week or two apart.

“The whole main floor creaks,” Mopsy writes. “The area of least creaking is the first half that was installed. It does creak but not nearly as bad as the second half installed couple of weeks later. One cannot walk anywhere without the creaking. It sounds like large toothpicks snapping with every step!”

The flooring was installed just five days after it was delivered to the house, with all 2000 ft. stacked in the living room. The supplier has tried to blame low humidity (in the 40% range) and suggests waiting until summer to see what happens.

“Some spaces have begun to appear between boards around the home,” Mopsy writes. “A quarter can be stood on end in some places. In the kitchen, crumbs have more recently started to get between the boards.”

That original post dates from 2012, but recently an FHB reader took another swing at explaining the cause. Let’s have a look at this nearly decade-old saga.

First, what about the glue?

In the trouble-free part of the house, the installer used an adhesive called Fortane LD, a moisture-cured urethane adhesive that was applied with a square-notched trowel. When flooring was installed on the first floor, the glue was Titebond, which was applied in a zig-zag pattern with a pneumatic glue gun.

Is the choice of an adhesive part of the problem?

“I would never use tube glue to hold hardwood and if I did, it would be a product like [Loctite] PL Premium—a urethane glue,” Calvin says. “But full spread is a different subject than zigzag. There’s more contact with trowel down.”

In addition to questioning the adhesive, Calvin also wonders whether the location of ducts beneath the floor might be a contributing factor. “Is the crawl dry?” he asks. “Is there a moisture barrier put down?”

Although there are several varieties of Titebond glue, including one that’s troweled on, DanH points out that they are generally a hard glue and stiffer than typical construction adhesive. “Unless the particular stuff was different from this it would seem to be a poor choice for flooring where there must be some give.”

Cussnu2 thinks that if the glue came out of a tube in a fairly thick ribbon, the flooring would have to be worked around quite a bit in order to flatten out the bead and allow full contact between the flooring and the subfloor.

“My guess would be that the glue is serving as a spacer between the floor and the subfloor, allowing it to flex when it is walked on,” Cussnu2 says.

Did the installer check moisture level?

Calvin also asks whether the installer used a moisture meter to check the floor and the subfloor.

The moisture readings between the flooring and the subfloor must be relatively close, Calvin says. Wide differences can affect the flooring.

“Though most don’t, good flooring installers will check the content of the subfloor and the finished floor before work beings,” he adds. “That’s what an acclimation period is all about. Bring the new stuff in concert with the existing since you’re putting it right on top of it.”

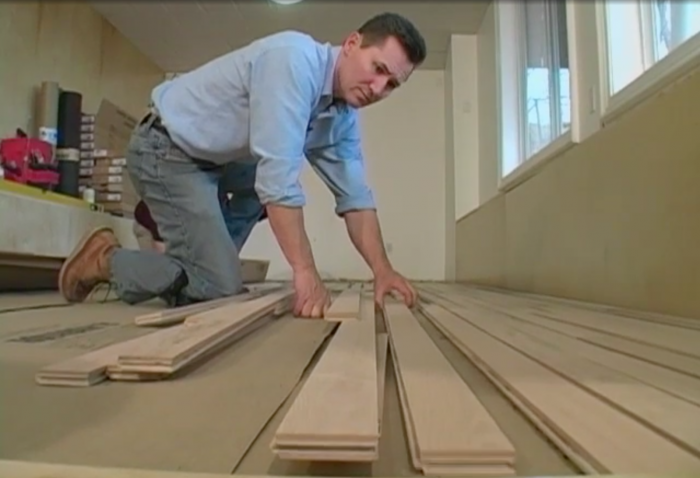
Mopsy is certain the installer never checked the moisture content of either material. The hardwood remained stacked and bundled for less than a week before the installation began.

Moisture readings should be taken on the subfloor, on the hardwood, and in a few spots on existing woodwork throughout the house, says Silvernails. Results should not vary by more than 2%. The hardwood should have been removed from packaging and stickered with a fan lightly circulating air around it.

“The slight cracks between boards is a definite sign that the wood was not fully climatized,” Silvernails says. “Sometimes this can take up to a month.”

The squeaks, he adds, are coming from boards that are moving up and down on a nail. “We run into a lot of problems such as this up here in Whistler, B.C.,” he says. “Wet winters and dry summers.”

Choose your subs wisely, adds IdahoDon. “It sounds like you have guys who don’t know what they are doing and your client is the loser,” he says. “Shame on the homeowners for not hiring the guy who did a good job the first time around. How many jobs of the new flooring guys did the homeowners visit that were similar to theirs? None. Was this most likely based on a low bidder getting the job? Yes. Stupid is as stupid does.”

A new theory emerges

That original thread left us with a couple of possible causes—the wrong adhesive, an adhesive that was applied incorrectly, or possibly a mismatch in moisture content between the flooring and the subfloor.

Just recently, an unnamed user (we’ll call him User-754) made another suggestion that could explain the widespread squeaking problem: the flooring itself. Apparently assuming that the floor is an engineered product with a layer of hardwood veneer on top and a core of plywood, User-754 suggests the two might be parting ways. He’s run into that problem himself.

“After a lot of back and forth, with the installers insisting it wasn’t their install that was the problem, but the floor itself, they came back to try to fix the problem with some spot-drilling and glue injection,” User-754 says.

They drilled through to the subfloor and injected glue, and also drilled just below the laminate surface and did the same thing. “Drilling and gluing to the subfloor did nothing but the partial did the trick. Turns out the top layer was delaminating after all. We ended up drilling into close to 20 boards and so far so good.”

Our expert’s opinion

Builder and remodeler Mike Guertin has these thoughts:

It’s always too late after wood flooring is installed to make repairs—especially with nail-down and glue-down systems. Any attempts short of removing the problem flooring and starting from scratch are rarely effective. And it’s difficult to pinpoint the root cause of a problem, whether it’s cupping, crowning, buckling, gapping, or squeaking and popping. There often are several contributing factors that alone may result in an annoyance but together lead to a complete failure—and others quoted here have done a good job of noting many of those factors. Without a thorough on-site evaluation we will never know what actually caused the gapping and popping problems in this house.

A highly skilled wood-flooring installer not only knows how to install flooring effectively, but also understands all of the variables that have to be considered—and addressed—before the first board is placed. We can’t install wood flooring the way it was done 20 or 40 or 60 years ago. The wood flooring products we install today are different, the subfloor is different, and the houses are different. I recommend that installers, both new and experienced, read the revised version of the National Wood Flooring Association’s (NWFA) “Wood Flooring Installation Guidelines.”  It’ll set you back $110, but will save much more than that by helping you avoid problems with an installation.

Here’s a list of the factors that I evaluate when selecting and installing a wood floor:

  • The flooring product. Is it compatible with the house, the seasonal temperature and moisture conditions in the house, and customer expectations? Wide-plank, live-sawn, or plain-sawn flooring isn’t a good choice in a leaky old house with cold winters and humid summers without air conditioning.
  • What is the floor system over: conditioned living space (second floor of a two-story home), or an unconditioned basement or crawlspace?
  • What is the subfloor, what condition is it in, and how is it fastened to the joists?
  • What is the joist spacing?
  • What is the direction of the flooring in relation to the joist direction?
  • What is the HVAC for the house and how is it operated over the course of a year?
  • What is the local climate?
  • What are the clients’ expectations?
  • What’s the likelihood that clients will follow occupancy requirements regarding space conditioning?

Check and compare site conditions to the manufacturer’s installation requirements and the NWFA manual. Don’t install the flooring unless all conditions are met. And document, document, document all conditions before and during installation. They include:

  • Moisture content of the subfloor
  • Moisture content of the wood upon delivery
  • Moisture content of the wood upon installation
  • Relative humidity of the house
  • Temperature of the house
  • Operation of the HVAC system several weeks before, during, and after installation

The flooring should be acclimated before it’s installed, which means placing it in the room with bundles opened and the flooring stickered to enhance airflow for the recommended period of time. Make sure to follow manufacturers’ recommendations on fasteners (including type, length, and spacing). Use the correct underlayment, and follow instructions on adhesive type and how it is applied. Allow the required spacing around the perimeter of the room to walls, thresholds, and other obstacles. Finally, plan for expansion and contraction joints.

Scott Gibson is a contributing writer at Fine Homebuilding and Green Building Advisor. Mike Guertin, an FHB editorial advisor, is a builder and remodeler in Rhode Island. Reader comments may have been edited for clarity.


RELATED LINKS

  • Video Series: Install Wood Flooring
  • 11 Wood-Flooring Problems and Their Solutions
  • Installing Strip Flooring

Sign up for eletters today and get the latest how-to from Fine Homebuilding, plus special offers.

Signing you up...

This site is protected by reCAPTCHA and the Google Privacy Policy and Terms of Service apply.
See all newsletters
See all newsletters
×

Get home building tips, offers, and expert advice in your inbox

Signing you up...

This site is protected by reCAPTCHA and the Google Privacy Policy and Terms of Service apply.
See all newsletters
See all newsletters

New Feature

Fine Homebuilding Forums

Ask questions, offer advice, and share your work

  • X
  • facebook
  • linkedin
  • pinterest
  • email
  • add to favorites Log in or Sign up to save your favorite articles

Log in or create an account to post a comment.

Sign up Log in

Become a member and get full access to FineHomebuilding.com

More Q&A Spotlight

View All
  • Leveling Foundation Walls
  • Tips on Ceiling Repair
  • Fixing Rotted Windowsills
  • Replace Rotten Boards in a Roof Overhang
View All

Up Next

Video Shorts

Featured Story

Tool Test: You Need a Drywall Sander

We tried out a range of rotary and random-orbit sanders to compare their dust collection, quality of finish, and user fatigue after hours of sanding.

Featured Video

A Modern California Home Wrapped in Rockwool Insulation for Energy Efficiency and Fire Resistance

The designer and builder of the 2018 Fine Homebuilding House detail why they chose mineral-wool batts and high-density boards for all of their insulation needs.

Related Stories

  • FHB Podcast Segment: Designing and Building an Efficient Slab-On-Grade Home
  • A Modern Texture With Historical Roots
  • The Twister
  • Mastering Floor Design and Construction: Tips from Industry Experts

Discussion Forum

Recent Posts and Replies

  • |
  • |
  • |
  • |
  • |
  • |
View More Create Post

Highlights

Fine Homebuilding All Access
Fine Homebuilding Podcast
Tool Tech
Plus, get an extra 20% off with code GIFT20

"I have learned so much thanks to the searchable articles on the FHB website. I can confidently say that I expect to be a life-long subscriber." - M.K.

Get home building tips, offers, and expert advice in your inbox

Signing you up...

This site is protected by reCAPTCHA and the Google Privacy Policy and Terms of Service apply.
See all newsletters
See all newsletters

Video

View All Videos
  • FHB Podcast Segment: Designing and Building an Efficient Slab-On-Grade Home
  • FHB Podcast Segment: Sealing a Floor Cavity in a Slab-on-Grade House
  • Podcast 606: Foam Slabs, Gaps in Click Flooring, and Board and Batten Rainscreens
  • Podcast 587: Members-only Aftershow—Basement Flooring
View All

Floors and Coverings

View All Floors and Coverings Articles
  • Mastering Floor Design and Construction: Tips from Industry Experts
  • What's the Difference: Linoleum vs. Vinyl
  • Keep Self-Leveler in Place
View All Floors and Coverings Articles

Fine Homebuilding Magazine

  • Issue 331 - June 2025
    • A More Resilient Roof
    • Tool Test: You Need a Drywall Sander
    • Ducted vs. Ductless Heat Pumps
  • Issue 330 - April/May 2025
    • Deck Details for Durability
    • FAQs on HPWHs
    • 10 Tips for a Long-Lasting Paint Job
  • Issue 329 - Feb/Mar 2025
    • Smart Foundation for a Small Addition
    • A Kominka Comes West
    • Making Small Kitchens Work
  • Issue 328 - Dec/Jan 2024
    • How a Pro Replaces Columns
    • Passive House 3.0
    • Tool Test: Compact Line Lasers
  • Issue 327 - November 2024
    • Repairing Damaged Walls and Ceilings
    • Plumbing Protection
    • Talking Shop

Fine Home Building

Newsletter Sign-up

  • Fine Homebuilding

    Home building tips, offers, and expert advice in your inbox.

  • Green Building Advisor

    Building science and energy efficiency advice, plus special offers, in your inbox.

  • Old House Journal

    Repair, renovation, and restoration tips, plus special offers, in your inbox.

Signing you up...

This site is protected by reCAPTCHA and the Google Privacy Policy and Terms of Service apply.
See all newsletters

Follow

  • Fine Homebuilding

    Dig into cutting-edge approaches and decades of proven solutions with total access to our experts and tradespeople.

    Start Free Trial Now
    • Facebook
    • Instagram
    • X
    • LinkedIn
  • GBA Prime

    Get instant access to the latest developments in green building, research, and reports from the field.

    Start Free Trial Now
    • Facebook
    • YouTube
  • Old House Journal

    Learn how to restore, repair, update, and decorate your home.

    Subscribe Now
    • Facebook
    • Instagram
    • X

Membership & Magazine

  • Online Archive
  • Start Free Trial
  • Magazine Subscription
  • Magazine Renewal
  • Gift a Subscription
  • Customer Support
  • Privacy Preferences
  • About
  • Contact
  • Advertise
  • Careers
  • Terms of Use
  • Site Map
  • Do not sell or share my information
  • Privacy Policy
  • Accessibility
  • California Privacy Rights

© 2025 Active Interest Media. All rights reserved.

Fine Homebuilding receives a commission for items purchased through links on this site, including Amazon Associates and other affiliate advertising programs.

  • Home Group
  • Antique Trader
  • Arts & Crafts Homes
  • Bank Note Reporter
  • Cabin Life
  • Cuisine at Home
  • Fine Gardening
  • Fine Woodworking
  • Green Building Advisor
  • Garden Gate
  • Horticulture
  • Keep Craft Alive
  • Log Home Living
  • Military Trader/Vehicles
  • Numismatic News
  • Numismaster
  • Old Cars Weekly
  • Old House Journal
  • Period Homes
  • Popular Woodworking
  • Script
  • ShopNotes
  • Sports Collectors Digest
  • Threads
  • Timber Home Living
  • Traditional Building
  • Woodsmith
  • World Coin News
  • Writer's Digest
Active Interest Media logo
X
X
This is a dialog window which overlays the main content of the page. The modal window is a 'site map' of the most critical areas of the site. Pressing the Escape (ESC) button will close the modal and bring you back to where you were on the page.

Main Menu

  • How-To
  • Design
  • Tools & Materials
  • Video
  • Blogs
  • Forum
  • Project Guides
  • Reader Projects
  • Magazine
  • Members
  • FHB House

Podcasts

  • FHB Podcast
  • ProTalk

Webinars

  • Upcoming and On-Demand

Podcasts

  • FHB Podcast
  • ProTalk

Webinars

  • Upcoming and On-Demand

Popular Topics

  • Kitchens
  • Business
  • Bedrooms
  • Roofs
  • Architecture and Design
  • Green Building
  • Decks
  • Framing
  • Safety
  • Remodeling
  • Bathrooms
  • Windows
  • Tilework
  • Ceilings
  • HVAC

Magazine

  • Current Issue
  • Past Issues
  • Magazine Index
  • Subscribe
  • Online Archive
  • Author Guidelines

All Access

  • Member Home
  • Start Free Trial
  • Gift Membership

Online Learning

  • Courses
  • Project Guides
  • Reader Projects
  • Podcast

More

  • FHB Ambassadors
  • FHB House
  • Customer Support

Account

  • Log In
  • Join

Newsletter

Get home building tips, offers, and expert advice in your inbox

Signing you up...

This site is protected by reCAPTCHA and the Google Privacy Policy and Terms of Service apply.
See all newsletters
See all newsletters

Follow

  • X
  • YouTube
  • instagram
  • facebook
  • pinterest
  • Tiktok

Join All Access

Become a member and get instant access to thousands of videos, how-tos, tool reviews, and design features.

Start Your Free Trial

Subscribe

FHB Magazine

Start your subscription today and save up to 81%

Subscribe

This is your last free article.

Don't miss another expert tip or technique from building pros. Start your free trial today.

Start your FREE trial

Already a member? Log in

We hope you’ve enjoyed your free articles. To keep reading, become a member today.

Get complete site access to expert advice, how-to videos, Code Check, and more, plus the print magazine.

Start your FREE trial

Already a member? Log in

Privacy Policy Update

We use cookies, pixels, script and other tracking technologies to analyze and improve our service, to improve and personalize content, and for advertising to you. We also share information about your use of our site with third-party social media, advertising and analytics partners. You can view our Privacy Policy here and our Terms of Use here.

Cookies

Analytics

These cookies help us track site metrics to improve our sites and provide a better user experience.

Advertising/Social Media

These cookies are used to serve advertisements aligned with your interests.

Essential

These cookies are required to provide basic functions like page navigation and access to secure areas of the website.

Delete My Data

Delete all cookies and associated data