Scribing a Skirtboard to an Existing Stair
A how-to for when you have to put in a skirtboard the hard way.

To celebrate FHB’s 40th anniversary, I’ve chosen my favorite Tips & Techniques from the first year of the magazine to feature throughout the year. A lot of the time these tips still work and don’t cost much. Here’s one of them…
Have you ever found yourself installing a skirtboard after the stairs are in place, perhaps when remodeling? If so, you can thank Forrest McCanless for sharing this tip. He describes how he made a 14-ft.-long paper pattern to make templates of the stair skirt with all its ins and outs. The finished product fits so well, you’d never know it was installed after the treads and risers.
—Charles Miller
Typically, skirtboards are sandwiched between the stair stringer and the wall, and are installed before the treads and risers that abut them. That’s the easy way. In a recent remodel, I had to put in a skirtboard the hard way—with the treads and risers already in place.
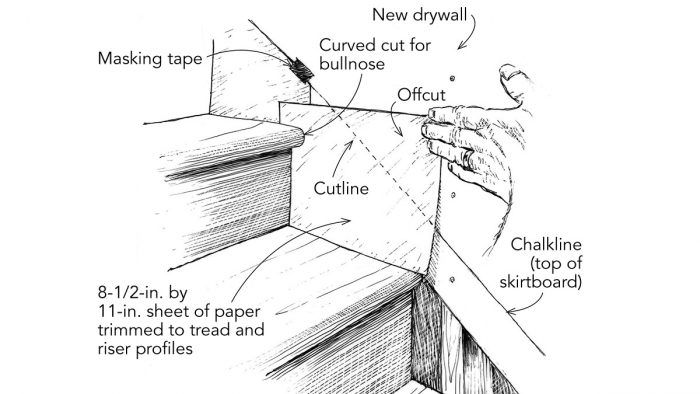
As shown in the drawing, I made a pattern out of taped-together 8-1/2-in. by 11-in. sheets of paper. Without any measuring, this method yielded an exact profile of a stair that had its share of crooked lines.
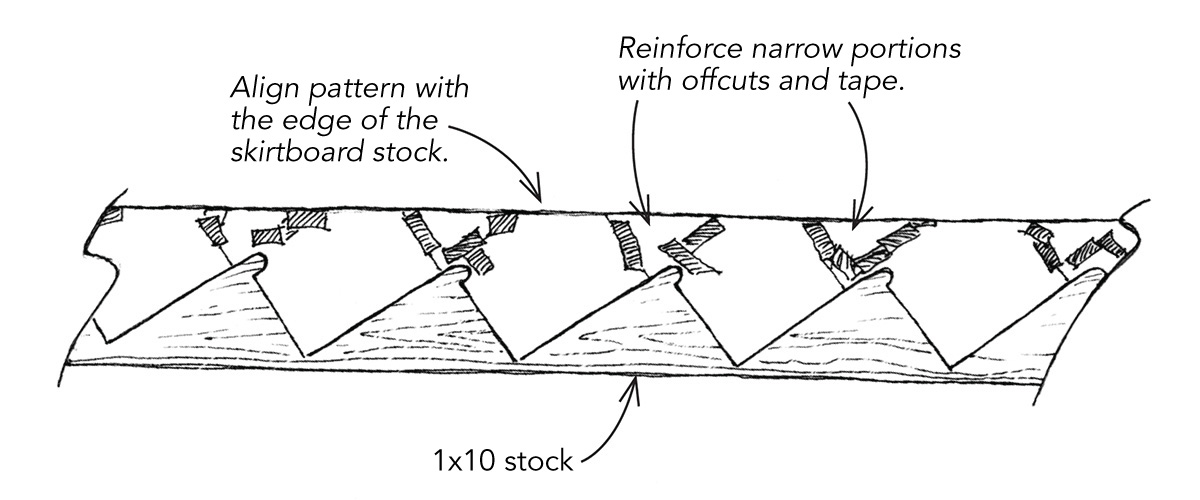
First, I snapped a diagonal chalkline at the angle of the stair. The chalkline represented the top of the skirtboard. Working from the top, I next cut, fit, and taped together pieces of printer paper, filling each triangular space from the tread and riser up to the snapped line. I used scissors to cut the curve around the tread bullnose and tapered the riser cuts in places where the risers weren’t plumb. I used the offcut triangles from each piece to reinforce the narrow parts of the pattern.
This process yielded a 14-ft.-long pattern, which I cut away from the wall and taped to a 1×10 piece of skirtboard stock. I aligned the long edge of the pattern with the stock and carefully traced the outline. This paper-doll pattern worked like a charm.
—Forrest McCanless, Oxford, Ga.
Edited and Illustrated by Charles Miller
Published in Fine Homebuilding #303


