Insulating a Workshop in Vermont
One owner-builder ponders the wisdom of adding a layer of exterior rigid foam to a large stick-framed building.
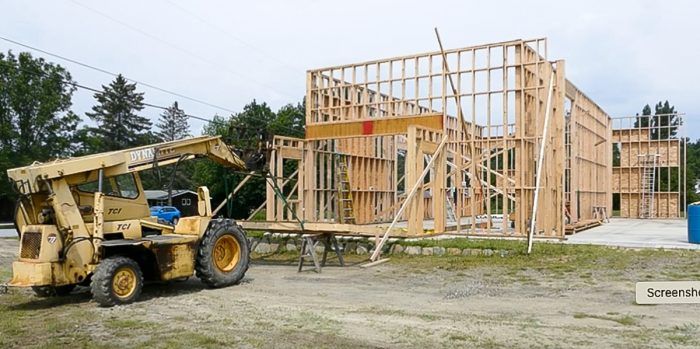
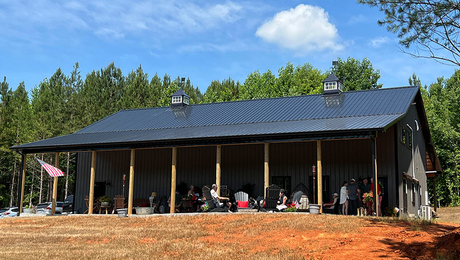
Mike is building himself a large workshop in a town not too far from Burlington, Vt. As he explains in this recent post on the Discussion Forum, the 4500-sq.-ft. stick-framed building will be divided into three bays, allowing Mike to heat only the part of the workshop where he will be working.
The issue is insulation. Vermont has cold winters—Mike has seen the thermometer plunge to 30° below zero.
“I was going to just use fiberglass in the walls,” he writes. “Then I got to thinking after seeing a friend’s place, why not put an extra 1-1/2 in. of foam on the outside. Windows are not in yet, so it would be easy to buck out with a 2×4 on the flat.”
A friend has suggested that with foam on the outside of the building, Mike should put only 3-1/2 in. of fiberglass in the 2×6 framed wall. Why? “He said you want a balance of insulation on each side of the sheathing,” Mike says. “Something about the point where the moisture will condense. I think he put 6 in. of foam on his house, but that is out of my budget.”
What should Mike do at this point? That’s the topic for this Q&A Spotlight.
Insulation should be balanced
Mike’s friend is right, says Eddo234.
“I live in Vermont, too, and depending on whether you live up in the Kingdom or down on the Massachusetts border, the ratio will be different,” Eddo says.
He directs Mike to a presentation on the topic by Martin Holladay, himself a Vermont resident and the former editor of Green Building Advisor. The presentation was at a Better Buildings by Design conference in Burlington in 2019. In it, Holladay discusses the various advantages of putting rigid foam on the exterior of a building, but he also notes that foam must be thick enough to keep the sheathing warm all winter long so it will not get wet from condensation. If the foam is too thin, the sheathing gets cold, and therefore damp, Holladay says.
An accompanying chart recommends various R-values for exterior foam sheathing, depending on climate zone and framing details. In climate zone 6 (Vermont), the minimum R-value of foam should be R-7.5 for a 2×4 wall, and R-11.24 for 2×6 walls.
These building assemblies have been the subject of a great deal of debate. There are situations in which walls with exterior insulation that’s ostensibly too thin don’t run into a lot of problems—but the safest path is to follow the recommendations and stick with the R-11.25 of foam in a 2×6 wall.
That said, Eddo adds that with a building so big, Mike can afford to give up a few more inches of interior space. So, why not consider a double-stud wall insulated with either cellulose or fiberglass. This wall assembly also reduces thermal bridging significantly, and it will be cheaper than foam.
Compare the costs of different approaches
Eddo thinks Mike would benefit by comparing the cost of adding exterior foam with the cost of adding a second, 2×4 wall inside.
“If I went the foam route, I’d put 2-1/2 in. of extruded polystyrene (XPS), or Gutex (wood-fiber insulation) if I had the money, then fiberglass or Rockwool on the inside wall,” Eddo says. “But my gut says I’d save money by the two-wall solution, fill the 2×6 cavities with fiberglass or Rockwool, add a second 2×4 interior wall and either blow in cellulose or use Rockwool/fiberglass.”
This wall calculator might help
Sterilecuckoo58 recommends that Mike have a look at the ABTG Wall Calculator. It allows the user to plug in various values for a wall assembly—such as cladding, sheathing type, and climate zone—to coordinate energy and building-code compliance.
“The ‘Perfect Wall’ has all the insulation on the outside of the sheathing and frame,” Cuckoo writes. “The inside of the rigid insulation is about room temperature. If it is a closed-cell foam, and you add fluffy insulation on the inside of the foam, you lower the temperature of that inside foam surface, and the inside air that is next to it cools to that lower temperature. That increases the relative humidity of that air.”
Cuckoo continues: “You can calculate the temperature of that interface using the respective R-values and indoor and outdoor temperatures. Then pull up a hygrometric chart, and you find your way to the RH [relative humidity], dew point, and so forth.”
In his own case, Cuckoo used 3 in. of EPS (expanded polystyrene) over 2×4 walls insulated with blown-in fiberglass for a retrofit in Connecticut. This assembly did not require an interior vapor retarder. He suggests that a wall assembly including 4 in. of EPS on the outside and 5-1/2 in. of mineral wool in the stud cavities would need only a coat of vapor-retarding paint on the interior to be free of moisture risks.
Insulation choices
In searching for rigid foam, Mike finds he could get used 3-1/2 in.-thick EPS for about $20 per sheet. That would yield an R-12 exterior insulation layer. For the cavity insulation, he used mineral wool in his house but is leaning toward fiberglass in the shop because it’s about half the cost.
“Go for the mineral wool!” says Andy Engel. “It costs more but it’s much easier to install well than fiberglass. I’ve done both and I try hard to avoid fiberglass now.”
The issue, Mike replies, is money. Rockwool for a 2×6 wall costs two and a half times more than fiberglass at Lowe’s, he says, and would add up to almost $5000 more in total costs.
“If they are both about R-20,” he adds, “is there really a difference in the two?”
Or, adds Eddo, what about cellulose? Dense-pack cellulose installed by a professional won’t settle or sag. Pros buy cellulose in bulk, he says, and might pass some of those savings on to the consumer.
Our expert weighs in
Editorial advisor Mike Guertin offered these thoughts:
Since Mike is building a shop and not a house, we have to consider the conditions of use when evaluating the insulation strategy and the risk of condensation in the wall cavities.
The potential for moisture condensation in a wall cavity is driven by moisture in the building. A shop is different than a house. Unless shop activities produce a lot of moisture—such as applying waterborne finishes on a regular basis—or other conditions contribute to high interior moisture levels, the moisture load is minimal—just Mike breathing. This means the formulas for calculating the R-values of exterior continuous insulation to fibrous cavity insulation don’t apply. Those formulas are based on homes with occupants breathing, bathing, cooking, cleaning, and watering plants.
I get the sense that Mike is meticulous with his construction practices, so I’m confident he’s going to do a good job with roofing, siding, and flashing, which should eliminate bulk water as a source. Mike confirmed that he installed a vapor barrier sheet in addition to the 2 in. of foam insulation under the slab, so soil moisture is not a concern. A new concrete slab holds many gallons of water, which would take a season to dry out, but Mike’s slab was placed eight years ago and has had plenty of time to dry.
So even in Mike’s cold Vermont winter climate, he can use any insulation strategy he wants for his shop, from cavity insulation only to a combination of any level of exterior insulation with cavity insulation, without risking condensation in the walls. I think his initial plan to use 5-1/2 in. of cavity insulation with 1-1/2 in. of exterior insulation or his second idea of 3-1/2 in. of used EPS and cavity insulation will be safe and make for a comfortable, efficient shop.
Since Mike is probably installing the cavity insulation himself, it will only take a little extra time to do a Class 1 installation job with fiberglass. The performance of fiberglass closely matches mineral wool and using it will save $5000.
Two steps to help reduce the chance for interior moisture to enter the wall cavities are air-sealing and installing a Class 2 vapor retarder or vapor retarder primer on drywall. Air-sealing blocks air from moving through and dumping its moisture in wall cavities, and the vapor retarder helps throttle any interior moisture from entering the walls too fast in winter and lets it escape in milder weather.
Scott Gibson is a contributing writer at FHB and Green Building Advisor. Some reader comments have been edited for clarity. Mike Guertin is a Rhode Island builder and an FHB adviser.
RELATED LINKS
- Exterior Insulation on a Garage-to-House Wall
- A Practical Air-Sealing Sequence
- Installing Rockwool for Continuous Exterior Insulation
Fine Homebuilding Recommended Products
Fine Homebuilding receives a commission for items purchased through links on this site, including Amazon Associates and other affiliate advertising programs.
Foam Gun
Respirator Mask

Insulation Knife







View Comments
I agree with Mike Guertin, though I’m not an expert. I have studied building science a lot lately and the concern for condensation in the wall cavity seems to apply to spray foam, closed cell particularly. Sheets of foam with open seams won’t likely trap moisture even if it would condense. The spray and batt method on interior of the wall cavity can condense if insufficient exterior insulation. A good peal and stick with vapor permeable qualities on the sheathing will allow vapor to move out of the building as well. Great discussion, good to hear people are getting on board with exterior insulation. Check out Matt Risinger on YouTube for more in depth building science.